To avoid these ads, REGISTER NOW!

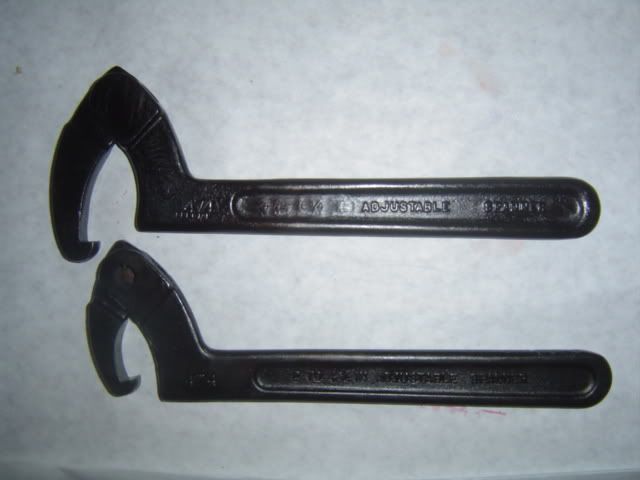
That manky looking wrench...

ZRX61

Well-known member
Joined
Aug 15, 2006
Messages
28,716
Location
Solar Blight Valley, SoCal
.. that was in the toolbox I rescued last week just got the mapp gas/oil treatement...

Before, 2nd from top:

7-12-10003.jpg


After a run through the blasting cabinet..

7-12-10004.jpg


After heat/oil...

7-12-10006.jpg


Waiting for it to cool down to finish it so it ends up like the one at the top of the first pic..


& that Penens wrench..
7-12-10005.jpg
 
To avoid these ads, REGISTER NOW!

cegreen

Well-known member
Joined
Feb 27, 2010
Messages
63
Location
New Jersey
So is this technique based on the same process that turns new, charcoal gray cast-iron frying pans into jet black pans after you've cooked fried chicken in them for a couple of years?

I've always wondered about that. :bounce:
 
OP
Z

ZRX61

Well-known member
Joined
Aug 15, 2006
Messages
28,716
Location
Solar Blight Valley, SoCal
It's actually a primitive version of case hardening. I was shown how to do it in HS when we made our own tools in metal shop. I just like the finish.
 
To avoid these ads, REGISTER NOW!
OP
Z

ZRX61

Well-known member
Joined
Aug 15, 2006
Messages
28,716
Location
Solar Blight Valley, SoCal
And you'll be showing us too right?

What? How to do it?

Ya just grab the tool with some visegrips, heat it up, plunge into oil, heat up, plunge into oil, repeat until it looks good.

It can be a bit messy with flaming oil flying off the tool.. & smoky.. so don't do this in the kitchen...

Probably won't see much color change for the first few cycles, but stick with it.

Just use some old junk tool to try it with.. or just a piece of steel
 
Last edited:
OP
Z

ZRX61

Well-known member
Joined
Aug 15, 2006
Messages
28,716
Location
Solar Blight Valley, SoCal
Don't be worried if it looks a bit *mottled* black/brown looking. It may even look a bit *rainbowy* in places. Look at the pic of it resting on the grill, it looks pretty mottled in that pic.
After it's cooled off just give it a polish with a soft cloth & Pledge. This will improve the look quite a bit. After the first attempt you'l get a feeling for how far to go with the dipping/heating.
Both those wrenches in the pic look completely black, but have a couple of dark brown patches.
 
Last edited:
OP
Z

ZRX61

Well-known member
Joined
Aug 15, 2006
Messages
28,716
Location
Solar Blight Valley, SoCal
One thing that is important is a uniform matt finish before you start. That's why I give em a quick going over with glass bead.
I tried it on some old 50c junk wrench a while back & even after glassbeading the finish looked patchy at best. That shows through after the heat/oil treatment.
 
To avoid these ads, REGISTER NOW!
Top Bottom