Seeing as it's the middle of winter, I finally got around to posting some pictures of my garage build. I still have to finish the interior once spring comes.
Let's start off with the foundation prep:

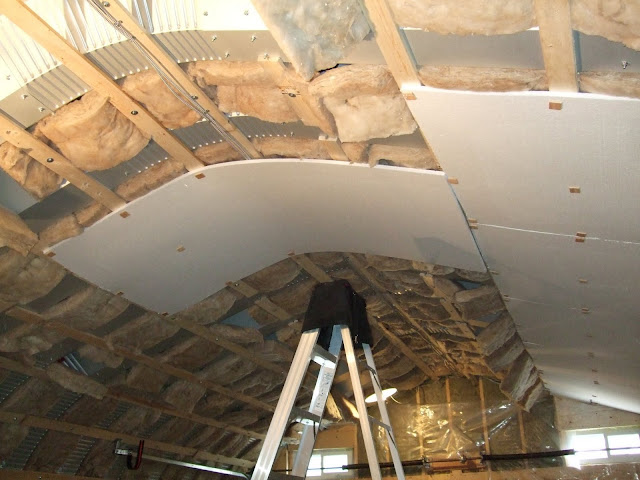
Here's the insulation and rebar, and the concrete guys installing the rebar spacers. After thinking long and hard, I decided not to put radiant heat in. I don't do enough "on the ground" work to justify the extra expense, plus I'll be drilling holes in the concrete for an interior wall, and didn't want to risk hitting a pipe. I will be heating it though, hence the insulation. It's also supposed to provide some protection from the ground shifting, not sure how much though.

The concrete pumper:

Concrete working action:

The forms off, 3 days old, keepin' it wet...

Prepping the approach:

And poured:

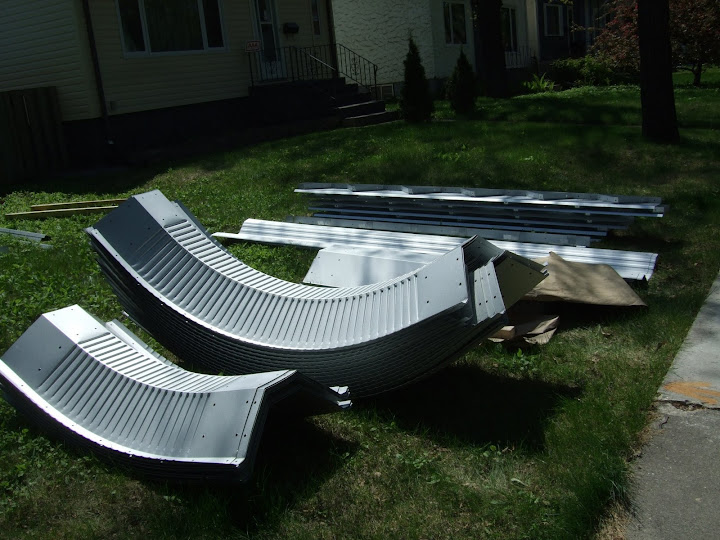
Believe it or not, that's the complete shell for a 20' by 30' garage, off the semi and in my front yard. Now the real work starts..
Here's the base plate connectors bolted to foundation, and the first two ribs up. The base plates took a total of 62-7" Red Head bolts bought from http://www.fastenermart.com/ great guys to deal with
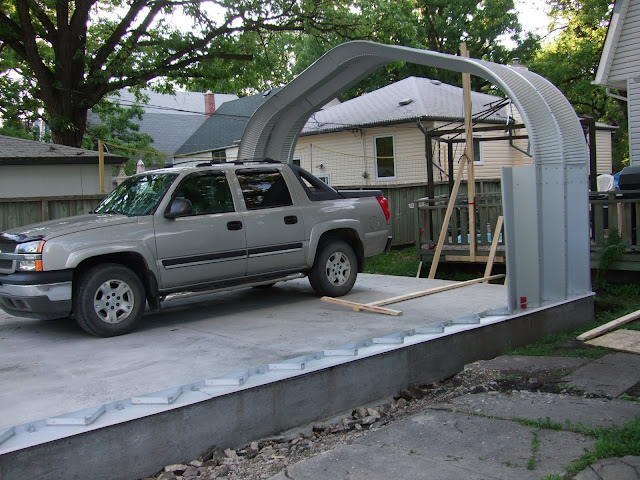
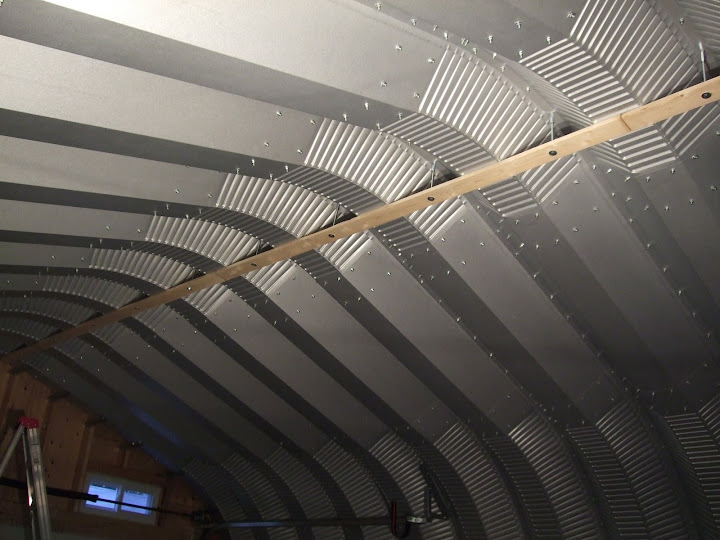
Proceeding along. Oh, forgot to mention the building is a 20'x30' "A Style" Galvalume steel building from www.futuresteel.com. The thin metal strip along the side has holes drilled every 24", it's used to keep the ribs aligned during construction. They are removed after the building is built.
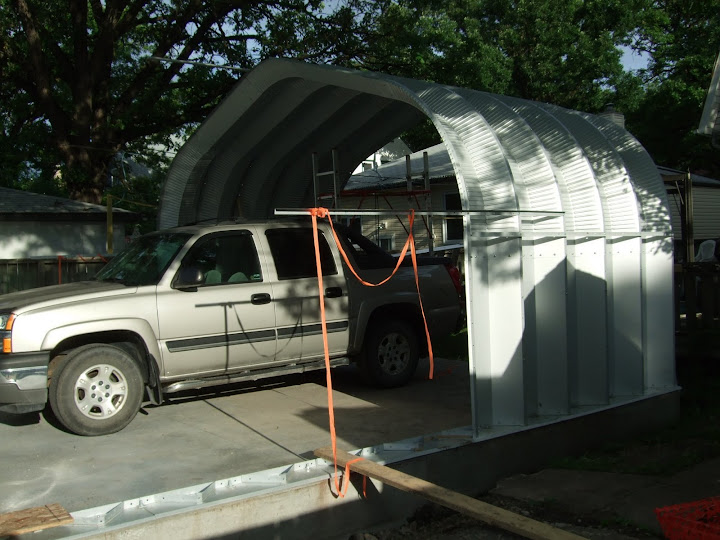
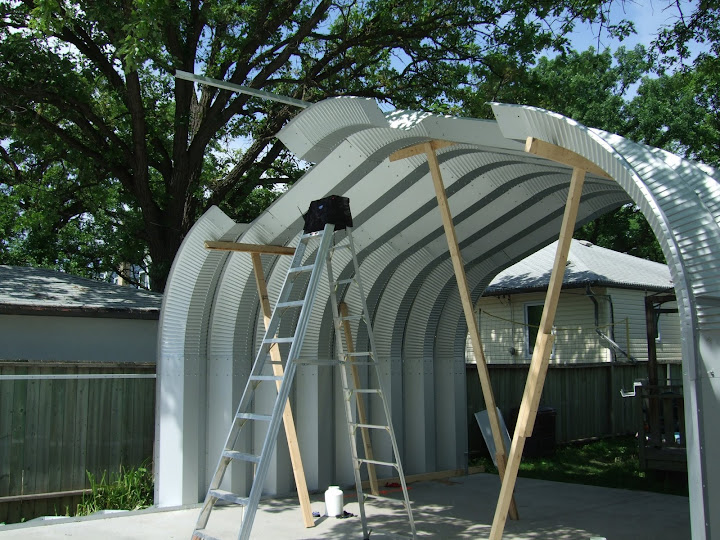
The preferred construction method is to assemble each rib on the ground, and hoist it into place. I didn't have enough people to do that, the neighbors helped with the first two ribs. After that I was on my own. I assembled the bottom and first curve piece together, bolt into place, then put up the peak piece, "cheating" by using the top guide angle, then putting up the two flat roof pieces. The trick is to ensure you have the right overlaps, and with any steel building, you assemble loose first, with bolts in every 3rd hole. After all the ribs are up, put in the remaining bolts, and tighten, round and round working up. I had the missus help with that part, about 2700(!) bolts total:
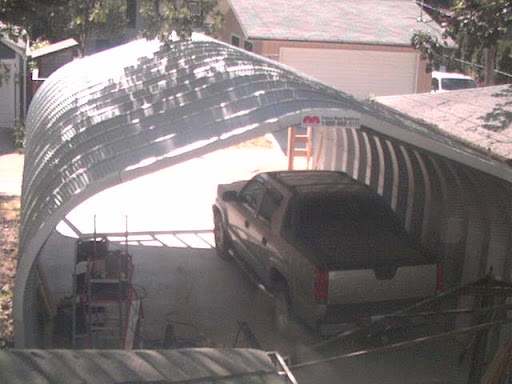
Here's a shot oof the finished shell from the house. It's kinda crappy, I'll see If I can find a better one later...
Starting the framing of the garage door:

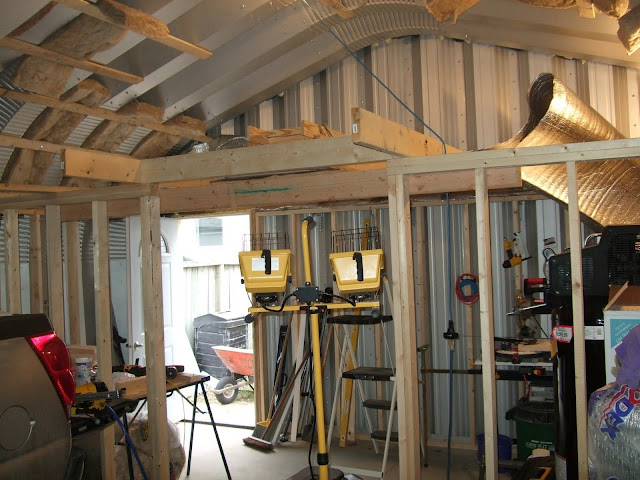
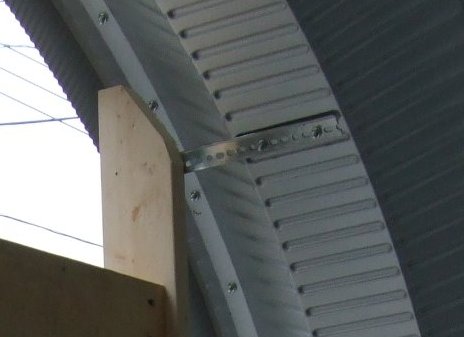
Here's a shot of the tie-in between the wood and steel parts of the building. It's just standard slotted angle iron. The bolt holes into the ribs have to be field-drilled, the first one was a little unnerving. I took my time, and used a punch to make an indent, and drilled a small pilot hole first, no extra holes
Foundation tie-in. I have sill plate gasket under the plate, as well as the galvalume base plates. I debated using pressure treated wood, but wasn't sure if it would corrode the bolts. It's up high and faces south, so I'm not too worried about rot.

The front framing almost finished, still have one stud in the center.

Let's start off with the foundation prep:
Here's the insulation and rebar, and the concrete guys installing the rebar spacers. After thinking long and hard, I decided not to put radiant heat in. I don't do enough "on the ground" work to justify the extra expense, plus I'll be drilling holes in the concrete for an interior wall, and didn't want to risk hitting a pipe. I will be heating it though, hence the insulation. It's also supposed to provide some protection from the ground shifting, not sure how much though.
The concrete pumper:
Concrete working action:
The forms off, 3 days old, keepin' it wet...
Prepping the approach:
And poured:
Believe it or not, that's the complete shell for a 20' by 30' garage, off the semi and in my front yard. Now the real work starts..
Here's the base plate connectors bolted to foundation, and the first two ribs up. The base plates took a total of 62-7" Red Head bolts bought from http://www.fastenermart.com/ great guys to deal with
Proceeding along. Oh, forgot to mention the building is a 20'x30' "A Style" Galvalume steel building from www.futuresteel.com. The thin metal strip along the side has holes drilled every 24", it's used to keep the ribs aligned during construction. They are removed after the building is built.
The preferred construction method is to assemble each rib on the ground, and hoist it into place. I didn't have enough people to do that, the neighbors helped with the first two ribs. After that I was on my own. I assembled the bottom and first curve piece together, bolt into place, then put up the peak piece, "cheating" by using the top guide angle, then putting up the two flat roof pieces. The trick is to ensure you have the right overlaps, and with any steel building, you assemble loose first, with bolts in every 3rd hole. After all the ribs are up, put in the remaining bolts, and tighten, round and round working up. I had the missus help with that part, about 2700(!) bolts total:
Here's a shot oof the finished shell from the house. It's kinda crappy, I'll see If I can find a better one later...
Starting the framing of the garage door:
Here's a shot of the tie-in between the wood and steel parts of the building. It's just standard slotted angle iron. The bolt holes into the ribs have to be field-drilled, the first one was a little unnerving. I took my time, and used a punch to make an indent, and drilled a small pilot hole first, no extra holes
Foundation tie-in. I have sill plate gasket under the plate, as well as the galvalume base plates. I debated using pressure treated wood, but wasn't sure if it would corrode the bolts. It's up high and faces south, so I'm not too worried about rot.
The front framing almost finished, still have one stud in the center.
Last edited:

 .
.