Some others;
Andreani (Italy) Suspension service tools. Vacuum pumps for shock bleeding, shock dyno, fork bushing replacement tool, a range of specialist brand specific tools, shaft clamps etc. Aimed at professional workshops, so not cheap, but can be good value for money compared to some OEM tools.
https://www.andreanigroup.com/resources/workbench-bike/pdf/andreani-MTB-2017-tools-list-en.pdf
ND Tuned (Portugal) Fork Steerer/stanchion replacement tools. Stanchion tools are very slick, I prefer my own crown support on most modern forks for removal, use their setup to fit the new steerer.
Blue Liquid Labs (USA) steerer/stanchion tools, cheaper, finish is not as good as ND, fork bushing resizing tool is nice
Off Street Only (USA) Shock hand dynos
PTR Parts (Czech) hand dyno, shaft clamps (good value for money)
Fox (USA) Fox suspension service tools, normally expensive
DB CycleWerks (Canada) Suspension shaft clamps, cheaper than OEM
Centrimaster (Germany) Wheel tools, the rim ERD tool is great, expensive
Laba7 (Lithuania) Suspension Dyno, vacuum pump, spring rate
Bounce Cycles (UK) OEM suspension tool alternatives, shaft clamps, seal bullets etc
RRP (?) Useful bearing removal and install set (as the bearing tools are aligned)
Hope (UK) Service tools for their own products (bore cap tools, bleed caps and funnel, bearing drifts etc, generally good and good value for money some like the hub support tool are handy general shop tools, some like their cranks are unnecessarily complicated (IMO)
Seized seatpost removal tool I made (while we are on bike tools)

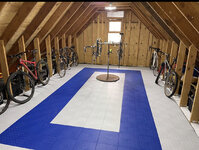
Workshop (if people are into bike tools)


")


