To avoid these ads, REGISTER NOW!

the bionic doghouse

Red Leader

Well-known member
Joined
May 15, 2011
Messages
2,688
Location
Denver, CO
Looks like you've got some fun projects going on! I bet all that open floor space is nice for all the stuff you are doing with the cars:thumbup:
 
To avoid these ads, REGISTER NOW!
OP
M

mustangmccance

Well-known member
Joined
Sep 8, 2009
Messages
832
my shop is no show room that is for sure. it is usually dirty and dog hair gets everywhere lol. but it works very well. I have pretty much all the tools I need. although I still want more lol and I intend to upgrade some of them, but the shop works for what I want to do, and that is play with cars. I rarely go inside anymore. just to eat and sleep. otherwise I sit out in the garage with the dogs. surf the net on my garage computer if I don't have anything else to do or just sit on the couch and read. but basically I live in the garage. my wife is not terribly happy with the situation but she has her tv in the bedroom and she is always watching dancing with the stars or american idol or some other thing that I have less than zero interest in so it works out. the kids monopolize the downstairs tv, she has that one. I hang out in the garage.
 
OP
M

mustangmccance

Well-known member
Joined
Sep 8, 2009
Messages
832
I bought my daughter a new billet export brace for her mustang project. my wife bought me a set of SAE gear wrenches for christmas so I got a chance to use them when I installed the export brace. this export brace comes from a small company called street or track LLC and it looks really cool I think.


before with the flat black stock export brace:


DSC00493-1.jpg


after with the billet adjustable export brace:

DSC00715.jpg


DSC00708.jpg

DSC00712.jpg
 
OP
M

mustangmccance

Well-known member
Joined
Sep 8, 2009
Messages
832
busy weekend. I have three different projects going on. I got the grill and window moldings on the 67, I had the 65 out to play with it for a bit and now I am going to replace the headlight assemblies on the 89. the place is a mess even though I already cleaned up most of it. I just thought I would post a pic to show this place is not clean all the time. lol
12043.jpg


and a couple to show the progress on the 67.
trial fitting the seats and the center console I am working on.

12034.jpg


rear bumper and molding.

12030.jpg


front bumper and molding
12026.jpg
 
OP
M

mustangmccance

Well-known member
Joined
Sep 8, 2009
Messages
832
I took a few days off work for spring break and I have been working out here on this car every day. I got quite a bit done since the last post.

door panels and hardware installed.

12001.jpg

12006-1.jpg


I also installed the steel trunk blockoff panel and used expanding foam insulation to fill the gaps so it should keep any dust or fumes out of the cabin.

I also installed the three point safety belts.

then put the dyna mat and carpet in. bolted the new seats in. finished buttoning up the dash. shifter bezel is in and bolted down. my illuminated sill plates arrived just as I was finishing the carpet so they are in as well.

the package tray is on back order as is the lecarra classic wood steering wheel but the interior is just about done. here are some pics of the nearly finished product. (still need to finish the console too obviously)

12010-1.jpg


the seats match pretty well even though in the pictures the front ones look grey. that is just from the flash.

12009.jpg


stereo install will be down the road a bit as well. I have used up most of my extra income for a little while. I have an older stereo that I will put in there just to fill the hole until I do the real install. I also bought the kick panels and the package tray without holes for the speakers so I can custom fit whatever speakers I use.


I also got the lokar brake pedal pad mounted yesterday.and you can see why I wanted these seats to work with the 3 point seat belts.

12008.jpg


and then my Dad noticed the chrome strips around the grill were not quite lined up right:piss2: so I spent a couple hours trying to fix that. whoever designed those stupid little fasteners that hold that front chrome strip on is one sadistic mother and that's all I have to say about that lol.
 
OP
M

mustangmccance

Well-known member
Joined
Sep 8, 2009
Messages
832
what a mess. but I had to post this pic where I have all 3 of my mustangs in the shop being tinkered with at the same time.

12004-2.jpg
 

GGB

Well-known member
Joined
Oct 26, 2011
Messages
388
Mustang, I just picked up on your "doghouse" thread. At first, I assumed that it must be where you were being sent when you got in trouble with the "boss"! And maybe it is; it would be worth getting in trouble to spend time there....

Very nice. But I'd just about bet that the best thing about your new garage is the time you get to spend with the kids working on projects. Makes me smile!

Good luck with your projects.

GGB
 
OP
M

mustangmccance

Well-known member
Joined
Sep 8, 2009
Messages
832
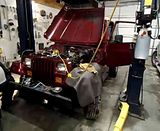
yeah the garage is where we all hang out it is a great place to spend time.

the 67 project has made some major progress so I thought I better update my thread. so now after several hours of applying fiberglass resin and sanding and repeat and repeat etc. it looked like this.

12033-1.jpg


we then used bondo to smooth it out and finish filling the seams and defects and primered it

12036-1.jpg


then like I said I wanted it to be body color so instead of having it upholstered we smoothed it some more and painted it with several coats of blue and then finished off with about 4 coats of clear.
12037.jpg


then I had an extra courtesy light circuit since this car does not have courtesy lights in the door and I was at wally world and found these little LED light strips.

12039.jpg


I stuck them along the bottom edge of the console

12040.jpg


they provide a little bit more light down in the footwell when the doors are open.

I don't know why the flash always makes parts of the picture all washed out but if you look at the pictures above the thing does match the body color despite the appearance in this picture. anyway I still need to wire it up and install the e brake boot it is just sitting on there in the pictures. I also am going to carpet the inside of the console. anyway I think it turned out ok.
12044.jpg


12045.jpg


next step is to pull the seats so I can dye them to match the back seats better and my new lecarra steering wheel finally shipped today. so I am getting very close to being ready to get this thing aligned and do some testing and tuning.

I was ok with the way they looked knowing that this was only temporary until I did the custom upholstery in a year or two but I am afraid I am a victim of peer pressure:sorry

but I also live in the real world and so I am limited by fund availability just like everyone else. so there were basically 4 problems with my seats.

1. the fronts are leather and the back vinyl
2. they are different year seats so the stitching is different.
3. the color of the fronts was lighter than the back
4. the leather was showing some cracks and age that didn't look that good.

1 and 2 I can't do much about until I replace the upholstery with custom which will cost between 1500.00 and 2000.00 to do the way I want so that is out of the question for now.

3 and 4 however is something we could address. Dad and I talked about it and I did some research on good old google and decided to try a leather dye. here are the results.

first a before pic I put the door panel next to the seats as a comparison.

098-1.jpg


the leather dying process I bought is a multi step procedure.

first is wash with Docs Dirt terminator. it already looks better.
102.jpg


then scrub with rawhyde.

103.jpg


then silicone wash

104.jpg


then leather prep. for some reason I did not take a picture of that step but it looked pretty much the same as after the silicone wash.

then you apply the amigo primer. this stuff is used for dying steering wheels so it is supposed to be really durable and not let any color transfer to clothes etc.

then you spray on the jet black leather dye in light coats and then finally cover it with high durability satin clear.

and here is the results.

105-1.jpg


108.jpg


I also carpeted the inside of the center console and installed and wired it.

installed the package tray and rear seat belts and the steering wheel arrived today so Dad helped me get it installed properly. it took some tweaking to get the turn signals to cancel properly and get the horns working but other than the sun visors and rear view mirror that basically finishes up the interior.


we. pretty much finished the main restoration on the 67 now. I dyed the seats to match the back seats and installed the steering wheel and package tray. then Dad brought his 94 mustang in to work on it, so I pushed the 67 outside and took some pictures.
finished a couple more minor details. and Dad wanted to do some work on the 94 mustang so we moved the 67 outside and I decided to take a couple pictures of it in the sun.

13004.jpg


13005.jpg


13002.jpg

ok
0001.jpg
 

tinbender 66

Well-known member
Joined
Mar 23, 2011
Messages
2,294
Location
Western Washington State
Nice work Doc!!! Stuff like this inspires me. The garage should be complete (notice I didn't say done) this summer and I can go full tilt on the Chevy II next winter. Can't wait........................:bounce:
 

Thedoc14

Well-known member
Joined
Mar 4, 2012
Messages
259
Location
Melb, Australia
Love the Stang and the colour is bitchin, job well done,great to see a build done on a realistic budget. Instead of a spare no cash get it done job. You should have plenty of pride in that all family build. GREAT WORK......
 
OP
M

mustangmccance

Well-known member
Joined
Sep 8, 2009
Messages
832
thanks for the positive comments guys. I am glad to have it about done now. my daughter is very happy with it, and now I can concentrate on my 89 convertible Dad gave me.

as far as the PT jacket, I was in the Army reserve for 26 years. activated twice but other than that no active duty. I got out a year and a half ago. that was a huge load off my poor wife's nerves.
 
OP
M

mustangmccance

Well-known member
Joined
Sep 8, 2009
Messages
832
when I started the build for the 67 I always intended it to be used as a school car. I got a little carried away in the doing of it though and it turned out really well. I wanted my daughter to appreciate it and I felt the best way was for her to take it to some shows to let other people besides me tell her how nice it was.

well we have taken it to 4 shows this summer and out of the 4 she has won 2 first place trophy's, and even in the ones she didn't win in she had a lot of positive comments so I think it has worked out. I still have a lot of tweaking to do until it is a reliable school car but she is only 14 so I still have a bit of time and in the mean time she can appreciate all our work.

08e9784c.jpg


later this month I am going to swap out the 2.73 gears in the 89 convertible and put in some 3.73 gears with a limited slip. this will be the first time I have ever swapped gears in 8.8 I have only worked on 9 inch rearends before so it will be another learning experience. I am also going to replace the valve cover gaskets as they are leaking all over the place and while I have them off I decided I might as well put some chrome ones back on. so should be a fun time.
 
OP
M

mustangmccance

Well-known member
Joined
Sep 8, 2009
Messages
832
I am not really sure about this forum. I like to talk about my projects so I post them in lots of places. I have not updated this page in a long time because I have not done much to the shop. I have done a lot in the shop however.

I have completely redone the interior on the 89 convertible, I also replaced and painted the hood on it. with a cervinis svo style hood.


new taillights.

 
OP
M

mustangmccance

Well-known member
Joined
Sep 8, 2009
Messages
832
I also bought a 90 jeep I have been working on a lot.


if anyone is interested in what goes on inside garages I could post up some progress pics on it.
 
OP
M

mustangmccance

Well-known member
Joined
Sep 8, 2009
Messages
832
well I haven't posted on here for a while but I thought I would put up some pics of some of the things I have done on the jeeps.
I bought this jeep off ebay from someone in Ohio. I never met him and I had the jeep shipped to me. that is the first time I had ever done that so I was not sure what I was going to get. the ebay description said the jeep ran but in talking to the owners mother after I bought it she said that he was having some problems with the idle. I asked them to send me some pictures of the engine because I assumed from the reading I had done on this year jeep that it had the stock carbureter on it and that was probably why it was having problems. they never did send me the pics so I had no idea what I was going to get when it got here. I was very excited when the truck pulled up. we tried to back the jeep off the trailer but it wouldn't start. we had to jump start it and we finally got it running enough to back it off the trailer. it would not stay running at all. I finally got the jeep up the half mile dirt road to my shop and it died again at the shop door so I pushed it into the shop to see what I had bought lol. here are some pics.


overall I was very happy with it. so after I got it into the shop I put the battery charger on it and started looking it over. the first priority was to get it running properly.
 
OP
M

mustangmccance

Well-known member
Joined
Sep 8, 2009
Messages
832
I was very pleasantly surprised when I popped the hood to see the weber carb already installed. My Dad is a retired mechanic. he lives nearby now. I finally got him to move out here after I built the shop. He did not want to leave all his tools and stuff at home but since my Mom died he was living all alone out there so I built the shop and convinced him to move out here. Now we tinker in my garage for fun.

anyway once we started looking at the engine we found a couple problems right off. first was that the vacuum advance was completely missing off the distributor. the little lever was sticking out of the distributor just flopping all over the place. secondly the vacuum lines were totally screwed up. and the lines to the transfer case were just cut off with what looked like a pair of side cutters. anyway after quite a bit of reading on here about the vacuum lines we got that sorted out, put in a remanufactured distributor, new plugs and wires, and a new fuel filter. then we did the nutter bypass and voila.


it started right up.
cheers.gif
We spent a bit of time setting the timing, and adjusting the carburetor and it starts right up and runs like a champ. now the thing runs so good I am in no hurry to swap that 4.0 in lol.
 
OP
M

mustangmccance

Well-known member
Joined
Sep 8, 2009
Messages
832
ok so then I took it for the first real test drive... and found several more problems lol.

1. no heat at all.
2. the heater fan would not shut off. just blew cold air.
3. there were a lot of holes in the floor and around the doors and hardtop and it was plain cold driving (again this was in early january when the jeep finally arived.)
4. the water temp gauge didn't work.
5. the front end needed a lot of work there was a lot of slop in the steering.

so we tore into it. to make a long story short. I found that the prior owner had not installed a thermostat when they put it together. so I put in a new 190 degree thermostat and that helped it started to make a bit of heat just not much. it did however fix the temp gauge lol. I guess it just wasn't getting warm enough to register on the gauge. anyway I decided the heater core must be partially clogged. so I swapped the heater core and did the blower motor upgrade at the same time. I also cleaned the bed liner off the heater plenum. (the prior owner just sprayed it all over in there without masking anything off). then I took the heater controls apart and fixed the switch to shut the fan off. put it all back together and it heats up nicely now.

I had a ball joint in the front suspension that was shot and that was one reason the front end wandered so much so I swapped that. I tried tightening the steering gear box and it helped a bit but it was leaking fluid all over and there was still slop in the box so I bought a new steering box and swapped that in. that fixed my handling up nicely.

the prior owner had also decided to trash the vacuum activated front axle disconnect and the posilock cable was included in the purchase. since the vacuum system had been trashed and I had used the posilock before I went ahead and swapped that in. I found out that I had a bad passenger side ujoint at that time and fixed it as well.

now I have four wheel drive.
 
OP
M

mustangmccance

Well-known member
Joined
Sep 8, 2009
Messages
832
after that I started tackling some of the little things that needed fixed. first I fixed a lot of little electrical problems like instrument cluster lights, and one of the biggest headaches I had was that stupid little light in the gear shift indicator. the indicator arm was broken and I found a new one to replace it. that was the easy part. I tried to replace the bulb and it would not come out. since I have never had to deal with that problem before I was not sure how the bulb was supposed to be replaced. I finally found out that it was just like the rest of the bulbs in the interior it was just completely corroded in the socket. so I ended up destroying the bulb but I got it fixed. I fixed the housing with j-b weld and painted it black. this was a big problem for my daughter as she can't quite get past the idea of if the gear indicator can't be seen how do you know what gear it is in. anyway it was a small but annoying problem fixed.


then in order to get it inspected I had to fix the horn. that was another much more difficult problem than it should have been. getting it running was easy compared to that lol.

first when I got the jeep obviously there was no horn button on there.


but before I bought a new horn button I started at the horn and found out that it was bad. so I swapped in a new horn. then I could make it honk by running current to it. so far so good so I tried to find a horn button that would work. it turns out after much sweating and figureing that the steering wheel that was installed and the installation kit that came with it were not compatible with this jeep. so I got a new steering wheel and adapter. I also bought the little horn hardware kit from napa to replace the spring contacts. then I had to replace the turn signal cancelling cam.

now in a mustang that is pretty easy. on this jeep it is obviously a bit more complicated because you have to remove that little snapring that holds it all in. I read that there was a special tool needed to fix that, I did not have that tool so I made this out of a couple bolts and a piece of angle iron from my scrap pile.


not pretty but it worked.

then the new steering wheel.


then I tackled some cosmetic issues. first I know I have spent too much time building mustangs but the grimy ugly engine compartment just bugged me so I spent some time with a pressure washer cleaned up where they obviously had a power steering hose fail as the entire engine compartment was covered in it. next I hate looking at rust so the master cylinder cap bugged me.


so I blasted it in my bead blaster and powdercoated it with my eastwood powdercoating system.

 
To avoid these ads, REGISTER NOW!
OP
M

mustangmccance

Well-known member
Joined
Sep 8, 2009
Messages
832
thanks.

ok. so after I did that much I just drove it that way for a while till it got warm out then my daughter wanted to take the top off it and put a bikini top on it for summer and I wanted to look at what was wrong with the weatherstripping.
so I put a power hoist a top in.


and pulled the top. I found several issues with the seals, first the drivers side corner was missing the corner piece. there was some of the old drivers door weatherstripping stuck to the top, but most importantly I think was that the aftermarket roll bar was not adjusted properly. the adjustment slot was not long enough so they could not tilt the windshield back to the proper position so it leaned forward about a 1/2 inch to far leaving a big gap and making the top not fit right. so I spent a little time with a drill and a dremel until I got the windshield to fit properly. then I took a look at the top.

don't get me wrong this jeep is in great shape for how old it is, there is some small problems here and there and this is a project vehicle so I have to find something to tinker with right?
anyway as I said above the front metal trim piece was rusted.


it doesn't copy well but the old window tinting is coming off in places and there are bid holes in it.


the wire to the rear defroster is broken, I don't know if the rest of the system works or not. that is something I still need to sort out.


the good news is the wiper works. the dome light does not.


anyway this is how it looks today.


you can't see him to well but my buddy Josh, my shop dog is in the back seat. he loves the joopacabra. all my dogs love to go for rides, but Josh is the only one I know won't jump out while I am in the store or whatever.

ok next task is to start working on the top. My Daughter started 10th grade on wednesday. she has her school permit so she can drive to school. she is afraid to take her mustang so she wants to take the joop unless it rains so I need to get the top back on it pretty soon. it needs a fair amount of work but nothing major. a coat of paint inside and out, some new weatherstripping and some elbow grease. hopefully I will get it finished and back on next week. I am going to paint the inside bright white with appliance epoxy enamel and the outside semi gloss black. I thought about painting it the tan color because I liked the look of it when I got it, but I decided black would be easier to touch up when the inevitable booboos occur.

so I have a bunch of parts waiting to be installed and a jeep top ready to be freshened up a bit. I will post up some more once I get the top done.

 
OP
M

mustangmccance

Well-known member
Joined
Sep 8, 2009
Messages
832
I spent a lot of time on the inside with a scotch brite and wax and grease remover. then I masked the whole thing off, and painted the inside bright white. then I set it down on some buckets to work on the outside.


I used a regular paint roller with a deep nap to paint it. we decided to use semigloss black paint. first because that is what my daughter wanted and second because I thought it would be easier to touch up later. anyway...


then I lifted it up again and put the new window trim and seals in place, and spent several hours scraping 2 layers of window tint off the windows. I would like to re-tint it at some point but the old stuff had to go as it was peeling off and looked like ****.


I think it looks pretty good.

now I have to do something that I am of two minds about. I have decided that I am going to put carpet in there.
anim_peep.gif
I like the fact that the jeep is bed lined, however last winter the floor was very cold and it has lots of drain holes in it. I decided the best way to "winterize" the inside a bit more, besides just fixing the weatherstripping, was to carpet it. I will have to keep a close eye on it to make sure the carpet is not getting and staying wet. I know it is not an ideal situation and will likely get me flamed, but as I said the main purpose in this jeep is be a cold weather rig. so I will have to make compromises on what I would like to do. anyway the carpet is bought and is in the process of being shipped. it should be here soon. I am going to wait to put the top on until after I get the carpet in to make it a bit easier to work on it.
 
OP
M

mustangmccance

Well-known member
Joined
Sep 8, 2009
Messages
832
I took the bikini top off and pulled the seats and center console. I had to have my daughter help me with the center console. someone had to hold the wrench on the underside after all lol.


then I took the rear view mirror off and put one in from a 99 mustang convertible. it has the built in maplights and surprisingly it slipped right onto the original mounting bracket. then I ran the wires down behind the weatherstripping and plugged into an add a circuit in the fuse box.


yes the windshield is dirty but its a jeep for crying out loud lol.

then I started putting the carpet in. I want to be able to pull it out and replace it easily when it gets wet or stained so I did not use any adhesive. it is just held in by bolts and a few screws.

btw here is a little tip I like to use when I am installing auto carpet. should anyone decide they want to put carpet in some where.

I have an old electrical tester that I broke years ago but it works great for this. if you can find the hole from the top just poke it through the carpet. or you can poke it up through the carpet from the other side. either way once the probe is poked through the hole this is for one of the seatbelt mounting tabs.


then take your soldering gun and it will melt right down along the probe and into the hole. if you poked it through from the bottom it will fall out or just pull it out from the top. then the soldering gun will melt the carpet back to the edges of the hole, you can move the gun around a bit to make the hole bigger. once you are done you have a hole that is melted just like you would do with the cut end of a nylon rope. it won't fray or pull the strands of the carpet like using a drill or hole saw.


ok so as I was installing the carpet I found some little things that needed to be addressed. there were some small parts that had surface rust, or just looked bad. like the tailgate latch.


so a little time with a wire wheel and my little scotch brite pad on my air sander.


and a little time with my eastwood powder coater.


a little wire wheeling, sanding and some chassis black.


then my wife bought me these little LED lights for my birthday and I did not really know what to do with them but I decided to put them on my center console. they stick on and are out of the way. I decided to just wire them into my light circuit so they come on whenever I turn on the lights.
to Illuminate the Dew lol.


carpet is in.


then I put new weatherstripping on the top and put it back on.


I did all of this during the summer btw. I am just putting the pics and progress on here now. in case anyone was thinking it was warm enough to go shirtsleeves in my garage right now, no it is not lol.
 
Last edited:
OP
M

mustangmccance

Well-known member
Joined
Sep 8, 2009
Messages
832
So after this I let my daughter drive it to school for a while. she likes driving it a lot and it works pretty well. no major problems. the only real issue is you have to pump the accelerator a lot to get it started. but once it starts it runs great. I always planned to do a fuel injection conversion to this. the next few installments will focus on doing that conversion. putting a 4.0 head on a 4.2 engine and converting to mpfi using a kit from Hesco.
 
OP
M

mustangmccance

Well-known member
Joined
Sep 8, 2009
Messages
832
I had considered doing a cam swap but I decided against it. I am however going to swap the 4.0 head on though.

first step to make access easier, pull the grill and radiator.


then I began disconnecting wiring and vacuum lines. then since we were going to pull the head it, is a lot easier to pull the head, intake and exhaust all at once than to do it separately.


so I set the engine at TDC and took the distributor cap off confirming that the rotor was pointed at number 1, and pulled the head.


then I had planned to change the timing set, so I pulled the harmonic balancer and the timing cover.

when I pulled the timing cover I found the crank sprocket positioned with the dot toward the cam sprocket. the cam sprocket dot however was 180 out. I rotated it around so the two dots are aligned. here is the pic.


however the rotor looks like this.


now keep in mind this engine was running just fine when I took it apart. but this as far as I know looks like the distributor is in 180 out of time. I called Hesco and asked them about it and they said to just re install everything like I took it out.

so I swapped the timing chain. it looks like this now.


the distributor looks like this.


before reinstalling the head I rotated the engine so the cam sprocket was at 1:00 and the crank sprocket was at 3:00 and counted pins. 15 count just like it should be. so I positioned it at TDC with the rotor pointing at number one again even though that means my timing dots are not aligned. reinstalled the head, torqued it properly.


then I had to pull the distributor
confused.gif
. the new distributor has a pin in it to keep it from rotating. My concern was that this looks like it is 180 out to me. should I reinstall it like it was? anyway I did a lot of reading on different forums for this. I know it is not that big of a deal to pull the distributor and swap it 180 but I wanted to get some more opinions before I pulled the distributor.
 
OP
M

mustangmccance

Well-known member
Joined
Sep 8, 2009
Messages
832
one thing I forgot to mention. this is a 4.0 head that I had for my 93 cherokee engine. in order install it on a 4.2 engine you have to do some work to it. first of all I had a full valve job and new springs installed. then you have to fill some of the water jacket holes on it that do not line up with the 4.0 block. there are lots of instructions on jeep forum about how to do this. basically you use biodegradeable packing peanuts or septic tank toilet tissue to plug the holes temporarily then fill them with jb weld. then after you run it for a bit you flush the cooling system to get all the debris out. it actually worked pretty easily. anyway the head was bolted on.
 
OP
M

mustangmccance

Well-known member
Joined
Sep 8, 2009
Messages
832
so while I worked on figuring out my timing issue I did some detailing work. I cleaned up the block. painted it. painted the head and the waterpump with eastwood alumablast paint. and did some powdercoating.

here are some of the pieces I powdercoated.


I also powdercoated the powersteering bracket red.

I had previously powdercoated the cherokee valve cover.
I stripped it in my blast cabinet. then I powdercoated it white with my little eastwood kit.


then after that cooled I blew on the red. and wiped off the raised areas with masking tape. just blotting it on there, move blot etc.


then I baked it using a portable IR heater I got when I bought my powdercoating kit.

 
Last edited:
OP
M

mustangmccance

Well-known member
Joined
Sep 8, 2009
Messages
832
I had to use the cherokee header, the 4.2 header won't work. the downside to this is that you have to modify the shifter linkage bracket to clear the header. and I had to custom fab the exhaust from the header to the catalytic converter and add an o2 sensor bung in the down pipe.

here is what the shifter linkage bracket looks like after I modified it.


I painted it with chassis black for rust prevention, and then I bought a downpipe from napa that a guy on another site suggested. it configures the exhaust pretty close to what I need. I will just have to cut it down and have it rewelded. I absolutely can't stand exhaust leaks so I will have the muffler shop guy do it for me.
 
OP
M

mustangmccance

Well-known member
Joined
Sep 8, 2009
Messages
832
and now for something completely different.

I don't know about you guys but I just love gadgets. any cool little gizmo or automation I love. well as I have said before I pretty much live out in my shop. I am rarely in the house and I like hanging out with my dogs. anyway I got an email recently about an automation company and I was looking through the website and I got a few ideas. first of all I lock my dogs in their little kennel room at night, otherwise they seem to want to bark all night. so I lock them in at night and let them out when I go to work. well I am always curious about what they are doing at night because sometimes they still bark, sometimes they chew stuff up etc. anyway I found this ip camera and insteon hub. the hub is the brains of the whole thing. it connects to your internet router and then you can access it with a smartphone app. it is motorized so you can move it left and right up and down. it works on both regular light and automatically switches to infrared when you turn out the lights. I just thought that was the coolest thing ever so I bought one.

this is the hub and the router. I have to stick it in this window so it will pick up my modem and wireless router in the house. now this modem is also a range expander so it boosts the signal and I use it for wifi for my computers and netflix out here in the garage. now it is wired to the insteon hub. yeah I know it is not the neatest installation but I am somewhat limited by my location. anyway it works.


here is the IP camera.


this is a screenshot from my cellphone


you can see on there that there is an icon for sound. right now I can hear what is going on. at some point It is supposed to be able to transmit sound so I should be able to talk to someone or the dogs over the camera system. you can see the arrows that move the camera around.

at the bottom there are 3 icons one for the front light, camera and backlight. because I also bought some switches that hook into the hub. I am constantly forgetting to turn off the back porchlight when I go in the house, then I either have to come all the way back out or most of the time I just leave it on. now from the house I can turn the deck light on or off. the front light is the light over the main man door and I had it wired on a dusk to dawn sensor so it basically came on at night and turned off in the morning. that is great in the winter, but in the summer the bugs just flock around it and so I usually just turned it off. now I can turn it on from the house and off when I go back in.


and if you look at the bottom of the page you can see the current temp in the garage. because I also got a thermostat and wired it in. that I had to call the local plumbing and heating experts on, but they got it done.

I always turn the heat down to 40 degrees when I go in at night then turn it back up when I come out. when I bought this thing it had been during that bad cold snap so it was so cold out here it took a couple hours to get the place warmed up. now I can turn the thermostat up before I leave work and it is well on its way to warming up when I get home.


I can also access this when I am out of town. I can check to make sure the dogs have enough water. later on I will add another camera out in the main shop for security, I may also add a light for the driveway for safety. once you spend the 149 dollars for the hub, the rest of the pieces are not that expensive. you can buy them a little at a time like I did and install them when you want. it is really pretty easy to do.

I know this stuff is kind of geeky but I love it. I think it is cool and it will be useful. I have been working on putting it together over the last few months and I wasn't sure if I wanted to post about it because it is so geeky. but I decided what the heck maybe some of you guys like this kind of stuff too.
 
OP
M

mustangmccance

Well-known member
Joined
Sep 8, 2009
Messages
832
Now back to our regular programming of me fixing this old jeep lol.

I searched the internet, posted questions on this forum and on Hesco's forum and at first I really got no answers accept for people assuming that either I had done something wrong installing the timing chain or that I had just moved the spark plug wires to make it run. I had done neither of those. finally Lee from Hesco let me know that in fact this is the way it is supposed to be.

Lee from Hesco posted this
"The timing dots when aligned has the engine at TDC firing #6, also at this time the #1 valves should be a "SPLIT OVERLAP" (that means the exhaust is almost closed and the intake is starting to open). Most engine builders use this to rough degree a cam in."

anyway that slowed me way down. I was concerned that something was not right and while I kept working on it I was kind of dragging my feet because I did not want to do anything wrong.

actually before Lee answered me I had put my finger over the spark plug hole and confirmed I was on the compression stroke so I had decided everything must be right so I continued putting things together. it was a relief to here from lee that everything was as it should be.
 
OP
M

mustangmccance

Well-known member
Joined
Sep 8, 2009
Messages
832
then I installed the new intake manifold.

then the fuel pump blockoff plate/ coil bracket.

next we lifted the jeep up and started working underneath. we spliced the new prefilter, electric pump and fuel pressure regulator into the fuel lines back by the gas tank and mounted them to the cross member by using the bolts that hold the skid plate in place.

zip tied all the hoses up high out of the way. I also installed the new speed sensor at this time.


and a few other things I can't think of right now.

I also found out that In an automatic transmission conversion you have to convert the kickdown linkage to a cable which is not in the kit. so I ordered that.


OP
M

mustangmccance

Well-known member
Joined
Sep 8, 2009
Messages
832
I installed the new harmonic balancer that came in yesterday.
cleaned and powdercoated the brackets for the powersteering pump.
cleaned the alternator and painted the fan and pulley.
mounted the ecu to the firewall.
attached the new fuel line to the fuel rail.
mounted the cps to the bracket on the oilpan.

monday I had to work very late so I did not get anything done and tuesday I only had about an hour to work on the jeep. so we started to run the wiring harness. I tell you this kit from hesco is awesome everything is pretty easy to do. the wiring harness is very straight forward. I made most of the connections in that hour.

we installed the Diode into the field wire of the alternator.

then hooked up all the sensors. the CPS is supposed to have a little paper wafer on it that sets the gap. I could not see any paper wafer but it said in the instructions to push the CPS right up against the harmonic balancer which I did.

then I ran the harness back to the transmission and hooked up the new speed sensor.

on back to the fuel pump. in the instructions it says make sure you know which terminal is positive and which is negative because it is very difficult to see once installed.... I read this little piece of advice after I had it installed of course. so out comes my handy dandy iphone which can get in places my head can't and has a zoom function.
http://s972.photobucket.com/user/mustangmccance/media/null_zpsea580110.jpg.html


I have found I use that trick a lot. when I could not read what my paint code was on my mustang I just took a pic of it and zoomed it out. if I need to see something under the dash where I can't get my fat head, pic. very useful tool.

anyway I got the fuel pump wired. coated it with dielectric grease per the instructions.

now I had to buy a different downpipe for the exhaust that has an o2 sensor in it. I found the right piece at napa. I had to cut it and it will have to be fabbed back to the catalytic converter. I think I will just run it over to the exhaust shop and let him deal with it. my welder needs to be replaced one of these days. Dad keeps talking about buying one. hopefully he will or else I am going to hopefully this summer.

once I got the exhaust pipe in place I installed the new o2 sensor and wired it up. then I completed the fuel connections by cutting the pressure hard line and splicing it to the new fuel line with a short piece of fuel injection grade rubber hose.

all hoses on the pressure side of the fuel pump are fuel injection grade and double hose clamped.

then I went back up top and hooked the constant 12 volt wire to the starter relay.

the switched twelve volt supply to the yellow wire that went to the old coil.

the ground went to the dipstick hold down bolt.

neutral safety switch wire to the ground wire on the starter relay.

with all the wires connected I hooked the battery back up, turned the key on and purged the fuel lines through the schrader valve.
 
OP
M

mustangmccance

Well-known member
Joined
Sep 8, 2009
Messages
832
you may notice in that picture above that there is only one hose clamp on that fuel line. that is the first of my minor messups. after reading the instructions again I had to go back and put another hoseclamp on all my connections.

once all that was done I could not resist cranking the jeep over. crank sputter crank sputter crank,,,,,nothing.

****,,, I considered the possibility that the stupid distributor could be 180 out.

I did not think so. after all my research and checking I was sure that part was right. but I was not sure about that stupid CPS. Dad says he told me to gap it with a feeler gauge and he probably did. I did not do that however. so we reset the cps with the feeler gauge to .025 and what do you know it fired. we shut it down as soon as it hit because we still did not have the radiator or anything in it.


then we put the front end back on connected the radiator hoses and filled it with water.

click on the picture to hear it the first time we fired it up.


she's alive. obviously we have no exhaust on it yet, and I still have a vacuum leak because I have not replaced the brake booster hose yet.

I still need to loom up the wiring better, and I just stuck the old spark plugs back in it so I will get some new champions and install them after I get the exhaust done.

next dumb mistake. I looked through the contents of the kit when I got it and thought I had everything, except the kickdown cable. hesco lists that as a separate piece so I thought it was not in the kit so I ordered it. it came tonight and it is exactly the same as the cable I already have. **** again, it was the throttle cable that was not in the kit and when I checked the packing sheet it does say the kickdown cable is included so I should have checked better. I am going to see if I can steal the one off the cherokee and make it work, if not I will have to call hesco again.

anyway I am not done yet but it is alive. it ran a little rough at first but then settled down, I am sure the computer is getting dialed in and it may take a bit before it is all recalibrated. the throttle response so far is pretty good so I am looking forward to getting it out and driving it. hopefully this weekend.

I also bought a K&N FIPK since it is designed for a 91-95 jeep I am going to have to do some judicious fabricating to make it work but I think it will look better than that funky thing they sent in the kit.
 
Last edited:
OP
M

mustangmccance

Well-known member
Joined
Sep 8, 2009
Messages
832
well yesterday I salvaged the cherokee throttle cable and made it work. then I took the jeep over to the muffler shop and had the exhaust hooked back up. it was missing pretty obviously on the way over so once I got the exhaust on it I swapped the spark plugs to some new champions and then changed the oil. took it for a spin and it seemed like everything was working perfectly. so I took my wife to the football game in it and it ran great but when I tried to start it after the game it barely started and the lights were really dim. I just about got it home and it died. obviously the alternator was not charging for some reason, and I obviously had not even looked at the voltmeter. so I walked the rest of the way home, came back with my jump starter battery. hooked it up to the battery and it started up and I drove it the rest of the way home with that hooked to the battery.

so we checked all the connections and they looked fine so I pulled the alternator out and took it over to o'reilly's this morning and had it tested. it tested fine. so we took it back and checked the wiring again. I powdercoated the mount so i thought maybe I wasn't getting a good enough ground.
1. so I ran a dedicated ground from the alternator anchor bolt to the chassis ground.

2. then I found out that one of the wires in the connector that plugged into the alternator was loose, so I took it out of the plug, wire brushed it, bent the little retaining tang a bit more and plugged it back in. put it back together fired it up and it still didn't charge so I revved it up a bit, and then it was charging. shut off the switch and it wouldn't shut off. so I disconnected the alternator plug and it died. at this point we looked again at the diode we installed in the alternator wiring harness and it was installed per the instructions with the "pink connector toward the alternator". so we researched, and tested the diode and read until we decided the pink connector must have been installed wrong in the kit. we switched it around and it worked perfectly.

so I drained and flushed the radiator and hooked up the heater hoses.
installed the 91 style washer bottle and fixed the wiring so now the rear windshield washer works.

took it for a cruise and it is running perfectly. now I have some minor things to finish up, like
1. cleaning up and looking the wires so it looks better,
2. figure out how to make the tachometer work with the new coil and wiring harness
3. make the k&N FIPK work with this 90 wrangler.
4. swap the throttle cables for the correct one when it arrives.
5. wire up the check engine light.
6. I also discovered I have a slow brake fluid leak that i did not know about so I am going to have to sort that out as well.

once I get that done this jeep will be pretty well restored I must say.


ok here is where we started


here is a pic of where I am at now.


OP
M

mustangmccance

Well-known member
Joined
Sep 8, 2009
Messages
832
ok so I got a bit impatient. I picked up a piece of strap iron today to make brackets for the air filter assembly. since this K&N FIPK is made for a 95 wrangler I do not have the proper mounting point for the stock airbox to tie into and the powersteering bracket is different as well so I had to improvise. the first thing I did was roughly place everything in where I wanted it. then I marked it. I cut a couple pieces of strap and bent them to fit the angle where I wanted to make my mounting holes. then I attached them to the bottom of the enclosure, and made sure everything lined up. then I cut a piece to go in between those two angle pieces and welded it together. I had to bend them at different angles because the front mount hits right about where the shock tower starts. once you position the bracket and tighten it down it sits pretty level, and is nice and solid. adequate for the job anyway.


not pretty but it worked. then I cleaned it up a bit more and powdercoated it. bolted it in place to the jeep fender and then bolted the enclosure to it. next I had to make a new bracket for the "saddle" that is supposed to attach to the upper bolt on the powersteering pump adjuster. that does not line up well on my jeep so I used the front intake and exhaust manifold bolt, and I powdercoated it red as well.

then I put it together and tightened all the clamps. I think it gives it a more finished look.


OP
M

mustangmccance

Well-known member
Joined
Sep 8, 2009
Messages
832
I have been driving it for a while now and I have to say that this is a huge improvement. It has excellent throttle response, starts easily every time and generally runs like a top. I love it.
 
OP
M

mustangmccance

Well-known member
Joined
Sep 8, 2009
Messages
832
I took a week of vacation last week. spent a couple days at lake okoboji then came home and spent a lot of time doing some of the yard work i have been putting off all summer. but I did take time to clean the shop yesterday. so I took some pictures. played around with the panoramic function on my phone.


and here I have some of my parts that I have gathered up for the 331 stroker I plan to build for the 89 convertible Woody from ford strokers said it should ship end of august so hopefully when I have some time off in october I will get it put together.


OP
M

mustangmccance

Well-known member
Joined
Sep 8, 2009
Messages
832
I haven't been on this site much in a while. but I have been working in my garage a lot. I haven't really made many improvements to it since my last entry. I have just been using the heck out of it. It works great for me. I can do anything I need to in it. and it is set up really well for my purposes. I did make a new addition recently however so I will post it up. I am building a 71 bronco from the ground up and I know I will be adding a roll bar when it comes back from paint. my engine hoist is not quite tall enough to get the roll bar in place I don't think so I decided to add a hoist above where I will need it. I bought a hoist off amazon. a 1350 pound hoist and anchored it to my ceiling beams by using a 1.5 inch piece of square tubing and setting it in a 2 inch piece of angle iron and welding the two pieces together. this gives a very strong piece of metal to anchor two. then I bolted it to the ceiling with grade 8 hardware. I bought a 20 foot extension for the controller so i can hang it down right by my lift control so it is out of the way but I can swing it around and stand behind the bronco and run the hoist. this should work well for my purpose. in the mean time I needed to lift the back of the truck to shim the rear body mounts. I did not want to damage the truck or the roof so I screwed some d rings into a 4 x 4 with some 1 inch lag bolts and used that to lift the body. it worked great. another great addition to the doghouse.


n6itKuX.jpg


I needed to adjust the body mounts to set the door gaps so I could weld the braces in place for when I am ready to pull the body off for paint.


7w7WGfA.jpg

just about there. a couple more things to do then off to paint.


orUbmUq.jpg
 
To avoid these ads, REGISTER NOW!
Top Bottom