To avoid these ads, REGISTER NOW!

The BMW project thread

neonnblack

Well-known member
Joined
Jun 7, 2010
Messages
4,913
Location
Reno, NV
Been a long time since i've really posted anything much of value here on the GJ. Lots of life, life problems, and lots of not being on the internet. But me and my girlfriend have been talking about building a barndominium and searching threads has really got me back interested in the forums... Anyways, i've gotten big into my BMW's and figured I'd post up some pics, specifically of my most current project, a 1990 525i. I'll add pictures, and comments here and there of whats been done, and as i complete other projects on it.

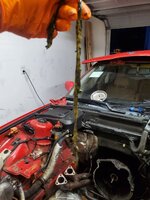
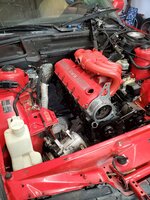
I picked up the car early in the Rona shutdown from a kid that was over having it as a project (more on this later :rolleyes:) on the test drive, as we're leaving his driveway he mentions the cars brakes are pretty much non existent. Great. His area was very hill-y. Made it back somehow, offered him much lower than what he was asking and made the deal. Brought it home on the trailer as we live 20mi from him and i didn't trust driving it back that far. The car was fairly complete, with the paint showing extreme oxidation and the interior had seen much better days. The M20 engine had some surprises in it as i later found out.20200411_175736.jpg20200411_172551.jpg20200411_172543.jpg20200411_171035.jpg
 

Attachments

  • 20200411_180649.jpg
    20200411_180649.jpg
    386.5 KB · Views: 36
To avoid these ads, REGISTER NOW!
OP
N

neonnblack

Well-known member
Joined
Jun 7, 2010
Messages
4,913
Location
Reno, NV
Getting it home, into its new space in my garage I go over the car spotting issues that will need addressing in the near future brakes, cooling fan, some bulbs a lot of misc stuff any 30 year old car would need. One thing that i noticed is that it would over heat after time and it had a fairly rough idle and low rpm driving was very difficult without it dying out at stops.

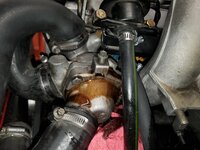
So i tear into the cooling system, start checking things out nothing leaking, hoses getting hot, coolant was clean, oil was clean. Decided to drain and refill the coolant in case the issue was a bubble in the system. Out came the vacuum bleeder, hooked it up and pulled a vacuum on the system with a slight leak in vacuum that i noticed. Okay crack the bleeder open to fill and this was the result....20200424_192105.jpg
Oil streaming out of the thermostat housing bleeder screw. Great this dude sold me a car with a bad head gasket... very interesting it had no coolant and oil mix.

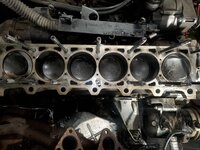
After this i decided the next step was to pull the head and check out what was going on. Good thing i did.. as i tear the engine down, i find that somewhere along the line the PO had put a set of ARP head studs in it. Great a 250 dollar set of studs... they botched the install on them. Some of the nuts were just a bit more than hand tight, some of them fully tightened they also torqued down the studs into the block, a big no no. On such a long, aluminum head this warped it fairly bad and was the main cause of the oil being sucked up from the crank case into the cooling system. You can also see that at some point the Tbelt broke and the valves had a hot date with the pistons.20200425_180537.jpg
A nice pile of top end parts.20200425_201055.jpg

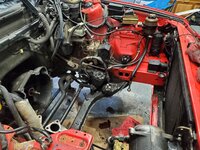
Head was stripped down and sent off to the machine shop for decking. Block seemed reasonably flat and are a very very strong iron block to begin with so i left that as it is... What i couldnt leave as it was, was the incredible amount of oil build up in the engine bay and all over the front k member. I tried cleaning it out as best i could but with the engine in, it was difficult. At this point knowing the head was a week or two out i decided to pull the entire engine out for cleaning.
20200502_114958.jpg
Very easy vehicle to work on, for a first time ive ever pulled an engine solo i way over estimated the effort needed. So out it goes. Next fun part was cleaning the engine bay....
 

vavet

Well-known member
Joined
Mar 6, 2012
Messages
5,329
Location
Ashland, VA
I always thought the E34 was the quintessential look of a BMW. Nice score on that. It looks to be in pretty good cosmestic condition, so once you get the mechanicals sorted, it'll be a dream. Your experiences with the head studs demonstrate my stance that I'd rather have a car that was neglected than molested. At least with it neglected, you know what to expect. When it's already been someone's project, you don't know until you start digging in what they "improved."
I don't think I've ever seen someone position the engine hoist to the side of a car to pull an engine. Was there a reason for doing that?
 
OP
N

neonnblack

Well-known member
Joined
Jun 7, 2010
Messages
4,913
Location
Reno, NV
I always thought the E34 was the quintessential look of a BMW. Nice score on that. It looks to be in pretty good cosmestic condition, so once you get the mechanicals sorted, it'll be a dream. Your experiences with the head studs demonstrate my stance that I'd rather have a car that was neglected than molested. At least with it neglected, you know what to expect. When it's already been someone's project, you don't know until you start digging in what they "improved."
I don't think I've ever seen someone position the engine hoist to the side of a car to pull an engine. Was there a reason for doing that?
It really is a timeless design, along with its 7 series counter part. Add to the fact e34s especially ones with v8's are skyrocketing in value, it was a great buy at the 1500 I initially paid.
I'm posting from the past as I started this project over a year ago and a dream it is. A ton of work has been put into this thus far and I can't even see the end yet. But that's how it always goes with the car projects. :eyecrazy:

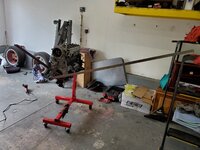
I don't have an actual driveway and my garage is about 24 feet deep so I had no ability to pull the engine from the front. Either dropping the sub frame or a side pull were the only options.
Down the rabbit hole!
Oh and the rabbit hole goes deep.
 
OP
N

neonnblack

Well-known member
Joined
Jun 7, 2010
Messages
4,913
Location
Reno, NV
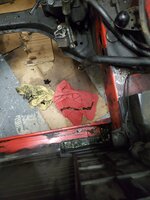
Leaving off from last time, there was a significant amount of cleaning that needed doing. After trying for a few days with small brushes and degreaser i decided to hit it with the pressure washer, which was great, but also incredibly messy. There are still grease marks all over the wall and floor to this day. But hey it worked about as well as i wanted it to.
20200506_194506.jpg
The AC in the car surprisingly still worked well. Its an original r12 system and i wasnt ready to convert over to 134 so i did everything i could to keep the system safe while pulling the engine and cleaning.
20200506_194518.jpg
Someone used stop leak in the radiator at some point with :shudders: green coolant. Leaving this interesting slimy worms things in the core support.20200505_202412.jpg20200505_202406.jpg
Some time with the pressure washer got me to the point i wanted.. any new grease\oil drips and stains would be noticeable and easy to track with a much cleaner bay.
20200509_165744.jpg
Guess i never got a picture of the passenger side. Just imagine the pass side also sparkly.

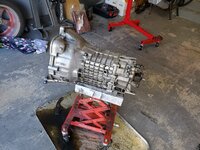
Shortly after being done, i decided why would i leave the stanky transmission in there, all dirty... so out with that also. Luckily the Getrag 260 transmission it has is wildly strong and incredibly light as far as transmission go. Very simple to pull, clean and work on. Cheap for others and parts also.20200517_151216.jpg
200k+ miles of buildup. as far as i can tell engine and trans are original to this car.
Pressure washer wasnt as effective on the trans so i had to soak and clean the small boxes painstakingly by hand. Wasnt perfect, but didnt really need to be either.20200524_173237.jpg20200524_173243.jpg20200524_173318.jpg
 
OP
N

neonnblack

Well-known member
Joined
Jun 7, 2010
Messages
4,913
Location
Reno, NV
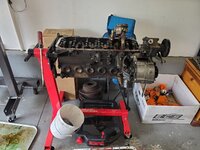
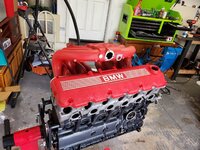
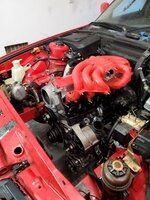
Next up since getting the head back was engine cleaning re-gasketing and reassembly. Easy task with the engine out of the car. Decided on black block, the bare aluminum head and red crinkle intake and valve cover.

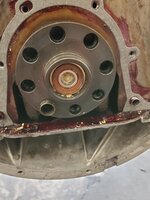
The only part of the engine i didnt take apart was the rotating assembly. In hind sight doing rings would probably have been beneficial, but i always planned on a full rebuild, stroked and forced induction at some point. What i did do was pull two main caps to check the health of the bearing, they had wear but nothing excessive for the mileage.20200502_142748.jpg

Cleaned and degreased the block. Also did the freeze plugs.20200503_202738.jpg

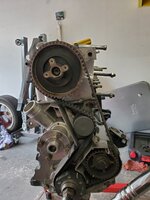
Coat of black engine paint, with the clean alu head, properly torqued this time, with other freshly cleaned engine accessory parts and timing belt. Exhaust studs were getting replaced. What a pain having to jam nut every one of them.20200515_185035.jpg
Setting timing, very easy with the engine on a stand.
20200516_151430.jpg


Crinkle red i applied incorrectly, came out okay still though. And to me the 3 colors ended up looking great.
20200516_152253.jpg

Me trying to rig up a way to put 300ftlb on the crank bolt. It didnt work. Borrowed a 1/2 impact and ugga dugga'd it into submission.
20200516_155007.jpg
 
OP
N

neonnblack

Well-known member
Joined
Jun 7, 2010
Messages
4,913
Location
Reno, NV
On this particular engine, the pilot bearing is captured in the end of the crank shaft. I dont have a puller for it but there is an empty cavity behind it and used the ol trick of pressing bread into it with a bolt.

My girlfriend walking into the garage with me standing there with a hammer, bag of bread on the ground next to me pushing little pieces into the engine, then taking a bite for myself saying "a bit for me, a bit for the engine" was comical.

And for those that dont know, getting a rod or bolt the same I.D. of the pilot bearing and forcing something like bread or tortillas into it will turn the bread into essentially hydraulic force and will push the bearing out. I think mine took about 3 pieces of bread.20200530_130025.jpg20200530_130659.jpg
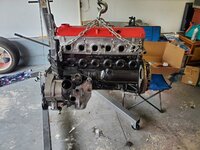
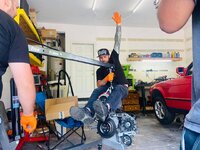
With everything back together, valves adjusted, i set the engine back in the car. But not before my brother came by to ride the crane.
20200530_142756.jpg20200531_193256.jpg20200531_193308.jpg
 
OP
N

neonnblack

Well-known member
Joined
Jun 7, 2010
Messages
4,913
Location
Reno, NV
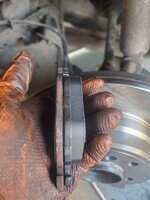
In the time between waiting for engine parts and such, I found out why the brakes were barely working.... it didn't really have any brakes left in it. Every pad was this worn and the rotors had an easy 1/16th-1/8th inch worn into the disc's. So new pads, rotors, slide pins, boots and set screws went in and the brakes are fine now. Still need to flush the old fluid out one of these days. Probably going to do braided lines then also. 20200418_191040.jpg

In between doing all of this I also had my other project going on, a 2016 340i. Down pipe, tune, much more aggressive than stock wheels and tires, carbon fiber trunk, resonator deletes with an electric cutout to go full straight pipe from the turbo back when I wanted. Took it out to the strip a couple times. Screenshot_20210913-200048_Facebook.jpg
FB_IMG_1630373411552.jpg
 

Ohmthis

Well-known member
Joined
Jan 20, 2013
Messages
3,018
Location
Outside of Louisville KY
Looks great! You’ll be up and running in no time I figure. My youngest brother had (I believe) a 325i of the same vintage. It would hold a corner like it was on rails. I was impressed with it.
 

jjeffries

Well-known member
Joined
Sep 7, 2013
Messages
91
Excellent BeeEmDubya and excellent work you’re giving it. I’m doing an 87 Porsche 924S; similar era and components, still the time before both companies (and M-B) went on cost-reduction drives. As you know, these can do almost infinite mileage.

I seem to remember that the e34 body was designed by one of the Zagato brothers? I need to look that up…

Also, I was a service mgr at a BMW dealer when the e34 was still current. The only bad thing I remember was coils going bad, but likely all German (and Swedish) cars with that system suffered the same. I recall that we had this major BMW-supplied scope that would do a balance test on the ignition (and likely other systems, too).

I look forward to more updates.

John (in Conn)
 
To avoid these ads, REGISTER NOW!

vavet

Well-known member
Joined
Mar 6, 2012
Messages
5,329
Location
Ashland, VA
I’ve never heard of using bread to press out a bearing. I’ve heard of using grease using that same principle, but not bread. Cool idea though.
 
OP
N

neonnblack

Well-known member
Joined
Jun 7, 2010
Messages
4,913
Location
Reno, NV
Thanks for the replies, everyone. I'll keep updating soon; recently started a new career and was out of town for a week, and I'll be heading to Phoenix for the month of October. But I'll update when I can.

Posts are getting close to where it's at current day.

Nice project. I have an e28 M535i and an e30 325iX myself. :)
I would do a lot of shameful things for an e30 x.

Excellent BeeEmDubya and excellent work you’re giving it. I’m doing an 87 Porsche 924S; similar era and components, still the time before both companies (and M-B) went on cost-reduction drives. As you know, these can do almost infinite mileage.

John (in Conn)
Yes! Other than some aging plastic issues mechanically they cant be beat with good maintenance. I'm currently at 221,000 miles. And from what I can tell everything other than the gaskets and seals I've replaced is original.
 
Last edited:
OP
N

neonnblack

Well-known member
Joined
Jun 7, 2010
Messages
4,913
Location
Reno, NV
Not many pictures of the next update, so just some light reading....

Engine installed it was time to start getting everything hooked back together. Since I knew they shoved a ton of stop leak into radiator I decided a new radiator and the smaller diameter hoses should just be replaced.

When I had bought the car it had no fan clutch or fan with it so I had to decide on gong the oem set up again, or fully electric. By chance I was surfing a local auction website when I came across a flex-a-lite black magic e-fan. 3,000 cfm was plenty for the engine in our climate. Put a bid and ended up with a 300 dollar fan for 30 bucks. What a score. Adding an aftermarket wiring harness got me in business.

At this point, the drivetrain was in great operating condition. And that's how I drove it a few times a month for a couple months while I recovered a bit from the cost of the project this far. Tattered interior, extreme "boat" feeling but I still loved driving it.

Always gotta stay within our means.
 
OP
N

neonnblack

Well-known member
Joined
Jun 7, 2010
Messages
4,913
Location
Reno, NV
Time flies when youre busy... leaving off from before after getting the drivetrain and brakes squared away, i decided to turn my attention to getting the interior into shape. As anyone with BMW experience knows, the 90s were not a great time for interior quality, especially the door panels, and mine were pretty tattered and falling off. At one point i opened my rear door and the panel stayed in the opening stuck to the weather seal. I luckily found a guy in an e34 FB group that had a rolled M5 of the same generation. black interior still intact. So i bought the front and rear seats, all door cards and some other misc bits from him had it palletized and shipped across the country.
Interior in all of its expensive glory.
FB_IMG_1639195738738.jpg
Went in and gutted the car. I loathe 90s plastic pieces.FB_IMG_1639195734248.jpg
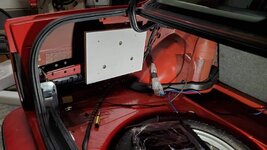
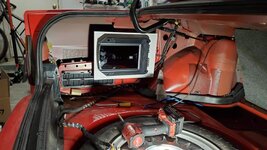
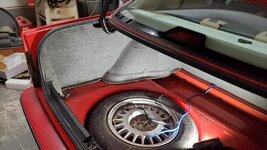
This was also an opportune time to start tearing out and running all my new audio lines, power, grounds, RCA, turn on wire, etc... And some pics of me hiding the amp in the trunk.
FB_IMG_1639195829303.jpg
FB_IMG_1639195834721.jpg
FB_IMG_1639195839854.jpg
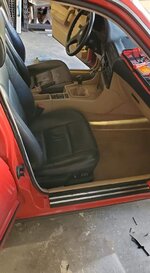
Getting the interior together was an amazing feeling, i was very self conscious about until then. I've mostly kept the two tone beige/black. I may one day get everything in black but for now i like it.
FB_IMG_1639195785400.jpgFB_IMG_1639195792112.jpgFB_IMG_1639195802142.jpg
 
OP
N

neonnblack

Well-known member
Joined
Jun 7, 2010
Messages
4,913
Location
Reno, NV
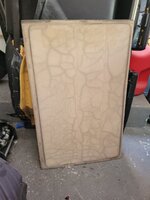
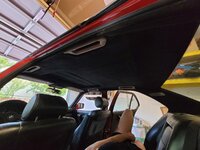
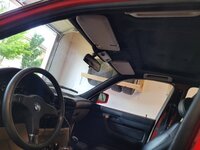
After that i finished up the stereo. Nothing crazy, Amped component set in the front with a single 10" sub in the rear. Was a very budget build and ill likely do it over, but better in the future. Soon after i got up the energy and desire to take care of the headliner, sunroof panel and A/B/C pillars. Bought some nice faux alcantara and got to work. Ive never really done anything like this before and for my first time, it came out pretty damn good. No regerts.
20210703_094055.jpg20210703_151935.jpg20210703_151930.jpg20210703_133718.jpg20210703_151829.jpg20210703_153158.jpg
My girlfriend laying in there like a weirdo.
20210703_182042.jpg
 

Attachments

  • 20210703_182025.jpg
    20210703_182025.jpg
    257.1 KB · Views: 17
  • 20210703_182035.jpg
    20210703_182035.jpg
    130.8 KB · Views: 8
OP
N

neonnblack

Well-known member
Joined
Jun 7, 2010
Messages
4,913
Location
Reno, NV
Still trying to find visors and oh **** handles. Black upper interiors and associated parts were rather rare when the car was made so they are very difficult to find now in good condition. They show up from time to time but for all handles, visors and the lights it can cost 700+dollars for a mint set. Until i find some myself, they stay beige i suppose.
 

jjeffries

Well-known member
Joined
Sep 7, 2013
Messages
91
SEM products are excellent for recoloring either to original or a color change (e.g., beige to graphite or black) and with gold basic prep work, more durable than you might imagine. “Color Coat” is the product line you’d want to use and jobbers who carry it can mix it into quarts; it’s a one part product and sprays really easily. Also available in aerosols.

Old German plastics have been a feature of my project car, too. On page 11 of my thread I start the rebuild of my 87 Porsche 924S’s dashboard.


Best regards,
John
 
To avoid these ads, REGISTER NOW!
Top Bottom