To avoid these ads, REGISTER NOW!

The Bunker

Lee Celtic

Well-known member
Joined
Jul 1, 2016
Messages
336
Location
Llanberis, North Wales UK
Hello All..

Thought I'd start my thread to try and keep myself motivated and moving forward with the Garage refit. It's going to take a while to get going as I have lots of structural stuff to do up top before I can really start inside. Back when we bought the house it had the remains of another building behind it.. the old owner had collapsed the first floor into the basement then boarded over it to form a terrace. With a little help from a few friends we completed his half-a-job a couple of years after moving in and collapsed every thing into a pile all by hand...

https://scontent-lhr3-1.**.fbcdn.net/v/t1.0-9/13590463_10210488456154504_6698473307518518998_n.jpg?oh=e1a0dbecc70be28d4f75f87b737bed1a&oe=586824BE
Photo of an old photo showing the rubble we had created..

Half a day with a back hoe and an 8 wheeler we had the site a lot clearer.. though access is tight living in the middle of a small Welsh Village.

https://scontent-lhr3-1.**.fbcdn.net/v/t1.0-9/13557934_10210488456394510_2608715888735384542_n.jpg?oh=c2c56a1b5fe0b5ee43218751e54ae900&oe=585F749C

https://scontent-lhr3-1.**.fbcdn.net/v/t1.0-9/13567396_10210488456794520_6097261334690396048_n.jpg?oh=13c23a989c9302cb54df57ccff9068cb&oe=582DEE0D

One Hundred and ten tonnes of rock was removed and I had to jack hammer out two feet of solid rock to get the floor down enough to be able to stand up in the bunker.. and because it was built on a hill the slab was 3 inches thick at the high end and thirty six inches at the low end..

That was 18 years ago.. since then the bunker has sat as a storeroom/workshop and dumping ground while I worked as a self employed upholsterer at another workshop and tried to complete a full renovation of the house while living in it.. During this renovation I came off a ladder and busted up my back pretty bad (burst two discs and tore all the muscles in my lower back) had to sell the business and stop working for a good while so pretty much everything stopped. Even had to sell my motorcycles so it must have been serious.. ;)

The roof of the Bunker is now our back yard, a large open terrace with BBQ in one corner and plenty of room for the dog. The house itself was extended over the garage so the Bunker now sits partially under the house and partly underground.

Construction is twin skin solid block with stainless wall ties on every block, around the top a 6x9 I beam forms a complete loop and on top of that are concrete Bison Beams and a block roof topped off with 2" of reinforced concrete and finally fiberglass roofing. Yup... it's a Bunker. :)

https://scontent-lhr3-1.**.fbcdn.net/v/t1.0-9/13567086_10210488590117853_8213567208658610319_n.jpg?oh=5098e462d38850e83d864df997922fcb&oe=5800020B

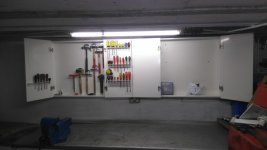
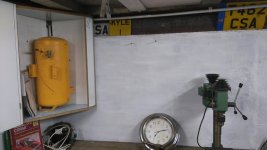
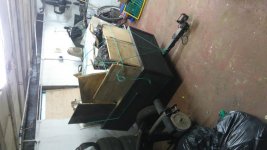
This is how it looks today. It's a mess but I have a plan.

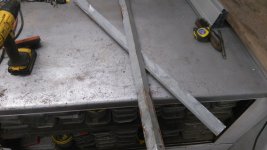
I've accumulated quite a lot of scrap ally wheels and steel stuff so first thing is to get that weighed in to add funds to the refit and to make space.

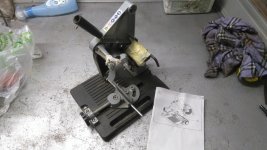
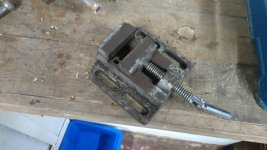
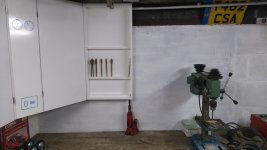
And during the next fair weather break I need to re-coat the roof/garden with a fresh topcoat before the winter weather starts. Until then there is no point doing any construction inside the Bunker as water drips right where I'm going to build. So instead I'm going to start working on what I have already beginning with a restoration job on my old Record No.25 Vise. :) pics to follow.

This is as she looks today.. this pic will change as The Bunker does..

attachment.php
 
Last edited:
To avoid these ads, REGISTER NOW!

hnsy

Well-known member
Joined
May 3, 2015
Messages
111
Looking forward to the updates

Sent from my Nexus 5 using Tapatalk
 
OP
L

Lee Celtic

Well-known member
Joined
Jul 1, 2016
Messages
336
Location
Llanberis, North Wales UK
So I guess like others I will try to explain my "Plan" as with all plans things may change as I go along due to outside influence (read as stuff I find on here)

First stage was always to treat the Bunker as a sinking airship and dump anything it doesn't need over the side to keep it in the air.. The process has been started with a trip to the scrap yard with a load of Junk..

This junk is not to be confused with steel stock/parts/stuff that looks handy/I wonder if I can make a ? out of that kinda stuff.. It was mainly old rusty wheels, bike frames from when the kids were little and offcuts too small to useful along with a couple of blown engines I stripped into different metals.. added £40 to the pot so all good. Bearing in mind I drove a Corsa into the same yard a year ago and only got £36 for the whole car I didn't do bad.

Today I've filled my little trailer again but this time full of old rotten timber, bags and bags of general tat mainly auto plastics and containers so a tip trip is on the cards for Friday.

Using my scrap money I bought a plastic container for £2 big enough to fit my Record No.25 in and began the stripping process with caustic soda. I've dipped most of the old doors in my house while restoring it so a little vice was not a problem. 2 days in the tank and a little agitation the thing was paint free, half a day with a wire wheel in the grinder had it clean and ready for paint. Also took the wire wheel to the top of my bench.

https://scontent-lhr3-1.**.fbcdn.net/v/t1.0-9/13537623_10210467760397123_2523753166029738152_n.jpg?oh=d24517f6136abde820f1d331502c73aa&oe=582B2947

You can see the No.25 on the left as it was. and the rusty steel worktop of my bench.. Not going for mint on the bench as I weld jigs to it regularly and grind them off again so it only got a coat of Alloy wheel silver as it's cheap and covers well.

https://scontent-lhr3-1.**.fbcdn.net/v/t1.0-9/14642410_195225617570027_727592701202585464_n.jpg?oh=188d83081e559b17d101f47da3e2cd15&oe=5B48E2C1

The Vice.. Many coats of black matt while holding stuff being sprayed.

https://scontent-lhr3-1.**.fbcdn.net/v/t1.0-9/13592356_10210488206628266_6755576352407374354_n.jpg?oh=0a697c4044ba2ff7121345be71b65ae5&oe=581EB0D6

Dismantled and ready for the tank.

https://scontent-lhr3-1.**.fbcdn.net/v/t1.0-9/14721505_195225610903361_441986633103459276_n.jpg?oh=ccf547087818dcf720c97254a9a92d98&oe=5B041852

And a final shot of it all back together. :thumbup:

https://scontent-lhr3-1.**.fbcdn.net/v/t1.0-9/14517391_195225684236687_2029054900939758421_n.jpg?oh=6eb3c8003880433f980d38a28bd84428&oe=5B1D529F

I want the Bunker to look like a tool free zone so it looks clean and clear. Nothing worse than doing a ten minute job then spending two hours cleaning overspray/sawdust/oil off tool racks so everything is going away.

I've always been a fan of the way boat builders use every nook and cranny to squeeze out as much storage as possible, I have worked on many yachts and cruisers and it always impressed me how some of the gizmos worked so I'm hoping to use a few ideas to max out my storage.

Due to the large step getting a car inside is a bit tricky so it only happens when it really needs to so a big open space in the middle is not really needed all the time. Also as this step goes from about an inch at one side of the door to 18 inches the other because we are on a hill I get water coming in now and again if the stream at the top of the hill diverts onto the road during storms so everything needs to be off the floor. It's at most half an inch but it soaks into anything left on the floor.

So for this installment,

Vice done.
Bench top done.
scrap gone .
rubbish loaded.
:)
 
Last edited:
OP
L

Lee Celtic

Well-known member
Joined
Jul 1, 2016
Messages
336
Location
Llanberis, North Wales UK
Well the weather took a turn for the worst so the work outside was put off and to keep busy I made a start inside..

I work in a furniture factory where we make 200 bedroom suites a day so theres always plenty of spare offcuts free for the taking. I know most would say stay away from MDF for the garage but I get it free. I have a small De-humidifier I picked up as a faulty item a few months ago for £20, turns out it was the thermostat sticking so after a little playing with it and adjusting it's working fine and started out pulling a gallon every 12 hours or there about, it's down to a gallon every 36 hours so it's getting dryer. And as I plan to leave it running 24-7 the MDF will be fine.

So onto the first item on my Build list.. Over Bench Tool Storage.

I chose to use white gloss faced MDF with 2mm plastic edge trim all round to seal any moisture out and also to keep the Bunker as bright as possible.

I wanted all the tools to be hidden when not in use but easy to get to so opted for two cupboards wall mounted above the bench that would not be too deep to give maximum bench top space. The hinges I used allow the doors to open fully letting them lay flat and not stick out over the bench. Corners are doweled glued and screwed (not going anywhere).

pic 1 First one up on the wall.
pic 2 second one almost done but I was 2 grommits short for the second door.
pic 3 Second one up on the wall and adjusted so the doors line up to give in effect one massive tool board.
pic 4 started adding tools.
pic 5 doors closed to hide the tools and reveal the entertainment :thumbup:
pic 6 Random photo from outside showing how the Bunker looks today.
pic 7 I re-used some old Dexian uprights for screwdriver racks. rounded the ends and sprayed them white.

The plan now is to add as many tools as I can to the boards so I can free up some space, I've also decided that for me the sliding doors on the front of my bench don't work for me. Getting anything out is difficult as they over lap and the access is poor. Plan B for the bench is to make Draw units that fit in the holes where the doors sit allowing storage for power tools and more hand tools. :cool:

One thing I'm still undecided about is where to mount the vise.. It's been to my left as seen in pic 4 because thats where my Father-in-law put it years ago. However I'm right handed and think it would be better on the right of me. The best and worst spot would be in the middle but thats where I'm used to working. My head hurts..:sad:
 

Attachments

  • DSC_0113.jpg
    DSC_0113.jpg
    125.1 KB · Views: 204
  • DSC_0128.jpg
    DSC_0128.jpg
    140.5 KB · Views: 226
  • DSC_0125.jpg
    DSC_0125.jpg
    128.2 KB · Views: 191
  • DSC_0124.jpg
    DSC_0124.jpg
    127.4 KB · Views: 203
  • DSC_0122.jpg
    DSC_0122.jpg
    131.3 KB · Views: 188
  • DSC_0117.jpg
    DSC_0117.jpg
    127.6 KB · Views: 186
  • DSC_0115.jpg
    DSC_0115.jpg
    137 KB · Views: 217

Pay2play

Well-known member
Joined
Jun 20, 2015
Messages
180
Had you considered using a receiver hitch to mount your vice to the bench like Jack Olsen and others have done. The square tubing receiver can also be used to mount grinders, wheel buffers etc and then be put away when not in use.


Sent from my iPhone using Tapatalk
 
OP
L

Lee Celtic

Well-known member
Joined
Jul 1, 2016
Messages
336
Location
Llanberis, North Wales UK
Hi All.. been a bit busy in the Bunker to do an update until now.. :D

So I left off with my new over bench tool cupboards finished and waiting for more tools.. and I've come to the conclusion I have way too many tools.. (if thats possible)

After having a think I decided to just add a good set of the most common used to the over bench storage then add more of the same type of cupboards along the next wall to take the others. One for woodworking, one for specialist car tools, Pullers, timing tools and the like.

One of the things I was going to buy was a Socket caddy for my socket sets to allow me to take them outside as there is nothing worse than getting under a car then finding out the right size is still in the toolbox in the garage. I'd seen a couple on ebay so went to the local shop to see if they had one.. I wasn't impressed.. The look good in the photo but up close they are thin and flimsy. Result.. I made my own. from a scrap bit of stainless steel and a trunk handle I've had knocking around for years. took about an hour and used up the rails I had in the lid of an old toolbox.. came out nice..
 

Attachments

  • DSC_0055.jpg
    DSC_0055.jpg
    130.6 KB · Views: 172
  • DSC_0057.jpg
    DSC_0057.jpg
    135.7 KB · Views: 177
  • DSC_0048.jpg
    DSC_0048.jpg
    148.5 KB · Views: 146
  • DSC_0045.jpg
    DSC_0045.jpg
    149 KB · Views: 118
  • DSC_0044.jpg
    DSC_0044.jpg
    148.7 KB · Views: 125
  • DSC_0043.jpg
    DSC_0043.jpg
    143 KB · Views: 124
  • 22bfbc11-a330-4c1b-b081-08c6e80ba002.jpg
    22bfbc11-a330-4c1b-b081-08c6e80ba002.jpg
    85.6 KB · Views: 135
OP
L

Lee Celtic

Well-known member
Joined
Jul 1, 2016
Messages
336
Location
Llanberis, North Wales UK
I've been itching to get around the first corner in the Bunker so I can start on the next wall.. I have a raised platform I plan to use as a Drill area that was built of brick when we were building the Bunker to get around a slab of green granite we just couldn't budge.As it turned out it's a great height to put my drill stand on so thats where it's gonna live..

To get around the corner I planned to add a corner cupboard for general storage but it's a bit of a stretch to get to and as with all corner cupboards they tend to be useless because of the awkward shape, storage is wasted..

I've been wanting to add a silent compressor to the bench to save having to drag out my portable every time I want a blowdown or to use a staple gun but setting one up under the bench was going to loose me good square storage so I had an idea..

I picked up a 25L air take off ebay for 99p (less than a pound works for me ) Then put a post on a local for sale facebook group asking if anyone had an old fridge they didn't want. Got one free if I collected which I did.

The Corner as predicted was no where near square as I had to get as much use of the ground space when I built the Bunker so the top and bottom panels were cut first then boxed up and set in place.. I stripped the pump from the fridge and took the carcass to the recyclers then using a bit of thin angle iron (actually folded sheet used to strengthen corners on pallets for shipping) I fabricated a chassie to hold the pump and tank together. It still needs the gauges and plumbing hooking up but that will have to wait until I get the door sorted out. I've moved the drain to the end of the tank and this will drain out through a remote tap under the cabinet.

I converted an old portable 25L to a fridge pump a few years ago and it's still going strong so I foresee no problems and it won't be so loud you can't hear yourself think. :D
 

Attachments

  • DSC_0018.jpg
    DSC_0018.jpg
    129.1 KB · Views: 149
  • DSC_0016.jpg
    DSC_0016.jpg
    138.9 KB · Views: 136
  • DSC_0017.jpg
    DSC_0017.jpg
    142.4 KB · Views: 128
  • DSC_0008.jpg
    DSC_0008.jpg
    130.7 KB · Views: 137
  • DSC_0007.jpg
    DSC_0007.jpg
    139.1 KB · Views: 113
  • DSC_0002.jpg
    DSC_0002.jpg
    130.3 KB · Views: 115
  • DSC_0021.jpg
    DSC_0021.jpg
    129.4 KB · Views: 127
OP
L

Lee Celtic

Well-known member
Joined
Jul 1, 2016
Messages
336
Location
Llanberis, North Wales UK
My son and I hit the Local car boot sale (swap meet) today as he wanted a driving lesson and we had to go somewhere right..?

Ended up picking through boxes of junk looking for stuff to use in the Bunker.. Best finds were these.. Drill vise £2, what looks like a drill/ milling vise £4, 12" Woden G clamp £8, Clock 50p, And a little gizmo to turn an angle grinder into a metal chop saw for small stuff £4. not a bad days haul.. My son picked up an old cut throat razor for £1.50 that he's now selling on Ebay for £45 ( Turns out it's vintage and collectable.)
 

Attachments

  • DSC_0023.jpg
    DSC_0023.jpg
    148 KB · Views: 119
  • DSC_0012.jpg
    DSC_0012.jpg
    136 KB · Views: 96
  • DSC_0013.jpg
    DSC_0013.jpg
    132.8 KB · Views: 92
  • DSC_0010.jpg
    DSC_0010.jpg
    129.2 KB · Views: 91
  • DSC_0011.jpg
    DSC_0011.jpg
    144.7 KB · Views: 94

oldironfarmer

Well-known member
Joined
Jun 25, 2016
Messages
6,664
Location
Terlton, Oklahoma
Wow!! Great build, and you do have a challenge on your garage door opening. I was wondering if there was any way you could cut a ramp into the downhill third of your opening, then build a matching fold up ramp so it makes a flat floor for the door when folded up and makes a rough ramp to drive on when folded down? Kind of like a dove tail trailer ramp.

Excellent finds at the boot sale. I guess we would call that a tailgate sale (truck), which would be a trunk sale (car), which is a boot (mis-used English :)).

All great finds, especially like the mini-cutoff saw, but your son did outdo you.

And your quiet compressor can't be beat for efficient use of space:bowdown::bowdown:

And, and... and your free finished MDF makes a great white board on every door - amazing!!
 
OP
L

Lee Celtic

Well-known member
Joined
Jul 1, 2016
Messages
336
Location
Llanberis, North Wales UK
"you do have a challenge on your garage door opening" yes I do.. thats why cars rarely go in.. when they do I have a heavy timber ramp cut to match the road so we can just swing in.. The only car thats actually driven in without the ramp was a Vaz2121 also known as a Lada Cossack which actually reversed in climbing the 18" step, very impressive..

The first silent (fridge) compressor I built used to pump up to 150psi easily but as it took some time I had to raise the original auto turn on from 60psi to 100psi so it didn't go down too far when I was using a staple gun at speed.. the plan with the fitted one is to add a fused switch to the outside of the cupboard and have the dials visible through a window in the door.. theres room in there for a small water trap and oiler when I get round to finding them in the junk boxes I have stacked..

Thanks for the comments and stopping by.. can't wait to see what yours looks like after the slab is poured.
 

Bib Overalls

Well-known member
Joined
Dec 4, 2006
Messages
3,318
Location
Jonesboro, Arkansas
Have you considered fabricating a short, fixed height, "table" on casters similar to a four post lift. Something you could collapse for storage. When you need to bring a car inside the table would be positioned at your door with casters locked. With a ramp positioned on the low side the vehicle would be driven in. The vehicle, sitting on the table would be high enough to do services underneath. With right-hand-drive you could easily exit and re-enter the vehicle although the first step down might be a stretch.

Can you access the "bunker" from the house or do you need to go outside first?
 
OP
L

Lee Celtic

Well-known member
Joined
Jul 1, 2016
Messages
336
Location
Llanberis, North Wales UK
When I built the Bunker the plan was to never bring a car in.. I was heavily into Bikes back then so the fact a car wouldn't make it was a good thing. Looking back I should have dug out more rock and put the door at the low end of the hill and given myself more head height inside but that would have taken months of work and as the wife was waiting for a kitchen to be built up top more time was not an option.. As it is I can use a ramp to get cars in and once inside I have jacks and stands to get them off the floor.. but again it's more of a tinkering and making stuff sort of place than a car shop..

These are a few things I made for my old Discovery.. I have a newer TD5 now :D

Slide mount and drinks holder for the dash
raised Air intake with military Top
Roof rack made with electrical conduit
The Old Discovery in -18c temperatures note the ice hanging off the front bumper..lol

This is more the sort of thing the Bunker is used for. :rocker:

The only access is from the road.. :(
 

Attachments

  • IMG_3359.jpg
    IMG_3359.jpg
    134.5 KB · Views: 133
  • SORK1.jpg
    SORK1.jpg
    70.8 KB · Views: 118
  • IMG_4344.jpg
    IMG_4344.jpg
    150.3 KB · Views: 130
  • IMG_2103B.jpg
    IMG_2103B.jpg
    110.5 KB · Views: 135
OP
L

Lee Celtic

Well-known member
Joined
Jul 1, 2016
Messages
336
Location
Llanberis, North Wales UK
Not much happening in The Bunker right now.. I made up the doors for the compressor cupboard and made a mock up of the cupboard for cutters and drill bits.. it looks ok that size so I'll get the timber cut and edged at work next week for the finished item. (with doors)

While I wait for the parts I need to finish the compressor I dragged the trailer back in and started going through the storage area under the house. (small door next to the main double doors) and filled it with stuff for the dump twice. After doing two trips I filled it again for a trip tomorrow. While moving stuff around finding stuff to dump I found my sons old dirt bike, He was 9 when he got it, he's 24 now..:shocking:

Just about to stick it on ebay along with some range rover tyres and a tow hitch so I can buy more tools..lol

I've also worked out that when I added strip lights I was planning a bench along the side wall under the window. it never happened as I got the steel bench so the lights I have are off center (yup OCD rears it's perfectly symmetrical head) so the lighting ring I put in can be moved which in turn will hide all the conduit between the roof beams leaving the ceiling pipe free ready for paneling :thumbup:

Bargain of the week.. a pick set for 25p with free postage..
 

Attachments

  • DSC_0033.jpg
    DSC_0033.jpg
    131.8 KB · Views: 104
  • DSC_0032.jpg
    DSC_0032.jpg
    131.7 KB · Views: 96
  • DSC_0029.jpg
    DSC_0029.jpg
    137.9 KB · Views: 101
  • DSC_0026.jpg
    DSC_0026.jpg
    137.6 KB · Views: 98
  • s-l1600.jpg
    s-l1600.jpg
    140 KB · Views: 95

Cris B

Well-known member
Joined
Mar 21, 2011
Messages
416
Location
Lancashire, UK
That is a bit of a project. I feel your pain in the digging out. My mother lives not too far from you and digging in her garden is most rocks with a bit of soil and hard going!

How big is the workshop space you are working with? It's difficult to get a feel for the size and shape from the photos.
 
OP
L

Lee Celtic

Well-known member
Joined
Jul 1, 2016
Messages
336
Location
Llanberis, North Wales UK
Sorry for the late reply Cris B.. wifey got us a weekend away in Chester.. so lots of drinking and eating meant not a lot done.. Just found a way to give better info about the Bunker in terms of size and the planned layout.

The layout shows five tool cabs along the right hand wall.. these will in fact be 3 double units on locking castors that can be wheeled and arraigned into a central island for bigger jobs..

The rest is as good as I could get it with the tools on the drawing program see attachment..

bunkerbuild.jpg

The only other thing I got done was to add the bolts to fix the vise to the bench.. may have cleaned them up a bit..:thumbup: and a few more tools added to the cabinets above the bench.. oh and I fitted the gauges for the fitted compressor to the fascia of the corner cupboard.
 

Attachments

  • DSC_0001.jpg
    DSC_0001.jpg
    136.1 KB · Views: 64
  • DSC_0006.jpg
    DSC_0006.jpg
    138.5 KB · Views: 74
  • DSC_0010.jpg
    DSC_0010.jpg
    149.8 KB · Views: 76
Last edited:

Bib Overalls

Well-known member
Joined
Dec 4, 2006
Messages
3,318
Location
Jonesboro, Arkansas
Did you spin those stainless steel bolts on a lathe? I did some the other day and I used a belt sander. Buffed, they look good but they are not as flat as yours. I guess your OCD trumps my OCD.
 
OP
L

Lee Celtic

Well-known member
Joined
Jul 1, 2016
Messages
336
Location
Llanberis, North Wales UK
Wet and dry paper spray glued to a sheet of glass just wet it down and then start rubbing in random directions starting at 400 grit down to 1200 then buffing wheel (with a stitched mop and brown wax compound). Just the way I used to do it on the show bikes.. takes a bit of time but gives a good finish. maybe 10-15 minutes a bolt head. doing about 40 for crank cases and covers used to take days.. I do like shiney..lol
 
OP
L

Lee Celtic

Well-known member
Joined
Jul 1, 2016
Messages
336
Location
Llanberis, North Wales UK
Sorry this may be a bit long winded but there are pictures I promise..lol

So today rather than going through yet another box of junk I put my mind to some storage/ workbench design..

I'm about to take my landrover off the road for a couple of months to get it ready for winter so I need to get all the timber and stuff I need home from work before then.

Most of the stuff I want to use is free and comes in sheets 1200mm by 900mm at 15mm thick and is coated on both sides with white. I'm going flat white on the rest of the build due to the finish being more resistant to scratches than the gloss while staying wipe clean..once I have the final sizes I'll get it all cut and edged to seal it up before putting everything together..

I took a few measurements and started drawing out what I have in mind, please bear in mind that the drawings are rough and not to scale but they do show what I'm aiming for..

The fixed tall cupboard will be screwed to the wall and be full of shelves for cleaning/valet stuff, service parts and will only be 8" deep so the garage door will open fully. The top shelf will house the electrical distribution board that is already there (really means hide it) I'll also be fitting the main light switches to the side of it so I can find them easily.

Then there will be three cabinets labeled T1 to T3.. Two of these will be all draws on full extend runners and one will have doors and shelves for bigger items. All three will be on wheels so they can be moved and re-positioned to give a central island I can use as a cutting bench for upholstering motorcycle seats.

Above these cabinets will be three shallow lockers similar to those on planes, I've got hold of some small rams to hold the doors up and think they will work great. These will house all my small stuff nut's, bolts, clips, rivets, etc. They will also have lights underneath to light up the cabinets below when working on them.

Once they are built I have some darker 35mm HD MDF with a green water proofing compound added that I'll make tops out of, the colour of the tops is to be sorted out later as I'm still not sure.

The sizes might look a little odd but it means they will fill the space I have and leave little or no gaps and will lock together for the island unit. The Plan is to use a load of 1" thick wall box section I have to make rectangular frames to mount the cabinets on and fix the casters to these with two locking casters per unit.

so in the first picture red wheels fixed to blue steel frames on the bottom of green cabinets. The height will tie in with an existing worktop that sits on a concrete wall we had to add during building the Bunker this houses my pillar drill..

Second picture shows the two layouts I want to use, normal in black and occasional in red.

The third shows both the right way up.. :headscrat

Thoughts..?
 

Attachments

  • DSC_0001.jpg
    DSC_0001.jpg
    128.9 KB · Views: 38
  • DSC_0003.jpg
    DSC_0003.jpg
    129.8 KB · Views: 35
  • DSC_0004.jpg
    DSC_0004.jpg
    125.3 KB · Views: 37
To avoid these ads, REGISTER NOW!
OP
L

Lee Celtic

Well-known member
Joined
Jul 1, 2016
Messages
336
Location
Llanberis, North Wales UK
More sorting of junk..

The local takeaway serves out it's meals in nice little plastic trays you can place in the ding machine (microwave) and after they are cleaned my wife stacks them for lunch box salads etc.. I snaffled away a stack today and started going through a few boxes of stuff..

DSC_0003_2.jpg

Now I don't know if it's only me but I have a bad habit.. It started small with just a single small plastic box at the side of my bench but snowballed into several large ish boxes..

What I seem to do is get given or find something and I take it to bits for what ever reason.. sometimes to try and fix.. other times to get something I need out of it.. and sometimes just to strip the metals and parts out for resale or scrap..

However it is at this point my habit kicks in.. Small screws especially self tappers are useful so they go in the box.. small electric motors are always handy so they go in the box.. cable of almost any length is handy so it goes in the box..ooh that looks handy..in the box.. might need that..in the box etc...

Always with the plan to sort the box out and put the little gems away but it never happens.. well today is the day..

I took the stack of takeaway trays and laid them out on the bench and grabbed one of the boxes of junk and started going through it.. today I managed to get three done. all the little gems are now in their own storage boxes.. Bulbs, seals,screws,washers,cables are coiled and stored in one box..

DSC_0004_1.jpg

Today was a good sorting day.. so good that I cleared the shelves of enough stuff to get more of the floor cleared away.

before ............. after..
DSC_0001_2.jpgDSC_0007_1.jpg
 
OP
L

Lee Celtic

Well-known member
Joined
Jul 1, 2016
Messages
336
Location
Llanberis, North Wales UK
Thanks they are off my old cars and my sons dirt bike (Kyle 1 is not a real plate).. I see you collect them.. I'm lucky as my wife got me some with my initials on them for Christmas last year.. they are mine for ever now as here you don't need to renew them.. once you have them the number stays with the car you own.. you just have to transfer them to the new vehicle..
 

tracktoy

Member
Joined
Dec 17, 2012
Messages
15
Location
south wales uk
Great project- the disco looks great in the snow:thumbup:

ive heard of people using fridge compressors but no idea how the work- something ill have to look into

keep up the great work :D
 
OP
L

Lee Celtic

Well-known member
Joined
Jul 1, 2016
Messages
336
Location
Llanberis, North Wales UK
So work in the Bunker has slowed lately as I put my back out again.. it happens quite often and I need to rest it..

However.. Time resting is used to plan and improve the ideas I have for the build.

Today I spent a little time mocking up one of the cabin style cupboards I plan to put along one wall (maybe two but I'll wait to see how these turn out)

I went with a mock up first as I wanted to see if they worked in the space I have. so the edges are not trimmed and the hinges are old ones I had knocking around.. Originally I was going to use a top hinge but it made the door raise too high and I wouldn't have had the 10mm gap between the door and the roof I need for the paneling I'm covering the ceiling with. So I tried the side mount hinges and they work better.. Ok so I'm loosing a little of the opening size but it's still plenty big enough to get stuff in and out.

I also had to narrow the cupboard I had planned to have them 300mm deep but after mocking up a shelf 300 deep it would have stuck out from the wall so much I'd loose the ability to use the units going below as a worktop. Also the plastic tubs I'm using for storage would have left an empty space at the back of the cupboard and thats just a waste of space.

So here's the pics of the mock up..

DSC_0019.jpg the closed cabinet.

DSC_0018.jpg open. a few of the tubs are in and I added the stands to give scale.

DSC_0020.jpg crappy old hinges but they worked.

As said the hinges were old ones I had knocking around and they held the door up ok.. but I suspect it may have been the rust on them that held the weight.. so I went out and got some with springs to make sure they will work. These look a bit better.. :thumbup:

DSC_0003.jpg

StillP I have to look through piles of the stuff to find the white I need but if your not bothered about colour and can get it collected I can get you a pallet about 80 sheets high of MDF sheets, one side is normally coated either colour or woodgrain and one bare.. we chip it at the end of every day and it goes into the Biomass burner and as we have tons of the stuff waiting to be chipped it's free.. Let me know and if you want it I'll collect as much of the good stuff as I can for you. The Boss would be glad to be rid of it. :lol:
 
OP
L

Lee Celtic

Well-known member
Joined
Jul 1, 2016
Messages
336
Location
Llanberis, North Wales UK
Well after a full week off work lying on the living room floor to sort my back out I'm actually back on my feet.. The Doc thinks I have torn a small muscle and thats what has been hurting.. but now it's had time to heal up I'm back at work from Monday.

So to warm up for work I got back in the Bunker to get some stuff done. :thumbup:

The rough plan I drew up on the tool cupboard wall a few weeks ago.

Today I tried to catch up and make it real.. I tested out the locker cupboard and found it worked well so I went ahead and made two more.

DSC_0004.jpg DSC_0005.jpg

They went up much quicker than I thought they would now I have the technique and they worked great. The third and last Locker went up and took me as far as the fuse box mounted by the door. The box itself is mounted on a standoff board as regulations state it must be so thats how it's going to stay. I made the last locker shorter than the others but left the door the same length, this was to give a small channel at the end of the cabinet for running cable when I come to fit the under cabinet lighting. I also had to move the light switch as it was in the way.

DSC_0011.jpg

All this left me with just one space on the wall to finish.. the upright cupboard around the fusebox..

DSC_0006.jpg
 
OP
L

Lee Celtic

Well-known member
Joined
Jul 1, 2016
Messages
336
Location
Llanberis, North Wales UK
First job was to empty the old shelves a friend gave me a few years ago and give the area a sweep this left me with a clear space to work with.

Before. DSC_0006.jpg After. DSC_0008.jpg

This last cupboard is the only one I'm doing full height so to match it at the top with the lockers I needed a dry run and a lot of tape measure work.

Dry run with the first gable..

DSC_0012.jpg

And again with the second. The socket will be removed when the new outlets go in under the Lockers. but for now the shelf needed to clear it.

DSC_0013.jpg

Top tip.. when drilling board for dowels slip a socket over the cutter and add a little tape to keep it there, you can then set the cutter depth in the drill and not have to worry about going all the way through.

DSC_0015.jpg

Assembly is pretty straight forward, glue in all the holes and tap the dowels in then bang it all together with a rubber mallet. I measured the shelves to make sure my floor jack and stands would fit without too much wasted space trying to maximize the space and I think it worked out pretty good.

DSC_0017.jpg DSC_0018.jpg
 
OP
L

Lee Celtic

Well-known member
Joined
Jul 1, 2016
Messages
336
Location
Llanberis, North Wales UK
To finish off I added the doors and screwed the cupboard to the wall before adjusting the hinges to get everything square and level.

DSC_0016.jpg

For now it will have no handles as I have an idea for some custom made ones but I need to get enough materials to make enough for all the opening doors.

DSC_0022.jpg DSC_0023.jpg

Next stage will be the three rolling cabinets that will fit under the lockers and act as a long worktop. Now I have the fitted stuff finished I can measure up for materials. As always all materials used were recycled waste from where I work. Much better than shredding and burning it. :D
 

BUGTHUG

Well-known member
Joined
Nov 12, 2010
Messages
2,960
Location
Kansas
looks very nice! Good use of the scrap material. I wish you were closer, I could use some of that material for some of my on going projects.
 
OP
L

Lee Celtic

Well-known member
Joined
Jul 1, 2016
Messages
336
Location
Llanberis, North Wales UK
Thanks.. Had to split it into three posts due to the photos.. I also have an idea for the worktops on the rolling cabs using pallet wood to make butcher style block tops.. plus a little stainless.. I keep seeing stuff on here and online and changing my mind..lol
 
OP
L

Lee Celtic

Well-known member
Joined
Jul 1, 2016
Messages
336
Location
Llanberis, North Wales UK
So over a year ago I was on a roll refitting my workshop when my youngest son asks if he can put his car in there for a couple of weeks to change the gearbox..

Over a year later he's driving around in a different car and I have a workshop full of scrap car.. Anyhoo I've got the thing out and had it towed away so I can now get back to it ..

In the last picture post I'd started the cabinets by the door so I'll take off from there..

After looking around this site and a good few others I spotted a pallet wall in someones living room and thought it looked quite good.. so I set about my walls..

First off I roughed out a couple of big boxes the same size as the cabinets I want to build later.. this helped me with positioning of the pallet wood and gave an idea of the finished look..

https://scontent-lhr3-1.**.fbcdn.net/v/t1.0-9/14523116_208176076274981_5478464375147960078_n.jpg?oh=d0bc76c576c77c479e6329ffafdbef7b&oe=5B1251EF

Then it was just a matter of adding the pallet wood a plank at a time..

https://scontent-lhr3-1.**.fbcdn.net/v/t1.0-9/14908317_208176299608292_2712968551798202754_n.jpg?oh=6d65a746d68ea0be69dac17b4af0aacc&oe=5B4B3266

I love the texture and it's great for just screwing stuff to.. if you change your mind the holes just add character. :rocker:
 
OP
L

Lee Celtic

Well-known member
Joined
Jul 1, 2016
Messages
336
Location
Llanberis, North Wales UK
If you have read through this thread you may have noticed I try really hard to use recycled or reclaimed materials where ever possible.. (thats code for tight wad) I really hate waste.. I do a lot of stuff with metal and wood that I get for free and really enjoy it..

Today I was given a Pallet.. now I can hear some of you guys saying to yourselves "Oh no another pallet coffee table." I just don't like todays throw away world..

I have plans for the pallet I was given.. First off I'm using some of it for an Island bench in the middle of the workshop for assembly and as a cutting bench for fabric.. Not sure what to do with the rest... it's pretty big... :wtf:

https://scontent-lhr3-1.**.fbcdn.net/v/t1.0-9/28056810_394472094312044_2368995863863292683_n.jpg?oh=bb99eff2827f4d2f50fd65e5df3fea03&oe=5B01DFC9

The cut section is 8' long so the whole thing is 24-26 feet long most of the cross rails are mahogany/ red hardwood of some sort but the first one is walnut :wtf:
 
OP
L

Lee Celtic

Well-known member
Joined
Jul 1, 2016
Messages
336
Location
Llanberis, North Wales UK
I've started thinking about the floor of the bunker.. at the moment it's just painted concrete.. well some of it's painted.. much of it is bare..

At first I was thinking of tiles but thats expensive.. I've seen a few interlocking foam things on ebay but after getting a sample they won't last long.. can't afford race deck type stuff and can't have anything with holes in, I'd be taking it up to get the sawdust out every 5 minutes.. so after a lot of thinking I think I'll just go with paint again..

so to get it nice and clean I thought I'd hire a floor scrubber and after googleing it an add on eBay popped up.. I put in two bids as I thought I could buy one for the cost of renting one for a day.. turns out I got it a little cheaper than that.. Collected it today.. Guy wasn't happy but what could he do.. I won the auction.. :)

https://scontent-lhr3-1.**.fbcdn.net/v/t1.0-9/28168646_394482524311001_5119534826531515744_n.jpg?oh=1f1c877e9a26c793f42733105e6b4a1b&oe=5B07701F
 
OP
L

Lee Celtic

Well-known member
Joined
Jul 1, 2016
Messages
336
Location
Llanberis, North Wales UK
I got the timber off the big pallet home along with a few MDF sheets I get from work.. As it turns out the dimensions of the pallet wood were all over the place and as I don't have a planer/thicknesser I just had to make do.. a few bits will need a tickle with a hand plane but overall the center bench I planed turned out pretty good.

It's still missing a couple of cross brasses at the far end but they will go in after I've moved my sewing machine into place.. The top boards are just resting in place at the moment but I have a plan to make the whole top slide towards the end with the clamps hanging to reveal the sewing machine when needed giving me a full size table behind the machine..

The vise is a record 52E and it will be let into the top rail after a resto.. it's a little stiff to use and needs some paint before mounting it.

But all in all I'm happy with my free bench/cutting table. even if some of the timber was wedge shaped.. (you can see the 4mm lip under the corner leg joint down to nothing at the bottom..lol)

https://scontent-lht6-1.**.fbcdn.net/v/t1.0-9/29027528_401286173630636_7978501475783409664_n.jpg?oh=2ef9dcd3b53e864d9a804975f5e4db12&oe=5B43DEC5

https://scontent-lht6-1.**.fbcdn.net/v/t1.0-9/29063310_401286203630633_7601529378714943488_n.jpg?oh=b1d621ad73904ee37095429532965f3a&oe=5B3C94FB

https://scontent-lht6-1.**.fbcdn.net/v/t1.0-9/29062646_401286290297291_9127887917362970624_n.jpg?oh=5e1dc443e546ddf8f9ab34d5f434c2e5&oe=5B473802

https://scontent-lht6-1.**.fbcdn.net/v/t1.0-9/29027926_401286260297294_3131434937249431552_n.jpg?oh=39fbbc3f5faae827248a8162c4ac90c2&oe=5B015284
 
OP
L

Lee Celtic

Well-known member
Joined
Jul 1, 2016
Messages
336
Location
Llanberis, North Wales UK
So things I've learned since starting..

The plan for the large rolling units has to change.. the idea of having 1100mm draws was nice but the trial ones I made sagged when filled with tools.. the bottom of the units also sagged under the weight of tool boxes and car batteries.. they looked ok but didn't work..

Also the idea of having the whole place sparse and un-cluttered looked dull and boring.. Yes I wanted it with as few dust traps as i could get but it was just none descript and sad looking..

These were the original units I started.. Too wide.

https://scontent-lhr3-1.**.fbcdn.net/v/t1.0-9/14962701_208176422941613_5962816196000541756_n.jpg?_nc_cat=0&oh=8755b57c6fdc83241fa6d9ae26ed3963&oe=5B32AD2E

With the weight of a chop saw and transformer on top they began to bulge out in the middle too after a few weeks due to no stretcher to hold the gables together so a re design was needed..

I decided to do all draws as I now have storage for larger items under my new workbench/cutting table. Half the width and doubled up they will be the same size as the originals. I also decided to add one stretcher per draw just to make sure they stayed square..They framed the draw fronts nicely..

https://scontent-lhr3-1.**.fbcdn.net/v/t1.0-9/29597325_408435886248998_6617671646360216171_n.jpg?_nc_cat=0&oh=89e8f070d1ca38f2819726b9f6521990&oe=5B351912

The draws are made from broken draw wraps from the skip at work cut down in height and then fixed to a 16mm base board, The draw fronts are Pallet wood to match the wall cladding ..Though the top draw front will be replaced at some point as I cut it a little small.

The runners are some cheap ebay ball bearing runners that were only single action but I pop rivited two together to make them full depth runners for a quarter of the price of the real thing.

https://scontent-lhr3-1.**.fbcdn.net/v/t1.0-9/29572600_408435819582338_7243629900232619628_n.jpg?_nc_cat=0&oh=6dd45e43743d82e181bc571585652e24&oe=5B73522E

There will be enough draws (20) to only have one layer of tools in them so after testing with a 15k weight in each of the draws I'm happy they will be good to go. The bottom draw is deeper for face masks , ear defenders and other bulky but light stuff.. The draw front for the bottom draw is still clamped up drying.

https://scontent-lhr3-1.**.fbcdn.net/v/t1.0-9/22308782_408436049582315_5092557222070182607_n.jpg?_nc_cat=0&oh=952db6c39ea9eb949ef597147b757ced&oe=5B6CF3F7

I really like the draw fronts and I even left the branding stamps on them to add character..
A quick coat of clear varnish to fend of dirty hand prints and cheap Handles off ebay again (£3 for 20) and I think they look pretty cool..

https://scontent-lhr3-1.**.fbcdn.net/v/t1.0-9/29597566_408436249582295_7977888406650402497_n.jpg?_nc_cat=0&oh=48b2422381d396c0be941f43b2198a7c&oe=5B345F46

https://scontent-lhr3-1.**.fbcdn.net/v/t1.0-9/29694415_408436366248950_8792249647947090912_n.jpg?_nc_cat=0&oh=3dc1a34afee0256b6a05d8afae25a91f&oe=5B6C097B

79p a roll none slip mat from home bargains as draw liners..

https://scontent-lhr3-1.**.fbcdn.net/v/t1.0-9/29573087_408436092915644_4328588122395352269_n.jpg?_nc_cat=0&oh=b4d60c1f173aad3e3f9ab84ceb3bffc7&oe=5B313AB9

And to make the place a bit more homely I've added a few bits and bobs to break up the wall space..
Starting to feel warm and fuzzy..lol

https://scontent-lhr3-1.**.fbcdn.net/v/t1.0-9/29683277_408436439582276_5359334921885518663_n.jpg?_nc_cat=0&oh=dd48ef7bf9fcbaa1fd4479d8f7f119a4&oe=5B2C7515

Only 3 more units and 16 more draws to make.. Fun never ends..:thumbup:
 
OP
L

Lee Celtic

Well-known member
Joined
Jul 1, 2016
Messages
336
Location
Llanberis, North Wales UK
Tonight I stripped the Record 52E down to clean it up.. I don't think it's ever been used. Usually the hole for the tommy bar has dents either side where it's been left to drop into the hole.. the hole on this one is perfect.. overall it's very good but there are a few marks in the paint so it's getting a new coat.. then onto fitting.

I bought two old Tin containers from a car boot sale for 50p each a year ago just because they were old and looked cool, I was surprised to find they were both full..

https://scontent-lht6-1.**.fbcdn.net/v/t1.0-9/29598222_410355129390407_4768141602353198255_n.jpg?_nc_cat=0&oh=73e2972cb13337693360d9e04d080d09&oe=5B75F9C2

I've actually been using the EESINUT and have to say it's really good.. I gave the vice a few drops yesterday and today it came apart really easy after being seized for years.

https://scontent-lht6-1.**.fbcdn.net/v/t1.0-9/29598356_410355149390405_7934388832958463485_n.jpg?_nc_cat=0&oh=e960c610ca3a12c94b13b81546e34cad&oe=5B394048

Parts waiting for cleaning..

https://scontent-lht6-1.**.fbcdn.net/v/t1.0-9/29594749_410355039390416_8810100448067336747_n.jpg?_nc_cat=0&oh=3235adb392a62d8d05dd01dc734b80a5&oe=5B6F55BC

Before..

https://scontent-lht6-1.**.fbcdn.net/v/t1.0-9/29597276_410355079390412_138676537756122597_n.jpg?_nc_cat=0&oh=4d276784319ffdd3d9698e2ead273bce&oe=5B75EF0C

After (toothbrush and vanish spot remover.. kind of fizzes up and pulls the crud out of the corners)

https://scontent-lht6-1.**.fbcdn.net/v/t1.0-9/29597909_410355096057077_2270666088868474968_n.jpg?_nc_cat=0&oh=de64898b3eb08efd3904bfe2d33ca788&oe=5B747568

I also spent some time gluing up a few strips to make the large bottom draw front for the new unit.
Now I don't own any sash clamps right now as I've been out of the woodwork game for years so I had to go oldschool.. Flat frame and wedges and a flat brace on the top to stop bowing.

https://scontent-lht6-1.**.fbcdn.net/v/t1.0-9/29792821_410354992723754_6130993094307967452_n.jpg?_nc_cat=0&oh=15b6a10e7be449c770293de5965a2040&oe=5B71815B

https://scontent-lht6-1.**.fbcdn.net/v/t1.0-9/28468059_410355016057085_5598710659238225061_n.jpg?_nc_cat=0&oh=a59ff616fdec0e946bb18af098f03b55&oe=5B275AE8

Then finally added the last of the saws to the wall.. The plan is to learn how to sharpen them and give them a good clean up.

https://scontent-lht6-1.**.fbcdn.net/v/t1.0-9/29790514_410354936057093_6278501522450600487_n.jpg?_nc_cat=0&oh=e80d9cc6e8d3ae1e223aa0fbcd52064e&oe=5B290399

You'll see the new unit is about 50mm lower than the old ones it gave me a little more space between the worktop and top cabinets..
 
OP
L

Lee Celtic

Well-known member
Joined
Jul 1, 2016
Messages
336
Location
Llanberis, North Wales UK
I also added some doors to the clamp store on the end of the new bench.. came out ok..

https://scontent-lhr3-1.**.fbcdn.net/v/t1.0-9/983625_409153709510549_2605284640020732215_n.jpg?_nc_cat=0&oh=1165efe825c96d89ac7bfe8263090ed8&oe=5B2BEB02

https://scontent-lhr3-1.**.fbcdn.net/v/t1.0-9/29571267_409153636177223_8595975460789247043_n.jpg?_nc_cat=0&oh=2d8b23a9c8e0342b0040265b84b77031&oe=5B6E77EF

https://scontent-lhr3-1.**.fbcdn.net/v/t1.0-9/29594701_409153512843902_7455108681723989364_n.jpg?_nc_cat=0&oh=c96ee241230420555d618dd9e39abef2&oe=5B3060EF

I just needed simple quick doors that looked the part and kept out the dust so I can avoid cleaning up all the time.. I don't mind doing the floor and bench tops but everything else should be kept clear as much as possible.

I cut some boards then set about cladding them .

https://scontent-lhr3-1.**.fbcdn.net/v/t1.0-9/29595045_409153572843896_7403765467958082458_n.jpg?_nc_cat=0&oh=a9e6c0e747782f41aca61d8b9ca23df0&oe=5B6E1B2B

https://scontent-lhr3-1.**.fbcdn.net/v/t1.0-9/29572246_409153546177232_3841500172158214401_n.jpg?_nc_cat=0&oh=fa0c49efdfc242c1ad149b2bf45510cd&oe=5B2BD370

https://scontent-lhr3-1.**.fbcdn.net/v/t1.0-9/29683906_409153476177239_4399327851231821449_n.jpg?_nc_cat=0&oh=5b9652853c4a578ea81b1277ac83b377&oe=5B74CD2E

https://scontent-lhr3-1.**.fbcdn.net/v/t1.0-9/29594929_409153449510575_4424623439593421586_n.jpg?_nc_cat=0&oh=27f7b3501f3dd7ded37f36cdecd16e6f&oe=5B2BE4C8

https://scontent-lhr3-1.**.fbcdn.net/v/t1.0-9/29694511_409153342843919_5665715110657317809_n.jpg?_nc_cat=0&oh=a39f1a6e572969b13d49b54c22f1af40&oe=5B68FB72
 
OP
L

Lee Celtic

Well-known member
Joined
Jul 1, 2016
Messages
336
Location
Llanberis, North Wales UK
I read a post I think it was bdbecker in the **** shack but i can't be 100% sure as it was a while ago but it went along the lines of not getting anything done because you over think it and end up doing nothing..

so I made a simple plan to do one big ish job Friday/ saturday then the rest of the week I can do little jobs either on the workshop or tools or anything.. I get about 1 - 2 hours a night to play in the bunker during the week which isn't really time to do big stuff..

So this weekends big-ish job was another draw unit, I made up a drilling pattern for the next ones at the same time so I can build them quicker..

I also changed the internal design as I had an idea to make pull out boxes with draw fronts added, From the outside they will look the same but I can slide them all the way out and put them on my work bench to save going back and forth..

This is the new design..

https://scontent-lht6-1.**.fbcdn.net/v/t1.0-9/30414562_412217562537497_8533724160268959744_n.jpg?_nc_cat=0&oh=bdd8dda9159ee55b3ef81606cc2855bb&oe=5B6ADAAB

And as my small job in there today I fitted the 52e into the bench and added some paneling below it to stop the inside filling with shavings..

https://scontent-lht6-1.**.fbcdn.net/v/t1.0-9/30415187_412217705870816_5059237888596639744_n.jpg?_nc_cat=0&oh=2f858deb10fdee622774e4b2512b8d36&oe=5B6CA61E

I still need to paint the vise and polish the screw so it's only held in with friction right now.. and I had a look through my scrap pile and found two slabs of pitch pine I can use to line the jaws..

https://scontent-lht6-1.**.fbcdn.net/v/t1.0-9/30264947_412217655870821_5108104218309296128_n.jpg?_nc_cat=0&oh=48455b69a29a5026df24019c63465952&oe=5B320E3C

They are from a Chapel seat I bought 10 years ago and the only bits left .
 
To avoid these ads, REGISTER NOW!
Top Bottom