To avoid these ads, REGISTER NOW!

The Concrete Underground

To avoid these ads, REGISTER NOW!
OP
C

ConCretin

Well-known member
Joined
Jan 20, 2011
Messages
3,378
Location
Central Maine
It's hard to believe but I made my first post in the Concrete Underground thirteen years ago almost to the day on January 20, 2011. Over the next several years I documented the build of my home in Maine as well as a little bit about our life here. I was amazed at the level of interest and made many friends from all over the world along the way. I stopped posting as construction neared the end because there just didn't seem to be much of interest to what I was doing.

When I recently entered the witness protection program and changed my username to protect my true identity, many of you expressed interest in the current state of things. I had actually been considering some kind of update so here we go.....

First off, we are still not 100% complete and you might be surprised at how much remains undone. I'm sure many of you can relate to having busy lives and annoying financial constraints. Nevertheless I'll catch you up with the state of the Concrete Underground in the hope you find it interesting and frankly because I miss doing it not to mention the interaction with all of you.

I'll take it area by area and follow up with any interesting construction details that I managed to record. Since this is the Garage Journal, let's start with the shop. This was to be my workshop and I had (have) big plans for this area. Since I used this area extensively during construction, it was filled with tools and equipment early in the process and thus never received the finished walls and floors I originally planned.

The far left corner is a welding area. I nabbed the table years ago and it serves its purpose well. I really like the Miller blue color so I painted the boxes to match.

IMG_0501.jpeg

This adjacent area on the back wall contains the lift pump and battery charging area. I have a little fold down desk in the corner and a whiteboard above to write down things I'm sure to forget within 5 minutes if I don't.

IMG_0500.jpeg

The front corner is used mostly for tool storage.

IMG_0492.jpeg

The opposite corner is mostly material and supplies

IMG_0479.jpeg

I did get the skylight installed over the lift. It's a bit absurd really but it does let in a lot of light in an area with no windows other than those in the OH door. I'll post some pics of how this went together in my next post.

IMG_0496.jpeg

Here's a view from outside

IMG_0499.jpeg

The lift has been worth 100% of the time and cost. The unground design takes up very little space in a relatively compact shop. This pis shows why I needed the extra headroom. Locating the skylight relative to the lift involved a bit of guesswork but every vehicle I've lifted so far fits the opening above.

IMG_0485.jpeg

I also got the 2 ton bridge crane installed and find it to incredibly functional. I use it often to pick things up in one area of the shop and move it to another as well as using it to load items into vehicles. It's obviously great for engine removal and install. If you recall, I installed two extra deep roof beams that the trolleys run on.

IMG_0487.jpeg

I bought the materials to build a sweet rolling steel work table but as you can see, I'm still getting by with saw horses and a sheet of plywood. I'm planning on building my new table once the K20 is out of the shop.

IMG_0488.jpeg

Well that should get us started. I'll start digging up pics and get back to you with more details. As always, happy to answer any questions you might have. Cheers.
 
Last edited:
OP
C

ConCretin

Well-known member
Joined
Jan 20, 2011
Messages
3,378
Location
Central Maine
Doug, it may not be obvious but your audience is fascinated watching paint dry.
Thanks, Bob. I don't know why I'm surprised. I spend an inordinate amount of time myself watching other people's paint dry.
Or concrete......
I see what you did there.
Yup, look fw to seeing the spaces after a few years, nothing is ever ”done” so we are all in that boat.
I'm hoping this motivates me to finish up a few things so I can post pics without being embarrassed by the stuff I never got around to.
I've always wanted one of those completely in ground lifts!
I've been accused is building the house around the lift........which is kinda what happened. The lift is awesome. In-ground lifts cost a bit more but given the relatively small space I have to work with, I can honestly say it's worth every penny. I built mine into new construction but they can also be retro-fitted into an existing slab.
Doug, you have seriously underestimated us. So glad you're back! :thumbup:
I won't make that mistake again. Let me know when you get bored and I promise to stop.
Everyone needs a pyramid skylight in their shop. Shop looks great, Chevy too.
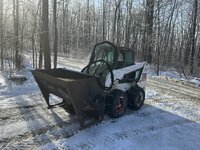
Thanks. It's a '72 K20 that I bought as a weekend work truck. It's an Arizona truck that's rust free but a bit rough around the edges. I drove it for a few years before the motor burned more oil than fuel. I resisted my natural inclination go way overboard and decided to do a basic overhaul. I'm fixing what's broken and leaving everything else alone. Not a single can of spray paint will lose its life in this undertaking although there will be a few shiny new parts.
Really glad you're back! I'll be patiently waiting on further updates.
Thanks. I'll try to post on a regular basis and keep it as interesting as the subject matter allows.
I think you need more welders. :D Seriously, a very well done house and shop. I read every post in your thread several years ago.
I use the Mig welder on the right almost exclusively. The little unit in the middle is a plasma cutter that I use quite a lot as well. The shiny one on the left is a Tig welder that I got with the best of intentions to become proficient but so far I have failed miserably. Oh well, there's always retirement....
That skylight is super cool, keep up the great work. As a functioning idiot seeing others work helps me take baby steps on my projects.
Thanks. I probably could have just built a flat roof on the raised section but there are no windows other than the overhead door and the extra light is nice. Plus I think it adds a nice architectural element to the outside of the house amidst a large expanse of roof you see from above coming down the driveway.
Thanks for the update posting. Good to see it on one of my favorite threads.
Thanks. I'm glad you've enjoyed it. I have too.
 

Pointbock

Well-known member
Joined
May 17, 2006
Messages
207
Location
AK
First off, we are still not 100% complete and you might be surprised at how much remains undone. I'm sure many of you can relate to having busy lives and annoying financial constraints. Nevertheless I'll catch you up with the state of the Concrete Underground in the hope you find it interesting and frankly because I miss doing it not to mention the interaction with all of you.

IMG_0488.jpeg

I bought the materials to build a sweet rolling steel work table but as you can see, I'm still getting by with saw horses and a sheet of plywood.
The showroom garages are cool but I kinda love this picture. Glad to see you back!
 

Nolift911

Well-known member
Joined
May 16, 2011
Messages
1,006
Location
Lansdowne, VA
Glad to see you back - you gave me a lot of great ideas for my build which is launching shortly. I am doing a gantry crane - beam thingy also in my garage. My architect said it was about the only way cost effectively to get the loft I wanted with the square footage I wanted - hence a column in my otherwise column=less garage space.

I figured it is not the end of the world and will add some function...

Question is...

Is it functional and how often do you use and would you do anything differently with it?

Jeff
 
OP
C

ConCretin

Well-known member
Joined
Jan 20, 2011
Messages
3,378
Location
Central Maine
I am doing a gantry crane - beam thingy also in my garage.

Question is... Is it functional and how often do you use and would you do anything differently with it?
Yes! Especially as I get older and my back isn't what it used to be, the ability to lift something out of a pick up bed or off the floor and place it anywhere in the shop is invaluable.

Everything in the shop was based around the lift and the gantry crane. For example; the overhead door was converted to a sliding door so it wouldn't interfere with either. Honestly I wouldn't change a thing. I didn't get everything right but the lift and gantry crane are awesome.
 
OP
C

ConCretin

Well-known member
Joined
Jan 20, 2011
Messages
3,378
Location
Central Maine
While we're on the subject of the shop; a couple things that have worked out well;

IMG_0503.jpeg

For those of you who's eyesight isn;t what it once was, this light was referred to as a loading dock light but it helps me see wth I'm doing.

IMG_0490.jpeg

The ventilation hood over the welding table helps ensure complaints about a range of odors in the house are minimized.

IMG_0494.jpeg

And one of the few items of decoration in the shop is my Grandfather's hand built tool chest, which continuously reminds me of the value of working with one's hands. Something I'm sure all of you can relate to.
 
Last edited:

Nolift911

Well-known member
Joined
May 16, 2011
Messages
1,006
Location
Lansdowne, VA
Yes! Especially as I get older and my back isn't what it used to be, the ability to lift something out of a pick up bed or off the floor and place it anywhere in the shop is invaluable.

Everything in the shop was based around the lift and the gantry crane. For example; the overhead door was converted to a sliding door so it wouldn't interfere with either. Honestly I wouldn't change a thing. I didn't get everything right but the lift and gantry crane are awesome.
Thanks - great info and none of us are getting any younger. You have specific attachments for it? My use would be yanking motors mainly but can definitely see other uses. Also the yellow is a perfect accent color.
 
OP
C

ConCretin

Well-known member
Joined
Jan 20, 2011
Messages
3,378
Location
Central Maine
Thanks - great info and none of us are getting any younger. You have specific attachments for it? My use would be yanking motors mainly but can definitely see other uses. Also the yellow is a perfect accent color.
I assume you are thinking along the same lines but the gantry moves in two directions to cover the entire area.

IMG_0507.jpeg

The rolling trucks provide movement in one direction.

IMG_0510.jpeg

and the rolling hoist provides movement in the other direction,
 
To avoid these ads, REGISTER NOW!

xtremek

Well-known member
Joined
Apr 13, 2012
Messages
11,603
Location
St. Johns, Mi
I think I'm going to steal that loading dock light idea. Where did you get it?

I built a pivoting gantry crane for my shop. Pivoting severely hampers its usability, but it's what I could afford and would fit in my shop. The BiL has some physical issues, so he installed a light weight one in his garage for lifting things like gas cans and sheet material into and out of his truck box. They are extremely handy to have.
 

Nolift911

Well-known member
Joined
May 16, 2011
Messages
1,006
Location
Lansdowne, VA
I assume you are thinking along the same lines but the gantry moves in two directions to cover the entire area.

IMG_0507.jpeg

The rolling trucks provide movement in one direction.

IMG_0510.jpeg

and the rolling hoist provides movement in the other direction,
Yours is a bit more fancy than mine - one direction, again its attached to a column at one end so no north south, just east west movement.
 

Kalmar

Member
Joined
Nov 29, 2010
Messages
8
When I recently entered the witness protection program and changed my username to protect my true identity, many of you expressed interest in the current state of things. I had actually been considering some kind of update so here we go.....
So, my post is long over due (give or take 7.5 years). I'd like to make a public apology to ConCretin. Back in 2016 when the thread went quiet for a bit I went too far down the Google rabbit hole, overstepped and invaded his privacy by posting some location details of the project. I genuinely appreciate what you have shared with the community- please accept my apology for what what would have most certainly been unwelcome behavior. Thank you for taking the time to return with updates, I'm sure everyone is thrilled to see where things are at.

Respectfully,
-K.
 
OP
C

ConCretin

Well-known member
Joined
Jan 20, 2011
Messages
3,378
Location
Central Maine
So, my post is long over due (give or take 7.5 years). I'd like to make a public apology to ConCretin. Back in 2016 when the thread went quiet for a bit I went too far down the Google rabbit hole, overstepped and invaded his privacy by posting some location details of the project. I genuinely appreciate what you have shared with the community- please accept my apology for what would have most certainly been unwelcome behavior.
I appreciate the apology Kalmar but please don't give it another thought. I'm sure I've inadvertently provided more than enough information to allow someone to track me down if they really wanted to. I don't worry too much about it. The paparazzi gave up a long time ago.

I hope you realize that my comment about changing my name had nothing to do with privacy concerns. I just thought ConCretin was more fitting on several levels.
 

Blackbyrd

Well-known member
Joined
Nov 28, 2020
Messages
1,147
Location
TN
Thanks for sharing more pics! I like the gantry idea, and yes the in floor lifts are more expensive, but I like that they are out of the way when collapsed. Especially in a tight space! We plan to build our final house in the next 5-10 years having a lift again is something I really want to work into the build.
 
OP
C

ConCretin

Well-known member
Joined
Jan 20, 2011
Messages
3,378
Location
Central Maine
I went back and took a look at what I had for pics on a couple of the shop's more interesting additions; the gantry crane and the skylight. I definitely did a better job of documenting the work when I was posting regularly. It's easy to get caught up in the work and forget to take pics but I'll share what I have. Let's start with the gantry crane.

The gantry started life as a raw 24', W8 x 24 beam, which spans 20' between the roof beams. I was looking for a 1 ton capacity figuring the heaviest thing I'd pick would be an engine and trans, which would be less than half of that. If I recall correctly, I had an engineer size it for me but I also referred to a chart provided by the trolley mfg.

IMG_3107.jpeg

I usually work alone so wrestling it in was a challenge. The trolleys that allow the lifting beam to roll along the roof beams is called an End Truck. I purchased these from Harrington Hoist and Crane. They are model HPC 510's, which can be installed as under mount or top running configurations. You can see the components on the welding table in the pic below. They come painted orange but since I know I wanted to paint the lifting beam OSHA yellow, I repainted them with gray primer to match the roof beams so I wouldn't have too many colors going on

4A340C56-1EAF-496E-A7DC-4B17DEABA6CC_1_105_c.jpeg

After I got the beams into position, I hoisted them up onto saw horses using a come-along and a fall protection beam slider.

A8A5FDEE-A2A0-4F70-BD8C-7F758453AFAC_1_105_c.jpeg

I them got them into position and used a laser to square everything up and transfer roof beam centerlines onto the top of the lifting beam

E0DEF2C8-7F61-467E-B743-EB44BC62BFFE_1_105_c.jpeg

I laid out the holes and used a mag drill with annual cutters to drill the various holes needed to attach the beam to the end trucks and attach the end stops

47555463-BC12-4F32-9094-AB570AA50238_1_105_c.jpeg

9DD89E35-EB2D-41E6-95B0-A9CDC598BB8B_1_105_c.jpeg

Once the holes were drilled I applied a couple coats of Rustolem on OSHA yellow.

21E96CBE-6E4A-482E-90C4-8458E533997C_1_105_c.jpeg

Next I attached the wheels to the end trucks and got ready to lift them onto the roof beams. The trucks need to be assembled in the air since the envelope the roof beam when done. I clamped the cross beams on first and then muscled the side pieces up and got them bolted together

E89E6599-546D-4E3A-93ED-7BA9BE0DF93F_1_105_c.jpegIMG_3254.jpeg

Here is one completely assembled

DD02D2E6-9222-4C70-B2BF-10FC76DB9D54_1_105_c.jpeg

I just ran into the 10 pic limit so I'll pick up from here in another post.
 
Last edited:
OP
C

ConCretin

Well-known member
Joined
Jan 20, 2011
Messages
3,378
Location
Central Maine
Picking up where we left off.

Now all I had to do was hoist the lifting beam up and bolt it to the end trucks. I intended to rent one hoist but the owner of the rental yard, upon learning what I was intending to do, insisted I take a second one at no additional charge so I wouldn't kill myself.

DCCB40B2-8776-4008-9B2B-28F139025B66_1_105_c.jpeg

It was pretty straight forward to bolt the beam to the end trucks.

AB8AAA84-D0EA-43FF-B187-124A7014D005_1_105_c.jpeg

I was pretty careful when we set the roof beams but I was still relieved when the gantry rolled back and forth over the length of the garage and tracked straight.

So that's the history of the bridge crane. So many of my earliest plans revolved around the in-floor lift and this hoist and I've never regretted the cost or effort required. It makes working in the shop so much easier.

As always, thanks for your interest. Cheers!
 
Last edited:

tweidman

Well-known member
Joined
Dec 1, 2009
Messages
502
Location
Ackermanville, Pa.
Doug, I just wanted to let you know that the house you have built is stunning. Knowing how it was constructed, thanks to his thread, makes it all that more impressive. I would love to see more exterior and interior pictures of the finished, or semi-finished house (as you alluded to) if you would be so gracious. It must be a dream to live there on the water....
 
OP
C

ConCretin

Well-known member
Joined
Jan 20, 2011
Messages
3,378
Location
Central Maine
Great to see current pics of the garage / shop in use. You did a great job setting it up. The remaining things will happen as you need them.

Thank you. The set up changes all the time. Maybe it's good to work in a shop for a while before you finally finish it........I just hope I live long enough to actually get it done.

Thanks for all the cool detail on the gantry setup!! I dig the OSHA yellow. I might have to revise my design to get some north south movement as well.

The ability to reach all corners of the shop is nice but you can make it work without. An overhead hoist is incredibly useful no matter what.

Some people would like to go see Frank Lloyd Wright's "falling water".

The next time I'm in Maine, I'd really rather go walk around the outside of this one if the owner would let me, lol.

Doug, I just wanted to let you know that the house you have built is stunning. Knowing how it was constructed, thanks to his thread, makes it all that more impressive. I would love to see more exterior and interior pictures of the finished, or semi-finished house (as you alluded to) if you would be so gracious. It must be a dream to live there on the water....

Thank you very much for the generous comments. It's incredibly humbling and I fear, undeserved. For those who are interested, my plan is to take you through the home and grounds area by area and share the current state of completion, any construction details we may have missed and a little about what it's like to live here.

I've had visitors in the past and would welcome anyone from the GJ that happened to be in the area if they wanted to pay me a visit. That may be foolhardy in this day and age but I feel like there are much greater risks in the world.
 
Last edited:
OP
C

ConCretin

Well-known member
Joined
Jan 20, 2011
Messages
3,378
Location
Central Maine
So along the lines of sharing what it's like to live here, let me describe one of the less attractive aspects. I don't think we talked a lot about the land or roads in previous posts but the house is at the bottom of a 2000' driveway that drops about 400 vertical feet, Not a big deal you say? Well most of that elevation change occurs in the last third resulting in grades approaching 45%. It's actually not too bad until we get freezing rain and the driveway turns into a death luge.

IMG_0516.jpeg

My daily driver is an older Yukon with some gnarly studded snow tires that wouldn't even get me started up the hill. The this occurs I have no choice but to ******** the crampons and trudge up the hill.

IMG_0519.jpeg

The next step is to hook up the sander on my S160 Bobcat. An absolutely vital element to my existence here. More on that later.

IMG_0520.jpeg

A couple heavy sanding passes generally allows 4 WD vehicles to pass but I can tell you one thing, driving this rig down an icy road is absolutely terrifying! I am constantly planning my escape route when I inevitably start sliding uncontrollably down the precipice but so far I've escaped the worst case scenario.

I'll share more about the driveway and why my wife calls me the road commissioner in future posts.
.
It's not all unicorns and rainbows
 

Attachments

  • IMG_0515.jpeg
    IMG_0515.jpeg
    1.3 MB · Views: 33
  • IMG_0520.jpeg
    IMG_0520.jpeg
    1.6 MB · Views: 28
  • IMG_0516.jpeg
    IMG_0516.jpeg
    1.5 MB · Views: 26
Last edited:

Jagmandave

Well-known member
Joined
Nov 6, 2011
Messages
6,299
Location
Overland Park, Ks.
I'll chime in too, welcoming you back to the land of the posting! :cool:

The bride and I were planning to build an ICF house and wished I had a concrete contractor like you that I could trust. Unfortunately we had a health crisis that killed our plans, so I had to live vicariously thru your posts.

Glad too see you're back at it, BTW, when the going gets scary, set the box full of sand down - you'll stop!
 
To avoid these ads, REGISTER NOW!
Top Bottom