thats nice. gona be so many levers.The direction change might be tough. How about pull to shut off?

You are using an out of date browser. It may not display this or other websites correctly.
You should upgrade or use an alternative browser.
You should upgrade or use an alternative browser.
The Everything 3D Printer Thread
- Thread starter BoilermakerFan
- Start date
mike93lx
ALLIANCE MEMBER
who are you kidding...you are already working on the modelthats nice. gona be so many levers.
gpiggaz
Well-known member
Any chance you guys are over thinking this? I just plug mine into a power strip mounted on the front with switch. Something like this:
https://www.harborfreight.com/12-outlet-super-power-strip-96737.html
https://www.harborfreight.com/12-outlet-super-power-strip-96737.html
Any chance you guys are over thinking this? I just plug mine into a power strip mounted on the front with switch. Something like this:
https://www.harborfreight.com/12-outlet-super-power-strip-96737.html
then you gotta trigger all the units on the strip.
gpiggaz
Well-known member
true.then you gotta trigger all the units on the strip.
mike93lx
ALLIANCE MEMBER
i can shut all of mine off at once from the UPS already.
this is mainly for stuff like nozzle swaps, resetting and selectively powering down when not running anything for longer stretches.
and yes, overthinking is part of the fun.
this is mainly for stuff like nozzle swaps, resetting and selectively powering down when not running anything for longer stretches.
and yes, overthinking is part of the fun.
bugnut
ALLIANCE MEMBER

Jehannum
Well-known member
Got tired of having to TIG up my aluminum clutch pedal, so I'm remaking it in steel, but to get there, I needed a jig with fixtures to position the over-center spring, the cruise control touch-off, and the master cylinder clevis.

I believe this answers the mail.

Everything is right where I need it to be.

Needs a little file work to get the CC touch-off to meet the register on the jig. Or I needed to do a better job getting the pivot in the right place. I dunno. Either way, it'll get flattened there:

New pedal is 10mm steel (with an oilite bearing for the pivot), and if I break that, well, I'll have some answering to do.
I believe this answers the mail.
Everything is right where I need it to be.
Needs a little file work to get the CC touch-off to meet the register on the jig. Or I needed to do a better job getting the pivot in the right place. I dunno. Either way, it'll get flattened there:
New pedal is 10mm steel (with an oilite bearing for the pivot), and if I break that, well, I'll have some answering to do.
mike93lx
ALLIANCE MEMBER
i enjoy the printing and appreciate the commitment on keeping your feet in the picturesGot tired of having to TIG up my aluminum clutch pedal, so I'm remaking it in steel, but to get there, I needed a jig with fixtures to position the over-center spring, the cruise control touch-off, and the master cylinder clevis.
I believe this answers the mail.
Everything is right where I need it to be.
Needs a little file work to get the CC touch-off to meet the register on the jig. Or I needed to do a better job getting the pivot in the right place. I dunno. Either way, it'll get flattened there:
New pedal is 10mm steel (with an oilite bearing for the pivot), and if I break that, well, I'll have some answering to do.

Bodj Built
Well-known member
I could upload those bad boys to feetfinder.com and have a lucrative side hustle!i enjoy the printing and appreciate the commitment on keeping your feet in the pictures
Beelzeboss
Well-known member
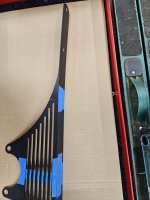
From a photo of grimy oil print from the part

To a quick 2mm thick test print


Even though I'm making the final version from aluminium 3D printing is an amazing tool for testing designs
To a quick 2mm thick test print
Even though I'm making the final version from aluminium 3D printing is an amazing tool for testing designs
mike93lx
ALLIANCE MEMBER
This is a part for a wheelchair, but wanted to share this here as I think it could be helpful for others.
We need to print a bunch of 95A TPU for soft parts and I've been doing OK with them, but have been dealing with some stringing and little clumps on the parts.
I switched off retraction and starting "printing by object". So it completes a part then goes to the next. It limits how much you can put on the plate, but damn, these parts are coming out perfectly
Firebrick43
Well-known member
Would be much better if printed in a light brown. Always a joy to flick it to the side and turn it on.
I always print one TPU part at a time for that exact reason.This is a part for a wheelchair, but wanted to share this here as I think it could be helpful for others.
We need to print a bunch of 95A TPU for soft parts and I've been doing OK with them, but have been dealing with some stringing and little clumps on the parts.
I switched off retraction and starting "printing by object". So it completes a part then goes to the next. It limits how much you can put on the plate, but damn, these parts are coming out perfectly
What's the easiest way to make a stl file. I need to make a tube like item. It's actually part of a hinge.
This is just an example but it's about 25mm in length with an ID of 10mm and OD of 14mm.
It's similar to this

I basically need to know what programs I need to use that are best for a beginner")
I got a Ender 3 V3 SE about 12 months ago and only just plugged it in the other day. I've saleslady printed up some stuff that I got from thingiverse and they came out great.
If I can master part creation then this thing is going to be a great asset to have around!
Thanks
This is just an example but it's about 25mm in length with an ID of 10mm and OD of 14mm.
It's similar to this
I basically need to know what programs I need to use that are best for a beginner
I got a Ender 3 V3 SE about 12 months ago and only just plugged it in the other day. I've saleslady printed up some stuff that I got from thingiverse and they came out great.
If I can master part creation then this thing is going to be a great asset to have around!
Thanks
mike93lx
ALLIANCE MEMBER
TinkercadWhat's the easiest way to make a stl file. I need to make a tube like item. It's actually part of a hinge.
This is just an example but it's about 25mm in length with an ID of 10mm and OD of 14mm.
It's similar to this
I basically need to know what programs I need to use that are best for a beginner
I got a Ender 3 V3 SE about 12 months ago and only just plugged it in the other day. I've saleslady printed up some stuff that I got from thingiverse and they came out great.
If I can master part creation then this thing is going to be a great asset to have around!
Thanks
kaymccampbell
Well-known member
^^^^This^^^^

kaymccampbell
Well-known member
Is it paying for itself?
i just triggered 300 jobs in 2 minutes. then cleared 50 printers to queue up. yea easy money to spendIs it paying for itself?
PelicanPines
ALLIANCE MEMBER
Looks like my heart Before the new valve & pace maker.
mike93lx
ALLIANCE MEMBER
Got tired of the terrible stock light and purchased a three pack of BQ Panda Lux upgrade kits.
Upgraded on the right, stock on the left. To be fair, having the AMS removed lets more light in, but it's a huge difference either way. Well worth the $10 per printer

Upgraded on the right, stock on the left. To be fair, having the AMS removed lets more light in, but it's a huge difference either way. Well worth the $10 per printer
Thanks for that, what an awesome program and it's Web based so can use it anywhere and on any platformTinkercad
I only spent an hour and I had a file ready to print. Most of that time was spent measuring. The first was I did was a bit tight, I guess 3D prints shrink just like metal does. I changed the dimension by 0.5mm and that did the trick.
I still think I need to learn free cad at some stage so I can do more advanced stuff.
Attachments

mike93lx
ALLIANCE MEMBER
I went straight to fusion when I got a printer. Definitely a steeper learning curve, but I didn't think it was bad.Thanks for that, what an awesome program and it's Web based so can use it anywhere and on any platform
The first was I did was a bit tight, I guess 3D prints shrink just like metal does. I changed the dimension by 0.5mm and that did the trick.
I still think I need to learn free cad at some stage so I can do more advanced stuff.
Yankeefarmer
Well-known member
You should also take a look at OnShape. Free if you don’t do any designs you don’t want others to see, full featured, built by the guys who did SolidWorks, and runs on the web in a browser.Thanks for that, what an awesome program and it's Web based so can use it anywhere and on any platform
The first was I did was a bit tight, I guess 3D prints shrink just like metal does. I changed the dimension by 0.5mm and that did the trick.
I still think I need to learn free cad at some stage so I can do more advanced stuff.
mike93lx
ALLIANCE MEMBER
What do you mean by this? Are all of your designs saved in a publicly accessible space?Free if you don’t do any designs you don’t want others to see
Yankeefarmer
Well-known member
Yes, if you use the free access version. You can search and download other peoples’ designs. If I were designing a product to sell, it’d be a no-go, and I would go for a paid subscription to keep my stuff private. Since I’m mostly designing one-off stuff like brackets, I don’t care if someone else wants to help themself to it.What do you mean by this? Are all of your designs saved in a publicly accessible space?
mike93lx
ALLIANCE MEMBER
Thanks.Yes, if you use the free access version. You can search and download other peoples’ designs. If I were designing a product to sell, it’d be a no-go, and I would go for a paid subscription to keep my stuff private. Since I’m mostly designing one-off stuff like brackets, I don’t care if someone else wants to help themself to it.
bggrnchvy
Well-known member

I had a problem.

I was certain they should go in here.

I had a tool.

Gridfinity to the rescue.

Days of printing later.

Problem solved.
signcrafter
Well-known member
- Joined
- May 9, 2012
- Messages
- 12,544
I really like that and one of the things I want to do. Dumb question but do you need to do the gridfinity thing or can you just print a bunch of parts bin trays and stick them in the drawer? I watched a few videos on gridfinity designs and think it might be nice if you are taking your bins in and out. But just curious if I wanted to print a drawer full of bins that will stay in the drawer is there any reason to do the gridfinity thing or could I just print a handful of trays with multiple bins and throw them in the drawer? Not trying to be negative, just wondering if it's needed or if it would save some time/material to just print 6 or so bin trays similar to yours to fill a drawer and put them in the drawer?
I had a problem.
I was certain they should go in here.
I had a tool.
Gridfinity to the rescue.
Days of printing later.
Problem solved.
Black300zx
Well-known member
I had/have a similar problem in the drawer under my printer which is about 4-5 bins away from being solved in the same manner. Just need a couple more almost-empty spools to burn up printing bins!
I had a problem.
I was certain they should go in here.
I had a tool.
Gridfinity to the rescue.
Days of printing later.
Problem solved.
Love Deutsch connectors!
You can, of course. The advantage of gridfinity or similar is a partially filled drawer doesn’t have the bins sliding around, and of course interchanging bins from drawer to drawer.I really like that and one of the things I want to do. Dumb question but do you need to do the gridfinity thing or can you just print a bunch of parts bin trays and stick them in the drawer? I watched a few videos on gridfinity designs and think it might be nice if you are taking your bins in and out. But just curious if I wanted to print a drawer full of bins that will stay in the drawer is there any reason to do the gridfinity thing or could I just print a handful of trays with multiple bins and throw them in the drawer? Not trying to be negative, just wondering if it's needed or if it would save some time/material to just print 6 or so bin trays similar to yours to fill a drawer and put them in the drawer?
bggrnchvy
Well-known member
I really like that and one of the things I want to do. Dumb question but do you need to do the gridfinity thing or can you just print a bunch of parts bin trays and stick them in the drawer? I watched a few videos on gridfinity designs and think it might be nice if you are taking your bins in and out. But just curious if I wanted to print a drawer full of bins that will stay in the drawer is there any reason to do the gridfinity thing or could I just print a handful of trays with multiple bins and throw them in the drawer? Not trying to be negative, just wondering if it's needed or if it would save some time/material to just print 6 or so bin trays similar to yours to fill a drawer and put them in the drawer?
You don't need the grid underneath. It just nests them nicely. I did it because Iw asn't sure how I wanted to lay out the bins 100% and since they don't occupy 100% of the space, I didn't want them to seperate and get messy evertyime I opened the drawer.
I also included pockets under each bin for some 6mmx1.8mm rare earth magnets I need to glue in to keep the whole thing more stable.
I had/have a similar problem in the drawer under my printer which is about 4-5 bins away from being solved in the same manner. Just need a couple more almost-empty spools to burn up printing bins!
Love Deutsch connectors!
They are pretty awesome.
mike93lx
ALLIANCE MEMBER
Last post on this one unless someone has a question, I promise.Thank you for following up after using them for a bit
I just ordered a second sunlu and will be putting the eibos up for sale. With the printing I am doing, the 24hr max on the eibos is annoying especially when my other two driers can do 99hrs. Plus it's tall and my kids are having a hard time accessing it.
If I just had the eibos, I doubt I would be looking to replace it.
No offence meant to the OPs or regulars of this thread, but does anyone mind answering some pre-newbie questions?
I still do all of my design work on the most analogue tool of all - a drafting machine. I now have a work station loaded with Solidworks to the limit, so will sit down and start learning it soon. That's just to set the correct frame of reference. A couple years ago, I bought an extremely basic CNC router for our eldest grandson (12 at the time) that he quickly learned to use, pretty much all on his own - but with downloaded files. He has since started to work with the 3d cad system from school (taught himself) but the router has lost its appeal as so limited in resolution and z axis travel. Summer coming to I am seriously thinking of buying a printer for him (and me) to use, but don't want to go too basic (such as with the router) or too overboard where thousands of dollars worth of equipment just sits around like the mega buck 14' quilting machine in our basement.
So: let's have a primer on machines, materials, software and accessories to find the sweet spot. Just to set what I hope is an attainable goal: grandson is an extremely good Lego builder, but we don't live near a Lego store (there is a room full of it at home and each grandparent's places). I would like a machine that can print with enough resolution to make lego pins and sockets that press fit (so kiss the low buck end goodbye??)
Last edited:
What is your target price point? There are good options around $200 and different good options that cost 3-4x as much.
I'm a big fan of the Flashforge 5M. It seems to be normally $220 or so but if you are willing to play Slickdeals games it can be had around $150.
The limitations are it's an open frame so it doesn't print more advanced materials that well (you can get a DIY enclosure kit to partially address that). It's also single color only. The up side is the machine is fast and within those limits it prints as well as the more experience printers. Also, it's cheap enough that you can just get another printer if you decide you need more capability.
As for material, start with PLA. It has limits but it's also cheap and easy to work with.
mike93lx
ALLIANCE MEMBER
Easy button? Any Bambu machine. Buy the best your budget can swing. X2D is a great value, IMO. A used P1S gets you an absolute workhorse for $350ish.No offence meant to the OPs or regulars of this thread, but does anyone mind answering some pre-newbie questions?
I still do all of my design work on the most analogue tool of all - a drafting machine. I now have a work station loaded with Solidworks to the limit, so will sit down and start learning it soon. That's just to set the correct frame of reference. A couple years ago, I bought an extremely basic CNC router for our eldest grandson (12 at the time) that he quickly learned to use, pretty much all on his own - but with downloaded files. He has since started to work with the 3d cad system from school (taught himself) but the router has lost its appeal as so limited in resolution and z axis travel. Summer coming to I am seriously thinking of buying a printer for him (and me) to use, but don't want to go too basic (such as with the router) or too overboard where thousands of dollars worth of equipment just sits around like the mega buck 14' quilting machine in our basement.
So: let's have a primer on machines, materials, software and accessories to find the sweet spot. Just to set what I hope is an attainable goal: grandson is an extremely good Lego builder, but we don't live near a Lego store (there is a room full of it at home and each grandparent's places). I would like a machine that can print with enough resolution to make lego pins and sockets that press fit (so kiss the low buck end goodbye??)
For CAD, there are lots of options, I chose Fusion and am liking it.
There are also millions of download able designs out there as well. Printables.com makerworld.com thingiverse.com and more
mike93lx
ALLIANCE MEMBER
Speaking of heaters, I really like my Sunlu S2 but it's not super stable and it always seems in the way. I've wanted to run it parallel to the side of my printer, but the power cord wastes a lot of space and I didn't want to lose more valuable counter space with the heater on its own.
I ordered a right angle plug adapter
And found a design for the base on makerworld
I wanted to place it on top of my Apc UPS, so I modified the design to include some tabs that slot into dovetails I added to the base. It's pretty much the perfect width for the UPS
I also opened up the area around the plug to give clearance for the right angle. My guess on clearance for the plug was about perfect, but I made the fit on the dovetails a little too loose, so they don't really snap in, but they hold well enough to work. I'm going to reprint them soon and try to get the fit just right. Attempt #1 was clearance of 0.15MM for the dovetail. Probably going to print 0.10 and 0.05 in the next round
Now I can pull the glass off the printer to make nozzle swaps and cleaning easier.
Last edited: