To avoid these ads, REGISTER NOW!

The Front to Back Four Car

stelthy77

Well-known member
Joined
Nov 1, 2015
Messages
56
Location
Toledo, Ohio
Hey Guys,

I found this site about two or three months ago, and have really enjoyed reading about all the great upgrades and improvements you all do to your garages and shops.

When my wife and I were looking for a house in 07 a three car was a requirement for me, but we stumbled upon our current home which has a 2.5 car wide and 2-3 car deep garage. It sold the house to me, luckily the rest of it was good to go with my spouse!

I have done many upgrades already, and wanted to share them with you. I also have many plans, and can't wait to keep this updated for your comments and suggestions. For me 2016 is the year of asthetic upgrades, paint and hopefully flooring.

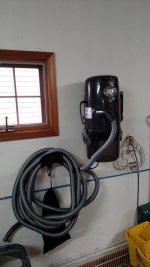
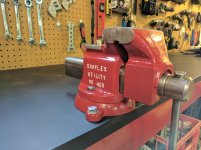
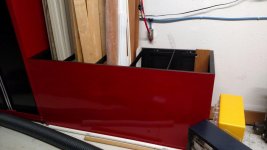
Here is a picture to get us started...
 

Attachments

  • IMG_20151104_194843970.jpg
    IMG_20151104_194843970.jpg
    147.9 KB · Views: 942
To avoid these ads, REGISTER NOW!

RangerSVT

Well-known member
Joined
Nov 13, 2010
Messages
70
Location
Rochester, NY
Wow, that's an awesome size garage to start with! Looking forward to seeing the progress as you freshen it up!
 
OP
S

stelthy77

Well-known member
Joined
Nov 1, 2015
Messages
56
Location
Toledo, Ohio
Thanks for the kind words guys!

For the first few years, I didn't do much to improve the space, I was just using it as it was, for the previous owner. Pegboard underutilized, bad paint, one workbench I brought with me from my previous home.

Because of the size, it is easy to be disorganized and just line stuff up along the walls. I am hoping to clean up some of the clutter.

Certain things like the cable wiring, drove me crazy, so I organized that.

Put up some tire storage, and built some workbenches, all in 2012.

Not pictured, I also installed nylon compressed air lines along the outside wall and hung some extension cord/lights from the ceiling.
 

Attachments

  • 2012-02-23 21.07.21.jpg
    2012-02-23 21.07.21.jpg
    145.6 KB · Views: 224
  • 2012-02-24 18.47.58.jpg
    2012-02-24 18.47.58.jpg
    164.1 KB · Views: 243
  • 2012-10-03 16.43.56.jpg
    2012-10-03 16.43.56.jpg
    148.7 KB · Views: 246
  • 2012-07-04 08.56.37.jpg
    2012-07-04 08.56.37.jpg
    137.1 KB · Views: 221
OP
S

stelthy77

Well-known member
Joined
Nov 1, 2015
Messages
56
Location
Toledo, Ohio
I usually utilize the front of the garage (near the door) as parking and keep the lawn tools and toys in that half. Then the back of the garage is used for my third car (and my Dad's third car in the winter) and as a shop area.

So I have my resources separated into two separate areas, air is ran to reels in the front and back, so I can work in either area on the cars, or add/check air pressure without having to fish a line across the garage. Both areas also have extension cords for shop vac and light for underhood work.

Both areas have drains for washing or snow runoff, so that is nice.

The back wall has pegboard and there is pegboard near the garage door on either side. I hated this pegboard at first and was going to replace it, until I found pegmate hook retainers. (On this forum no less!) They REALLY make a huge difference in the usability of the pegboard. No peg hooks flying everywhere when you yank a tool off of them. So last year, I organized my back pegboard wall to get tools off of the bottom of the workbenches where my toddler could get to them.

Found some great power tool pegboard storage solutions.
 

Attachments

  • IMG_20150322_202654.jpg
    IMG_20150322_202654.jpg
    141.8 KB · Views: 381
  • IMG_20150322_202926.jpg
    IMG_20150322_202926.jpg
    136.1 KB · Views: 333
  • 20140220_013706_Android_downsized.jpg
    20140220_013706_Android_downsized.jpg
    80.1 KB · Views: 406
OP
S

stelthy77

Well-known member
Joined
Nov 1, 2015
Messages
56
Location
Toledo, Ohio
Thanks again guys. I agree that this garage has huge potential. Really it was this forum and seeing guys with well finished garages that made me want to take it from functional, to the next level.

My wife thinks I am crazy, and with a newborn at home, there isn't as much time as I would like to keep it clean.
 
OP
S

stelthy77

Well-known member
Joined
Nov 1, 2015
Messages
56
Location
Toledo, Ohio
So in early summer last year, I purchased a Craftsman cabinet to store hazardous materials safely away from my roaming toddler.

Shortly thereafter, I realized I needed some better wood storage. My wife actually saw this idea on pintrest.

I took an old filing cabinet removed the drawers and painted the outside Regal Red (rustoleum enamel) and the inside flat black. The color match is VERY close to the Craftsman red.

This little painting project gave me my color theme moving forward. It should look pretty good, considering a lot of my tools use a similar color theme (toss in some grey as an accent color, too). I know it isn't too original, but it should look good.
 

Attachments

  • IMG_20150712_211631.jpg
    IMG_20150712_211631.jpg
    145.7 KB · Views: 220
  • IMG_20150712_211506540.jpg
    IMG_20150712_211506540.jpg
    137.7 KB · Views: 186
  • IMG_20150712_211515343.jpg
    IMG_20150712_211515343.jpg
    140.8 KB · Views: 171
OP
S

stelthy77

Well-known member
Joined
Nov 1, 2015
Messages
56
Location
Toledo, Ohio
Workbenches.

My wife hates my workbenches.

Rather, she hates the amount of time I have spent on these damn workbenches. I will digress to explain perhaps where some of the hatred comes from...

Before our first child 3 years ago, my wife didn't really do any "nesting". Don't get me wrong, she decorated the baby's room (it looked great!), but she didn't care too much about the rest of the house like some other women. I, on the other hand, did a CRAZY amount of nesting. finishing up projects all over the house, starting new ones, even little things like patching a hole and painting. I just knew I wasn't going to have the time after the baby came, and so I was like a crazy man running all over the house, every waking minute.

In addition to the rest of the house, I started working on my workbenches. I had gotten some laminate table tops from my office redecoration, they were in perfect condition, very heavy duty, and combined with some plans from the internet (I don't remember where), some 2x4's, and my grandfather's old circular saw, I built three of these before my child arrived.
 

Attachments

  • 2012-07-04 08.56.37.jpg
    2012-07-04 08.56.37.jpg
    137.1 KB · Views: 131
  • IMG_20151125_132100933.jpg
    IMG_20151125_132100933.jpg
    143.3 KB · Views: 112
Last edited:

sayoda

Well-known member
Joined
Mar 28, 2013
Messages
99
Great work benches!!

Its really cool that you used your grandfather's saw!
 
OP
S

stelthy77

Well-known member
Joined
Nov 1, 2015
Messages
56
Location
Toledo, Ohio
Hey guys,

I have been neglecting this thread big time, but haven't been neglecting my garage.

I have done a bunch of updates and worked pretty hard on it this past year. I'll do my best to get it all caught up over the next few days.

My last post discussed my workbenches. Well, I wanted them to match my black and red theme, so I gave them a coat of paint. Flat black enamel on top gloss red enalmel on bottom.
 

Attachments

  • IMG_20151230_152059047.jpg
    IMG_20151230_152059047.jpg
    150 KB · Views: 216
  • IMG_20151230_152120624.jpg
    IMG_20151230_152120624.jpg
    151.7 KB · Views: 246
OP
S

stelthy77

Well-known member
Joined
Nov 1, 2015
Messages
56
Location
Toledo, Ohio
About that same time, I painted my reznor heater side panels. I used high temp black, but I didn't need to, those sides don't get hot at all.

Speaking of that heater, does anyone know the best way to raise it up? It is at forehead cracking height right now.

I am comfortable with shortening the gas line, it is the exhaust chimney where I am not sure about how to proceed.

Right now it looks to have the correct "slight angle" on the horizontal run, but the connector where it meets the ceiling seems to be unnecessarily large. I don't even know the terminology to know what to look for.

Any help here would be appreciated.
 

Attachments

  • IMG_20151127_145337125.jpg
    IMG_20151127_145337125.jpg
    143.7 KB · Views: 120
  • IMG_20151130_101657557.jpg
    IMG_20151130_101657557.jpg
    140.9 KB · Views: 134
Last edited:
To avoid these ads, REGISTER NOW!
OP
S

stelthy77

Well-known member
Joined
Nov 1, 2015
Messages
56
Location
Toledo, Ohio
just think if you built a shed and moved some of that stuff outside!

So I went ahead and moved my riding lawn mower out of the garage. There is some question as to whether we are allowed a shed in my neighborhood according to HOA rules, (different rules, different plats) but I found a solution that works.

That cut down on grass clippings this last summer. I would love to get all my lawn stuff out of the garage, but there just isn't room.
 

ratdoggy

Well-known member
Joined
Mar 27, 2009
Messages
11,971
Location
Akron-Canton area OH
Workbenches.

My wife hates my workbenches.

Rather, she hates the amount of time I have spent on these damn workbenches. I will digress to explain perhaps where some of the hatred comes from...

Before our first child 3 years ago, my wife didn't really do any "nesting". Don't get me wrong, she decorated the baby's room (it looked great!), but she didn't care too much about the rest of the house like some other women. I, on the other hand, did a CRAZY amount of nesting. finishing up projects all over the house, starting new ones, even little things like patching a hole and painting. I just knew I wasn't going to have the time after the baby came, and so I was like a crazy man running all over the house, every waking minute.

In addition to the rest of the house, I started working on my workbenches. I had gotten some laminate table tops from my office redecoration, they were in perfect condition, very heavy duty, and combined with some plans from the internet (I don't remember where), some 2x4's, and my grandfather's old circular saw, I built three of these before my child arrived.

A guy's (or gal if so inclined) first project in a house is to build at least 1 workbench....2 if the first one gets buried under stuff:)
 

ratdoggy

Well-known member
Joined
Mar 27, 2009
Messages
11,971
Location
Akron-Canton area OH
Your garage got me thinking if I tear out the bathroom and mudroom I'd have a 4 car also
Right now it's a 3 car
Don't think I can get Mrs.Ratdoggy on board with that :evil:
 
OP
S

stelthy77

Well-known member
Joined
Nov 1, 2015
Messages
56
Location
Toledo, Ohio
A guy's (or gal if so inclined) first project in a house is to build at least 1 workbench....2 if the first one gets buried under stuff:)

I just got rid of my old workbench (didn't match the rest), because it just became a place for **** to gather! I have 3 now, and they still always seem to be covered with half finished projects...
 
OP
S

stelthy77

Well-known member
Joined
Nov 1, 2015
Messages
56
Location
Toledo, Ohio
Next I put up garage vac. I love it, but the filter does clog pretty fast (I see some sort of dust deputy setup in my future). I also setup some pegs to hold the accessories.
 

Attachments

  • IMG_20160109_140529210.jpg
    IMG_20160109_140529210.jpg
    141.9 KB · Views: 104
  • IMG_20160110_113642331.jpg
    IMG_20160110_113642331.jpg
    139.2 KB · Views: 95
  • IMG_20160110_113649795.jpg
    IMG_20160110_113649795.jpg
    135.7 KB · Views: 92

q20v

Well-known member
Joined
Jul 25, 2009
Messages
156
Location
Ottawa, ON
Love what you've done so far. I have been tossing around ideas for my benches in the garage and the red/black is growing on me. Just might have to steal that idea from you.

I need a 4 car garage in my life. Like, really bad.
 

Toododd

New member
Joined
Jul 4, 2010
Messages
3
Location
Newark, Ohio
Great idea for the wood storage - I have an extra deep two drawer unit which should work. Maybe I will bolt some wheels on to the bottom--errrr back.
 

AP2TUDE

Well-known member
Joined
Aug 14, 2007
Messages
84
Location
Rockwall, TX
Just saw that idea for the wood storage. That is incredible. Such a great idea.

Also, just applying a coat of paint to things makes a huge difference. That heater looks fantastic now. I would continue that paint on the exhaust pipe coming off the heater all the way to the ceiling, that would really finish it off.
 
Last edited:
OP
S

stelthy77

Well-known member
Joined
Nov 1, 2015
Messages
56
Location
Toledo, Ohio
Just saw that idea for the wood storage. That is incredible. Such a great idea.

Also, just applying a coat of paint to things makes a huge difference. That heater looks fantastic now. I would continue that paint on the exhaust pipe coming off the heater all the way to the ceiling, that would really finish it off.

Good idea to paint the exhaust! I have more high temp paint. I would love to raise the heater, I need to look into that more...
 
OP
S

stelthy77

Well-known member
Joined
Nov 1, 2015
Messages
56
Location
Toledo, Ohio
Love what you've done so far. I have been tossing around ideas for my benches in the garage and the red/black is growing on me. Just might have to steal that idea from you.

I need a 4 car garage in my life. Like, really bad.

Steal away! I already stole it from Craftsman. I'll be tying in the color scheme more.
 
OP
S

stelthy77

Well-known member
Joined
Nov 1, 2015
Messages
56
Location
Toledo, Ohio
Next I looked to replace some pegboard I had in the front on either side of the garage. I have a friend at whirlpool who got me employee pricing on a bunch of Gladiator stuff. Here are some before pictures, they don't include everything I needed to store, partly because I had a lot of it on the floor...
 

Attachments

  • IMG_20160320_213017055.jpg
    IMG_20160320_213017055.jpg
    144.6 KB · Views: 76
  • IMG_20160320_212939114.jpg
    IMG_20160320_212939114.jpg
    142.9 KB · Views: 75
  • IMG_20160320_212851873.jpg
    IMG_20160320_212851873.jpg
    147.6 KB · Views: 81
OP
S

stelthy77

Well-known member
Joined
Nov 1, 2015
Messages
56
Location
Toledo, Ohio
And some during and after shots. This isn't the final organization, but it is pretty close. I did add some more rows of gear track to get some rarely used stuff up higher.
 

Attachments

  • IMG_20160913_122930809_HDR.jpg
    IMG_20160913_122930809_HDR.jpg
    145.5 KB · Views: 92
  • IMG_20160913_122944009_HDR.jpg
    IMG_20160913_122944009_HDR.jpg
    155.1 KB · Views: 101
  • IMG_20160913_122911884_HDR.jpg
    IMG_20160913_122911884_HDR.jpg
    144.4 KB · Views: 110
  • IMG_20160909_112847374.jpg
    IMG_20160909_112847374.jpg
    136.8 KB · Views: 108
  • IMG_20160504_125251716.jpg
    IMG_20160504_125251716.jpg
    145.6 KB · Views: 109
  • IMG_20160324_131047465.jpg
    IMG_20160324_131047465.jpg
    150 KB · Views: 127

nmk_61802

Well-known member
Joined
Mar 6, 2008
Messages
965
Location
Central IL
About that same time, I painted my reznor heater side panels. I used high temp black, but I didn't need to, those sides don't get hot at all.

Speaking of that heater, does anyone know the best way to raise it up? It is at forehead cracking height right now.

I am comfortable with shortening the gas line, it is the exhaust chimney where I am not sure about how to proceed.

Right now it looks to have the correct "slight angle" on the horizontal run, but the connector where it meets the ceiling seems to be unnecessarily large. I don't even know the terminology to know what to look for.

Any help here would be appreciated.

Looks like you have a single wall run to the heater, a double wall "B" vent thru the drywall ceiling and attic space to out the roof. You are required by code to run double wall pipe thru walls.

The single wall pipe connects to the interior wall of the double wall pipe, ensuring the outer connection remains cool. The outerwall is not connected to anything on the inside. Then you have a thimble or storm collar at the ceiling itself.

Beware different manufacture do the double wall crimps slightly different and not all play well together when trying to fit collars and thimbles.

https://www.menards.com/main/heating-cooling/venting/gas-appliance-venting/c-9462.htm
 

taumac

Well-known member
Joined
Aug 30, 2011
Messages
8,104
Location
Brooksville, Fl
Workbenches.

My wife hates my workbenches.

Rather, she hates the amount of time I have spent on these damn workbenches. I will digress to explain perhaps where some of the hatred comes from...

Before our first child 3 years ago, my wife didn't really do any "nesting". Don't get me wrong, she decorated the baby's room (it looked great!), but she didn't care too much about the rest of the house like some other women. I, on the other hand, did a CRAZY amount of nesting. finishing up projects all over the house, starting new ones, even little things like patching a hole and painting. I just knew I wasn't going to have the time after the baby came, and so I was like a crazy man running all over the house, every waking minute.

In addition to the rest of the house, I started working on my workbenches. I had gotten some laminate table tops from my office redecoration, they were in perfect condition, very heavy duty, and combined with some plans from the internet (I don't remember where), some 2x4's, and my grandfather's old circular saw, I built three of these before my child arrived.


LMAO, I can take heat off of you there. Have wife read my thread and you should never have another again. Trust me!! :lol_hitti
 
OP
S

stelthy77

Well-known member
Joined
Nov 1, 2015
Messages
56
Location
Toledo, Ohio
Looks like you have a single wall run to the heater, a double wall "B" vent thru the drywall ceiling and attic space to out the roof. You are required by code to run double wall pipe thru walls.

The single wall pipe connects to the interior wall of the double wall pipe, ensuring the outer connection remains cool. The outerwall is not connected to anything on the inside. Then you have a thimble or storm collar at the ceiling itself.

Beware different manufacture do the double wall crimps slightly different and not all play well together when trying to fit collars and thimbles.

https://www.menards.com/main/heating-cooling/venting/gas-appliance-venting/c-9462.htm

Thanks, from your info and what I can find, it looks like they do make some lower profile class b wall thimbles I can use. I think for right now I will try to raise it using the pipes I have and being sure to have a 1 inch drop over 4 feet as recommended by the installation directions I found.
 
OP
S

stelthy77

Well-known member
Joined
Nov 1, 2015
Messages
56
Location
Toledo, Ohio
I am lucky enough to have a slop sink in the garage next to the door. It is great for all kinds of stuff. The previous owner had some old kitchen cabinets around it; I used them for for cleaning supplies and towels.

I never really liked the way they looked. I removed the old cabinets, cleaned up the back splash (lots of paint on there...), re-caulked the sink, and used some plasti-dip to paint the hose reel.

Then I replaced the cabinets with Craftsman black and red ones that fit my color theme.

Last, I put up a cleaning supply/paper towel holder shelf, and a towel hanger.
 

Attachments

  • IMG_20161003_124804543.jpg
    IMG_20161003_124804543.jpg
    140.3 KB · Views: 66
  • IMG_20161002_142155659.jpg
    IMG_20161002_142155659.jpg
    143 KB · Views: 63
  • IMG_20161002_112445299.jpg
    IMG_20161002_112445299.jpg
    138.9 KB · Views: 62
  • IMG_20161002_093509088.jpg
    IMG_20161002_093509088.jpg
    141.2 KB · Views: 59
  • IMG_20160928_144656307.jpg
    IMG_20160928_144656307.jpg
    139.5 KB · Views: 60
  • IMG_20160928_141139304.jpg
    IMG_20160928_141139304.jpg
    140.1 KB · Views: 66
OP
S

stelthy77

Well-known member
Joined
Nov 1, 2015
Messages
56
Location
Toledo, Ohio
I posted about this in the vice thread, but I'll put it here, because it was a fun project that came about while I try to improve the look and feel of my garage.

When my grandfather passed, I got his household vice. Didn't think much about it; used it and abused it (as did he). There was all sorts of paint on it and I am sure he never greased it. But as most of you know these things are built like tanks (literally, this thing is heavy for a 4 incher).

I took the old paint off and cleaned it as much as possible before hitting it with a coat of paint and lettering it.

I purchased another similar vice to get a missing pipe jaw. I also had to fabricate a hardy for it, as it was lost some time ago.

I am sure my grandfather would appreciate it, and at the same time think it a little ridiculous the amount of time I put into it. But I hope to pass this along to my grand kids, so a little tlc now should help that...

Before:
 

Attachments

  • IMG_20161003_175828839(1).jpg
    IMG_20161003_175828839(1).jpg
    113.9 KB · Views: 30
  • IMG_20161002_221753555.jpg
    IMG_20161002_221753555.jpg
    149.7 KB · Views: 29
  • IMG_20161002_221727023.jpg
    IMG_20161002_221727023.jpg
    145.4 KB · Views: 28
  • IMG_20161002_221531745.jpg
    IMG_20161002_221531745.jpg
    142.3 KB · Views: 25
  • IMG_20161002_221522512.jpg
    IMG_20161002_221522512.jpg
    139.1 KB · Views: 26
  • IMG_20161002_221350107.jpg
    IMG_20161002_221350107.jpg
    148.2 KB · Views: 28
  • IMG_20161002_221306486.jpg
    IMG_20161002_221306486.jpg
    148.8 KB · Views: 31
OP
S

stelthy77

Well-known member
Joined
Nov 1, 2015
Messages
56
Location
Toledo, Ohio
I mounted it to my heavier workbenches. For fun, I used square head bolts to match the square heads on the vice.

During and After:
 

Attachments

  • IMG_20161111_130650.jpg
    IMG_20161111_130650.jpg
    140.4 KB · Views: 47
  • IMG_20161112_141015.jpg
    IMG_20161112_141015.jpg
    141 KB · Views: 47
  • IMG_20161112_142426.jpg
    IMG_20161112_142426.jpg
    141.1 KB · Views: 44
  • IMG_20161112_142315.jpg
    IMG_20161112_142315.jpg
    139.5 KB · Views: 47
  • IMG_20161112_141053.jpg
    IMG_20161112_141053.jpg
    140.6 KB · Views: 41
  • IMG_20161112_142230.jpg
    IMG_20161112_142230.jpg
    139.6 KB · Views: 45
  • IMG_20161112_142512.jpg
    IMG_20161112_142512.jpg
    137.6 KB · Views: 43
To avoid these ads, REGISTER NOW!
Top Bottom