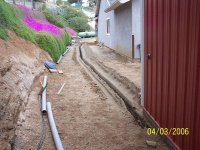
To avoid these ads, REGISTER NOW!

The Garage Mahal!

rasputin

Well-known member
Joined
Jan 19, 2006
Messages
45
Location
Lake Geneva, WI.
One quick question. I noticed that your garage door track follow the arc of the roof line/ceiling. That is a great way to save on space, but how on earth do you keep the doors in the open posistion?

Thanx!
 
To avoid these ads, REGISTER NOW!

W-Cummins

Well-known member
Joined
Jan 9, 2006
Messages
1,639
Location
Iowa
rasputin said:
One quick question. I noticed that your garage door track follow the arc of the roof line/ceiling. That is a great way to save on space, but how on earth do you keep the doors in the open posistion?

Thanx!

Thats a "follow the roof pitch" door track and the springs hold the door up just like they do on a normal setup. You can cut the ends of the regular track at an angle to allow this to work with a lower angle roof. When I purchased my doors it was only a few more $$ for the manufacture to do it.
William.....
 
OP
R

REFLEXX

Well-known member
Joined
Aug 14, 2005
Messages
913
Location
Riverside, CA
What W said is right on. In my case it was $250 more to have the door installed. Otherwise it would have taken me two days.

Now that I've seen how it's done, I'd have no problem doing it myself (without the trial and error part).

The door balances perfectly, stays above the opening and stays down (without springing up).

Some door places I spoke to said they will not do it because of liability. "If the spring breaks, the door comes slamming down." I'm more worried about my Diet Coke addiction killing me.
 
OP
R

REFLEXX

Well-known member
Joined
Aug 14, 2005
Messages
913
Location
Riverside, CA
I've determined that this is no longer a garage. It's a damn house for my tools to live in!!!

Drywall is 50% complete (hanging, not finishing). Only the big FAB room is left. It's time consuming, there's no way around that. I could be a hypocrite and hire a bunch of illegals. But I will not. 100% American "made." Well that's not really true; I'm Ukranian, the wIfe's a New Yorker, the Kids are Khazakhstani., the dog is German and they all have helped tremendously!

You can see where the metal trusses are now hidden. The only gripe is each beam adds FOUR edges/corners to mud & tape!

Now I'm debating wether or not to mud & tape & texture, or to hire someone (legal) to do it for me.

I cannot wait to paint, I'm really looking forward to putting some racing stripes on this baby!!!

I'd like to move in end of this month. HAHAHAHAHAHAH!!! :lol_hitti
 

Attachments

  • 100_7899-web.JPG
    100_7899-web.JPG
    108 KB · Views: 1,650
OP
R

REFLEXX

Well-known member
Joined
Aug 14, 2005
Messages
913
Location
Riverside, CA
I just looked at the "views" count for my little project. Holy-crapoly it's almost 11,000!!!

I'm wondering if I should have called it "the shack" instead of the "Garage Mahal". I don't want to dissapoint anyone after looking at the "My New Garage 1300000$" post. I don't even belong in the top ten, at least not yet.

Perhaps I should just rename it "My new garage $100,000 max, with everything it it!" :wtf:
 

redjetty

Member
Joined
Feb 8, 2006
Messages
5
Location
Arkansas
better check your local electrical codes,, if you get caught without the sides up and exposed wiring (exposed to weather,rain) here in arkansas you would have to pull it all out,,, be careful!! rj
 
OP
R

REFLEXX

Well-known member
Joined
Aug 14, 2005
Messages
913
Location
Riverside, CA
Wires are all buttoned up, the skins went up three weeks after the wires. Inspectors had no issues, agreed that it was an easier way to do it.
 

The Alchemist

Well-known member
Joined
Feb 16, 2006
Messages
142
Location
Doylestown, PA
Your garage looks great. Both my father in law and brother in law have 26X40 garages and hopefully one day I'll be adding a 26X30 to my current 20x20.

Keep up the good work and keep posting pics.
 
OP
R

REFLEXX

Well-known member
Joined
Aug 14, 2005
Messages
913
Location
Riverside, CA
Updates!

This drywall is heavy! I had to buy an extension for the panel lift to reach my 15ft peaked ceiling. I also had to buy an additional 21 sheets of 4x12x 5/8" sheetrock!!! That will make 92 sheets total, with about 3-4 sheets of wasted material included. Luckily I bought the first 70 sheets at $13, now they are $17 each!

Another 1 or 2 weeks and I'll be ready to mud/tape/sand. But I will probably have someone do it for me.

The first estimate I got for "hanging drywall and ready for paint" was $8,500. That was because I wanted a smooth wall finish, which is very expensive and perhaps not necessary. The drywall guy said that 30% of that cost was just the prep for a smooth wall.

Now with me hanging all the drywall and requesting a light "orange peel" texture, the cost will be considerably less and within my budget. Plus the orange peel will hide any imperfections in the walls.

Meanwhile I finished up the electrical panel. The main feeder line is not in yet and the fat wires you see that are not hooked up are for the CNC mill.
 

Attachments

  • 100_8106-web.JPG
    100_8106-web.JPG
    120.4 KB · Views: 1,772
  • 100_8110-web.JPG
    100_8110-web.JPG
    134.2 KB · Views: 1,412

hemi

Member
Joined
Jan 5, 2006
Messages
23
Location
moreland hills, ohio
REFLEXX said:
thanks.

That would be me. "Do it once, do it right"


Reflexx,

only a man who has spent quality time with machine tools would wire a box with such style and grace, and be repulsed by anything less :thumbup: Are you running the mill and vmc on single phase ? I have been following your progress since joining a couple of months ago and admire your work! I have about 10 more questions, but I'll save them for a PM. I hope you don't mind. regards, hemi
 
OP
R

REFLEXX

Well-known member
Joined
Aug 14, 2005
Messages
913
Location
Riverside, CA
Hemi,

thanks for the compliments. Your answers:

The knee mill is a "Kent" with a 5hp variable frequency drive. All I have to do is wire it differently and it accepts single phase. I lose about 25% power, but it's still more than a regular "Bridgeport" at 3HP.

The CNC mill is a different story. My machine needs 38amps @ 3phase. in single phase I need 60amps to be safe. The phase converter I'm buying is called "Phase Perfect" it's the worlds first (and patented and expensive) Digital Converter. But it needs 80amp service to be safe. So, in my usual overbuilt manner, the wiring and breaker is big enough to handle 125AMPS!

I may be broke when I'm done, but I'll have a damn nice shop!
 

W-Cummins

Well-known member
Joined
Jan 9, 2006
Messages
1,639
Location
Iowa
REFLEXX said:
Hemi,

thanks for the compliments. Your answers:

The knee mill is a "Kent" with a 5hp variable frequency drive. All I have to do is wire it differently and it accepts single phase. I lose about 25% power, but it's still more than a regular "Bridgeport" at 3HP.

The CNC mill is a different story. My machine needs 38amps @ 3phase. in single phase I need 60amps to be safe. The phase converter I'm buying is called "Phase Perfect" it's the worlds first (and patented and expensive) Digital Converter. But it needs 80amp service to be safe. So, in my usual overbuilt manner, the wiring and breaker is big enough to handle 125AMPS!

I may be broke when I'm done, but I'll have a damn nice shop!

If your VFD mill runs at -25% of power on single phase you have some thing all messed up! Is the VFD undersized??

If you mill is listed as having a current requirement of 38 amps then you need 38 amps to be safe not 60 :) I bet if you take your clamp on amp meter ( you do have one right?) and hook it up the the mill running at full bore you will not pull any where near the 38 amps on any of the legs. Try it and report back...

How much is the patented expensive digital snake oil selling for?? BTW if the device requires 80 amps feed it with a 80 amp breaker do NOT use a 125 amp, bigger is not better here. You can use the 125 amp wire if you want to waste some $$ or if you really need it (voltage drop)

Also both of your mills will run just fine off a rpc. Thousands do every day! Just don't feed the generated leg to the leg the controls run on, and your fine.
 
OP
R

REFLEXX

Well-known member
Joined
Aug 14, 2005
Messages
913
Location
Riverside, CA
W,

The Kent mill guys say that the VFD wired for 1ph will be about 4hp.

I spoke to the guys from Cincinatti, they make my ARROW 500 CNC. They have seen several machines damaged (fried boards) by Rotary Phase Converters (RPCs). The specifically say NOT to do it. The drives (axis, not spindle) are slowly destroyed by "slightly dirty" power that a rotary converters generate.

The www.phaseperfect.com units are digital and they guarantee power that is CLEANER than utility supplied power. The info on the site backs that up and they have many CNC mills doing just fine with thier units. Not to mention that they are silent compared to rotary units inside the same room with me! The units are $2,500 (DPC-10) or $4,000 (DPC-20) depending which one I'll need. I cannot afford to damage a $50,000 machine.

If you know more about this, please post. I'd love to save some money.
 

W-Cummins

Well-known member
Joined
Jan 9, 2006
Messages
1,639
Location
Iowa
REFLEXX said:
W,

The Kent mill guys say that the VFD wired for 1ph will be about 4hp.

I spoke to the guys from Cincinatti, they make my ARROW 500 CNC. They have seen several machines damaged (fried boards) by Rotary Phase Converters (RPCs). The specifically say NOT to do it. The drives (axis, not spindle) are slowly destroyed by "slightly dirty" power that a rotary converters generate.

The www.phaseperfect.com units are digital and they guarantee power that is CLEANER than utility supplied power. The info on the site backs that up and they have many CNC mills doing just fine with thier units. Not to mention that they are silent compared to rotary units inside the same room with me! The units are $2,500 (DPC-10) or $4,000 (DPC-20) depending which one I'll need. I cannot afford to damage a $50,000 machine.

If you know more about this, please post. I'd love to save some money.

Sounds like your VFD on that machine is undersized for operation on single phase. you could replace it with a larger one if you NEED the power, but I would just hook it to a generated 3 phase sub system ( a 3 phase panel with the 3 phase power supplied from what ever means you decide to make it.) BTW. the RPC "circuit" is "enhanced" with more 3 phase motors running at one time on it.

I looked at their site before I posted :)
I couldn't find any guarentee of any such thing at their site. I saw some rather "interesting" claims about their product. I also read their technical paper. I'm not impressed. Answer this one question does the system run correctly on the "(evil, nasty, dirty power:)" that the power co supply now?? If so, why do you need a better system than that?? I also find it strange their example system used 2 phases of a 3 phase 208 volt service for their "test" why not a single phase 240 volt system like 99.9% of the people that would run this system would have??

As for the Fried boards... YES of course they have seen fried boards. Hook any 120 to ground volt application to 208-240 volts to ground (on a generated or wild leg system) and **** you will fry it. That's why I told you NOT to do that :) Is your mill the 15 hp model? Look at the circuit for you machine and see if any of the servo's power supplies are 3 phase I bet they are not.

William..
 
OP
R

REFLEXX

Well-known member
Joined
Aug 14, 2005
Messages
913
Location
Riverside, CA
William (W-Cummins) and Hemi,

I PMed William to continue this conversation via that OTHER communication system (phone!) and he was kind enough to call me back! We spent a good half hour on the phone.

He explained and convinced me that a rotary would work for my application and potentially save me $3,000!!! I'll contact the RPC manufacturers and the machine builder to confirm, but everything he told me made logical sense.

He also explained some of the wiring questions I had about grounding my shop's panel and the new house panel. Not just how to wire it, but why it should be that way.

All this info would have taken dozens of postings back and forth!

A BIG THANK YOU TO W-CUMMINS! For taking the time to help a fellow junkie. You're now my electrical Guru. :bowdown: :bowdown: :bowdown:
 

maa139

Well-known member
Joined
Feb 24, 2006
Messages
175
Location
West Chester PA
I just read through this whole thread. What I think is even better than the AWESOME shop that's there is the fact that the daughters helped build it. Very, very cool.

Matt
 
To avoid these ads, REGISTER NOW!
OP
R

REFLEXX

Well-known member
Joined
Aug 14, 2005
Messages
913
Location
Riverside, CA
OK! Update time. It has been a while and it's been a LOT of work.

Managed to put up 92 sheets of drywall (4'x12'x5/8" thick!) mostly nights and weekends. That's 4,400 sq feet of sheetrock and 4,500 drywall screws! I would guess that's about 4-5 sheets of waste material (cut off ends, openings, etc). 80% of the work was solo, with help from MOM, wife and daughter to load the sheets onto the lifter. My guy friends don't come around anymore :sad: Big sissies, all of them!

Only one sheet fell of the lift and it had to be from the highest point! It was a slow slip and it wasn't going to hit me. I just cringed and watched it commit suicide. 1 sheet + 15ft drop = 12 random pieces. I was done for the night.

I will not say that it was difficult work. But my arms and shoulders were aching after a few hours.

must have tools:

The "Blindmark", the drywall lift (with 15ft extension), utility knife, 100 pack of fresh blades, drywall "hole" saw, the cheesegrater file (for cleaning ends), a ROTOZIP or equivalent, 4x8ft worktable, chalk snapline, drywall T-square, Senco Gun, cordless drill (for screwing manually) and a lot of Diet Coke.

The next step is the metal corners, taping, mudding, sanding and texturing. I've hired someone to do it for me. It would take me too long and I lack the experience. Somethings I let the PROs do for me. It's expensive (around here everything is) but this guy does a lot of commercial work (hospitals, etc..) and promised good results. $5,000 is the bill. More than I wanted to pay, but that's how it goes. He is basically doing a 1,500 sq ft house with arched ceilings and a lot of corners (the boxed trusses).

Meanwhile I'm putting in the big and little electrical. Everything from trenching the main feeds to installing receptacles and switches.
 

Attachments

  • 100_8142-web.JPG
    100_8142-web.JPG
    93.8 KB · Views: 1,648
  • 100_8191-web.JPG
    100_8191-web.JPG
    100.4 KB · Views: 1,340
  • 100_8213-web.JPG
    100_8213-web.JPG
    76.1 KB · Views: 1,225
OP
R

REFLEXX

Well-known member
Joined
Aug 14, 2005
Messages
913
Location
Riverside, CA
A few more pics and info.

The garage door was an area I wanted to "clean up" so here's what I did.

Every garage door I've ever seen always uses those ugly perforated metal angles to moun the back of the tracks. They are also a ***** to drywall around. So I started thinking.....

First you see that the tracks match the angle of the ceiling, thay also match the angle of the trusses that happen to be very close!

So I decided to get rid of the metal angles and relpace them with something a little more elegant.

One one side I just used a 2" long round spacer and bolted thru the track and into the vertical beam. Left side metal angle....all gone!

On the other side, I cut and bent up a piece of 3/16" steel and welded it to the truss. Then I just bolted the track to that. No more ugly metal going into the ceiling and hanging/finishing drywall just got easier!!!

Nice and smooth lookin' IMHO. :bounce:
 

Attachments

  • 100_8186-web.JPG
    100_8186-web.JPG
    76.4 KB · Views: 1,288
  • 100_8157-web.JPG
    100_8157-web.JPG
    92.6 KB · Views: 1,190
  • 100_8133-web.JPG
    100_8133-web.JPG
    107.1 KB · Views: 1,182
  • 100_8131-web.JPG
    100_8131-web.JPG
    50 KB · Views: 1,287
  • 100_8187-web.JPG
    100_8187-web.JPG
    65.4 KB · Views: 1,360

bmwpower

Super Moderator
Staff member
Joined
Apr 24, 2005
Messages
12,578
Location
NJ
Holy ****....$5K for drywall finishing? Dang, that's a tough hit. It's hard to tell how much rock that is, but 4400 sqft sounds like a lot. Looks nice, though. I like your track "mod".

BTW, that cheesegrater thing is called a rasp.
 

Wardrum

Well-known member
Joined
Jan 31, 2006
Messages
243
Location
Wisconsin
I love that garage door track hanger treatment. I showed it to a neighbor this morning who is building a new shop. He had just started putting up his "traditional" perforated angle iron hangers but decided to remove the angle irons after seeing your idea and do something similar.

Your whole "Garage Mahal" thing is fantastic. Can't wait to see the finished product.
 

mleichtle

Well-known member
Joined
Aug 10, 2005
Messages
223
Location
Wisconsin
bmwpower said:
Holy ****....$5K for drywall finishing? Dang, that's a tough hit. It's hard to tell how much rock that is, but 4400 sqft sounds like a lot. Looks nice, though. I like your track "mod".

Lay the sheets out end to end, thats roughly 1/4 mile :3gears: if my math is correct :eyecrazy:
 

Kuhlryde

Well-known member
Joined
Apr 14, 2005
Messages
103
Location
Columbus, Ohio
Got any updates? I have been waiting patiently :willy_nil J/K

I saw a post you had at one time saying the kit was about 14000 without the wood. What all does that include? I got my packet in the mail from MiracleTruss the other day and plan to go with them when I build.
 
OP
R

REFLEXX

Well-known member
Joined
Aug 14, 2005
Messages
913
Location
Riverside, CA
Smatter o'fact I was about to post an update!

The drywall mudding/taping/sanding/texturing guys finished in about a week. They skipped some days to let stuff dry, other wise it's about 4 guys x 4 days of work. It would have taken me a month straight and I wouldn't have come close to what they did. The tools they had and the speed at which they worked was amazing. I'm a perfectionist (as if nobody noticed) and they did a REALLY GOOD job, I mean it's damn near perfect. The texturing was exactly what I wanted. Very light and smooth. The boss's son (who supervised the job) didn't want any money until I was 100% satisfied. This was money well spent. Between me shimming and shaving the walls, putting up the drywall and them doing the finishing work, the walls turned out DEAD FLAT!

Lesson here: Sometimes the PROs are the way to go!


Meanwhile I was working on upgrading the BIG electrical. New weather head and a new panel on the house. From a decrepid 125 amp panel to a 400amp monster. 200 to the shop and 200 for the house. The panel is now on and awaiting inspection and electric co to move the meter. Here I had help too, a friend drove 2 hours to spend the day with me. He's a lifelong electrician and made it all look easy. He wired it so we have power till the meter get's changed over. I was just the helper this day. Learned a bunch too.

Lesson here: It's good to have connections and still drop some cash for friends who go WAY out of thier way to help you on a weekday.

this past week:

Monday- Walls are textured and I get the big panel mounted. I ask the drywall guys to leave the floor coverings in place since I will be painting ASAP.

Tuesday- painted the main truss in the "fab" room Hammerite black and mask it off.

Wednesday- damn work gets in the way.

Thursday- mask windows and doors. Spray 15 gallons of Behr PVA drywall primer on 4,200 sqft of wall. Bought a Wagner "Paint Crew 770" from Costco. Worked fantastic till it quit ON GALLON #11! It's 6PM and I'm not done priming. I tear it apart and see that there's a piece broken. I'm screwed. I fly to Home Depot (8pm) and buy the exact same thing (except it's called a Paint Crew XTRA). It works fine and I finish priming around 11pm. Paint Crew #1 is going back to Costco soon, It's defective in my book. If #2 craps out, I've got 30 days to take it back to HD.

Friday (03/31)- Fire up the Wagner and lay down (and up) 10 gallons of Behr Pure Premium Ultra White (Consumer reports #1 for semi-gloss indoor latex). Two light coats give me a NICE finish, but my arms dont work anymore. The sprayer holds up just fine and I'm keeping it. I spend about an hour tearing it apart and cleaning it. It turned DAYS of work into about 14 total hours of priming and painting (for 1,500 Sq FT!)


PAINTING LESSONS LEARNED:

1. Airless sprayer ALL THE WAY. super easy, but masking everything and protecting youself is a must! Whatever is not masked, gets painted (see pic below) I did a horizontal pattern and then a vertical pattern to cover up from about 12-16" away. Ear muffs and a good respirator make the job fun.

2. strain your paint and thin a little bit. The 5 gallon buckets of paint didn't come filled to the rim. The paint (and primer) were about a inch and a half below. So I just add water to the rim and mixed in. Sprayed real nice, no clogs.

3. stilts would have been nice for spraying the 9ft ceilings, but a step stool worked.

4. make sure the masking in on, otherwise the spray will blow paint underneath stuff.

5. reward your kids for helping. After they helped unmask everything and helped get all the **** off the floor (mostly heavy paper and tape) I let them play "stuntman!" with the pile of coverings. Who need a trampoline when you've got a construction site!!!
 

Attachments

  • 100_8308-web6x4.JPG
    100_8308-web6x4.JPG
    54.9 KB · Views: 980
  • 100_8307-web6x4.JPG
    100_8307-web6x4.JPG
    58 KB · Views: 1,132
  • 100_8306-web6x4.JPG
    100_8306-web6x4.JPG
    60.3 KB · Views: 1,182
  • capn-overspray.jpg
    capn-overspray.jpg
    22.3 KB · Views: 819
  • before-pic.jpg
    before-pic.jpg
    22.8 KB · Views: 494
  • 100_8247-web6x4.JPG
    100_8247-web6x4.JPG
    30 KB · Views: 723
  • 100_8242-web6x4.JPG
    100_8242-web6x4.JPG
    51.3 KB · Views: 610
  • 100_8241-web6x4.JPG
    100_8241-web6x4.JPG
    71.4 KB · Views: 631
  • 100_8238-web6x4.JPG
    100_8238-web6x4.JPG
    81.2 KB · Views: 870
  • 100_8237-web6x4.JPG
    100_8237-web6x4.JPG
    113.2 KB · Views: 739
OP
R

REFLEXX

Well-known member
Joined
Aug 14, 2005
Messages
913
Location
Riverside, CA
Kuhl,

By the time I'm done, I'll probably be about $70-80,000 finished. But as you can see, it's all top of the line, insulated, etc.... Basically it's overkill.

a normal "shop" would be MUCH less. THe "BIG" expense are the kit, the wood and the concrete. The rest is icing on the cake, but still adds up quickly. EVERY trip to Home Depot is hundreds of dollars, some were thousands.

I'm broke, but getting happier every day. My deadline for moving in is 3-4 weeks.
 

bmwpower

Super Moderator
Staff member
Joined
Apr 24, 2005
Messages
12,578
Location
NJ
Looks good! I, too, sprayed my garage and agree with what you've said.

It looks like your mask wasn't working too well - I see some white nose hairs!
 
OP
R

REFLEXX

Well-known member
Joined
Aug 14, 2005
Messages
913
Location
Riverside, CA
The nose hairs are from when I was cleaning/purging the spray gun. Didn't think to wear the mask during cleaning. Nose hairs now trimmed (I didn't realize the extent of the "nostril wooly" I had going on till I painted them!!! :willy_nil
 
OP
R

REFLEXX

Well-known member
Joined
Aug 14, 2005
Messages
913
Location
Riverside, CA
More updates!

It's like a long distance runner that can finally see the finish line. I've got this urge to work on it 24/7. Soooooo close.

I'm probably breaking some child labor laws, but the kids LOVE painting stuff. The grey is on 50" up and the black/red stripe will follow soon. Two coats of Behr Semi Gloss grey (they have like 20 different shades, I picked the most "industrial" one.)

I used the lazer beam to throw a line across the walls then masked with blue tape. Same lazer I used for doing the exterior screws. Very handy (and now at Costco for $25)

Today's project is the trenching. Rented from HD for $120 for four hours and that's exactly how ling I had it for. The actual trenching took about 2:45. The trench to the house was thru pure DG (decomposed granite) and was very slow going. The other trench was thru relatively soft fill dirt and went fast. I still have 3-4 feet of trench to do by hand and that is hell. I have a huge pick axe and it's gonna take hours.

I know that the ditch isn't straight, but I had to stay away from the propane lines. It actually worked out great, cuz' the pipes are slightly bent and I just pick the matching curves and drop them in.
 

Attachments

  • draintrench.jpg
    draintrench.jpg
    72.7 KB · Views: 704
  • wallpaint.jpg
    wallpaint.jpg
    35.7 KB · Views: 830
  • childlabor.jpg
    childlabor.jpg
    43.7 KB · Views: 1,172
  • trenchingfun.jpg
    trenchingfun.jpg
    72.9 KB · Views: 913
  • maintrench.jpg
    maintrench.jpg
    73 KB · Views: 684
OP
R

REFLEXX

Well-known member
Joined
Aug 14, 2005
Messages
913
Location
Riverside, CA
I posted this in another thread about picking stripe colors and designs, but here's the latest....

I just might skip the red stripe, black alone is lookin good! A laser line is critical for application.

I found the perfect "stripes" at Mcmaster.com Page 1763 $19 for a 60 yard roll! This stuff is like thick electrical tape, and shows the texture of the walls underneath. You'd swear it's painted on with razor sharp lines! The finish is best described as "semi-gloss" which matches the paint perfectly.

The specs:
------------------
Solid Color Marking Tape
This general purpose, adhesive-backed PVC tape is 6.8 mils thick and is supplied on a 3" ID cardboard spool. Meets Fed. Spec. PPP-T-66, Type 1, Class 2. For indoor and outdoor use. To Order: Please specify black, blue, green, magenta, orange, red, white, or yellow.
------------------

Here are pics of the before and after:
 

Attachments

  • 100_8366-web6x4.JPG
    100_8366-web6x4.JPG
    54 KB · Views: 441
  • 100_8365-web6x4.JPG
    100_8365-web6x4.JPG
    64.2 KB · Views: 821
Last edited:

Willy Victor

Well-known member
Joined
Apr 9, 2006
Messages
444
hemi said:
reflex,

I would look forward to your trenching! I have to trench 600 feet, across two of my neighbors properties, under a common driveway, through the woods, and under my personal driveway. Now my local power company wants me to run 4" conduit the entire length!!! hemi

600ft of 4in. pipe is going to cost you a ton. Willy Victor
 
OP
R

REFLEXX

Well-known member
Joined
Aug 14, 2005
Messages
913
Location
Riverside, CA
Gents,

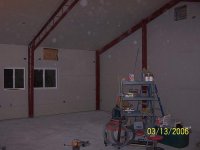
It's been a while and I've been a busy guy. I've done a lot to the shop and will be posting MUCH info soon. As for now, I had a member PM me about my Epoxy-coat experience and I wanted to share that first:


PREP:

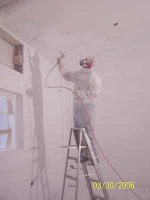
According to Epoxy-coat, you can sand (80-100 grit) or etch the floor, both are NOT necessary. I chose to sand and mop since my concrete is stain free and about 8 months old. I rented a pad sander from Home Depot and bought 10 sheets of 80 grit. The concrete was not as smooth as I liked, it had trowel marks in many places. The sander took care of that! First I went around and scraped any splatters of dried paint or drywall mud. Then I broomed all the big chunks. As for the actual sanding it took only 3 hours and 8 sheets to get the floor looking great and "baby's ***" smooth. I really liked the results.:thumbup: The dust wasn't too bad (the sander comes with a "catch bag") but I still wore a respirator/mask. Concrete dust is certainly not good for you and dries out your skin big time.

Immediatley after that I took my shop vac with brush and went to town. I vacuumed the entire floor a few times and all the nooks/crannies. There was still a layer of "chalk" on the floor. I bought one of those industrial mop wringer and bucket deals and "moist mopped" the entire floor. I clean out the water and mop about eight times to make sure that I'm not just putting the dirt back. The floor must be DRY before you epoxy, so I waited till the next morning to epoxy.

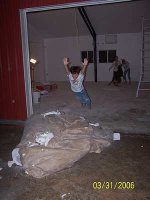
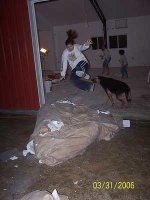
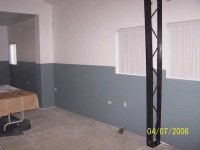
I did about 1,000 sqft with the help of one of my "teen slaves" :bounce: . I had two "kits" (6 gallons total). I would suggest an extra kit for anyone that's right at the 500 sqft-per-kit limit and lay it on thick! It's an extra $260, but you'll be looking at your floor for a long time!


TOOLS:

Metal paint mixer - the one with the kit is junk and broke.
18" wide roller - lays on the epoxy wide and fast (tray not nec)
Latex gloves - this stuff is sticky
4" roller - for edges
paint pole/broom handle- they give you a squeegee, but no pole.
paper towels & drop cloth

APPLICATION:

I mixed all the grey together (just part A) to make sure the color is the same between batches. Then I mixed three gallons at a time (A 2 gal +B 1 gal). It started to get "sticky" at about 40 minutes, but presented no problems. Two people made this job much easier and quicker, but one can do it.

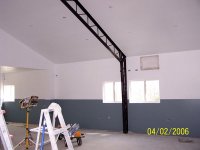
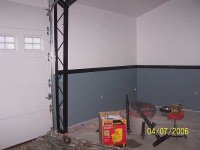
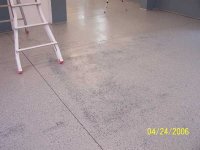
We started by cutting-in (painting around the perimiter against the walls) with the 4" roller. We then did 10' x 5' areas at at time, otherwise you couldnt throw the flakes far enought to reach every spot! We went heavy on the flakes, I'm hoping it will make it more durable and less slippery (since I didn't add the sand/sillica/grit). The technique is to take the paint can and pour out a line of epoxy and then squeegee it around. Follow up with the roller. This stuff is too thick to just roll on, the supplied squeegee really helps spread it out. At first I was concerned about running out of epoxy and spread it out like paint (thin) that was a mistake (see pictures). As it started to dry, dark areas showed up where the concrete absorbed more epoxy! I was pissed, but it was my fault.

So we started to lay it on thick and the problem went away. I still have a few dark areas to fix, but no big deal. I did 700 sq ft with flake and 300 without (in a different room). The next morning I did a second coat in the room with no-flake epoxy and it looks incredible! I also started to touch up the thin areas in the flaked room, but then I ran out of flakes!!! sheesh. I got more coming.


RESULTS:

All in all, I'm very pleased with the results (so far) and would highly recommend Epoxy-coat. This stuff must be very good because I left the squeegee (with some epoxy on it) sitting on the floor and the next day it was STUCK. I mean I couldnt tear it off the concrete! This stuff "epoxied" the rubber to the concrete. I had to scrape it off :lol_hitti

I was walking on the stuff 24 hours later and now it's been 3-4 days, the stuff is rock hard. I'm waiting for the flakes to touch-up the last spots and I'm done. Total time 2 days (6 hours per day, nonstop), Total cost about $750 (2 kits + sander + supplies). That's $2 per sq ft, not too shabby.

I'll be posting a lot of updates soon. I've been busy finishing up and getting ready to move in!!!!
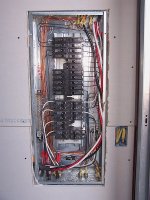
 

Attachments

  • floor-epoxy.jpg
    floor-epoxy.jpg
    28.4 KB · Views: 818
  • floor-epoxy2.jpg
    floor-epoxy2.jpg
    38 KB · Views: 1,225
Last edited:

MXtras

Well-known member
Joined
Aug 17, 2005
Messages
1,356
Location
On the Right Coast
Man - I am jealous!

That is some nice work, Reflexx. Awesome, awesome job. I think it is very cool how you summarize everything after you complete each task - what tools it took, the amount of time, the costs and what you learned. I think that is a very nice touch to this thread! Kudos.

Now you just need to place your order for some of my cabinets and workbeches to set everything off!

Keep it coming! I'd like to see more pics of the interior spaces, btw - maybe before finishing and after shots...

Scott
 

sjsfire

Well-known member
Joined
Feb 21, 2006
Messages
371
Location
illinois
I rented a pad sander from Home Depot and bought 10 sheets of 80 grit. The concrete was not as smooth as I liked, it had trowel marks in many places. The sander took care of that! First I went around and scraped any splatters of dried paint or drywall mud. Then I broomed all the big chunks. As for the actual sanding it took only 3 hours and 8 sheets to get the floor looking great and "baby's ***" smooth.


So how big was this "pad sander" is it one of those walk behind floor scrubbers or something smaller? And if you don't mind the question, how much was the 80 grit sheets/ Thanks
 
To avoid these ads, REGISTER NOW!
Top Bottom