To avoid these ads, REGISTER NOW!

The "Hole"

armstrr

Well-known member
Joined
Apr 24, 2007
Messages
83
Guess it is time to introduce myself and share a bit... Sorry, I don't have a prettier title...my wife started calling my garage "The Hole" and it stuck...

I'll let the pictures do some of the talking:

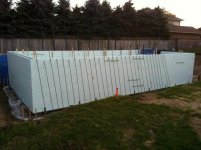
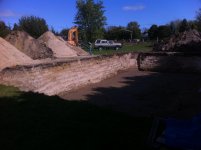
picture 1: the basement delivered. Nudura ICF blocks 8" approx R-23 rating
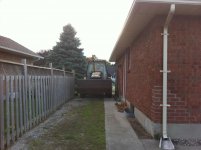
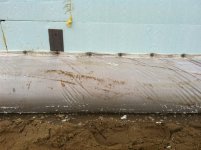
picture 2: neighbour didn't feel too neighbourly...so I got a permit to temorarily put a culvert to gain access from the back yard
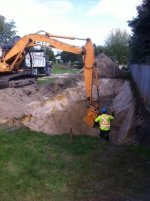
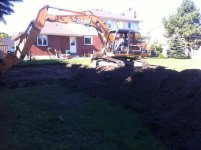
picture 3: the dig begins...I believe the date was October 25, 2010
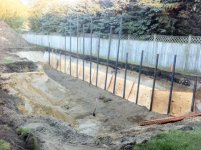
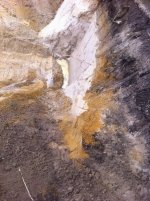
picture 4: those are I-beams driven into the earth with the excavator (till his machine was lifted... the plywood was placed against the earth and covered with tarps, then braced against the ibeams. this was to put pressure on the excavted walls to prevent the excavation on that side (100% sand as you can see...) from caving in (please note the accute angle of that excavation!!!) and having the neighbour's fence fall on my head (sometimes i wish it had...)
picture 5: footing fabric form laid out, rebar in place and the corner forms placed on adjustable feet and put in place
picture 6: guess the small amount of childhood playtime with lego was retained (I did have to take a one day course before the distributor could sell me the ICF blocks...got a "free" hat to prove it!)
picture 7: almost done installing the ICF blocks
 

Attachments

  • photo1.JPG
    photo1.JPG
    123.9 KB · Views: 283
  • photo7.JPG
    photo7.JPG
    140.9 KB · Views: 278
  • photo6.JPG
    photo6.JPG
    122.5 KB · Views: 297
  • photo5.jpg
    photo5.jpg
    53 KB · Views: 279
  • photo4.jpg
    photo4.jpg
    66.6 KB · Views: 273
  • photo3.jpg
    photo3.jpg
    44.8 KB · Views: 287
  • photo2.JPG
    photo2.JPG
    126.9 KB · Views: 292
Last edited:
To avoid these ads, REGISTER NOW!
OP
A

armstrr

Well-known member
Joined
Apr 24, 2007
Messages
83
a little extra corner bracing...just to be sure! i have yet to fasten the footer fabric to the icf walls. the pour was scheduled for the next day.
 

Attachments

  • photo8.JPG
    photo8.JPG
    135.3 KB · Views: 135
Last edited:
OP
A

armstrr

Well-known member
Joined
Apr 24, 2007
Messages
83
monopour footing...my inspector gave me his personal ph #... he wanted to see if the building would fall in on me...:headscrat

yup...

I'm famous... (infamous in the neighbourhood...)

Huston...we have a footing! (and an 8' concrete wall...)

Shout out to Joey and the guys at Fastfoot. They were on technical support standby and called me often for progress reports (and incouragement!). None of the trades envolved had seen this done before.

34 cubic meters poured (44.5 yd3 for my yankee friends) with the help of my father in law a friend and two hired guns to handle the pump truck hose
 

Attachments

  • photo9.JPG
    photo9.JPG
    132.2 KB · Views: 147
Last edited:
OP
A

armstrr

Well-known member
Joined
Apr 24, 2007
Messages
83
a little waterproofing (Blueskin is produced 15 minutes away...got a great deal on B-stock!)
 

Attachments

  • photo10.jpg
    photo10.jpg
    56.2 KB · Views: 160
OP
A

armstrr

Well-known member
Joined
Apr 24, 2007
Messages
83
radiant tubing. 3 runs of 1/2" pex each 300'. those are door window cut outs underneath. approx R-12 polyurethane encased in fiberglass skins. cuts easily with a circular saw, but a skidsteer can run over them without damage... 12x8' sheets of wire mesh on rebar chairs. it wasn't fun walking in there to say the least
 

Attachments

  • photo11.jpg
    photo11.jpg
    67.9 KB · Views: 218
OP
A

armstrr

Well-known member
Joined
Apr 24, 2007
Messages
83
a helper and i installing the the bailey comfloor steel pans http://www.profoundit.com/product::2435::COMFLOR-COMPOSITE-FLOOR-SYSTEM

the galvenized steel pan is profiled to accept concrete in grooves thus acting like rebar. The floor was spec'd and engineered so i could park a 1 ton truck above without any posts or beams in the basement. (the 2x4 walls are required till the concrete cures)
 

Attachments

  • photo12.jpg
    photo12.jpg
    10.6 KB · Views: 139
Last edited:
OP
A

armstrr

Well-known member
Joined
Apr 24, 2007
Messages
83
the pans are all in place, the vertical rebar in the walls has been bent over the pans, the rest of the rebar is set in place as is the 6x6 mesh, and 3 more runs of 300' 1/2" pex tubing.

i'll continue later
 

Attachments

  • photo13.jpg
    photo13.jpg
    12.3 KB · Views: 133
Last edited:
OP
A

armstrr

Well-known member
Joined
Apr 24, 2007
Messages
83
very impressive, isn't that how they used to pour bank vaults?

not sure about bank vaults...the pictures i have do not show it, but there is about 5-6000 linear feet of rebar in those walls running vertically every foot and horizontally every course.

with my walls weighing 160 000lbs (before either of the floors or the building above)... this is the place to be for any nasty weather.

Actually, now that i am thinking about it... my research found panic rooms for the rich and famous are built this way.
 

mws444

Well-known member
Joined
Jan 2, 2011
Messages
245
Location
Texas
You have my attention! Great start! what all do you have planned for the basment?
 

gatewaysysop

Well-known member
Joined
Nov 11, 2008
Messages
3,317
Location
Arizona
Really cool looking build, definitely liking that it's something I haven't seen before. Keep the pics coming please, this is very cool. :thumbup:
 
OP
A

armstrr

Well-known member
Joined
Apr 24, 2007
Messages
83
some back story...

at the last house, i hade an insulated/heated plumbed etc garage workshop...it was a tad tight, as I will be the first to admit...I am space ineficient...ok, I am messy, but I am trying to change, so I need everything to have a place...

We had just finished renovating the house, so I was about to actually start enjoying the shop (woodworker wanna be), since the only projects coming out of it were renovation orientated...

With my wife pregnant with our 4th child, the house (in her opinion...) was going to be a little tight, so she started looking on MLS (damn the internet), and found the place you see which was cheaply finished and filled with dog and feline urine and feces...I was not impressed with it, but she dangled "the dedicated shop carrot" in front of me...well I bit. So we moved in on 9-11-06 and I have been renovating since. Late 2009/Early 2010, I had enough of stumbling around in my unfinished, uninsulated, unheated garage and I started investigating construction methods for a workshop.

If you search my earliest posts, you will see I was asking about the Lumber Link building system...any DIY'ers out there looking at pole barns owe this system a look see. I had a designer come up with a plan for a SINGLE level 22.5'x44' workshop. I went narrow, because I wanted a fairly steep roof profile for neighbourhood asthetics and because an accessory building around here can only be 16' 4" !!!! (and 540sf)

Because I wanted to build bigger than the allowable sf, I also went for about an extra 17" in height so I could have a little headroom in the attic for storage.

I had to apply for a varience which all of the city officials gave their blessing to...BUT, they only recommend the building be allowed...a review committee consisting of five 85 year olds (seriously...I am not exaggerating there) have the final say at a public hearing. Well, one of my neighbours showed up cause he was certain this building was gonna devalue his property and I was gonna start some kind of business in the shop...

So I was granted the size, but denied the height. My pretty 3d (professionally drawn...) plans were basically out the window, and the lumberlink system would no longer work...unless I went DOWN a couple of feet... So I looked into that, but once that happens, the permit process gets more involved, engineer spec'd foundations etc come into play. I wasn't happy with the new designs, and even unhappier about the extra costs involved...I was 40% of the way or more towards a....basement :deathmeta:deathmeta

So I had my designer look into it, and low and behold...I was allowed to proceed... so the plan was...woodshop in the basement and multipurpose building on main level. part pool house, part garage, part games room.

so here I am 13.5 months later, a few $$$ poorer, a few stories richer, and time will tell if I am any wiser.

stay tuned.
 

i8tokyo

Well-known member
Joined
Apr 20, 2009
Messages
255
Location
south of Somewhere but not close enough to a Saint
LOL, that sounds about right with planning boards inspectors and such. very cool. A friend well he was a friend of a friend anyways. he had a wood shop under his garage. same thing your doing. Dehumidifer !!!! Atleast in Chicago area during the summer. Dude looks good. You got your woodshop layed out?
 
OP
A

armstrr

Well-known member
Joined
Apr 24, 2007
Messages
83
Yes... I have some water issues... I'll discuss at a later date :/
I used to scribble layouts on paper but don't have anything set in stone (pun intended). It will mostly revolve around the tablesaw and workbench... And efficient dust collection piping.
 

SuperSocket

Well-known member
Joined
Nov 2, 2010
Messages
2,683
Location
Michigan
very impressive, isn't that how they used to pour bank vaults?

Yes but thicker on the walls and a whole lot more rebar... like four times that amount.


Don't you just love neighbours? Glad to see you took the high $$$ road and kept going.

Gotta love those neighbors... they are always too busy interfering with other peoples business.


I'm glad you showed him that you can still get what you want and there is squat he could do about it. Personally I would have painted the one side facing him an obnoxious pink (as long as it fits under city color rules).


It is not too late to put in some vents into your garage facing the neighbor... I would recommend this "cactus" looking vent ;)

hot_weird_funny_amazing_cool6_dispute-between-neighbors-1_200907271732315942.jpg
 
Last edited:
OP
A

armstrr

Well-known member
Joined
Apr 24, 2007
Messages
83
hahaha...nice!!!

my friend (SHOUT OUT TO JOE MANAFO) suggested a flag pole with a pirate's flag flying at the corner closest to his deck...hmmm still a possibility.

actually we exchanged words yesterday for the first time in 13 months. he wasn't impressed with the trim job i did on those evergreens hanging on my side of the fence. actually accused me of trying to kill his trees. (i have a strong chemistry background...if I wanted his trees dead...they would be dead). On several occasions during the conversation I asked if we could be friends again, a question he would just simply not answer... so I guess his mind is made up. Sad, really.

One of the excuses he used at the town meeting was that i could rent it out as an apartment. I set up my wireless router today. if you are ever traveling in a Canadian neighbourhood and your iphone asks if you want to connect to a network called "Apartment_for_Rent_apply_within" you have found me...stop in for a beer. :beer:

My wife suggested when I am finished the shop I make up a real for rent sign and post it on my front lawn. ( I realy do own a rental property...so we'll see!)
 
Last edited:
To avoid these ads, REGISTER NOW!

mws444

Well-known member
Joined
Jan 2, 2011
Messages
245
Location
Texas
hahaha...nice!!!

my friend suggested a flag pole with a pirate's flag flying at the corner closest to his deck...hmmm still a possibility.

actually we exchanged words yesterday for the first time in 13 months. he wasn't impressed with the trim job i did on those evergreens hanging on my side of the fence. actually accused me of trying to kill his trees. (i have a strong chemistry background...if I wanted his trees dead...they would be dead). On several occasions during the conversation I asked if we could be friends again, a question he would just simply not answer... so I guess his mind is made up. Sad, really.

One of the excuses he used at the town meeting was that i could rent it out as an apartment. I set up my wireless router today. if you are ever traveling in a Canadian neighbourhood and your iphone asks if you want to connect to a network called "Apartment_for_Rent_apply_within" you have found me...stop in for a beer. :beer:

My wife suggested when I am finished the shop I make up a real for rent sign and post it on my front lawn. ( I realy do own a rental property...so we'll see!)

LOL.....neighbors! I guess everyone has "that neighbor". I am fortunate to have had mine move away a few years ago. Between the fighting, drug dealing and attempted suicides I was ready for them to leave. We had the property line fued when I went to build a fence and replace the shared hedge, rather than going to court I gave them the 13". Funny how some people will fight over things just for the sake of fighting.
Really like your build, look forward to watching it progress.
 
OP
A

armstrr

Well-known member
Joined
Apr 24, 2007
Messages
83
i found a few more pictures some of you may be interested in...

picture 1: what I started out with. Actually, i removed a ton of trees (but planted 3 for every 1 i removed!)

picture 2

picture 3: i had a backhoe come in and dig a test well to see if ground water would be an issue. i had heard many conflicting reports...so only one way to find out!
 

Attachments

  • 003.jpg
    003.jpg
    145 KB · Views: 68
OP
A

armstrr

Well-known member
Joined
Apr 24, 2007
Messages
83
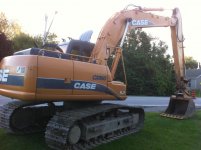
excavator had to make its own entrance. the neighbor wouldn't let me take a few fence panels down (shocker) so i had to get yet another permit to allow a temporary culvert. luckily i found some nice used plastic ones.
 

Attachments

  • 014.jpg
    014.jpg
    145.7 KB · Views: 74
  • 005.jpg
    005.jpg
    140.5 KB · Views: 62
  • 004.jpg
    004.jpg
    147 KB · Views: 71
OP
A

armstrr

Well-known member
Joined
Apr 24, 2007
Messages
83
so...we built a road...why not, right?

excavation began...i had him scrape the topsoil in a pile for reuse. i was nieve at the time, but i let something like 18 triaxles of sand go out my gate for free. turns out they are worth 3-$400/load. oh well it wouldn't have been fun to store it...luckily when the time came, there was some road construction very close and i was able to get 5 loads back for....$75 delivered!!!:)

so you can see we hit water...very disapointing as this is late october and the watertable is likely at its lowest (though i was told it was very stable in my area...) so we backfilled a bit and continued. i made a decision to cut my basement height by 9" and continue...unfortunately, we hit that water about 2' sooner than anticipated from the backhoe test...i guess taking the pressure off a large area made this the path of least resistance...

at this point i knew the basement would be "out of the earth a bit"...but remember, i can only be 16'4" above grade. :headscrat
 

Attachments

  • 024.jpg
    024.jpg
    147.3 KB · Views: 43
  • 014.jpg
    014.jpg
    145.7 KB · Views: 43
  • 027.jpg
    027.jpg
    145.1 KB · Views: 41
  • 032.jpg
    032.jpg
    148.6 KB · Views: 67
Last edited:
OP
A

armstrr

Well-known member
Joined
Apr 24, 2007
Messages
83
i call this first one: the finger of God. i was shocked that the excavator could only push those 5" i beams about 8' down...perhaps the sand stops somewhere...we were not going to go deeper to find out.
 

Attachments

  • 044.jpg
    044.jpg
    149.2 KB · Views: 46
  • 042.jpg
    042.jpg
    148.6 KB · Views: 53
OP
A

armstrr

Well-known member
Joined
Apr 24, 2007
Messages
83
in case you haven't seen an ICF block up close and personal. I wasn't joking when i said lego earlier. i chose NUDURA brand as they come in 8' sections and all the others were 4'. fewer joints, but bigger blocks. of course i built this myself for the most part, so smaller blocks may have had an advantage. you can see that there are plastic tension bands that hold the block together as the concrete exerts pressure outwards. those same plastic bands, which in this case are every 8", act as screwing surface for drywall, shelving, etc. supposedly they provide about 225lbs of pull out force per screw. ok.

and there are a few piles of sand...boy, my sons enjoyed them!
 

Attachments

  • 003.jpg
    003.jpg
    143 KB · Views: 62
  • 004.jpg
    004.jpg
    145.5 KB · Views: 56
OP
A

armstrr

Well-known member
Joined
Apr 24, 2007
Messages
83
i stumbled onto a footing fabric form. remember, i am doing 90% of this on my own, and getting a crew in to form the footing and then paying for a pump truck gets expensive... the important thing was the layout, which i botched a couple of times...good thing my forms were light and easy to move!!!

once the fabric was laid out, and secured with a few 4" nails to pin it down, it was opened up. the corner assemblies were pre glued outside of the hole (see, the name sticks!) and carried in and put in place. a stringline is used as a guide with a spacer block used to guage the correct distance from the line. that's my buddy phil down there...you will see him running all the excavation equipment for everything except the actual basement dig.

notice how wet it is down there... :/
 

Attachments

  • 002.jpg
    002.jpg
    149.2 KB · Views: 57
  • 004.jpg
    004.jpg
    145.4 KB · Views: 59
OP
A

armstrr

Well-known member
Joined
Apr 24, 2007
Messages
83
yup, that's me welcoming you to the gun show...

the rebar for the walls and footings were engineer spec'd. i used rebar chairs to hold it to the right height.

The $250 rebar bender/cutter i got from northern tools got a workout...actually, i got the workout using it...
 

Attachments

  • 004.jpg
    004.jpg
    149.5 KB · Views: 61
OP
A

armstrr

Well-known member
Joined
Apr 24, 2007
Messages
83
first pic: organized chaos. it looks worse than it is. just getting the preglued assemblies in their correct position without disturbing the string line was a chore

a few shots at the interior of the blocks. you can see that there are dovetail extrusions on the inside face of the blocks...the concrete sets up in there and makes it impossible for the concrete wall to "shed" the insulation. you will also notice the profile on the icf plastic forms channels for the rebar to sit in.
 

Attachments

  • 009.jpg
    009.jpg
    142.3 KB · Views: 44
  • 007.jpg
    007.jpg
    140.2 KB · Views: 46
  • 001.jpg
    001.jpg
    147.4 KB · Views: 41
OP
A

armstrr

Well-known member
Joined
Apr 24, 2007
Messages
83
you can see some of the vertical rebar ready to be threaded down into the wall. it is staggered in height to match the floor pan that will be placed ontop of the walls...the highest rebar gets bent into the slab, the lower ones get bent into the bottom of ibeam structure that is formed by the interconnected floor pans. you'll see that better later...i think.

you can rent wall braces for icf, but they rent by the day or week...and since i was doing this after work and days off...that could add up. the company that sold me the fabric also sells accessories that attach to lumber and make a functioning scaffold and adjustable wall brace. that is $600 in lumber...but none of it was wasted, i used it all many times over as you will see. and i'm still not done with a lot of it.

and...a night shot: no rest for the wicked
 

Attachments

  • 013.jpg
    013.jpg
    146.2 KB · Views: 32
  • 005.jpg
    005.jpg
    145.7 KB · Views: 31
  • 018.jpg
    018.jpg
    156.8 KB · Views: 28
Last edited:
OP
A

armstrr

Well-known member
Joined
Apr 24, 2007
Messages
83
ok, so you can see...its still wet down there. i had to modify the braces and put some planking under the feet as the wall braces were sinking!

to the right you can see the adjustable feet that are attached to the lowest course of blocks. using a drill with a hex extension, you can raise or lower the wall. i set up a laser level in the middle (AT NIGHT)and using the 2nd course of blocks i was able to get the building within 1/8" of level over its 44' length

and, yes, wind does happen...i guess i didn't have my staircase wall supported well enough. that was a nervous night for me...9' tall styrofoam walls dancing in the wind...i could have done without it. i was certainly glad i went with the nudura blocks...they have a locking detail that may have saved my keaster...i don't think therre is another block that does. (end commercial).

for you lord of the ring fans out there.... another nickname for the hole is Mordor...perhaps i will forge one ring to rule them all in the bowels of my shop...
 

Attachments

  • 013.jpg
    013.jpg
    157.4 KB · Views: 34
  • 011.jpg
    011.jpg
    144.1 KB · Views: 30
  • 007.jpg
    007.jpg
    145.8 KB · Views: 31
Last edited:
OP
A

armstrr

Well-known member
Joined
Apr 24, 2007
Messages
83
i found a better picture detailing those adjustable feet

hey, is that water?
 

Attachments

  • 001.jpg
    001.jpg
    143.2 KB · Views: 46
OP
A

armstrr

Well-known member
Joined
Apr 24, 2007
Messages
83
day of the pour i fastened the fabric to the lower block. i used self tapping pocket hole screws with washers (the washers and a different type of screw came with the fabric). it is almost november here...so i found regular screws were cracking the plastic i was screwing into...not comforting. they worked fine in warmer weather, but you gotta love self tapping screws.

you can see the challenge i had. my permit allowed me to put the building 3' off the lot line, but we ended up 5'. i had excavators refuse to quote me unless i moved it 10' further out...they were worried about the excavation walls caving...yah, me too. you can see how steep that excavated wall is and how tight i was able to get the basement wall to it. under 14" of loose topsoil, that is all sand. i think the tree roots must have helped keep things together.
 

Attachments

  • 005.jpg
    005.jpg
    146.4 KB · Views: 22
  • 009.jpg
    009.jpg
    145.3 KB · Views: 28
OP
A

armstrr

Well-known member
Joined
Apr 24, 2007
Messages
83
the day of the big pour! it felt like my wedding day. everything i had invested in this in both time and money would be out the window if the forms had a massive failure.

interesting, but it makes sense: you build this thing as straight as you can...but before the pour, you adjust the brackets to the walls are leaning in about 3/4" at the top!!! that is so it is actually leaning on the braces (it is braced from the inside). once the walls are filled, you adjust them to perfect level...but don't go too far or...timmmmmberrrrr there goes a 40 000lb wall (and the rest of the building with it.)

the wrong mix was sent in the first truck. it was supposed to be a stiff mix to fill the footing. the idea is to do the wall in lifts. first fill the footing bag and 1' up the wall, let it kick off, then do 3' and come back and finish it on the last lift. due to all of the rebar and plastic form ties, consolidation is crucial. I took that job.
 

Attachments

  • 010.jpg
    010.jpg
    146.7 KB · Views: 27
  • 008.jpg
    008.jpg
    142.8 KB · Views: 29
OP
A

armstrr

Well-known member
Joined
Apr 24, 2007
Messages
83
thankfully, everything went off without a hitch. it was interesting to watch the concrete flow through and fill the footing bag. the inspector (and a car load of his co-workers) watched from the top of the excavation and gave me two thumbs up
 

Attachments

  • 004.jpg
    004.jpg
    147.7 KB · Views: 50
  • 006.jpg
    006.jpg
    147.9 KB · Views: 51
  • 008.jpg
    008.jpg
    142.8 KB · Views: 50
  • 036.jpg
    036.jpg
    151.2 KB · Views: 65
To avoid these ads, REGISTER NOW!
Top Bottom