To avoid these ads, REGISTER NOW!

The John Deere House...and Garage

MEngineer

Well-known member
Joined
Apr 13, 2015
Messages
345
Location
Everett, Wa
Hello everyone,

I have been a member on here for about a year and have been really enjoying all of the excellent projects that you all have been posting about.

My wife and I finally were able to purchase our first home and we moved into it on 5/11/2016.

I am not a John Deere fanatic, but the previous owner must have got a deal on the paint.

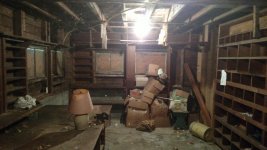
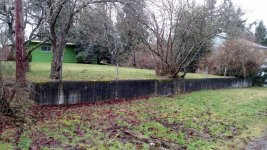
Here are a few pics and then I will get on to the story of how we got it and the specifications. The first couple of pics are the views from the road. The third pic is the front view of the workshop/garage, and the last is a pic of the interior of the work shop space.

The property was a short sale and took us 5 months from initial offer to move in. When we looked at the house the guy had all of his stuff still in it.

I will upload more "before" pics in a bit as time allows. I will have to catch you up to the current status when time allows.

I hope you all enjoy this journey as much as I have while following yours.
 

Attachments
  • IMG_20160118_103727382.jpg
    IMG_20160118_103727382.jpg
    149.2 KB · Views: 1,020
  • IMG_20160118_103907993_HDR.jpg
    IMG_20160118_103907993_HDR.jpg
    149.1 KB · Views: 930
  • IMG_20160118_104238656_HDR.jpg
    IMG_20160118_104238656_HDR.jpg
    150.6 KB · Views: 1,054
  • IMG_20160118_102745038.jpg
    IMG_20160118_102745038.jpg
    145.3 KB · Views: 1,032
Last edited:
To avoid these ads, REGISTER NOW!
OP
M

MEngineer

Well-known member
Joined
Apr 13, 2015
Messages
345
Location
Everett, Wa
There were a lot of people that told me that I was getting in over my head considering that this purchase was my first house. I learned a lot and felt completely helpless at times when dealing with my underwriter. I still dislike them to this day.

Anyway, some of the specifics that I promised:
The sale price was $238,342 and it includes .39xx acres, a 2700 sqft 1 story w/ full daylight basement, an attached 740sqft work shop space, and two car ports which I can probably park Qty(4) cars under at the same time with a few modificaitons.

The house is located on a dead end street and was/is the worst house on the block. We have a large green belt behind us and some interesting neighbors on each side. One of them is "off the boat" russian (accent and all) but has evidently lived there since 2000 (go figure).

The home has LP gas fired boiler for hot water baseboard heat, 2 functioning fireplaces, and was built in 1950, but thankfully the electrical was "updated" in the 70's or so to non grounded electrical circuits instead of knob and tube.

My bank required a hold back for some work that the owner was not willing to do. The hold back came to $7,145 that I will get back as soon as I finish fixing the problems they outlined.

The hold back critera are:

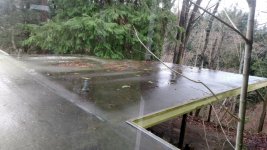
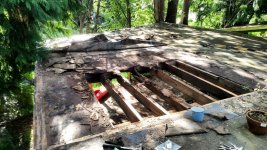
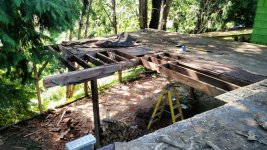
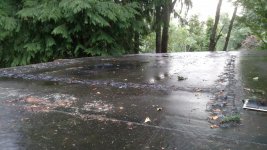
Fix the hole and rotten car port roof
Fix 2 broken windows
Fix the thermostat
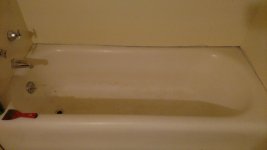
Clean bathtub

The windows are aluminum frame single pane with glazing so the panes were relatively easy to replace.

I supposedly needed something to keep me busy. This project will definitely do that
 
OP
M

MEngineer

Well-known member
Joined
Apr 13, 2015
Messages
345
Location
Everett, Wa
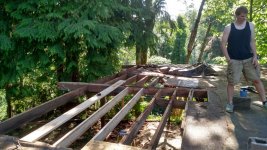
Here are some pics of the roof repair. I got it put back together. It kind of bothered me that I was forced to repair the car port as I fully intend on removing it and replacing it with a large 2 car garage. But alas, the bank is not reasonable...
 

Attachments

  • IMG_20160118_101459097.jpg
    IMG_20160118_101459097.jpg
    152.6 KB · Views: 581
  • IMG_20160529_152119287.jpg
    IMG_20160529_152119287.jpg
    154 KB · Views: 556
  • IMG_20160529_180028144.jpg
    IMG_20160529_180028144.jpg
    162.6 KB · Views: 576
  • IMG_20160605_171838894_HDR.jpg
    IMG_20160605_171838894_HDR.jpg
    158.3 KB · Views: 534
  • IMG_20160604_164139324.jpg
    IMG_20160604_164139324.jpg
    162.5 KB · Views: 528
  • IMG_20160606_170452227_HDR.jpg
    IMG_20160606_170452227_HDR.jpg
    156.5 KB · Views: 556
  • IMG_20160614_203848674.jpg
    IMG_20160614_203848674.jpg
    153.8 KB · Views: 492
OP
M

MEngineer

Well-known member
Joined
Apr 13, 2015
Messages
345
Location
Everett, Wa
One of the best things already about this house is the excuse to purchase all of the tools that I have been wanting.

My wife and I have a deal that I will only buy the tools that I "need". They all have to have a purpose and "NO DUPLICATION".

I will cross those respective bridges as they arrive, but in the mean time I get to buy new (to me at least) tools.

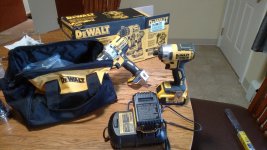
Recently to support the roof repair project I decided to join the ranks of cordless drill/driver owners and after some research bought the Dewalt 20v MAX brushless drill/driver set.

I also was able to pick up a worm drive skilsaw from Craiglist for $50. The thing is brand new, the previous owner claimed to "not be a carpenter" and didn't like it taking up space in his garage. The thing is so new that the "Made in the USA" stickers are not even faded.
 

Attachments

  • IMG_20160614_203953106.jpg
    IMG_20160614_203953106.jpg
    150 KB · Views: 250
  • IMG_20160614_204100987.jpg
    IMG_20160614_204100987.jpg
    144.3 KB · Views: 280
OP
M

MEngineer

Well-known member
Joined
Apr 13, 2015
Messages
345
Location
Everett, Wa
I used some CLR and a scraper to remove the material from the tub. I am still going to take a sledge hammer to it as soon as the bank is happy, but it should pass now. I think it doesn't look to bad for a 60 yr old tub, but some may differ in opinion.
 

Attachments

  • IMG_20160614_204129468.jpg
    IMG_20160614_204129468.jpg
    158.9 KB · Views: 425
  • IMG_20160118_101907427.jpg
    IMG_20160118_101907427.jpg
    147.2 KB · Views: 406
OP
M

MEngineer

Well-known member
Joined
Apr 13, 2015
Messages
345
Location
Everett, Wa
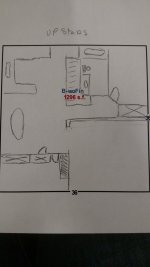
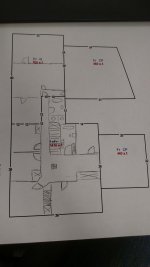
In case you guys are interested in the layout, here are 2 pics with the approximate room locations drawn in. The square pic is the upstairs, and the other is the downstairs which has the work shop and car ports all on the same level.
 

Attachments

  • IMG_20160118_153503624.jpg
    IMG_20160118_153503624.jpg
    136.4 KB · Views: 279
  • IMG_20160118_153528831.jpg
    IMG_20160118_153528831.jpg
    143.7 KB · Views: 272

SilverBullitt

Member
Joined
Feb 27, 2015
Messages
10
Looks like you have some serious work ahead, but congrats on getting the place. I look forward to seeing what you do with it.
 
OP
M

MEngineer

Well-known member
Joined
Apr 13, 2015
Messages
345
Location
Everett, Wa
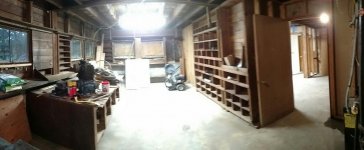
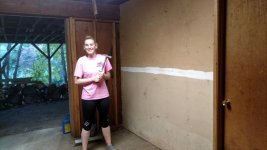
So, after finally getting the workshop/garage space cleaned out enough to put some of my stuff in it, I took some better pics to share. There are 3 rooms, one smaller room for storage (probably) and then two larger working bay/rooms.

The first pic is from standing in the entry door looking into the larger bay.

The second is standing in the back of the first pic and showing the into the storage room.

The third is of the other working bay.

The fourth is of the non-structural wall that I did not like and decided to remove.
 

Attachments

  • IMG_20160617_193803192.jpg
    IMG_20160617_193803192.jpg
    145.8 KB · Views: 335
  • IMG_20160617_193834001.jpg
    IMG_20160617_193834001.jpg
    149.4 KB · Views: 319
  • IMG_20160617_204711146.jpg
    IMG_20160617_204711146.jpg
    145.4 KB · Views: 339
  • IMG_20160617_193949614.jpg
    IMG_20160617_193949614.jpg
    144.9 KB · Views: 300
OP
M

MEngineer

Well-known member
Joined
Apr 13, 2015
Messages
345
Location
Everett, Wa
Since taking the previous pics I have a bit of progress to show for it.

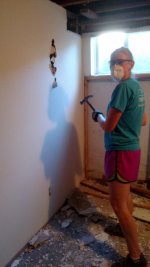
I have (with the enthusiastic destructive help of my wife) removed the wall and cabinets from the storage space.

I also managed to install another fluorescent fixture in the primary bay.

I managed to score Qty(10) of the 4ft fluorescent fixtures including bulbs for $10 each. When the bulbs or ballasts give out I will replace the bulbs with the 48" LED bulbs.

The last two pics are of the storage room before and after cabinet removal.
 

Attachments

  • IMG_20160617_204745121.jpg
    IMG_20160617_204745121.jpg
    144.3 KB · Views: 332
  • IMG_20160617_200355928.jpg
    IMG_20160617_200355928.jpg
    147.4 KB · Views: 393
  • IMG_20160617_194010913.jpg
    IMG_20160617_194010913.jpg
    142.7 KB · Views: 589
  • IMG_20160619_183959642.jpg
    IMG_20160619_183959642.jpg
    144.7 KB · Views: 307
  • IMG_20160619_185334931.jpg
    IMG_20160619_185334931.jpg
    143.3 KB · Views: 299
  • IMG_20160619_104526761.jpg
    IMG_20160619_104526761.jpg
    145.1 KB · Views: 288
  • IMG_20160619_190058102.jpg
    IMG_20160619_190058102.jpg
    141.3 KB · Views: 287
OP
M

MEngineer

Well-known member
Joined
Apr 13, 2015
Messages
345
Location
Everett, Wa
My folks decided to come by and see the place (finally) and to help out a bit with some of my projects.

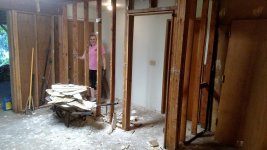
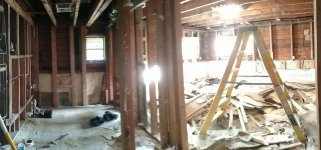
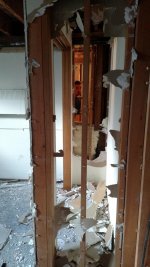
I had a 20yd dumpster delivered to remove a bunch of debris from the roof job and other miscellaneous left over trash. Since it still wasn't full, I decided to start on the demo in the nasty bathroom. The demo then extended to the adjacent bedroom.

I am going to strip all of the exterior walls down to nothing and then re-insulate, re-wire, and re-plumb as required.

The part I dislike the most is cleaning up the demo debris. Everything from there on is PROGRESS!
 

Attachments

  • IMG_20160626_190453760.jpg
    IMG_20160626_190453760.jpg
    153.5 KB · Views: 291
  • IMG_20160625_123202622.jpg
    IMG_20160625_123202622.jpg
    140.6 KB · Views: 381

sbd4de3

Well-known member
Joined
Sep 20, 2014
Messages
131
Good to see your ambition with this place, many wouldn't have taken this on. Good luck brother, looking forward to seeing your progression!
 

pitterpat

Well-known member
Joined
Jun 30, 2011
Messages
686
Location
Indianapolis
Nice job on getting the house first. Looks like you're making good progress and have a good wife to help when she has to.

Keep up the progress, don't cut corners.
 

Bib Overalls

Well-known member
Joined
Dec 4, 2006
Messages
3,318
Location
Jonesboro, Arkansas
Residential knob and tube wiring was obsolete before WWII. It was replaced by much cheaper (labor and materials) Romex cable. Your house may have been wired with aluminum cable. This was common during the Korean war and caused all kinds of problems down the road and became a fire hazard. The 70s rewire was most likely done to replace the aluminum wire. This was a common, abet expensive, remedy for aluminum wire that literally corroded away at switches, outlets, and other junctions and terminals. Even today, electricians occasionally run into aluminum wire when remodeling.

As for the color, I think International Red or Kabota Orange would be more suitable than John Deere Green. Really make your place standout.
 

rayra

Well-known member
Joined
Dec 1, 2014
Messages
4,724
Location
Escaped from Los Angeles
If you have no attachment / preference for the rustic aged wood look of the shed / workshop interior, I suggest you shoot the whole thing with white primer. It will definitely brighten and (visually) enlarge the space. And make your lighting improvements go farther.

It will certainly be a 'labor of love'. I've rehabbed a few old houses in my day, not sure I have another in me. But it's comparatively easy to work wonders, as long as the bones are sound. The house's and yours.

I also suggest you start with the livability stuff first, rather than later. A bathroom, the kitchen, the main bedroom. Update and improve. Make your key living spaces better as soon as practicable. They'll make a huge difference in everything else you do going forward on the place. Don't leave them for last. That way when you are dog tired and dirty you can restore yourself in some comfort.
I got this backwards on the last 55yr-old house we slaved on, doing a complete gut / rebuild on the main bath with a deep wide jacuzzi tub, travertine tile etc only in the last year before we sold the place. Used a crappy low-sided tub with a shower curtain as you've pictured, for a decade of trips to that mountain "vacation" house.
 
To avoid these ads, REGISTER NOW!
OP
M

MEngineer

Well-known member
Joined
Apr 13, 2015
Messages
345
Location
Everett, Wa
Sorry it has been a while. My progress has been less than I was hoping, but I am taking the turtle approach "slow and steady" and we will get there. For me, slow can be others fast, but still I have to keep the energy up.

From purely a nostalgic perspective, I do like the old framing exposed, but it is all going to get insulated and sheet rocked when I get to that point.

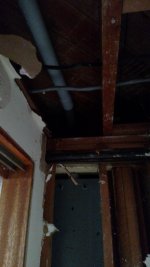
I finally decided that I wanted to get some legitimate progress done, so I decided that I would focus on the electrical. I replaced the existing panel with one that has more slots and space. I am also running conduit to a sub panel that I installed in the store room/laundry room that I will feed my garage off of. I will have 200 amp for the house and 150 for the shop.

I have yet to finish the conduit installation, but am nearing the end. then I will pull the feeder wire and splice them into the service.

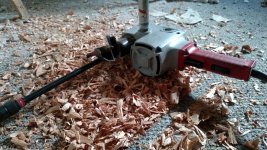
To support my conduit installation I pulled the rock off of the ceilings in the affected bed rooms for access. I also purchased a Milwaukee Hole Hawg (worm drive) drill for cutting all of the large holes for plumbing and electrical.

Here are some pics
 

Attachments

  • IMG_20160712_173649035.jpg
    IMG_20160712_173649035.jpg
    147.7 KB · Views: 207
  • IMG_20160712_185749484.jpg
    IMG_20160712_185749484.jpg
    143.4 KB · Views: 206
  • IMG_20160712_193335051.jpg
    IMG_20160712_193335051.jpg
    147.4 KB · Views: 200
  • IMG_20160712_193307931.jpg
    IMG_20160712_193307931.jpg
    164.9 KB · Views: 235
  • IMG_20160717_151805066.jpg
    IMG_20160717_151805066.jpg
    145.1 KB · Views: 257
OP
M

MEngineer

Well-known member
Joined
Apr 13, 2015
Messages
345
Location
Everett, Wa
I have multiple projects running in parallel like most of us here. I am working on the house, trying to improve the exterior, trying to grow some tomato plants, fixing my air compressor, and others that I am sure that I am forgetting.

I have to get the electrical sorted out before my compressor will be of any use, so I am trying to respect the sequence of events.

I want to use my blasting cabinet to clean all of the parts of my compressor, but I need my compressor functioning to operate the cabinet. A classic conundrum. Therefore I am having to take the slow process of cleaning the parts. I am going to start a thread on my compressor, and will fill you in there.

I fertilized the lawn and have been watering the **** out of it. I hit the lottery and bought a house with no water meter so I pay a flat rate for unlimited use. That will probably change in the next 10 years, but I am going to use it while I have it.

Here are a couple of non demo shots of the exterior after some yard work.
 

Attachments

  • IMG_20160712_195521397.jpg
    IMG_20160712_195521397.jpg
    150.7 KB · Views: 196
  • IMG_20160712_193615924.jpg
    IMG_20160712_193615924.jpg
    158.2 KB · Views: 200

Zeke

Well-known member
Joined
Aug 13, 2009
Messages
17,176
Location
Long Beach CA, the sewer by the sea.
That's a jewel of a house. Having owned and heavily worked on a few (besides being a general contractor) I suggest not starting anything new until you get what you have going finished. And I mean finished. It's too easy to be too eager.

AMHIK
 
OP
M

MEngineer

Well-known member
Joined
Apr 13, 2015
Messages
345
Location
Everett, Wa
I hear what you are saying, it is a constant thought myself, but I am trying to figure the best way to do it.

I am definitely open to suggestions, but I don't like poking holes in finished walls, and I am primarily working in the basement right now. I will need to do plumbing for the kitchen upstairs before I finish the ceilings in some of the rooms.

My plans are to get a bathroom and bedroom finished downstairs and then move down there so that I can rage on the rest of the place.

I am working on determining the proper sequence of events so that I get everything done in the right order and don't have to un-do stuff I already did.
 

Zeke

Well-known member
Joined
Aug 13, 2009
Messages
17,176
Location
Long Beach CA, the sewer by the sea.
I hear what you are saying, it is a constant thought myself, but I am trying to figure the best way to do it.

I am definitely open to suggestions, but I don't like poking holes in finished walls, and I am primarily working in the basement right now. I will need to do plumbing for the kitchen upstairs before I finish the ceilings in some of the rooms.

My plans are to get a bathroom and bedroom finished downstairs and then move down there so that I can rage on the rest of the place.

I am working on determining the proper sequence of events so that I get everything done in the right order and don't have to un-do stuff I already did.
Sounds like a plan to me. Map it out on paper so you don't miss a step. When in doubt about electrical run some conduit between floors.
 
OP
M

MEngineer

Well-known member
Joined
Apr 13, 2015
Messages
345
Location
Everett, Wa
Sorry for the lack of updates. Work on the house has been progressing slowly. I need to focus on taking some more representative pictures for you guys and will try to get them uploaded one of these days.

As for progress, we have got one room cleaned out down to the studs and the rubble hauled off to the dump. We now have 2 more rooms that are almost cleaned out and hauled off, and will hopefully get that finished up this week.

During a recent sequence of events conversation with my wife, we laid out all of the projects we wish to accomplish this winter and then attempted to identify all of the pre-requisite projects that are weather sensitive.

We discovered that we need to get the roof of the work space leveled out and re-attached to the house to support the re-running of the hydronic heating plumbing prior to needing it this fall. I need to get the heating solidified now so that I can completely finish the sheetrock in the bedrooms when I get to that point this winter otherwise I will be stuck waiting on the weather till next May.

My wife is catching the "want to live in a new house" bug, so she has been more than willing to contribute effort and support (usually in the form of delicious meals) so I have been more than happy to keep the progress moving.
 

matt_i

Well-known member
Joined
Mar 14, 2008
Messages
10,753
Location
SE Michigan
I want to use my blasting cabinet to clean all of the parts of my compressor

Proceed with caution here. An piston based air compressor is not that far different from an IC engine, which one would never put in a blast cabinet without a voluminous high pressure heated wash down afterward. One piece of grit could really ruin your day, down the road some. Of course there are softer friable abrasive media like walnut shells but it won't cleanup paint as well.
 
OP
M

MEngineer

Well-known member
Joined
Apr 13, 2015
Messages
345
Location
Everett, Wa
Very good point there. If/when I get to that point, I will have to consider that aspect carefully before ruining my afternoon :)

Proceed with caution here. An piston based air compressor is not that far different from an IC engine, which one would never put in a blast cabinet without a voluminous high pressure heated wash down afterward. One piece of grit could really ruin your day, down the road some. Of course there are softer friable abrasive media like walnut shells but it won't cleanup paint as well.
 

madoc1

Well-known member
Joined
Dec 11, 2012
Messages
1,242
Location
spicewood, tx
will be following your remodel. seems like a nice and should be really nice when finished. you certainly have a great workshop area-jealous.

jim
 
OP
M

MEngineer

Well-known member
Joined
Apr 13, 2015
Messages
345
Location
Everett, Wa
So, I finally got some time to upload some pics of my antics.

The first is of me removing the existing electric panel, and the next is part way through the install of the replacement.

My wife is a champ and has been taking her post work frustrations out on the walls that have to go while I am working on the less pleasant and or more technical projects.

We are working to clear out all of the gypsum board from the walls so we can update the plumbing and the electrical....and remove all of the rat corpses from the walls to help the smell.

I think the current count is somewhere near 5 or 6.
 

Attachments

  • IMG_20160717_151805066.jpg
    IMG_20160717_151805066.jpg
    145.1 KB · Views: 140
  • IMG_20160717_195454278.jpg
    IMG_20160717_195454278.jpg
    143.1 KB · Views: 153
  • IMG_20160814_155705029.jpg
    IMG_20160814_155705029.jpg
    145 KB · Views: 237

drivesitfar

Well-known member
Joined
Oct 23, 2013
Messages
36,075
Location
Pacific Northwest
ME: i just was getting ready to turn off the computer and head out the door and noticed your thread at the top of the heap so wanted to make a post so i can find it easier later.

best of luck with the new place and i'll hopefully be able to help advise you on some home projects or just sit in my chair and enjoy watching.

take care
 
OP
M

MEngineer

Well-known member
Joined
Apr 13, 2015
Messages
345
Location
Everett, Wa
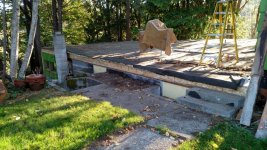
I have finally had a chance to make some more progress on my garage.

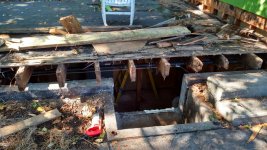
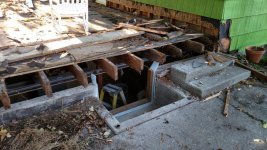
My current focus is to level its(the garage's) roof and seal it up for the winter. In order to do so, I need unrestricted access to the rear wall which required the removal of some of the built in shelving.

Since I am at it, I decided to clean out the window wells which were full of natural matter mixed with trash.

After I got the window wells cleaned out, I started in on the roof jacking process which is requiring me to remove the soffit and blocking from the ends of the rafters in order to free them up.

Once I get the clearance I will be splicing the affected rafters and replacing the rotted out sill plate.

I built a composite beam and have positioned my jack to apply some force to lift the rafters once they are loose.
 

Attachments

  • IMG_20160823_172703287.jpg
    IMG_20160823_172703287.jpg
    154.6 KB · Views: 207
  • IMG_20160823_185910913.jpg
    IMG_20160823_185910913.jpg
    149.8 KB · Views: 206
  • IMG_20160824_182716709.jpg
    IMG_20160824_182716709.jpg
    144.5 KB · Views: 204
  • IMG_20160830_200821655.jpg
    IMG_20160830_200821655.jpg
    149.2 KB · Views: 236
  • IMG_20160825_181405944.jpg
    IMG_20160825_181405944.jpg
    148.7 KB · Views: 230
  • IMG_20160830_200911156.jpg
    IMG_20160830_200911156.jpg
    146.1 KB · Views: 200
  • IMG_20160830_200919696.jpg
    IMG_20160830_200919696.jpg
    144.9 KB · Views: 201

drivesitfar

Well-known member
Joined
Oct 23, 2013
Messages
36,075
Location
Pacific Northwest
ME: it looks like you have your hands full that is for certain. i'll have to give you a sledgehammer for a housewarming gift or maybe your bride likes the size of your hammer to do the demo.

i'll try to keep looking for updates on your thread as you post them and ask questions so we can help if you might need some.

just an FYI. i felt exactly like you about the old cast iron tub in my house that went to the dump, but since you spent all that time cleaning it up if you don't want to keep it and can get it out to your driveway in one piece that tub is a keeper and more comfortable than most of the tubs made today (if it's long enough). my parents have a tub like that in their 1928 built home and i still remember taking a bath 40+ years ago before i move out because it was more comfortable than any bathtub or Jacuzzi I've owned since.

at worse case offer it up on Craigslist Free section and you won't have to pay to dump it because i'm betting it weighs a few hundred pounds.

are you changing out the entire electrical? it looks like you have some if not all copper plumbing?

good luck and how are your tomatoes if they are ripe yet? also if you grow basil like we do alongside our tomatoes a little mozzarella and olive oil and balsamic and bread and you've got a meal for a king and one of our favorites.

cheers
 
OP
M

MEngineer

Well-known member
Joined
Apr 13, 2015
Messages
345
Location
Everett, Wa
Drive,

I have finally been getting some ripe tomatoes. This warm streak has helped get a few of them to ripen to the point of consumption.

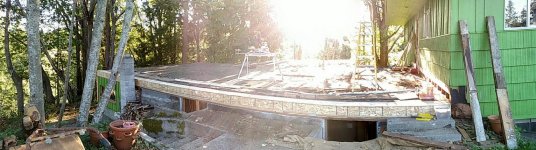
As for my progress on my roof project, I finally got the decking replaced last evening and took some pictures.

I still have to put plywood over the window openings until I get some windows to fill the holes with, but that won't likely be for a while.

My plan is to spray the new construction down with Tempo SC Ultra (works great on bugs) and then fold the rubber roofing back over the exposed decking and move on with my life.

Next summer I intend to put up some walls and expand the kitchen out on to that newly leveled surface.

Here are a few pictures:
 

Attachments

  • IMG_20160905_174242796.jpg
    IMG_20160905_174242796.jpg
    142.5 KB · Views: 100
  • IMG_20160904_130148943_HDR.jpg
    IMG_20160904_130148943_HDR.jpg
    158.5 KB · Views: 148
  • IMG_20160904_181438420.jpg
    IMG_20160904_181438420.jpg
    155.1 KB · Views: 135
  • IMG_20160905_173152616.jpg
    IMG_20160905_173152616.jpg
    147.5 KB · Views: 133
  • IMG_20160908_154655320.jpg
    IMG_20160908_154655320.jpg
    154.2 KB · Views: 140
  • IMG_20160905_173335453.jpg
    IMG_20160905_173335453.jpg
    152.1 KB · Views: 141
  • IMG_20160909_154731783.jpg
    IMG_20160909_154731783.jpg
    171.6 KB · Views: 146
OP
M

MEngineer

Well-known member
Joined
Apr 13, 2015
Messages
345
Location
Everett, Wa
And here are the others that I took showing the decking installed:
 

Attachments

  • IMG_20160911_173134950.jpg
    IMG_20160911_173134950.jpg
    130.5 KB · Views: 109
  • IMG_20160911_173157503.jpg
    IMG_20160911_173157503.jpg
    163 KB · Views: 127
  • IMG_20160914_174609017.jpg
    IMG_20160914_174609017.jpg
    170.4 KB · Views: 127
  • IMG_20160914_174645044.jpg
    IMG_20160914_174645044.jpg
    127.5 KB · Views: 111
OP
M

MEngineer

Well-known member
Joined
Apr 13, 2015
Messages
345
Location
Everett, Wa
And finally last night after I boarded up the windows and sprayed for bugs. I folded the roofing back over and have moved on to other projects. The roof should hold up till next spring I hope.
 

Attachments

  • IMG_20160915_175739712.jpg
    IMG_20160915_175739712.jpg
    153.2 KB · Views: 133

pennsylvaniaboy

Well-known member
Joined
May 28, 2014
Messages
417
holy snikeys that is alot of money for that property IMO, especially if that is for the worst place on the block in that condition. Remind me to not but a house in Everett, WA
 
OP
M

MEngineer

Well-known member
Joined
Apr 13, 2015
Messages
345
Location
Everett, Wa
holy snikeys that is alot of money for that property IMO, especially if that is for the worst place on the block in that condition. Remind me to not but a house in Everett, WA

Perhaps I wasn't clear in my explanation.

This house was the "worst house on the block".

The price for the size of lot and square footage was a steal for the Everett, WA area.

After accomplishing all of the work I intend to, assuming the market holds (which is an entire other conversation) I expect this house to be sellable for between $450k and $550K.

In the mean time I have a very low monthly payment and a project :beer:
 
To avoid these ads, REGISTER NOW!
Top Bottom