To avoid these ads, REGISTER NOW!

The Machine Shed

climb.on

Well-known member
Joined
Apr 13, 2015
Messages
501
Location
Minnesota
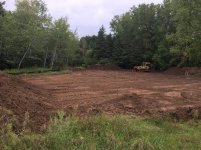
Well it's my turn to share a build here as many of you have. We bought 15 acres where I never thought we could afford it, house is sold, plans are done, budget is blown, permit in hand, building site stripped and the subs start showing up next week. I am serving as the general contractor and will do a lot of the work myself.

Here are a few features:
-2200 sq/ft house
-attached 3 car garage
-single level
-slab on grade FPSF (floating slabs)
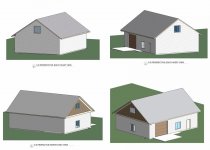
-36'x48'x12' Shop (The Machine Shed)
-House will have 9-1/2" thick double stud walls R36
-Shop will have 6" SIP panel walls and bonus room trusses
-10kW grid tied solar
-My wife will finally be able to park in the attached garage LOL

The house and shop renderings are rather generic and not the colors, siding materials, or roofing we will have.

In the 2nd photo, you can see the topsoil is stripped and our vehicles are parked in the garage, and my skid steer is in the shop.

I shot these videos with my drone back in the spring to help me with the site planning. It was incredible helpful.

This YouTube Video starts near the north end of the property and flies to the south.

This You Tube Video circles around the footprint of where the house will go. (same one as I linked in an earlier post)

I'll try to post updates (with a focus on the shop of course) and answer questions as often as I can, but this is going to be one hell of a busy fall.
 

Attachments

  • site plan1.jpg
    site plan1.jpg
    149.7 KB · Views: 205
  • site plan2.jpg
    site plan2.jpg
    149.3 KB · Views: 216
  • house.jpg
    house.jpg
    139.1 KB · Views: 201
  • shop.jpg
    shop.jpg
    139.3 KB · Views: 180
Last edited:
To avoid these ads, REGISTER NOW!
OP
C

climb.on

Well-known member
Joined
Apr 13, 2015
Messages
501
Location
Minnesota
I am struggling with the window layout in the shop. I have none on the south facing side (except in the bonus room), but will probably add some, but I'm not in love with the north and west sides, either. Thoughts?
 

DarrenF

Well-known member
Joined
Mar 11, 2008
Messages
291
Location
Thunder Bay, Ontario
i like it. I am just beginning my 36x50x13 w attic trusses, shop build. I am also struggling with window layout. I may add them after the shop is built
 
OP
C

climb.on

Well-known member
Joined
Apr 13, 2015
Messages
501
Location
Minnesota
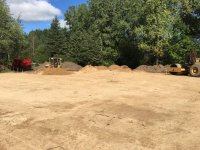
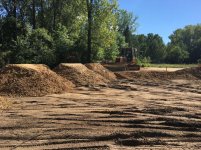
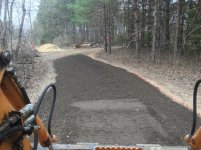
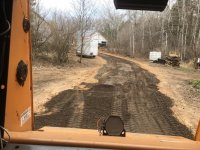
91 loads of sand (+8 more loads of class 5 gravel) delivered, graded & compacted today. 20 more loads than expected - ouch. Later this week, 6" of class 5 over the area where the building slabs will be. Amazing how much they got done today with 1 dozer, 1 roller, and 7 dump trucks. The material was only a few miles away though.
 

Attachments

  • IMG_5427.jpg
    IMG_5427.jpg
    147.3 KB · Views: 108
  • IMG_5425.jpg
    IMG_5425.jpg
    145.1 KB · Views: 112
  • IMG_5412.jpg
    IMG_5412.jpg
    144.6 KB · Views: 109
  • IMG_5408.jpg
    IMG_5408.jpg
    152.8 KB · Views: 113

bcoke

Well-known member
Joined
Mar 8, 2013
Messages
341
Location
Pawlet Vermont
Just a quick thought have you had a solar company check the buildings orientation to the sun track.............when I had staked out the 4 corners of my house I called him in and he said I did a pretty good job but a 5 degree swing would yield a 15% solar gain.......a no brainer cocked it 5 degrees have not had an electric bills since we went active.......Bobbycoke
 
OP
C

climb.on

Well-known member
Joined
Apr 13, 2015
Messages
501
Location
Minnesota
Just a quick thought have you had a solar company check the buildings orientation to the sun track.............when I had staked out the 4 corners of my house I called him in and he said I did a pretty good job but a 5 degree swing would yield a 15% solar gain.......a no brainer cocked it 5 degrees have not had an electric bills since we went active.......Bobbycoke

No I haven't. I did the site analysis myself. I am NABCEP certified, but I'm definitely not a professional installer. I looked at the numbers at true south and also at 10 degrees. The difference was negligible, but I didn't look at it from more than those angles. Might have to look at it some more, but a 15% increase is amazing for only 5 degrees.
 

theoldwizard1

Well-known member
Joined
Feb 22, 2011
Messages
43,216
Location
SE MI
I really like that you can not be seen from the road !

My daughter's father-in-law just built a house with double stud walls. It has not been a whole year so I have not heard what his energy bills are like. I also like SIP construction ! Why not SIP SIP roof on the Machine Shed ?

What is the pitch on the Nachine Shed ? More pitch will give you more usable bonus room space.
 
OP
C

climb.on

Well-known member
Joined
Apr 13, 2015
Messages
501
Location
Minnesota
That's some plot you have there, :thumbup: I love the driveway off the road through trees to the house. It's going to be beautiful.
Good work fella.

Regards :beer:
Steve.

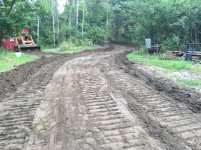
Thank you. I intended on having a straighter driveway but it just worked out this way and I'm glad. I like the feel and look of the gentle curves a lot.
 
OP
C

climb.on

Well-known member
Joined
Apr 13, 2015
Messages
501
Location
Minnesota
I really like that you can not be seen from the road !

My daughter's father-in-law just built a house with double stud walls. It has not been a whole year so I have not heard what his energy bills are like. I also like SIP construction ! Why not SIP SIP roof on the Machine Shed ?

What is the pitch on the Nachine Shed ? More pitch will give you more usable bonus room space.

SIP walls on the shop made more sense for me than on the house. With the shop, it gives me an almost instantly usable shop to build the rest of the house from. I will just paint the OSB interior, run some electrical and the main level will be done. No sheetrock, no insulation and I can put a screw in anywhere I want. Also I got spooked on using SIPS for the house because I read they don't block noise very well and we are on a busy road. And they are more expensive than a double stud wall too.

The roof on the shop (and house) are 8/12. This will give me a 16' x 46' bonus room. I chose not to do SIP roof panels because of the cost. They more than double cost and I feel like installation would be more challenging too. I'll be putting up the wall panels myself. Here is a video of the panels I will be using.
 

Stuart in MN

Well-known member
Joined
Sep 8, 2005
Messages
23,139
Location
Minneapolis
Also I got spooked on using SIPS for the house because I read they don't block noise very well and we are on a busy road.

My next door neighbor built a garage using SIPs, both for the walls and the roof (it has a second story that his wife uses as a studio for her clothing design business.) We live in the inner city part of Minneapolis, just off a main street where there's a lot of traffic around the clock, and it's actually very quiet inside - they love it.
 
OP
C

climb.on

Well-known member
Joined
Apr 13, 2015
Messages
501
Location
Minnesota
My next door neighbor built a garage using SIPs, both for the walls and the roof (it has a second story that his wife uses as a studio for her clothing design business.) We live in the inner city part of Minneapolis, just off a main street where there's a lot of traffic around the clock, and it's actually very quiet inside - they love it.

Yah I had read plenty of example like that too. Probably other variables that contribute to to noise one way or the other. I didn't want to risk it and it was quite a bit more expensive than even a double stud framed wall too.
 
Last edited:

C_F

ALLIANCE MEMBER
Joined
Jan 21, 2005
Messages
9,675
Location
Utah...SNOW BLOWS!
That's great that you were able to find a nice secluded spot like that, it looks great! I see you have a few bodies of water nearby too, so you won't have to go without during summertime skeeter season. :lol:

Looking forward to seeing your progress photos!:beer:
 
OP
C

climb.on

Well-known member
Joined
Apr 13, 2015
Messages
501
Location
Minnesota
I've been ridiculously busy with the project, but here a few photos to update the progress.

1st & 2nd pics is the form prepped and ready for the pour. The pour was a big day. both the house and shop in one day. 4000sq/ft between the 2 buildings. Rather emotional. It was quite a journey just to get to that point and really it had only just begun...

3rd & 4th pics are the framing of the house in progress.

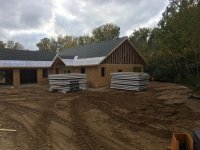
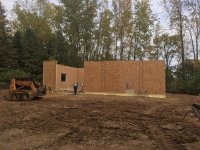
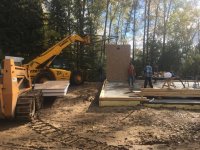
5th & 6th pics those are the SIP walls of the shop. The entire shop 36 x 48 x 12 is in those 2 piles. I was sure they forgot some panels. Nope. We had the wall up and assembled in one day. Framer set the trusses the next day.
 

Attachments

  • IMG_5650.jpg
    IMG_5650.jpg
    146.1 KB · Views: 156
  • IMG_5649.jpg
    IMG_5649.jpg
    149.1 KB · Views: 158
  • IMG_5618.jpg
    IMG_5618.jpg
    145.9 KB · Views: 177
  • IMG_5602.jpg
    IMG_5602.jpg
    146.6 KB · Views: 159
  • IMG_5577.jpg
    IMG_5577.jpg
    148.2 KB · Views: 154
  • IMG_5543.jpg
    IMG_5543.jpg
    148.1 KB · Views: 153
  • IMG_5519.jpg
    IMG_5519.jpg
    149 KB · Views: 153
Last edited:
To avoid these ads, REGISTER NOW!
OP
C

climb.on

Well-known member
Joined
Apr 13, 2015
Messages
501
Location
Minnesota
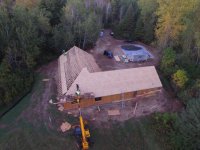
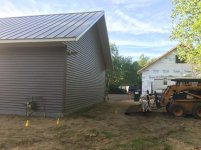
1st & 2nd pic start and end of the day of setting the wall panels for the shop.

3rd is current status. Shop on the left. House (garage) on the right.

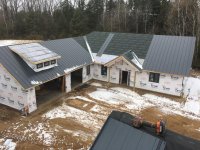
4th pic is on Sunday, starting the metal on the back of the shop roof. Same as on the house. The weather is freaking KILLING ME! It has snowed 4 times already and each of the last 3 Fridays, so I haven't been able to work the roof on the last several Saturdays. See the snow in the valleys of the house? That's why I'm on the shop. :mad: Just keep grinding...
 

Attachments

  • IMG_5848.jpg
    IMG_5848.jpg
    149.7 KB · Views: 177
  • IMG_5750.jpg
    IMG_5750.jpg
    149.4 KB · Views: 154
  • IMG_5659.jpg
    IMG_5659.jpg
    146.3 KB · Views: 139
  • IMG_5655.jpg
    IMG_5655.jpg
    150 KB · Views: 137
OP
C

climb.on

Well-known member
Joined
Apr 13, 2015
Messages
501
Location
Minnesota
Update on the Shed...

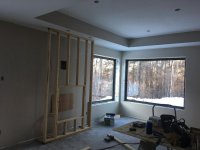
We are insulated and have heat! The old radiant tube heater is installed. Got it from my father in law. It's old but in good shape and is working well. Still need to plumb a vent for combustion air, but she's cranking out heat...and just in time for the sub zero temps coming in a couple days. Now I need to frame out the stairs to keep the heat in the lower level, but man it's awesome to think about moving on from the job site propane and kerosene heaters....breathing fumes, filling tanks, and generally freezing my **** off!

We have light! Lights are installed. Separate thread on lighting is HERE. I am pretty damn happy with the result.

Next is the floor, compressed air, and garage door opener.
 

Attachments

  • light1.jpg
    light1.jpg
    144.1 KB · Views: 194
  • light2.jpg
    light2.jpg
    142.1 KB · Views: 179
  • light3.jpg
    light3.jpg
    145.6 KB · Views: 161
  • light4.jpg
    light4.jpg
    144.8 KB · Views: 154
Last edited:
OP
C

climb.on

Well-known member
Joined
Apr 13, 2015
Messages
501
Location
Minnesota
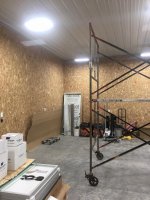
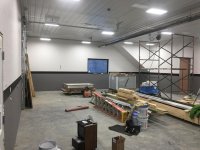
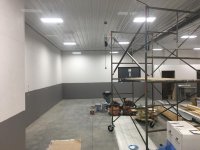
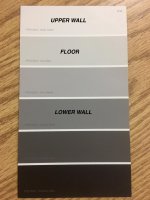
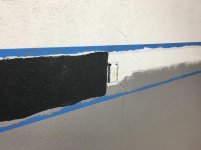
Quick update now that the shop walls are done. I planned to do a vinyl stripe but it just didn't stick well enough on the rough surface. I had a really rough surface...the rough side of OSB. I think it would have failed pretty quickly. So I had to paint it instead. I used a really slick technique (I read about here on GJ) for getting a good painted stripe, by painting the background color over the tape edge, before the stripe color. That way any bleed through is sealed off with it's own color. I still got a little bleed here and there, but if you saw how poorly that even the blue tape was sticking to the rough OSB you would be amazed how little bleed I got. I'm really happy how the walls turned out.
 

Attachments

  • 4.jpg
    4.jpg
    135.5 KB · Views: 125
  • 3.jpg
    3.jpg
    141.1 KB · Views: 132
  • 2.jpg
    2.jpg
    138 KB · Views: 134
  • 1.jpg
    1.jpg
    133.1 KB · Views: 107
  • IMG_6340.jpg
    IMG_6340.jpg
    144 KB · Views: 127
  • IMG_6342.jpg
    IMG_6342.jpg
    136.3 KB · Views: 126
Last edited:
OP
C

climb.on

Well-known member
Joined
Apr 13, 2015
Messages
501
Location
Minnesota
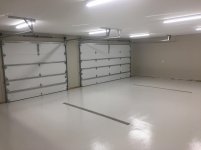
Next is the floor. I am doing the same 2 part epoxy and urethane topcoat, that I used in the attached garage. Here is how it turned out in the attached garage.
 

Attachments

  • 5.jpg
    5.jpg
    138.8 KB · Views: 172
Last edited:

papp101

Well-known member
Joined
Oct 14, 2012
Messages
91
Subscribed - great chatting with you today! Amazing build, I remember drooling over this thread earlier in the year.

Thanks again!:rocker:
 
OP
C

climb.on

Well-known member
Joined
Apr 13, 2015
Messages
501
Location
Minnesota
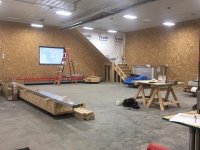
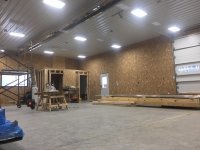
Been too long since I updated. I had intentions of doing this more often, just don't have the time. I'm both, working a full time job and building the house & shop. I just grabbed some random pics. Inside the shop is mostly done. I'm working on siding the house and shop now, then will start building cabinets and finishing trim and doors (for the house) in the shop once I have the siding done. I've got a few of my old restored machines in, Lista & Lyon cabinets w/ bowling alley top, and my SawStop table saw. The rest will get moved in either when they are needed, or when I have time.

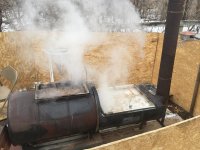
I did take a break for a couple days to make maple syrup this spring. That's my daughter grabbing the first drop. Made about 3 gallons this year - could have done much more with the long season. It was a great year for syrup, but I kept it short and...well you get the idea.
 

Attachments

  • IMG_6634.jpg
    IMG_6634.jpg
    86.2 KB · Views: 106
  • IMG_6631.jpg
    IMG_6631.jpg
    104.4 KB · Views: 104
  • IMG_6623.jpg
    IMG_6623.jpg
    114.4 KB · Views: 82
  • IMG_6697.jpg
    IMG_6697.jpg
    150 KB · Views: 92
Last edited:
OP
C

climb.on

Well-known member
Joined
Apr 13, 2015
Messages
501
Location
Minnesota
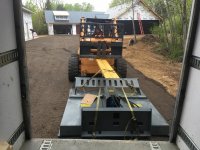
Getting class 5 down on the driveway was a big step. It was a a pretty mucky mess all spring with the epic snows we had. Even with the sandy soil, it got real old dealing with it everywhere. I didn't thin I would ever appreciate class 5 recycle so much. Asphalt will go between the house & shop later this summer. The concrete aprons are poured now too. If you look close I buried 2" PVC under every concrete slab. Just a little detail that took a couple house and $100 to ensure I can always have access to run electric, water or whatever under those slabs. That my wife running the skidder as we extract the brush mower out of my trailer. She's pretty cool to put up with my shenanigans. The last pic shows the shop apron all finished...if you can get past the oddly friendly dog & cat.
 

Attachments

  • IMG_6995.jpg
    IMG_6995.jpg
    152.6 KB · Views: 88
  • IMG_6931.jpg
    IMG_6931.jpg
    148.4 KB · Views: 80
  • IMG_6930.jpg
    IMG_6930.jpg
    152.2 KB · Views: 75
  • IMG_6929.jpg
    IMG_6929.jpg
    153.6 KB · Views: 73
  • IMG_6928.jpg
    IMG_6928.jpg
    153.4 KB · Views: 76
  • IMG_6906.jpg
    IMG_6906.jpg
    147.2 KB · Views: 72
  • IMG_7071.jpg
    IMG_7071.jpg
    147.1 KB · Views: 81
Last edited:
OP
C

climb.on

Well-known member
Joined
Apr 13, 2015
Messages
501
Location
Minnesota
And just so I feel like I am making progress, a few pics of some siding going up on the back of the house.

The last 2 pic opposite views across our wetland. You can just barely make out the house through the trees. I'll have to limb the trees and clear some brush to open up the view, but it will give some very nice sunsets and wildlife viewing.
 

Attachments

  • IMG_6956.jpg
    IMG_6956.jpg
    148.9 KB · Views: 76
  • IMG_7091.jpg
    IMG_7091.jpg
    153.4 KB · Views: 75
  • IMG_7092.jpg
    IMG_7092.jpg
    151.8 KB · Views: 76
  • IMG_7088.jpg
    IMG_7088.jpg
    154.4 KB · Views: 72
  • IMG_7050.jpg
    IMG_7050.jpg
    148.8 KB · Views: 86
  • IMG_6295.jpg
    IMG_6295.jpg
    127.1 KB · Views: 78
OP
C

climb.on

Well-known member
Joined
Apr 13, 2015
Messages
501
Location
Minnesota
Nice progress! :beer:

Man, it looks like a skid-steer is a great machine to assist in installing siding. :thumbup:

That platform I made to go on the skid steer has been a lifesaver! I use it constantly. Really helped get all my roofing to the eve then walked each piece up from there. Great for soffits & facia too.
 
Last edited:

iowa4x4dieselman

Well-known member
Joined
Dec 5, 2012
Messages
224
Next is the floor. I am doing the same 2 part epoxy and urethane topcoat, that I used in the attached garage. Here is how it turned out in the attached garage.

Garage Floor looks awesome!! what product did you use? I am in the process of a new house and would like to do this before we move in. Also I like the drain setup. I may have to add that to the idea list. Last night my contractor said he recommended a drain in the center but was thinking all the way across, whereas yours has them in the middle. but potentially not in the walkway when cars are parked in there.

What foam did you use underneath the slab?

Keep up the great work!!
 
OP
C

climb.on

Well-known member
Joined
Apr 13, 2015
Messages
501
Location
Minnesota
Garage Floor looks awesome!! what product did you use? I am in the process of a new house and would like to do this before we move in. Also I like the drain setup. I may have to add that to the idea list. Last night my contractor said he recommended a drain in the center but was thinking all the way across, whereas yours has them in the middle. but potentially not in the walkway when cars are parked in there.

What foam did you use underneath the slab?

Keep up the great work!!

Thanks! I used PPG Amerlock 2/400 and PPG Pitthane. I detail the floor epoxy in this thread and the product details and quantities are in post #27. I have been using my shop, normally now, for a year and my garage for about 3 months. My only complaint is the color I choose. It's too light. I knew that as soon as I put it down, but I just wasn't willing to take on the delay to change it. It looks awesome when it's clean but of course, it's not clean very often. Although, I suspect I keep it a lot cleaner than if it were speckled or a darker color and couldn't see the dirt as easily.

I like the trench drains in this orientation. I originally planned to have them at the garage door entrance, but the concrete guys talked me out of it. They said it would be pretty tough to get slopes right. No complaints having them this way. I feel like there is more flat floor (no level, but flat and sloped to the drain) with a trench drain than with one center drain where the floor is more like a funnel. My concrete guys jacked up the drain a bit during the poor in the shop so it's a little crooked, but it drains fine, just a little off. If you go this route, make sure you have them strongly secured before the pour.

I used XPS insulation under the slab, slab perimeter and the wing insulation for frost protection. I don't know the brand or recall the density...250 I think.
 
To avoid these ads, REGISTER NOW!
Top Bottom