To avoid these ads, REGISTER NOW!

The Manufacturing Mechanisms Garage

Dynames

Active member
Joined
Mar 28, 2014
Messages
27
Location
Torrance, Ca
It's the beginning of the year and I think it’s about time that I contribute rather than just lurk around in the forums. I will forewarn that this will be most likely lengthy and pictures will be sparse as I didn’t document everything as much as I would have liked. Hope that there’s a piece here or there that you find interesting or can incorporate. Alright, so here we go.
After saving, negotiating and having some extremely good luck, me and my wife purchased our first (and likely only) home in southern california a year and a half ago. A 3 bedroom , one and a half bath mid-century modern home that had a combination of wonderful original design (beautiful open beam ceilings!) , terrible original design (How did they cook in this kitchen...) and questionable "fixes" over the years. Work needing to be done to bring out the beauty that got covered over from literal decades of “upkeep”.
The garage ,on the other hand, was a blank slate.A two car garage ( 19’ x19.5’) with one light, one outlet and open stud walls. Compared to the storage closet that was housing my tools before, this was a giant step up (the realtors never understood why I was so adamant to see the garage).
My plan has been to make a prototype/manufacturing space. Not going to lie, the Tony Stark garage is pretty much my dream goal. So that means controlled environment, lighting, enough electricity to power everything, reliable internet, storage and work areas. Essentially an Electronics area, digital fabrication area, and a metal working/Fabrication area (woodworking to be done outside as much as possible.)
The house has priority for funds (We can’t live in the garage, well at least my wife doesn’t) so in the Time x Quality x Cost formula, Time is going to be the compensating factor for low costs and good quality.
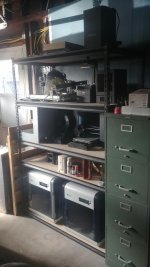
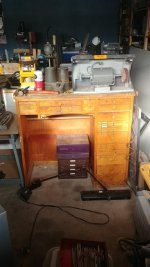
One thing to keep in mind is that I’ve been saving up for this day. And when I mean saving up, That means in tooling and machines. Alot of tooling. The following picture is moving day when I emptied out previously mentioned storage closet that was roughly 3’ x 6’.
attachment.php


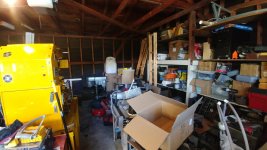
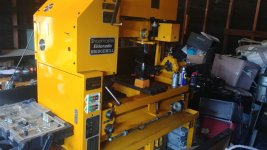
All this had to be stored in the garage while it was being worked on while being away from the walls. This problem got worse when my father went through his divorce and gave to me all of HIS tools and materials. I had also purchased an El Dorado CNC shortly after I had the house as the stars aligned so much I couldn’t pass it up.
attachment.php

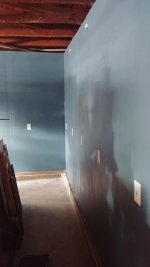
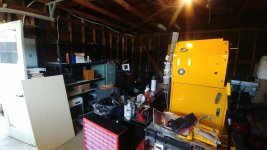
Here’s how the garage was initially.
attachment.php

attachment.php

attachment.php

attachment.php

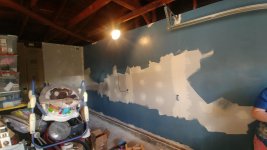
First priority was power. As I don’t do high voltage, I left this to the professionals. I got 120 amps pulled to the garage into a new box. Sadly, single phase was the best option for me so that ruled out some heavy machinery (though possible with a VFD conversion down the road). With the box in place, it was time for the wiring. Mapping out what tools I was going use, in roughly what area , resulted in 6 lines needing to be routed through the walls (Lights, Printer Farm, Electronics Bench, CNC, Misc Machinery area and the back wall which is earmarked as storage but in case I change my mind in the future) mostly being either 10 or 15 amp lines.
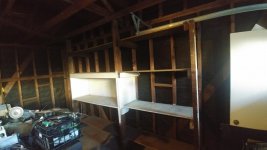
What little shelving I had courtesy of the previous owners got broken down and everything was shifted to the center of the garage.
attachment.php
 

Attachments

  • 20190427_080738.jpg
    20190427_080738.jpg
    83.7 KB · Views: 362
  • 20191002_074355.jpg
    20191002_074355.jpg
    98.3 KB · Views: 354
  • 20190929_132119.jpg
    20190929_132119.jpg
    131.5 KB · Views: 355
  • 20190929_132059.jpg
    20190929_132059.jpg
    148.2 KB · Views: 357
  • 20190929_132052.jpg
    20190929_132052.jpg
    150.5 KB · Views: 353
  • 20190929_132042_HDR.jpg
    20190929_132042_HDR.jpg
    129.4 KB · Views: 352
  • Message_1567976113290.jpg
    Message_1567976113290.jpg
    123.6 KB · Views: 359
To avoid these ads, REGISTER NOW!
OP
D

Dynames

Active member
Joined
Mar 28, 2014
Messages
27
Location
Torrance, Ca
No Pictures of the wiring process but I can safely say that I went from two outlets to ~40 outlets. Each line with GFCI outlets to make sure everythings in compliance. 10 of the outlets were for the lights. I didn’t want to hardwire the lights so I installed outlet boxes near the top of the wall to give me flexibility. Hopefully this is something that will pay off for me down the road.

attachment.php


Insulation was next. R-19 rated insulation was installed between studs. Installation wouldn’t have been so bad if I wasn’t doing it in the middle of summer. The coveralls and gloves did not help with the heat problem. Pneumatic nail gun was a god send for this project.
Finally drywall! It was probably 6 months by the time I got to this point. Learned very quickly that if mudding was like frosting a cake, I should never frost cakes. This was one of the few things that I feel like I should have just paid someone do this for me. I could never get the skill right and all the sanding gave everything a fine layer of white dust which was not ideal.
Painting is my wifes forte so she helped put some color on those barren walls. While we were figuring out what should be the colors for our house (Moth grey and Cracked Pepper for the curious) I saw this blue and decided that it was the right color. It probably didn’t help that the paint color was called “Blueprint”.

attachment.php

attachment.php

attachment.php

attachment.php

attachment.php


The shelving was the next priority as digging through the mountain to find anything was something I did not want to continue. This was where the first of many Ikea hacks were used. I had a series of IVAR shelves that I had used in the apartment for books and in the storage room already. These were the perfect depth and height to maximize the wall space. A trip to ikea filled in the remaining wall length but some tweaking needed to be done to get all the usable space. To gain back the extra 2” of floor space caused by the concrete foundation and have the shelves be flush with the wall, I 3d printed adapters to have the IVAR legs connect to 2”x2” lumber with leveling feet.

attachment.php
 

Attachments

  • 20210103_120547.jpg
    20210103_120547.jpg
    108.3 KB · Views: 336
  • 20200321_161630.jpg
    20200321_161630.jpg
    88.6 KB · Views: 336
  • 20200321_161616.jpg
    20200321_161616.jpg
    35.5 KB · Views: 338
  • 20200321_161606.jpg
    20200321_161606.jpg
    37.6 KB · Views: 338
  • 20200201_142035.jpg
    20200201_142035.jpg
    82 KB · Views: 338
  • 20200130_160116.jpg
    20200130_160116.jpg
    103.7 KB · Views: 340
  • 20191013_102209.jpg
    20191013_102209.jpg
    134.6 KB · Views: 341
OP
D

Dynames

Active member
Joined
Mar 28, 2014
Messages
27
Location
Torrance, Ca
The back of the shelf rested on the concrete lip and the front has peg legs added to compensate for the height difference. Living in california means all the shelves were mounted to the wall securely.

attachment.php


I had been keeping an eye out for a flat file cabinet to use as a tool chest and found a great deal on one in the area. A three tier unit for $100 where I sold a tier (I liked that two tiers was essentially bench height) for $125. Money back in the garage fund!

attachment.php


The printer farm could finally be grouped together on shelving. I have a bad habit of picking up broken 3d printers for cheap and getting them up and running. If I can do so much with one 3d printer, I can do more with 8 right? right?

attachment.php


The electronics corner was next. Moving into the house resulted in alot of people donating furniture and items that were taking up space in their garage to be put in OUR garage. One of those pieces was a KALLAX two cube by 4 cube storage…. Thing. It was awkwardly sized standing up but was perfect for undertable storage once a $10 “AS-IS” countertop was put on top (I use the Ikea AS-IS section like a hardware store). Salvage the drawers and doors from our old ikea media center and now there was better storage options for the electronics.

attachment.php

attachment.php


I needed more workbench space so another donated ikea item was hacked on to the table. To be clear, the countertops and table tops for ikea are built very different. The countertops are a very dense particle board that’s thinner than the table tops and very heavy. The table tops are actually a core of honeycomb cardboard in a venier box, so light for its size and thicker for the honey comb to take additional loads without bending or warping. To have a smooth transition and level surface, 3d printing came to the rescue again. To combine the two, I 3d printed joints that compensated for the height difference as well as pre determined screw spacings to keep the two pieces lined up and tight even with a large load on the seam.

attachment.php


To support the other end of the table,I took a waterloo 5 drawer tool chest from my wifes late grandpa and put it back into use. It was on its last legs and was on the verge of being scrapped. The faded red wasn’t matching up for that corner, rust spots were starting to pop up and the wheels were completely shot so refurb time!
It’s still not completely done as house projects got me side tracked but the main body and some of the drawers have gotten the grind and paint completed. I removed the wheels as this was going to be in a fixed position. A wood frame was made and cut to match with the height of the tabletop. The black paint helps to transition the colors. The main unit was sanded down to bare and given a pewter hammer tone finish. The drawers are black except for the face which is the pewter hammertone finish. Additional storage for the cost of paint and alot of sanding and grinding, definitely within budget!
The corner was starting to finally together and just needed some shelving to pull it together. Ikea once again. Two floating shelves set at the height of two akromills storage boxes. It’s one of those things that makes me happy when I see it and means that that corner is finally 85% there.
attachment.php
 

Attachments

  • 20200913_140309.jpg
    20200913_140309.jpg
    142 KB · Views: 329
  • 20210103_120609_HDR.jpg
    20210103_120609_HDR.jpg
    71.2 KB · Views: 327
  • 20210103_115833.jpg
    20210103_115833.jpg
    126.4 KB · Views: 331
  • 20200327_112935.jpg
    20200327_112935.jpg
    73.5 KB · Views: 329
  • 20200325_161208.jpg
    20200325_161208.jpg
    66 KB · Views: 330
  • 20200325_160929.jpg
    20200325_160929.jpg
    107.4 KB · Views: 332
  • 20200202_092724.jpg
    20200202_092724.jpg
    116.5 KB · Views: 336
OP
D

Dynames

Active member
Joined
Mar 28, 2014
Messages
27
Location
Torrance, Ca
During this time, All the other machinery and work tops were finding a place to settle. I salvaged a Lab table from the trash next to my work. Sanded top and a urethane coat and it was good to go. Few months into the pandemic, my local sears was closing down and I was able to get a watchmakers table that was buried in a back room for $40 (as well as a whole assortment of polishing tools and watch parts). Another Item that I was keeping an eye out for to have as a lathe table.
attachment.php

With the additional work surfaces and a stand for the drill press, I made an island for fabrication. Nestled between the CNC and the storage shelves, it’s central to most of the tools and now needs to be optimized.
Next steps right now is to get everything sorted and to get better lighting. Going from one light bulb to two is a large improvement, but the lighting situation is the next big step to get done.
That gets to roughly now. I’ll be updating with projects and improvements as I go so i’m accountable to keep things going.
 

Attachments

  • 20200726_175836_HDR.jpg
    20200726_175836_HDR.jpg
    72.6 KB · Views: 331

loganb

ALLIANCE MEMBER
Joined
Dec 29, 2011
Messages
5,530
Location
Omaha, NE
Print farm, cnc, fab equipment, and probably no space for permanent car parking??? My kind of garage! Subscribed and excited to follow along here!

Any plans for enclosing and or insulating that ceiling or going to have a summer in it first?

Great work so far...keep it coming

Sent from The Garage Journal mobile app
 

LutzTD

Well-known member
Joined
Dec 31, 2011
Messages
3,673
Location
Lutz, Florida
looks great so far! I will be watching and curious to see the CNC mill in action, I have never seen that model before.

as far as 3phase, don't count it out. There are quite literally tons of old 3ph equipment out there cheap, most pro's don't want used (no warrantly, no depreciation etc), most non-pros don't have 3ph. Phase converters have come a long way and they are not too expensive, there are enough around that they come up on craigs quite frequently. If you can get a 10HP one then you are set.
 
To avoid these ads, REGISTER NOW!
OP
D

Dynames

Active member
Joined
Mar 28, 2014
Messages
27
Location
Torrance, Ca
Thanks everyone for the positive feed back!

Loganb - No real plans yet. Right now its doing a good job being my lumber yard from all the scraps left over from house projects. I did get a vent fan to be able to force the hot air out but it's not a priority right now. Don't really have the time to get it all done in one shot just yet. Though this might be winter me forgetting how hot it can build up...
Also I'm going through your thread right now. Good to see someone else having flat cabinets and a laser engraver in garage.

LutzTD - you and me both! Everything still turns okay but I haven't messed around with it since I got it. It's a 3 in 1 setup of Mill/Drill/Lathe so I should be able to do CNC Turning operations as well as the CNC Milling operations. I'm still hesitant on how rigid it is but I think for my current and future goals (short of really taking off manufacturing wise) it should suffice. Plus for the $1000 I got it for, that's a pretty cheap entry into mid size cnc.

californiamillghia - sadly no. 110v was the only option I had. Not sure how thats going to work out if I get an air conditioner for the house....
 

loganb

ALLIANCE MEMBER
Joined
Dec 29, 2011
Messages
5,530
Location
Omaha, NE
120V to 240V transformer could help solve the voltage problem....but may run out of amps. Really depends on how many amps of headroom you have available. If you've only got 120V....makes me guess there isn't a ton of extra supply there
 

californiamilleghia

Well-known member
Joined
Apr 11, 2020
Messages
537
Location
SoCal
I am about 5 miles from Dynames house and have 110v and 220v

my 220v was added for an electric clothes dryer sometime in the 1950s I think ,

There is no plug in the kitchen for an 220v electric stove ,

There are areas around here where the tract homes were built "all electric"
 

LutzTD

Well-known member
Joined
Dec 31, 2011
Messages
3,673
Location
Lutz, Florida
I am about 5 miles from Dynames house and have 110v and 220v

my 220v was added for an electric clothes dryer sometime in the 1950s I think ,

There is no plug in the kitchen for an 220v electric stove ,

There are areas around here where the tract homes were built "all electric"

definitely an obstacle for a shop, I wonder if they could change the step down transformer for his house, but then a new breaker box etc, etc. bummer
 
To avoid these ads, REGISTER NOW!
Top Bottom