To avoid these ads, REGISTER NOW!

The Shepherd's Wrench Garage

Makoto

Well-known member
Joined
Jun 24, 2012
Messages
640
Location
Houston, Tx
Well, Its about time to start documenting my new build. We got a new house built in 1980 and this time the garage is a 2.5 so there is plenty of room for something I've always dreamed of owning...


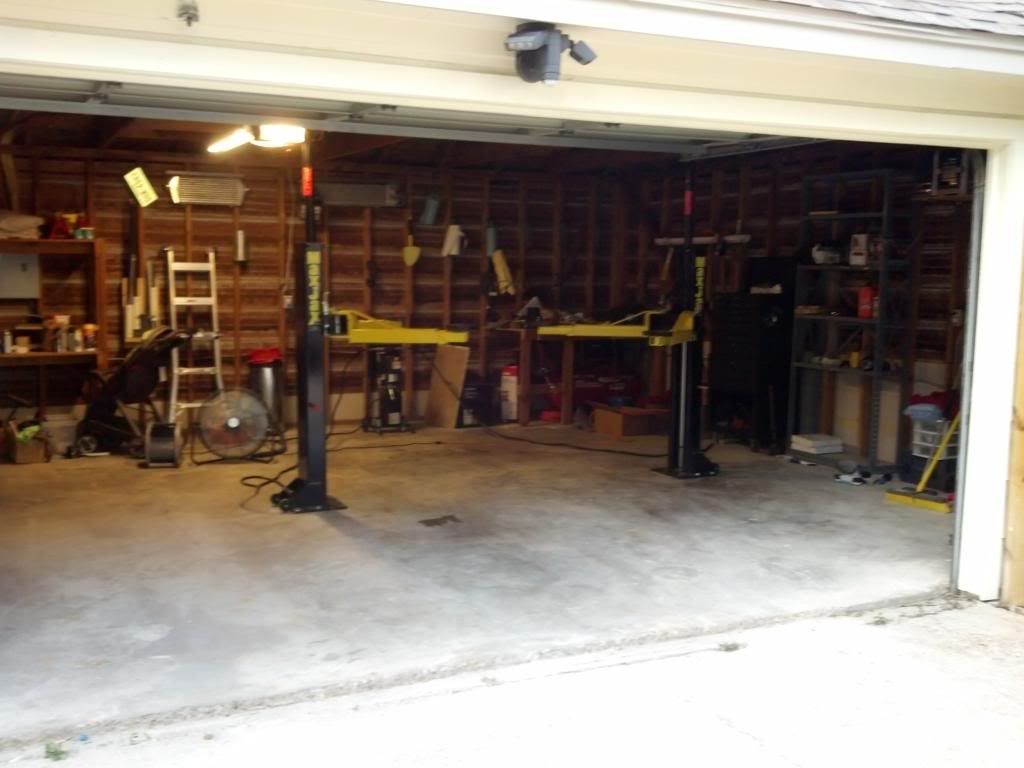
Thus the garage build has been officially kicked off.

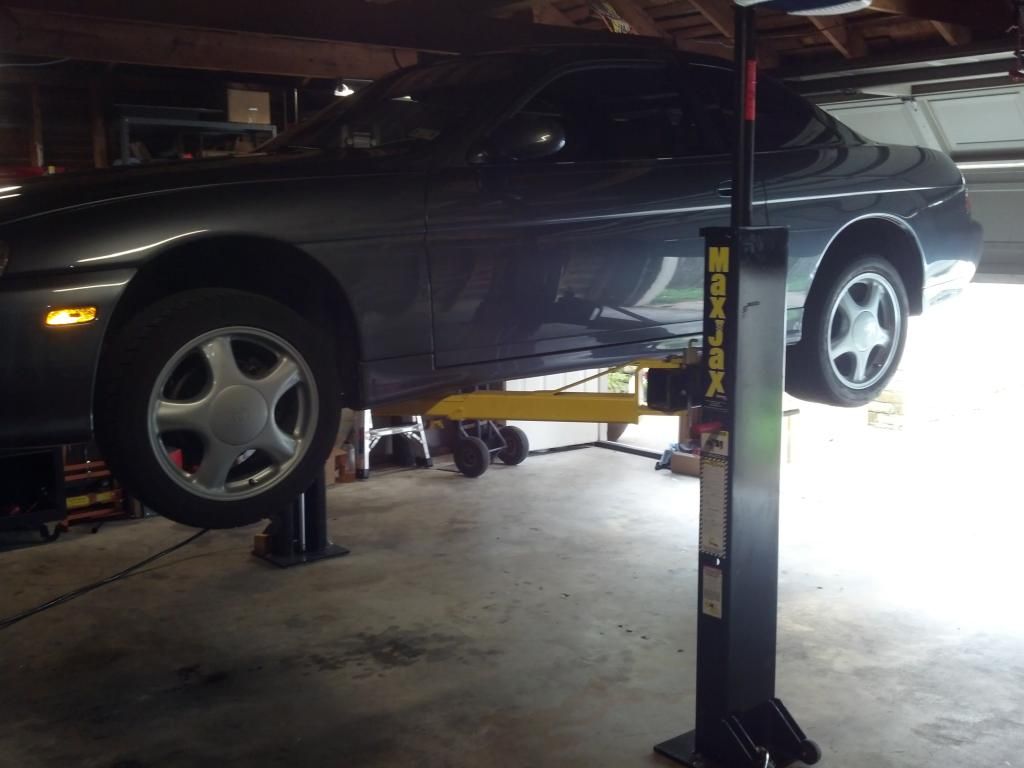
Here is my maxjax install:

See the drill? Get that from Home Depot. costs about 60 bucks for a day with the 2 bits you'll need (5/8 and 7/8)


I did my middle rear bolts first to line up my columns. Get a 12 or 16 lb sledge to make this easier. Also pick up a few sacrificial bolts in case you're clumsy like me. Just in case.

IMG_20140621_111233_442_zpsqnr8nmeb.jpg.html


First anchor done. I aligned the column with one wall to keep it square then made the other column square to the first.

IMG_20140621_113132_251_zps0hxvzsb8.jpg


Protip: get some PVC pipe to center the first 2 bolts. This way you'll have about an 1/8 inch tolerance around each bolt for easy installation.

IMG_20140621_120131_790_zpsa2pktgfc.jpg.html


Like this:

IMG_20140621_120144_276_zpsoh5e0mqx.jpg


now make the other column square to the first one. I set the distance at 122 inches.

IMG_20140621_120213_069_zpsygmudbti.jpg


This is important. you want to blow out the holes but thats really dusty. Do this:

Place a big fan behind you to push the dust away
Take some piping and tape a rod to it, this is so you can hold the pipe in the hole to push out all of the dirt.

IMG_20140621_122447_944_zpsoxltqk0y.jpg


you hold the tip of the rod sticking out to keep the pipe at the bottom of the hole. its pretty cool to watch, too.

IMG_20140621_122457_621_zpsxzscpedk.jpg


Second one done, now make em square.

IMG_20140621_131202_483_zpsu4spqcbi.jpg


After this I used the 7/8 bit in each hole to make my first marks. This is to dig out a little crater so the 5/8 pilot bit will center itself. It worked like a charm.

The hardest part was setting the bolts probably mostly because I kept trying to pull them up to a certain depth like the instructions said. most of them are about a quarter inch lower than the surface instead of the recommended 1/8" so I might just get some slightly longer bolts just to be safe.

Next up: roof vent, lights, and walls. I'm thinking of using steel siding for the interior walls so that I can just unscrew them when I want to insulate the walls later.
 
To avoid these ads, REGISTER NOW!
OP
M

Makoto

Well-known member
Joined
Jun 24, 2012
Messages
640
Location
Houston, Tx
Finally making some real progress. Today I installed a couple more T8 light fixtures, relocated the workbench and the air reel.

The maxjax works great. I think I want to eventually get a longer hoses made so I can run them from the ceiling.

IMG_20140630_161731_431_zpsroeenzk0.jpg


This is the view from the side door. Its a clear path, I think I may leave this column up permanently since it doesn't really get in the way.

IMG_20140630_162415_728_zpsm6ouqa0n.jpg


from the workbench
IMG_20140630_162358_446_zpszys6dcfs.jpg


Plenty of height to do most things with the door up. I need to lower the door to go the full monty.

IMG_20140630_161802_211_zpsm97esk6y.jpg
 
OP
M

Makoto

Well-known member
Joined
Jun 24, 2012
Messages
640
Location
Houston, Tx
Here's a better pic from outside showing the layout. there really is plenty of room to do anything. I need some sheetrock in a bad way.

IMG_20140630_203306_831_zpsrxzykkwu.jpg
 
OP
M

Makoto

Well-known member
Joined
Jun 24, 2012
Messages
640
Location
Houston, Tx
I wasn't happy with the clearance above the lift area so I moved the joist over a few feet towards the center. I'll be doubling up on all the other joists before I do the ceiling.

IMG_20140719_132701_349_zpsql6q8dt9.jpg


When I do the ceiling it'll have a center portion inset of about 8 inches.

This is where I moved the joist to. I sandwiched some 2x4's and screwed/nailed them all together to hopefully make the pair stronger than the sum of their parts.

IMG_20140719_132712_836_zpsj4nj8hsi.jpg


I'm limited to how far the door can go up with a car on the lift, even lower if its a car with a wing like a supra.

IMG_20140719_143920_842_zps469rpele.jpg


This is the spacer I made to move the garage door opener off center make room for the maxjax piston at full height.

IMG_20140719_132634_909_zpsehimdfna.jpg


ahh full lift height.

IMG_20140719_143932_072_zpstrhjz9tu.jpg


and the clearance up top

IMG_20140719_143956_893_zps0cwiw7xt.jpg
 
Last edited:
OP
M

Makoto

Well-known member
Joined
Jun 24, 2012
Messages
640
Location
Houston, Tx
Finally starting to get things a lot more organized. I know it still looks crappy, it'll be that way till I can get some cabinets and sheetrock.

IMG_20140927_162524_164_zpsgovxi2fn.jpg


I made a little cart for all my woodworking tools to keep them out of my mechanic tools.
IMG_20140927_162708_872_zpsqsmexeic.jpg


IMG_20140927_162645_575_zpsg0qlavzu.jpg


IMG_20140927_162602_537_zpscvm15zbh.jpg


I hacked up the big 6 foot wide shelf and made this 3 foot wide one that actually utilized the space effectively.

IMG_20140927_162621_738_zpsq1qszjcq.jpg
 
Last edited:
OP
M

Makoto

Well-known member
Joined
Jun 24, 2012
Messages
640
Location
Houston, Tx
Its hard trying to restore a car and build a garage at once so ya gotta go little by little. well, us poboys gotta go little by little, anyhow :)

I've always wanted to do this. I hid the outside sensor for the garage inside the wall. I'll cover it with a plate and lexan or something. sweeping around those suckers has always been annoying.


My wife was scratching her head at all the plugs. a few bucks of overkill is gonna be handy someday.


I moved that 3 gang switch from its terrible location to a more suitable one by the garage door opener.

 
Last edited:

Marvin Thighblaster

Active member
Joined
Oct 6, 2014
Messages
38
Location
NSW Australia
What a great space - it's going to look awesome once it's sheeted but don't sweat on that as it still looks beaut at the moment. Having those extra power outlets will certainly come in handy when lugging that MIG around your shed ;)

Silly question - if you wanted to put a Supra with the high wing on the lift, why not back the car in the garage so the (lower) nose is at the door end? Sorry if that's a really dumb question - we don't have those types of lifts in Australia.
 
OP
M

Makoto

Well-known member
Joined
Jun 24, 2012
Messages
640
Location
Houston, Tx
What a great space - it's going to look awesome once it's sheeted but don't sweat on that as it still looks beaut at the moment. Having those extra power outlets will certainly come in handy when lugging that MIG around your shed ;)

Silly question - if you wanted to put a Supra with the high wing on the lift, why not back the car in the garage so the (lower) nose is at the door end? Sorry if that's a really dumb question - we don't have those types of lifts in Australia.

With the door down it all clears just fine, the wing isn't as high as the roofline. My only real issue is getting things like trucks on it because they are so tall. I'm considering getting a quote to raise the ceiling up to 10ft (its about 9ft in the cutout I have) and if the whole ceiling is 10ft then I can make the garage door be higher allowing for full lift height with the door up.

as it is its worked out pretty well. It isn't often that I need to get the car higher than a couple feet so I might not bother with all that at all.

I got time to roll that around though :)
 
OP
M

Makoto

Well-known member
Joined
Jun 24, 2012
Messages
640
Location
Houston, Tx
I decided I'm tired of tripping over the maxjax hydraulic lines. I also decided that since I haven't moved my right post since I installed it I can just mount the pump to that sucker.

IMG_20141122_154426_879_zpsjnngpgag.jpg


IMG_20141122_154412_923_zpsqhttprqi.jpg


Here's the jist of what we're goin for.

IMG_20141122_164124_353_zpsmy4kdzq4.jpg


IMG_20141122_170705_448_zpsfoidxwxn.jpg


backside before i smooth it out with body filler.
IMG_20141122_164213_501_zpswbadyxdp.jpg
|

Inside of frame.

IMG_20141122_164203_019_zpsclpsypal.jpg


Just need to weld a strip of angle iron to the post and have a shorter line made for that side. Then its a little finishing to make it all pretty like.
 
OP
M

Makoto

Well-known member
Joined
Jun 24, 2012
Messages
640
Location
Houston, Tx
I added a 45 degree brace to keep it from flexing too much.

IMG_20141123_153430_032_zpshj6ydz6c.jpg


IMG_20141123_153414_362_zpsjsrb2vrt.jpg


IMG_20141123_153356_638_zpsdkwje1s6.jpg


Everything is all tacked up. I ran out of time this weekend so I'll have to get some good beads around those flanges later on. All I need now is to have the short hydraulic line made and a few 90 degree fittings.
 
OP
M

Makoto

Well-known member
Joined
Jun 24, 2012
Messages
640
Location
Houston, Tx
Here she is bolted up. plenty of walkin room. Hopefully today napa can make me the 5 foot hose I need and I can find a couple 90 degree 3/8 npt fittings.

does anybody know if I can use regular home depot brass fittings for these high pressure hydraulic lines? those pressures are kinda scary.

IMG_20141126_133049_061_zpsk5tk4gh4.jpg


IMG_20141126_132954_633_zpsgwtnhy3g.jpg


IMG_20141126_133057_639_zps9h5wnndk.jpg
 
To avoid these ads, REGISTER NOW!
OP
M

Makoto

Well-known member
Joined
Jun 24, 2012
Messages
640
Location
Houston, Tx
everything works so far with no leaks! i just need one of these to get that line pointed upwards instead of out:

DV_WebLarge_P_25791.jpg


IMG_20141126_205826_882_zpsybnuj7mv.jpg


I'll do bondo and paint to clean everything up after that fitting gets here and installed.
 
OP
M

Makoto

Well-known member
Joined
Jun 24, 2012
Messages
640
Location
Houston, Tx
here's the line i ended up having made. 5 foot with a 90 on one end. this little thing was the pricey part: $103

IMG_20141126_172822_821_zpsy04glmrw.jpg


here it is installed before i route it all clean like.

IMG_20141126_205839_906_zps8ltlst1b.jpg
 
OP
M

Makoto

Well-known member
Joined
Jun 24, 2012
Messages
640
Location
Houston, Tx
haven't put a car on it but the system is bled and working.

IMG_20141129_213352_965_zpsmz1wke9q.jpg


hopefully i can paint the post and its new frame soon. im quite pleased.
 
OP
M

Makoto

Well-known member
Joined
Jun 24, 2012
Messages
640
Location
Houston, Tx
sorry for the crappy pic and dirty floor but you get the idea. I still need to drill and tap some holes for a couple loops to get those lines looking pretty.

IMG_20141202_210916_881_zpsam3lhxat.jpg
 
Last edited:
OP
M

Makoto

Well-known member
Joined
Jun 24, 2012
Messages
640
Location
Houston, Tx
those FMIC's are from 2 cars. one was my built 240sx (Ka24E-T) and the other was from an SR10 ram or viper, i can't remember. Lord willing I'll be boosting the SC someday but first she needs to retire from daily driving and get a 6-speed with an LSD. honestly the NA motor is great as is, its the auto i hate.

here are some pics of the way I'm hanging up the other hose.

IMG_20141202_210849_224_zps1sgbl9ih.jpg


I used the quick connect for 2 reasons. 1. its secure. that heaving fitting dropping down on a car is not something you want. 2. it keeps the fitting clean.

Sidenote: I removed the little plunger inside of it so it doesn't open up the hose once connected.
IMG_20141202_163001_746_zpsejnkdq5b.jpg
 
OP
M

Makoto

Well-known member
Joined
Jun 24, 2012
Messages
640
Location
Houston, Tx
swapped out the fuel pump on my mom's truck for her today.
I am SO happy with the mod. There is SO much room now, im not tripping over lines, and it takes like 2 minutes to put the other post up.

Today was a good day :)

IMG_20141206_195311_539_zpsjaqq3mnm.jpg


I hope to do insulation and sheetrock in the spring.
 
OP
M

Makoto

Well-known member
Joined
Jun 24, 2012
Messages
640
Location
Houston, Tx
Scored some free shelving from behind an HEB. They were damaged and filthy. An few minutes spent bending the back legs out then cleaning them up and i've got a near $200 set of shelves for free. When I get a set of 36x18x78" steel cabinets I'll have everything I need organization wise.

10943731_1537167129906051_1012168251407225927_n.jpg


slow but steady.
 
OP
M

Makoto

Well-known member
Joined
Jun 24, 2012
Messages
640
Location
Houston, Tx
I've been needing a decent paper towel holder and had this idea to make a steampunk/industrial contraption. The gears are from a honda push mower, the nut/cover is from a ford escape rear shock, and the rest is just srap i had lying around. yeah i know the welds ****. i was in a hurry and its not supposed to look perfect. think ratrod paper towel holder. i might clean it up later if i feel like it.

IMG_20150215_194031_050_zpsg8pxchue.jpg


IMG_20150215_194020_137_zps0pxcsi3o.jpg


mounted where it goes.
IMG_20150215_194344_695_zpsi4wyfbjy.jpg
 
OP
M

Makoto

Well-known member
Joined
Jun 24, 2012
Messages
640
Location
Houston, Tx
Can. not. wait. for. sheetrock.
IMG_20150216_184128_531_zpsbmwdubye.jpg


that mess in the corner is going into a big industrial steel cabinet as soon as my bonus comes in. Might even get the walls done, too.

IMG_20150216_184225_236_zpstbpaqmks.jpg
 

bonecrrusher

Well-known member
Joined
Aug 18, 2011
Messages
578
Location
Charlotte, NC
I saw one of those with a 2JZ engine in it and a giant turbo - it beat a Viper with Nitrous at a dragstrip many years ago - talk about a sleeper!
 
To avoid these ads, REGISTER NOW!
Top Bottom