To avoid these ads, REGISTER NOW!

Between 705 & 1200 SQ/FT The Texas Barn in PA

Workspaces between 705 and 1200 squarefeet.
OP
M

madison069

Well-known member
Joined
Nov 5, 2010
Messages
4,375
Location
Monroeville, PA
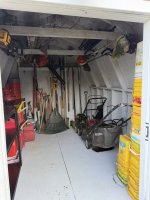
The shelves came in yesterday and I got them assembled and installed in the shed. I condensed the smaller gas cans down to one can as they were two cycle fuel and I needed multiple cans for different properties back in the days.
IMG_4313.jpeg
IMG_4314.jpeg

Now to organize the lawn tools on the back wall, bring the lawn stuff from the bunker into the shed, and continue to purge.
 
To avoid these ads, REGISTER NOW!
OP
M

madison069

Well-known member
Joined
Nov 5, 2010
Messages
4,375
Location
Monroeville, PA
Looks like your boy is definitely a “Tidy Cat” man! 😂
Funny thing is I collected those buckets from recycling days from the neighborhood before I got my boy. But he does use Tidy Cat, but from a cardboard box style while I transfer the litter into a plastic bucket just because I like the bucket more than an open cardboard box and the cardboard box style is cheaper!

Those Tidy Cat buckets are nice cause they are square and easier to store, I think. Along with those buckets are the ones I used for removing the bunker dirt, so they earned the right to hang around a little longer.
 
OP
M

madison069

Well-known member
Joined
Nov 5, 2010
Messages
4,375
Location
Monroeville, PA
After doi ng some small jobs, I got more yard stuff out of the bunker and in the shed. Now atleast I have it so in one place and I can organize it.

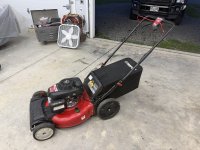
After that task I got two mowers fixed and cleaned to post for sale.
IMG_4333.jpeg
IMG_4339.jpeg


I got this 2 cycle lawnboy next as it’s my last mower to fix.

IMG_4211.jpeg
IMG_4212.jpeg

I haven’t repaired a 2 cycle mower before, so it will be interesting to see how this goes.
 
OP
M

madison069

Well-known member
Joined
Nov 5, 2010
Messages
4,375
Location
Monroeville, PA
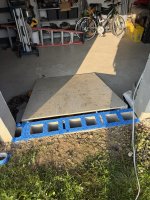
I’m sorry future self if you ever have to get this door sill plate out.

I called up the metal shop close by and was able to get a 1/4” plate cut to the dimensions of the bunker door sill.

IMG_4377.jpeg


I decided I would do anchors to hold the door sill in place. So I welded some big bolts and put nuts and washers on the end of the bolts.
IMG_4395.jpeg

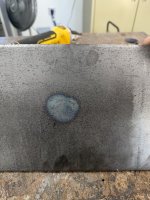
Weld looks ok.
IMG_4396.jpeg

Heat got through too.
IMG_4397.jpeg

Prepped the door sill, cleaned it and chipped any cement mortar that was on the surface. Then taped the top flat surface.
IMG_4400.jpeg

Here we are filled in. I left the holes that got the anchors a little low for displacement when putting the anchors in them.

IMG_4401.jpeg

Then removed the tape and applied loctite adhesive, overkill? Probably. I just hope I never have to remove it.
IMG_4402.jpeg

Just like that, the door sill is in place and pressed down with wood and a high lift jack.
IMG_4403.jpeg

Hopefully this doesn’t come back to bite me.

Once it’s cured I’ll work on the side frames, decided to just use pressure treated wood. Once I have it all framed out I’ll measure the opening and start designing the door and find the hardware for the door.
 
OP
M

madison069

Well-known member
Joined
Nov 5, 2010
Messages
4,375
Location
Monroeville, PA
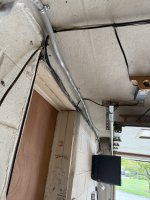
Got to love old cable installer jobs. Instead of removing the junk, they just put new on top of old.

Here is what I started with.
IMG_4382.jpeg
IMG_4383.jpeg

After pulling all of this cable off the wall, it was looking cleaner.
IMG_4387.jpeg

Here is the finished results.
IMG_4407.jpeg

When I get ready to run new electrical wires through this attached garage I’ll also clean up the walls and patch all of the holes with cement patch.

For now, this will hold over.

Why did I even do this now? Well the internet connection was really crappy on the other side of the house and the garage. So I wanted to run a new cat6 line from the router to the new location of the WiFi extender. Not much to write about there except I got a new wire fishing stick set for the job. Went with the Milwaukee 15ft glow in the dark sticks, works pretty slick!

Oh and I did get the air compressor switch wired up and working now since the WiFi was stronger in the garage. The switch that the remote relay uses can’t go far in the garage, guess it’s due to the concrete and ground. I can use it as long as the switch is above the air compressor location. But the app it comes with is pretty nifty and it works great once I got the internet network split into 5ghz and 2.4ghz instead of the Self Organizing Network and also turned on the internet of things network too.
Here is what you see on the app when using it to turn on the air compressor.
IMG_4415.png

This will allow me to see if the air compressor is on from the house and can be turned off without going to the bunker!

Tomorrow is cleaning day since it’s trash day Tuesday. Hope to toss more stuff to the trash guy.
 
OP
M

madison069

Well-known member
Joined
Nov 5, 2010
Messages
4,375
Location
Monroeville, PA
Much cleaner.

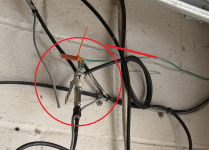
Did you retain the surge protector and ground at the cable entrance wherever it was relocated?

1786358076798.png
It wasn't even connected to the ground. Along with the RG6 cable isn't being used throughout the house since they installed the fiber optic line. When they did the fiber optic install, they disconnected all of this stuff and just left it on the wall.
 
OP
M

madison069

Well-known member
Joined
Nov 5, 2010
Messages
4,375
Location
Monroeville, PA
Much cleaner.

Did you retain the surge protector and ground at the cable entrance wherever it was relocated?

1786358076798.png
I should have also added that the TV and internet in the house have gone away with the RG6 cable, they are all connected via Cat6 cable or WiFi now. Hence why I relocated the WiFi extender to the side of the house close to the garage. So, if I even left the RG6 surge protector on the wall and actually hooked it to the ground rod outside, it wasn't going to do anything.

I'm trying not to be a hoarder, but I'll keep the surge protector and ground cable in my box of data/RG6 cable parts and nick knacks as a just in case deal.
 
OP
M

madison069

Well-known member
Joined
Nov 5, 2010
Messages
4,375
Location
Monroeville, PA
Today I did my usual meet up with a customer to sell a lawnmower at the Harbor Freight parking lot. While there I figured I would finally get a 1000lbs hydraulic lift so I wouldn’t have to keep picking up lawnmowers by myself or anything heavy and big out of the truck.

When I was talking to the clerk and getting ready to ring up, the clerk told the manager what I wanted. The manager said I got a lift marked down, come look at it.

So off I went to the back to look at it and when I saw the price I was surprised! All that was wrong was the box was damaged and a small dent/crease in the corner of the lift table.
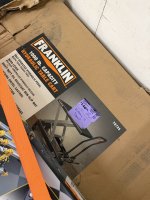
IMG_4432.jpeg

So I told him I’ll take it!
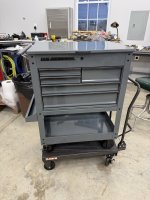
So he loaded it up along with the 5 drawer tool cart I wanted also and we got to the register to ring them up.

Well when he rung it up, the 25% coupon was being applied to both units and he said he couldn’t let the lift go any lower in price. So we figured out if we made the price $182 it would ring up close to $146 but it actually came up as $136 and so I said give me a minute and I’ll do the math to allow his system to hit $146. He said” it’s close enough” and let me have it for $136 instead of!
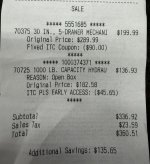
IMG_4433.jpeg

So I basically walked out of the store with the lift and tool cart for the original price of the lift!
Unless there was a coupon to make the 5 drawer cart $199, I also think they dropped the price on the tool cart some more cause I only knew of a 25% coupon for the cart! So instead of $74 off they made it $90 off!

So back at the Texas barn I got it all unloaded and started assembling them.

Here is the dent/crease on the lift.
IMG_4434.jpeg
A little hammer and dolly and it was gone almost.
IMG_4437.jpeg

Here is the cart on the lift.
IMG_4438.jpeg

It was nice to assemble the cart on the lift instead of getting on the floor or bending down.
IMG_4439.jpeg
IMG_4440.jpeg

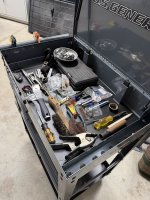
Now to make a platform on the lift for lawnmowers and sort some commonly used tools inside the tool cart! I’ll sell the plastic cart I’ve been using since I’d rather have the footprint of the shop free instead of using it for the cart.
 
To avoid these ads, REGISTER NOW!
OP
M

madison069

Well-known member
Joined
Nov 5, 2010
Messages
4,375
Location
Monroeville, PA
Nice deal on the lift. All lifts and carts are 25% off this week for inside track members and starting Friday will be for everyone. It seems they might have just advanced those for you if you don't have inside track.
Yep, I got inside track membership due to the amount of stuff I’ve been buying from there. Plus my store is currently 2 miles from the house so it’s close for quick needs.

I told my wife about this deal and she said, too bad you can’t get that kind of deal on the car lift. 🤦🏻‍♂️😂🤣
 
OP
M

madison069

Well-known member
Joined
Nov 5, 2010
Messages
4,375
Location
Monroeville, PA
HF being close is so bitter sweet, when you said 2miles, I had to look, mine is 2.2 miles! :p
I double checked on Google Maps and apparently it’s 1.2 miles from my house. Downside to it is Walmart just recently bought that mall property and so now everything is to be demolished. My understanding is Walmart has to pay for everyone’s relocation, so not sure when it will happen but harbor freight will be moving in the future.

So pros and cons to living so close to those stores.
 

Cdubu52

Well-known member
Joined
Sep 4, 2014
Messages
651
Location
Pittsboro, NC
We just got one close to me as well. Its been there about 6 months now and its 7 miles from me. I live between 2 towns, 6 miles from one and 7 miles from another. In other words, its right next door. We stopped by this weekend and my wife asked what did we do before HF opened. I reminded her that Lowes is 6 miles the other way and Amazon still delivers, but this has definitely been more cost effective! And it gives me a good excuse to stop by her favorite lunch spot to grab take out on Saturdays.
 
OP
M

madison069

Well-known member
Joined
Nov 5, 2010
Messages
4,375
Location
Monroeville, PA
Some updates on projects around here. The bunker door sill is holding place and is a lot nicer then stepping on those cinder blocks.
IMG_4449.jpeg

Will have to wait to put the side boards in place and then I’ll paint it all with black rustoleum paint.

Also took everything off the plastic cart. I put the plywood on the lift and used j-bolts with star nuts to hold the board to the lift top. It works pretty good and is easily removable if needed.
IMG_4450.jpeg
IMG_4451.jpeg

Took all of the tools off the cart, I need to sort this stuff and add more to the tool mechanic cart.
IMG_4452.jpeg
IMG_4453.jpeg

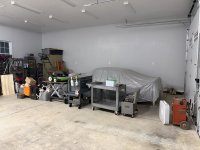
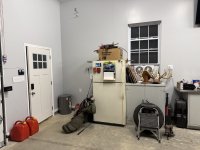
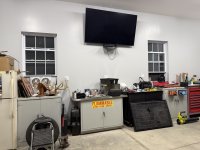
I spent a good bit of time cleaning and sorting the attached garage as it became a catch all lately. Need to do some more work in there but it’s semi cleaned and I hauled 2 contractor bags of trash out. If a tool was broke, it got tossed, if it was goods that Home Depot has and I didn’t need it for any upcoming projects I tossed it too. Feels good to keep tossing stuff.
 
OP
M

madison069

Well-known member
Joined
Nov 5, 2010
Messages
4,375
Location
Monroeville, PA
Some progress in the Texas barn, this area between the camaro and the wall was full of stuff like siding, metal, wood, left over project materials and so on. I was able to get this area cleared out and got the material relocated to their semi home. Still need to build a vise stand for this vice.
IMG_4461.jpeg
IMG_4462.jpeg

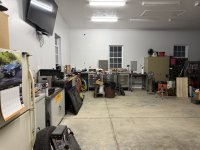
Here’s the state of the rest of the garage. I got a wall cabinet coming that matches the wall cabinet that is on the bench right now. They will go to the right of the tv wall. But I need to sort through this stuff and toss what’s no good and group it into piles to be stored together.

IMG_4463.jpeg
IMG_4464.jpeg
IMG_4465.jpeg
IMG_4466.jpeg
IMG_4467.jpeg
IMG_4468.jpeg

Yes it’s a mess, but it’s been a process of sorting, trashing, and relocating everything.

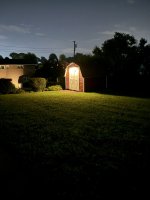
To end the thread here’s a night shot of the shed with its solar light.

IMG_4470.jpeg
 
OP
M

madison069

Well-known member
Joined
Nov 5, 2010
Messages
4,375
Location
Monroeville, PA
It's time to flip the Calander!

Enjoying the build and the Camaro.
Thanks! It seems like I haven't gotten a lot done, but I look back and realize I have only been in the house for 7 months along with was still taking care of another house and repairing everything. I have to remind myself that for one person, I've done a lot in those 7 months. My wife and kids want to do a bunch of cosmetic stuff in the house, but I keep reminding them that I need to do the wiring and most likely there will be demo going on in the basement and walls of the house soon. They are not happy about waiting.

I'll try to remember and do that tonight!
 
OP
M

madison069

Well-known member
Joined
Nov 5, 2010
Messages
4,375
Location
Monroeville, PA
Where'd you find that solar light?
Amazon is where I got mine. It’s nice and bright enough for the area in front of the shed. The photo makes it brighter then it is, but I think it’s perfect in person.

IMG_4474.png

It also has a little switch on the inside of the hood so you can turn it off if you don’t want it to come on every night but I like that it’s on when I go in the house. I don’t know how long it’s on though as I haven’t been outside before sunrise since I’ve installed it.
 
To avoid these ads, REGISTER NOW!
Top Bottom