To avoid these ads, REGISTER NOW!

The Transformation

roadracer10

Well-known member
Joined
Feb 12, 2012
Messages
51
Location
NE Oklahoma
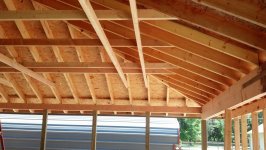
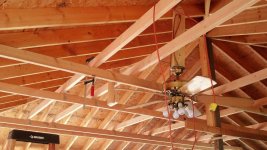
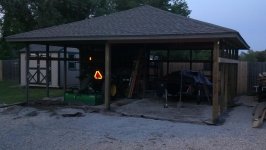
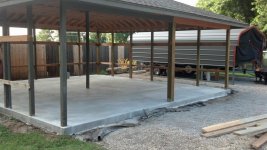
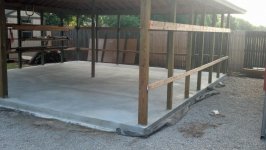
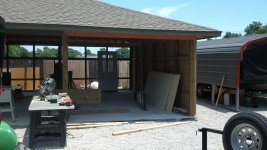
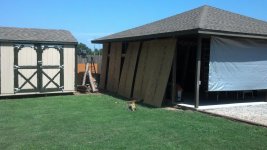
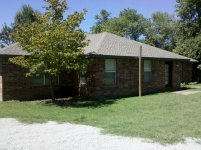
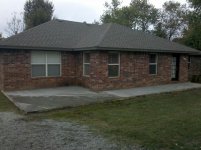
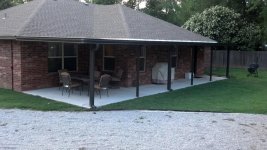
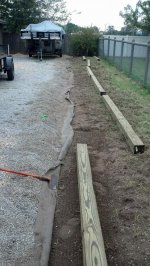
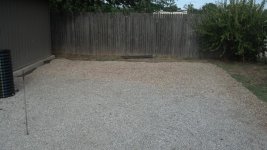
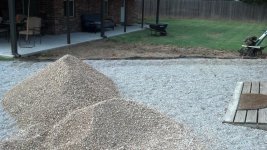
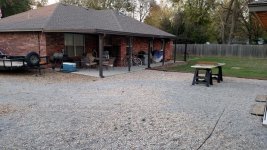
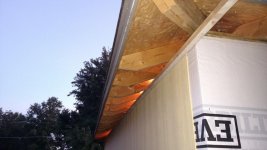
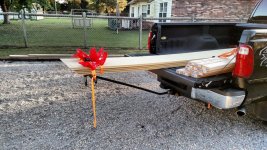
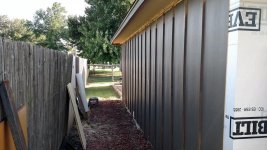
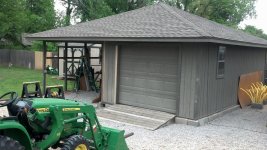
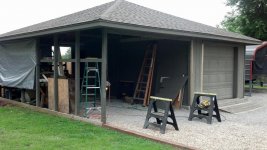
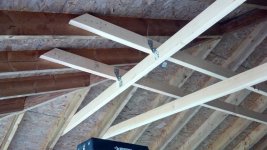
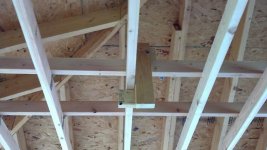
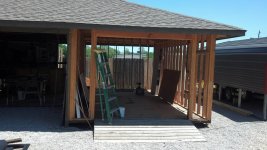
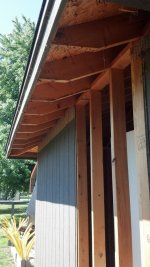
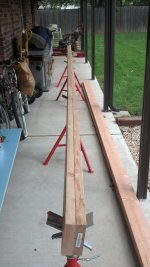
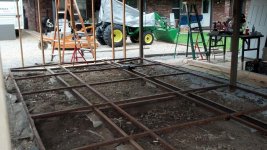
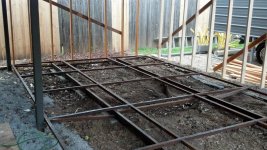
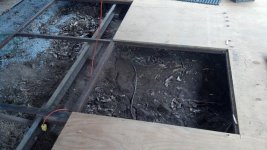
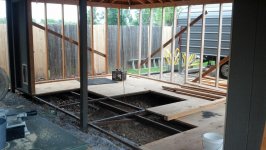
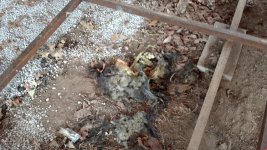
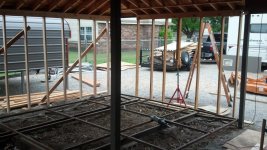
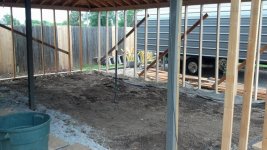
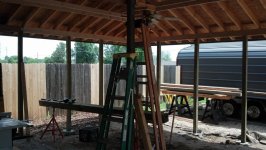
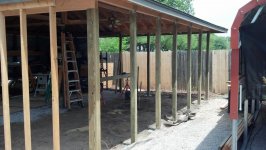
So as usual the first post starts out been lurking around forever but now its my turn. Been in the house for 5 years now and finally getting around to doing this. I'm no construction guy but I think this has turned out well, and surprisingly like I thought it would when we found this place. I wanted more space, for a bigger shop of course, but we love the house and decided I could make this work. 1/2 acre in a great neighborhood, the building is 24X24. The north side is a open 12X24 carport, the south is 12X24 enclosed on a raised floor. Not sure why it was done this way. Seemed to be well made, traditional framing on the raised floor. Ill update as fast as I can, but I'm slow on the computer
 

Attachments

  • CAVE 1.jpg
    CAVE 1.jpg
    144.7 KB · Views: 330
  • CAVE 2.jpg
    CAVE 2.jpg
    145.4 KB · Views: 317
To avoid these ads, REGISTER NOW!
OP
R

roadracer10

Well-known member
Joined
Feb 12, 2012
Messages
51
Location
NE Oklahoma
OK so the plan. Remember I'm no construction guy so my terms might not be exact. I'm going to support the enclosed side at the ends of the 2x6 rafters(where the soffit is) on three sides with temporary walls. When it gets supported I will tear out the walls and floor and go back with 4x4s supporting doubled 2x6 beams. then the south side will match the north and it will be like a 24x24 pole barn. With the hip roof the center post will stay for now. Since this is major surgery on this building I wanted to do as much as I could to keep it solid. So first I wanted to tie the hip roof together.
 

Attachments

  • CAVE 3.jpg
    CAVE 3.jpg
    82.4 KB · Views: 191
  • CAVE 4.jpg
    CAVE 4.jpg
    76.4 KB · Views: 174
  • CAVE 5.jpg
    CAVE 5.jpg
    116 KB · Views: 173
OP
R

roadracer10

Well-known member
Joined
Feb 12, 2012
Messages
51
Location
NE Oklahoma
I'm doing/did 95% of this by myself so I came up with this to help hold up the 2x4s. When that was done I removed all the blocks around the base of the enclosed side. We had put those in to keep our kids (labs) from digging under the building
 

Attachments

  • CAVE 6.jpg
    CAVE 6.jpg
    99.3 KB · Views: 143
  • CAVE 7.jpg
    CAVE 7.jpg
    89.2 KB · Views: 140
  • CAVE 8.jpg
    CAVE 8.jpg
    153.3 KB · Views: 143
OP
R

roadracer10

Well-known member
Joined
Feb 12, 2012
Messages
51
Location
NE Oklahoma
OK next up was to remove the sheeting/siding from the enclosed side. Also the garage door. Worked out well, did minimal damage to siding and sold it and the door on CL
 

Attachments

  • CAVE 9.jpg
    CAVE 9.jpg
    136.8 KB · Views: 173
  • CAVE 10.jpg
    CAVE 10.jpg
    121.2 KB · Views: 126
  • CAVE 11.jpg
    CAVE 11.jpg
    150 KB · Views: 136

ddawg16

Well-known member
Joined
Jul 11, 2008
Messages
21,005
Location
S. California
Welcome....

How about at least telling us what state your in. I'm guessing east coast...FL?

Nice start. And, your right.....what you have looks good.
 
OP
R

roadracer10

Well-known member
Joined
Feb 12, 2012
Messages
51
Location
NE Oklahoma
OK so here is a couple of pics of the beam I made out of 2x6s. The third pic is of the first temp wall in place on the south side.
 

Attachments

  • CAVE 12.jpg
    CAVE 12.jpg
    147 KB · Views: 154
  • CAVE 13.jpg
    CAVE 13.jpg
    148.3 KB · Views: 152
  • CAVE 14.jpg
    CAVE 14.jpg
    152.5 KB · Views: 174
OP
R

roadracer10

Well-known member
Joined
Feb 12, 2012
Messages
51
Location
NE Oklahoma
Well I didn't really get specific pics of the other 2 temp walls before I started on the floor. They are obvious in these pics though. One the temp walls were up then I took down the framing and then the 2 layers of plywood on the metal frame.
 

Attachments

  • CAVE 19.jpg
    CAVE 19.jpg
    156.3 KB · Views: 122
  • CAVE 18.jpg
    CAVE 18.jpg
    157.1 KB · Views: 143
  • CAVE 16.jpg
    CAVE 16.jpg
    151.1 KB · Views: 129
  • CAVE 15.jpg
    CAVE 15.jpg
    151 KB · Views: 141
OP
R

roadracer10

Well-known member
Joined
Feb 12, 2012
Messages
51
Location
NE Oklahoma
Here is a pic of a surprise I found under the floor. For months there had been a lingering smell of skunk. I thought he was coming and going as there is undeveloped property behind my house. Well no, he made it under the floor and then didn't make it back out. Digging him out and disturbing the remains was horrible. the smell got 10 times worse and hung around for days
 

Attachments

  • CAVE 17.jpg
    CAVE 17.jpg
    161.7 KB · Views: 191
OP
R

roadracer10

Well-known member
Joined
Feb 12, 2012
Messages
51
Location
NE Oklahoma
OK so the first pic is the last one where the raised floor is still there. I was able to cut it into 3 24ft long pieces with just a sawzall. I was glad to not have to drag the torch out. I also got a little help moving them out between the studs of the temp walls. The last two the floor is gone and show nice views of the temp walls.
 

Attachments

  • CAVE 20.jpg
    CAVE 20.jpg
    155.4 KB · Views: 93
  • CAVE 21.jpg
    CAVE 21.jpg
    148.3 KB · Views: 93
  • CAVE 22.jpg
    CAVE 22.jpg
    155.1 KB · Views: 99
OP
R

roadracer10

Well-known member
Joined
Feb 12, 2012
Messages
51
Location
NE Oklahoma
So now that the old enclosed side is torn out I can start to rebuild. Double 2x6beams go in supported by 4x4s. Basically the south side will match the north and it will turn into a pole barn, kinda.
 

Attachments

  • CAVE 26.jpg
    CAVE 26.jpg
    151.7 KB · Views: 68
  • CAVE 25.jpg
    CAVE 25.jpg
    147.1 KB · Views: 70
  • CAVE 24.jpg
    CAVE 24.jpg
    143.4 KB · Views: 74
OP
R

roadracer10

Well-known member
Joined
Feb 12, 2012
Messages
51
Location
NE Oklahoma
I used 4x6s on the corners and in the front I put a 6x6 where the two header sections meet. I don't have a pic of that specifically.
 

Attachments

  • CAVE 27.jpg
    CAVE 27.jpg
    149.7 KB · Views: 87
  • CAVE 28.jpg
    CAVE 28.jpg
    150.3 KB · Views: 84

C_F

ALLIANCE MEMBER
Joined
Jan 21, 2005
Messages
9,675
Location
Utah...SNOW BLOWS!
For being no construction guy, I think you're doing a fantastic job so far! I'm sure it will turn out great, looking forward to more updates. :)
 
OP
R

roadracer10

Well-known member
Joined
Feb 12, 2012
Messages
51
Location
NE Oklahoma
Thanks

Here is a few more pics inside looking at the rafters. I initially wanted to do just enough to help tie it together while I did the work but also in hopes of being able to get rid of the center post. But the more I put up I realized it would be perfect for the ceiling. Then after MANY conversations with people more experienced than me I decided to leave it. So since it was staying I tied it in.
 

Attachments

  • CAVE 31.jpg
    CAVE 31.jpg
    148.5 KB · Views: 86
  • CAVE 32.jpg
    CAVE 32.jpg
    150.5 KB · Views: 85
  • CAVE 30.jpg
    CAVE 30.jpg
    147 KB · Views: 86
  • CAVE 29.jpg
    CAVE 29.jpg
    149.9 KB · Views: 89
OP
R

roadracer10

Well-known member
Joined
Feb 12, 2012
Messages
51
Location
NE Oklahoma
So this is it, as I referred to it in a earlier post as basically a pole barn. Next is to get ready for a slab. This is also when I really had to start thinking about siding, doors and all the exterior stuff. I hadn't really thought that far ahead because I was so concerned about just getting it to this point.
 

Attachments

  • CAVE 33.jpg
    CAVE 33.jpg
    152.6 KB · Views: 137
  • CAVE 34.jpg
    CAVE 34.jpg
    143.4 KB · Views: 113
OP
R

roadracer10

Well-known member
Joined
Feb 12, 2012
Messages
51
Location
NE Oklahoma
So you can see by the pics there was gravel on the left side and just dirt under the raised floor. So in preparation for a slab I am spreading the gravel all around. It had cloth under the that was kinda torn up so I took it out and used it (and the JD) to move the gravel. So the gravel got spread and packed.

I don't think I mentioned earlier but where I'm at in this project is about May. Well some of you may remember the record rain we had around this time. So between the weather and scheduling it took over a month to get my slab. those pics will be next. Thanks for looking
 

Attachments

  • CAVE 35.jpg
    CAVE 35.jpg
    152.4 KB · Views: 70
To avoid these ads, REGISTER NOW!
OP
R

roadracer10

Well-known member
Joined
Feb 12, 2012
Messages
51
Location
NE Oklahoma
Well the day finally came after many reschedules and lots of rain. I didn't get any pics of the rebar but there is a lot in there.
 

Attachments

  • CAVE 36.jpg
    CAVE 36.jpg
    152.1 KB · Views: 117
  • CAVE 37.jpg
    CAVE 37.jpg
    150 KB · Views: 102
OP
R

roadracer10

Well-known member
Joined
Feb 12, 2012
Messages
51
Location
NE Oklahoma
Well with the pad done its time to put some clothes on this thing, and this is where I got stalled a little. Debated metal siding, but I have never worked with it and the wife didn't like the idea. I wanted something nicer than just wood. Then after a trip to Colorado I wanted cedar, wanted it to look like a mining cabin. Priced the cedar and decided against it. So I finally decided on hardie board siding.
 

Attachments

  • CAVE 40.jpg
    CAVE 40.jpg
    152.2 KB · Views: 56
  • CAVE 39.jpg
    CAVE 39.jpg
    148.7 KB · Views: 59
OP
R

roadracer10

Well-known member
Joined
Feb 12, 2012
Messages
51
Location
NE Oklahoma
Did some reading and researching on the siding deciding if I was going to buy a nailer. What type, what brand etc. While doing all this I went ahead and started putting up OSB on the outside. So in this pic you can see I am getting started with this. I like the vertical look better than horizontal so I ended up with 4x8 sheets of hardie siding. You can see it in this pic along with the door.
 

Attachments

  • CAVE 41.jpg
    CAVE 41.jpg
    151 KB · Views: 90
  • CAVE 42.jpg
    CAVE 42.jpg
    147.1 KB · Views: 113
OP
R

roadracer10

Well-known member
Joined
Feb 12, 2012
Messages
51
Location
NE Oklahoma
So I did have a little help with the OSB and after that it got me thinking about my sheets of hardie siding. I wasn't sure when I was going to get any more help and I knew I couldn't handle those 4x8 sheets myself. Plus the siding is kinda bland. It has groves to simulate vertical siding but they are not deep and they are a foot apart I think. Just wasn't sure if that was what I wanted. Then I found my answer. Went to purchase the perforated soffit, 16'' by 12' pieces and then found the solid stuff. There it is, that's what I want. Decided to use the 16'' soffit as vertical siding and use 1x2 cedar strips where they meet. More pics to follow, thanks for following
 
OP
R

roadracer10

Well-known member
Joined
Feb 12, 2012
Messages
51
Location
NE Oklahoma
I thought I would show a few pics of the house and how it ties in with the shop. When we bought the house there was nothing really, no patio or cover. Also the gravel in the backyard was not edged or maintained. I have to use gravel due to lateral lines from the septic. Ok fist pic is when we bought, then the patio, then the cover.
 

Attachments

  • HOUSE 1.jpg
    HOUSE 1.jpg
    144.9 KB · Views: 77
  • HOUSE 2.jpg
    HOUSE 2.jpg
    106.1 KB · Views: 75
  • HOUSE 3.jpg
    HOUSE 3.jpg
    145.6 KB · Views: 95
OP
R

roadracer10

Well-known member
Joined
Feb 12, 2012
Messages
51
Location
NE Oklahoma
So you can see in pic three I cleaned up the grass edge but this made for odd mowing. Going to fix that. Also previous owner had a fifth wheel RV but only put down the gravel as far as the back axel.
 

Attachments

  • HOUSE 6.jpg
    HOUSE 6.jpg
    146.1 KB · Views: 62
  • HOUSE 5.jpg
    HOUSE 5.jpg
    149.2 KB · Views: 57
  • HOUSE 4.jpg
    HOUSE 4.jpg
    152 KB · Views: 58
OP
R

roadracer10

Well-known member
Joined
Feb 12, 2012
Messages
51
Location
NE Oklahoma
I wasn't able to find regular gravel in the size I wanted and clean so I just went for some river rock, looks good and adds some color. So now we fix the odd corner
 

Attachments

  • HOUSE 7.jpg
    HOUSE 7.jpg
    151.9 KB · Views: 44
  • HOUSE 8.jpg
    HOUSE 8.jpg
    154.4 KB · Views: 41
OP
R

roadracer10

Well-known member
Joined
Feb 12, 2012
Messages
51
Location
NE Oklahoma
Last two pics, are this week. Still have some stuff on the patio to get in the right place. No specific pic but I added the gravel under the trailer up to the house. In the second pic you can see the drive through gate in relation to the house and shop
 

Attachments

  • HOUSE 10.jpg
    HOUSE 10.jpg
    148.7 KB · Views: 68
  • HOUSE 11.jpg
    HOUSE 11.jpg
    117.1 KB · Views: 74
OP
R

roadracer10

Well-known member
Joined
Feb 12, 2012
Messages
51
Location
NE Oklahoma
OK back to the shop. Here is basically finishing up the OSB and then getting it wrapped
 

Attachments

  • CAVE 45.jpg
    CAVE 45.jpg
    149.2 KB · Views: 73
  • CAVE 44.jpg
    CAVE 44.jpg
    150.3 KB · Views: 72
  • CAVE 43.jpg
    CAVE 43.jpg
    150.4 KB · Views: 61
OP
R

roadracer10

Well-known member
Joined
Feb 12, 2012
Messages
51
Location
NE Oklahoma
So the opening on the left is going to be the door, at his point. I was still considering several options as far as garage doors. Two 10x7 garage doors, or maybe a sliding barn door hanging from under the soffit. Then I also got to thinking about natural light as I had no windows. Did I like where the door was, because I would be coming in from the yard. So the shop kinda stayed like it is in the last pic for awhile and I worked on siding on the other three sides.
 

jwhcars

Well-known member
Joined
Nov 18, 2007
Messages
756
Location
Central PA
Your patio turned out fantastic, it looks like it has always been that way. Your garage is coming along just fine.
 
OP
R

roadracer10

Well-known member
Joined
Feb 12, 2012
Messages
51
Location
NE Oklahoma
It was about this point in the build that I got some lights put up. I just went and got some cheap fixtures and put them up quickly as the main concern right now is the exterior. Took the 4x8 sheets back and picked up the first load of my siding material. They didn't have enough, so basically only got one sides worth.
 

Attachments

  • CAVE 46.jpg
    CAVE 46.jpg
    141.7 KB · Views: 65
  • CAVE 47.jpg
    CAVE 47.jpg
    56.2 KB · Views: 59
OP
R

roadracer10

Well-known member
Joined
Feb 12, 2012
Messages
51
Location
NE Oklahoma
I didn't want to have to hook up the trailer to go get 12' stuff so I thru this together and it worked like a champ. I did the back wall first so that I could mount a rack to store steel. I'll have to find that pic, it worked out well.
 

Attachments

  • CAVE 48.jpg
    CAVE 48.jpg
    151.3 KB · Views: 71
  • CAVE 49.jpg
    CAVE 49.jpg
    105.3 KB · Views: 73
OP
R

roadracer10

Well-known member
Joined
Feb 12, 2012
Messages
51
Location
NE Oklahoma
Well I got some work done and made some changes with no pics. Anyway, decided there was no point in the left garage door. With the patio and cover there is no way to back anything in there. So I moved the door and decided on a French door that gives some natural light. So the siding is up on the north and south sides and framing the door openings
 

Attachments

  • CAVE 51.jpg
    CAVE 51.jpg
    119.3 KB · Views: 44
  • CAVE 52.jpg
    CAVE 52.jpg
    146.8 KB · Views: 45
  • CAVE 53.jpg
    CAVE 53.jpg
    147.6 KB · Views: 49
To avoid these ads, REGISTER NOW!
Top Bottom