The Alternator that Won't Stop Fighting
I would have never guessed that when I switched from the Ford alternator to the GM alternator that I would cost me so much time, money, and cause so much frustration. When I'd installed this alternator a 3.5 years ago it seemed easy enough, unbolt the old alternator and bolt this one on, do a little wiring and go on my happy way. In a way it worked just fine, it spun, charged and all in all worked just fine. However, it would eat belts over time and the back of it hit the engine, or the side would hit the frame if it cleared the engine.
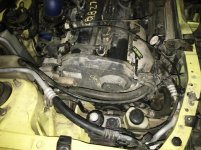
I decided it was time to fix the fitment issues and clean up the front of the engine a little at the same time. I wanted to move the alternator forward one grove on the crank pulley, to do that I needed to get a short water pump pulley and while I was at it I decided to also buy a nice alternator bracket. This is where things went down hill. I ordered the alternator bracket for a 302 by mistake which meant one of the bracket bolts wouldn't line up with the hole in the head. Also the water pump pulley hit the crank pulley. Simple enough I'll order a new smaller crank pulley and build a bracket for the alt. bracket to head bolt. Also the alt. bracket didn't line up with the now forward belt location. I bought longer socket headed cap screws and made spacers 1" longer than the ones that came with the kit. Here it is all mounted up:
View media item 58269
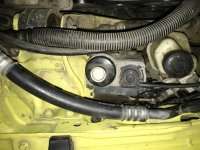
Here is a photo of the alt. bracket and in the upper left you can see the bolt which doesn't line up with the head:
View media item 58270
A better photo of the gap:
View media item 58273I have yet to finish that bracket as I just made a design and template this morning.
Also included in the kit was this spacer used for attaching the alt. to the adjuster rod:
View media item 58271
As you can see the holes don't line up, I ended up reshaping the radius by alt. and also reaming out the hole to make it fit:
View media item 58272
Another issue was the way the kit was designed I had to rotate the alt. 180 degrees from its original mounting location, but this made the wiring connectors on the wrong side. I solved this be taking the alt. apart and rotating the case. The last issue so far was now the bolt hole in the alt. on the pivot side was too small. Sigh, break out the drill and make the hole bigger. Now finely after 6-7 tries I should be able to mount all of this up once I have the new little bracket completed. Sometimes I wonder why I bothered in the first place. Then realize I love doing this stuff even it is gets frustrating at times.
Even though everything is disgustingly dirty and in need of cleaning and paint I'm not messing with it. The days are numbered for this engine and if I clean it I'm ensuring I'll either spring a leak and spray oil everywhere, or simply blow it up.
")
JB


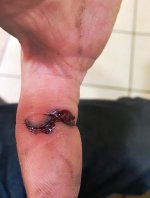
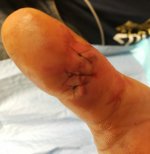
 Glad it didn't break or take that part of your thumb off, hard to hitch hike with a short thumb. Looks like its going to hurt for awhile, damn that's a shame when youre just trying to help someone.


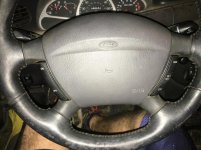
 The thumb is much better and other than being tender around the actual cut/tear it isn't really holding me back. If you have any questions on the S.A.S. feel free to ask, I'll explain my reasoning whether or not that is right I'll have to let others decide. Since you asked here are a few photos of my cobra.