To avoid these ads, REGISTER NOW!

The Watermans Garage - 2 Car Attached

mikey111k

Active member
Joined
Oct 6, 2011
Messages
32
Hi everyone. It’s my first time posting on this forum but I have been lurking around for a while (you can tell that some things I plan on doing came from other members garages – I hope they don’t mind). I moved into my first house in the beginning of 2011 and finally got around to working on the garage. I have slowly been working on it between other house projects. It is a 2 car attached garage that is 20’ x 20’ with 8’9” ceilings. By most standards the garage was not in horrible shape when we moved in but it wasn’t the ‘vision’ I had for my garage. I like to do just about anything on the water and need room to store some of the toys, such as paddle board, kite boarding gear, surf boards sailboat gear and fishing gear. The wife doesn’t want this stuff stored in the house anymore. I also want to make it somewhat of a shop for house projects, board building (I have been making some kite boards in a friends garage) and hopefully building a wooden kayak and skiff in the semi near future. My goal is to keep it as a functional garage, meaning that I want to park our two daily drivers in the garage and have room to get around them. To do this I decided that all storage had to be above head level and keep floor mounted/stored stuff to a minimum. As you can see from the pictures the garage was fully finished (drywalled and painted) but needed some work.

Here is what I had/have on my to do list:
- Patch and paint walls and ceiling
- Add shelving in back wall recess.
- Replace old tank water heater with a tankless heater.
- Make storage racks over garage door
- Move AC into attic.
- Make cut out’s in ceiling for paddle board and bikes.
- Make soffit storage on 2 walls
- Fold down work benches on north wall
- Insulate over garage and garage door
- Add AC
- Redo wiring and lighting.
- Epoxy coat the floor.

The list will keep changing as I continue the project but this is what I am thinking of right now. I have been working on the garage for a couple months. I will update as I keep going. It might be a little slow in progress but slowly but surely it will get done.

Here are a few pictures of what it looked like when we purchased the house.

View media item 16281
View media item 16280
View media item 16282
While moving in it was used as storage as we got situated. These show the rest of the garage before any work was done.

View media item 16283
View media item 16284
More posts to follow to get caught up with current progress.

Michael
 
To avoid these ads, REGISTER NOW!
OP
M

mikey111k

Active member
Joined
Oct 6, 2011
Messages
32
The next picture shows the new garage door opener and the early stages of hole filling and removal of unwanted lights, fans and hooks.

View media item 16285
The next two pictures show the overhead storage racks and the beginning of painting.

View media item 16286
View media item 16287
The next picture shows the cut outs for the recessed storage. The long cutout will be for the paddle board and the other two will be for bikes.

View media item 16288
Michael
 
OP
M

mikey111k

Active member
Joined
Oct 6, 2011
Messages
32
The next step was getting the attic ladder installed.

View media item 16289
Then i started removing the old electrical and roughing in the new stuff. I am going with a 60 amp sub panel that will feed 20amp outlets around the garage and all the lighting. This will also eventually feed the AC unit.

This picture shows the panel cut out along with the new water heater and my new tool chest.

View media item 16290
While i was in the attic doing the electrical i decided to do the compressed air line at the same time. I am not doing much for air. Just a portable 1 hp compressor with a 7 gallon tank that will be plumbed to a hose reel in the ceiling. I don't have much demand for air and i wanted a smaller portable compressor to use for projects around the house. The next picture shows the air line and location for plugs for the compressor.

View media item 16291
Next was the outlets that will be over the work benches.

View media item 16292
Michael
 
OP
M

mikey111k

Active member
Joined
Oct 6, 2011
Messages
32
More electrical work and painting.

Compressor area with outlets and plumbed for air. Along with shelving installed.

View media item 16293
Hose reel hung.

View media item 16294
Bench outlet and shelving.

View media item 16295
Started to rough in panel. At this point all i need to do is run the main power wire from my main panel to the sub panel. At that point i will get the inspection and close out the permit and turn on the power. It will be nice to get rid of the extensions cords running from inside the house.

View media item 16296
This pretty much gets us up to date. Im working on finishing up the electrical and starting on the frame work for the recessed storage.

Michael
 

A1an

Well-known member
Joined
Sep 25, 2010
Messages
1,095
Location
Tampa, FL
Looking good so far. I'm curious to see how this recessed storage turns out.
 
OP
M

mikey111k

Active member
Joined
Oct 6, 2011
Messages
32
Hi everyone. I made some progress so i figured i would post an update.

I finished up the electrical and had the final inspection and finally got to turn on the power to the garage. I have been working on getting the rest of the lights hung and have a few more to go. Below is a picture of the fully wired panel (with plenty of space for expansion - now i need my AC) followed by a picture of the east wall showing where i plan to keep my tool chest. The chest will be in between the two cars when they are in the garage. I also finished the painting on the east wall and got the cover plates put on.

View media item 16670
View media item 16671
Next i started in on finishing up the framework for the recessed storage.

View media item 16672
View media item 16673
Now that it was structurally sound i had to test it out and make sure the paddle board fit.

View media item 16674
View media item 16675
Next was insulation. None of the garage had insulation over it. So i bought some to start on the attic over the garage and to do the area over the recessed storage so that i could start to work on getting that area dry walled.

View media item 16676
View media item 16677
Next is dry walling and some more work in the attic. I need to finish the insulation over the garage and the whole attic needs a once over for the insulation. There are a lot on thin spots and areas with no insulation. This wont be a fun job. I am also going to wire in some permanent lights in the attic so i can see for this project and any future projects. I figured they would be nice to have.

Michael
 
OP
M

mikey111k

Active member
Joined
Oct 6, 2011
Messages
32
I have a question for everyone.

I am using some recessed lights for my soffit storage and will have a couple left over. So i was thinking of putting them in the recessed storage area. Below is a picture with two sets of different colored circles (green and blue). These are the two locations i have come up with so far.

The green circles are on the ceiling facing down and each one will be in between the three storage areas (not in the middle of the three bays), hopefully this makes sense. The problem i have with this is that i can not get the lights in the middle of the storage area length wise because of a rafter so they will be off set to one side. Also when you are using the lifts you will be looking right into the lights.

The blue lights are on the vertical wall and will also be in between the three storage areas. The recessed lights that i have are positionable so i was thinking of setting them low and pointing them up some. I thought this might make a neat affect but could also look kind of weird.

What do you guys think? Right now i only have two spare lights but if some one has a good idea for more lights i may be willing to buy more.

View media item 16684
Thanks
Michael
 
OP
M

mikey111k

Active member
Joined
Oct 6, 2011
Messages
32
I was finally able to finish up the attic storage. Next up is the soffit storage. Unfortunately i wont be able to completely finish the soffit storage until i move the AC into the attic which wont be able to happen for a while. Other then that i think i am going to pull down one of the overhead storage racks and consolidate all my material onto one side and make fishing rod holders on the other.

(pics are from a phone so they are not the best.)

View media item 17854
View media item 17855
View media item 17856
Michael
 
OP
M

mikey111k

Active member
Joined
Oct 6, 2011
Messages
32
Thanks guys. It was alot more work and took alot more time then i expected but at the end of it i think it was worth the effort.

Michael
 

takeiteasy

Active member
Joined
Dec 15, 2011
Messages
40
Location
WA
That storage belongs on the "best of garagejournal" thread. I know I've seen it before, but it is executed awesome here, especially with the lighting in there! Lol, I even pinned it on pinterest! I hope you don't mind :) I wanted to do the same with my bikes, but wondered about the handlebars...that's very simple solution to that problem!
 

Brian R

Well-known member
Joined
Dec 1, 2009
Messages
591
Location
Chestertown, MD
That in the rafters storage is slick! Watermans Garage - where you from? I live in TX but have a place on Chesapeake Bay where Waterman defines a job/way of life - crabbing/fishing/oystering on the Bay.
 
OP
M

mikey111k

Active member
Joined
Oct 6, 2011
Messages
32
Thanks guys. I wish i could take all the credit for this but it was first done by palsor1 for some kayak storage. I just took his idea and modified it to work for what i needed to store.

Brian R - I am from miami Fl. A 'waterman' has many different meanings depending who you ask. I believe it originally originated from Hawaii and has taken on different meanings. For me i have always been involved with water activities and boats (i lived on a boat for 15 years). It is self pro claimed but i thought it would describe what i wanted to do (store) in my garage.

Michael
 
OP
M

mikey111k

Active member
Joined
Oct 6, 2011
Messages
32
I finally made some more progress in the garage. I haven't had much time lately due to other house projects.

I removed one of the overhead storage racks and made some fishing rod holders.

View media item 21473
View media item 21472
I then started on the soffit storage. I need to get the AC moved into the attic so i can finish off the one side. I am at the point of test fitting some doors.

View media item 21474
View media item 21475
View media item 21476
View media item 21478
View media item 21477
Hopefully i will get some time soon to get some doors hung and maybe start dry walling the bottom of the soffit.

Michael
 
To avoid these ads, REGISTER NOW!
OP
M

mikey111k

Active member
Joined
Oct 6, 2011
Messages
32
Thanks guys.

rlwhitetr3b - Yes i did make the rod racks. I couldn't find any racks i liked for a reasonable price so i decided to make what i wanted and it ended up being cheaper then buying one and i got exactly what i wanted.

Michael
 
OP
M

mikey111k

Active member
Joined
Oct 6, 2011
Messages
32
I have finally been able to get some more work done. I installed a new door that goes from the garage to the house. I finished up the trim around the attic ladder. Got the AC moved into the attic. I made some board racks to store my surf/skim/snow/skate boards.

Board rack


I have the soffit storage just about ready to paint. I need to move the water heater up so i can finish the drywall in the corner and do some final sanding on the rest of the drywall.

Soffit 1


Soffit 2


Soffit 3


Soffit 4


Soffit 5


Soffit 6


Once i get the soffit stuff done im going to move onto making my fold down work benches and then epoxy the floor.

Michael
 

ihateimacs

Active member
Joined
Feb 22, 2011
Messages
32
Location
Weeki Wachee, Fl
when I first started looking at the pics I was wondering what in the world you were doing/thinking?! THEN I saw! Thats an awesome idea! Great job.
 
OP
M

mikey111k

Active member
Joined
Oct 6, 2011
Messages
32
Thanks guys. I got alot of great ideas from others on this forum.

I got the final sanding done on the soffit storage this weekend so hopefully i will be able to get some primer on it in the next few days.

Does anyone have a lead on where i can get some reasonably priced butcher block for my fold down benches? Everything i have found has been ridiculously expensive. If i cant find anything I am thinking that i will sandwich two sheets of 3/4' MDF together for the tops. With come clear coat i think it will look OK.

Michael
 

j p smith

Well-known member
Joined
May 22, 2013
Messages
1,213
Location
Glendale, Arizona
Michael on one of mine I was able to get a partial lane from a bowling alley. I think it is 12 feet long.
I can post a picture this evening if you want. Jeff
 

j p smith

Well-known member
Joined
May 22, 2013
Messages
1,213
Location
Glendale, Arizona
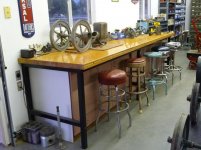
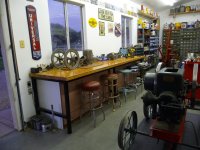
Hey Michael. Here are a couple of pictures of the bench. The Mauve cabinets came from a dental office remodel. I was able to turn them over and reverse the drawer slides to put the drawers on the bottom. I would like to put a aluminum edge on it. Jeff
 

Attachments

  • P1010097.jpg
    P1010097.jpg
    140.4 KB · Views: 159
  • P1010098.jpg
    P1010098.jpg
    140.8 KB · Views: 122
OP
M

mikey111k

Active member
Joined
Oct 6, 2011
Messages
32
Jeff,

Thanks for the pictures. Those tops look really good. I will have to search around online some and see if I can track down some of that.

Thanks again.

Michael
 

AirJunky

Well-known member
Joined
Dec 6, 2012
Messages
841
Location
Priest River, ID
The recessed storage for the bikes & SUP & the additional board racks turned out great! Looks like you need some more for the wakeboard & wakeskate too.

On the butcher block idea, I have a friend who made a conference table out of a bunch of 2x4s. The top is planed & sanded smooth so it looks like a butcher block. Turned out pretty nice. If that's too thick, maybe using 2x2s instead would work?
 

granada don

Active member
Joined
May 20, 2013
Messages
34
Hi JP

Nice bench and plenty long too, what the heck is that valve out of at the end of your bench ?

Thanks, G Don
 
OP
M

mikey111k

Active member
Joined
Oct 6, 2011
Messages
32
Airjunky: Good idea on the bench top. Im going to price out some 2x2's and probably try it out. Those extra boards are actually my kiteboards. I cant quite tell from your picture but are you kiting or wakeboarding on the foil? I have wanted to try out a foil board for a while now.

Michael
 

AirJunky

Well-known member
Joined
Dec 6, 2012
Messages
841
Location
Priest River, ID
Airjunky: Good idea on the bench top. Im going to price out some 2x2's and probably try it out. Those extra boards are actually my kiteboards. I cant quite tell from your picture but are you kiting or wakeboarding on the foil? I have wanted to try out a foil board for a while now.

Michael

Yea, I'm a SkySki rider..... basically a sit down foil towed behind a wake boat. Their a lot of fun. I've done the stand up a few times too. You will have a great time with it. The sensation of flight is second to none! :rocker:

BTW, on a whim, after seeing a few posts where guys have used old bowling lanes for a work bench, I thought I'd look on CL for them. Even in the little town I live in, I found 3 ads for them. They all said it's heavy stuff, like 300+ lbs for an 8' section. They all wanted like $300 or $350 for it. I think the butcher block will look almost as nice & be a bit lighter & less expensive. Although you will need to have access to a surface planer, belt sander & the clamps to build it. Good excuse to buy more tools!
 
OP
M

mikey111k

Active member
Joined
Oct 6, 2011
Messages
32
Hi everyone,

I made some progress this week. I got the soffit trim and the doors painted. Next up is moving the water heater up so i can finish the corner and installing the recessed lights.


Michael
 
To avoid these ads, REGISTER NOW!
Top Bottom