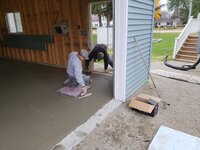
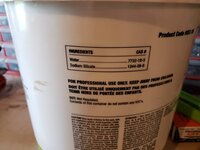
I slept good but not very long. Was in bed by 9, sleeping before 10 and wide awake at 2am. What better thing to do than put the sealer on so its dry before my uncle cuts it in the morning.
I found every single imperfection and a few things I would have done differently but it's still damn good enough for me.
As the Essential Craftsman would say it turned out within Allowable tolerances.
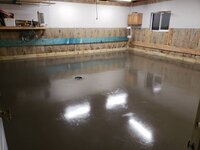
It's thick, sweepable, not an excessive slip hazard when wet, and kinda purdy.
Things I learned or would have done differently-
1, Double, triple check grade and compact many times then check again.
Figuring concrete amount would have been much easier with consistantly thickness and about $150 in wasted concrete lesson learned.
2, if making a step, make it 10"+ deep.
I didn't even think about it when I formed it up with the first boards I found laying around that I didnt even have to cut to length. My uncle said. "If you woulda made the step taller you could have put in a nice sidewalk to the deck but it's not tall enough and small steps ****. They are just a trip hazard." Too bad he didnt speak up sooner in the week and I didnt think of it. Lesson learned but it will be just fine for a few years as is till i do so min etching with the deck.
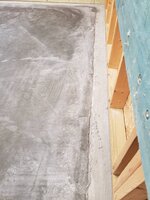
3. Be more accurate striking off along edges. Many spots higher than they should be along the wall. My wife's uncle does epoxy floors for a living. Maybe a few years down the road if it still bugs me I can have him grind it all flat and epoxy it all the way to the wall.
4. Dont leave power trowel on the concrete. Pretty ugly blade indents from where it sat right in front of service door in between passes.
5. Don't use so much if any rebar. It was a constant trip hazard. The spacing wasn't even hardly big enough to step in between. Everybody broke a lot of those cheap plastic chairs. They either push into foam or shatter or both. Every one of us broke a bunch but I tossed them and replaced them as we poured. I didnt get any bricks cut but the chairs actually worked good.
6. My buddy's skills were awesome and they are way stronger than me. They worked very well as a team and I was the odd man out mostly trying to puddle and keep chairs under the rebar as we went.
7. Organization and a little more experience sure helped things go more smooth. It was nice having my buddy Chad there this time (he had a wedding when we poured walls) anything my uncle said that I questioned Chad confirmed putting my mind at ease we were doing the right thing.
8. Putting concrete down without forms is a pain. The stuff I tossed down around window well had grass and **** all over in it and isn't very thick. I'm pretty sure it will only last a year if that. We'll see this winter. Not really a big deal to tear out and break up tho if it doesnt last.
9. Edge around entire forms, not just by doors. Where slab meets foam and wall it kinda looks like ****. Hopefully I can fix it well enough to caulk the joint.
10. Use wider foam along walls. 1/4" is a pita.
11. If I ever build a brand new shop someday it will have 8ft poured walls with 4ft of it exposed. 4ft buried and 8ft 2x6 walls on top of that with 2" foam on outside running all the way down to bottom of concrete wall. Then I wouldnt need foam under the slab and whole structure should stay warm.
Well. That's about it. Time to get a little sleep before my uncle comes in a few hours.

Sent from my SM-G960U using Tapatalk