
You are using an out of date browser. It may not display this or other websites correctly.
You should upgrade or use an alternative browser.
You should upgrade or use an alternative browser.
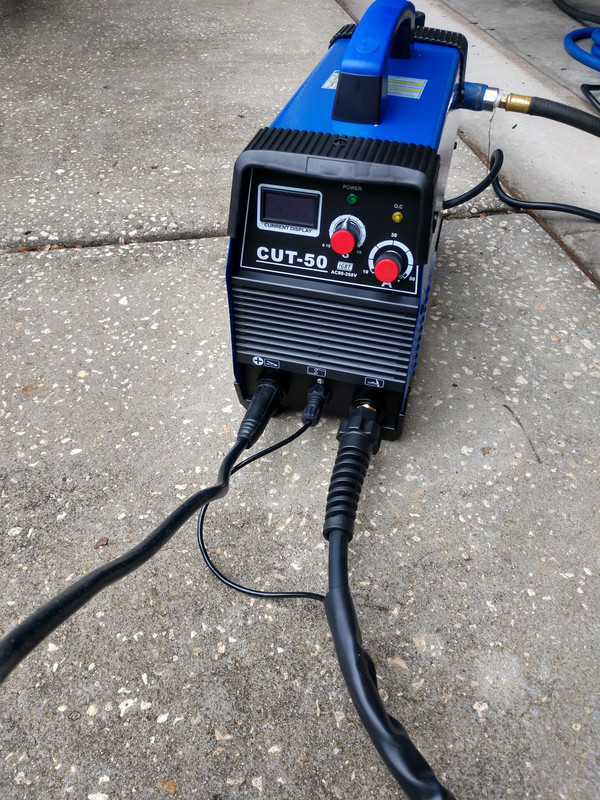
Those $200 plasma cutters
- Thread starter Jland
- Start date
Jswain
Well-known member
Unless you're running it with a plasma table or cutting nonstop artwork out of sheet metal the air consumption is not bad I'd say anything over a 5cfm compressor with a 20+ gallon tank and for cutting up flat bar/sheet etc you're styling.
The dryer & cleaner the air the longer your consumables will last. I upgraded to an ag60 torch so the consumables last much longer but cost more, the pt31 torch consumables are so cheap it's not really going to break the bank with a short life anyways.
I've literally used it for side jobs that paid for itself plus some in one job so yes I would definitely buy it again. Get yourself a leather torch cover at the same time to protect the hose for the torch, watch some videos and pick up a big pack of consumables
The model I bought was a herocut cutpro50i
The dryer & cleaner the air the longer your consumables will last. I upgraded to an ag60 torch so the consumables last much longer but cost more, the pt31 torch consumables are so cheap it's not really going to break the bank with a short life anyways.
I've literally used it for side jobs that paid for itself plus some in one job so yes I would definitely buy it again. Get yourself a leather torch cover at the same time to protect the hose for the torch, watch some videos and pick up a big pack of consumables
The model I bought was a herocut cutpro50i
Unless you're running it with a plasma table or cutting nonstop artwork out of sheet metal the air consumption is not bad I'd say anything over a 5cfm compressor with a 20+ gallon tank and for cutting up flat bar/sheet etc you're styling.
The dryer & cleaner the air the longer your consumables will last. I upgraded to an ag60 torch so the consumables last much longer but cost more, the pt31 torch consumables are so cheap it's not really going to break the bank with a short life anyways.
I've literally used it for side jobs that paid for itself plus some in one job so yes I would definitely buy it again. Get yourself a leather torch cover at the same time to protect the hose for the torch, watch some videos and pick up a big pack of consumables
The model I bought was a herocut cutpro50i
Thanks....think im going to get one today
Gunfixr
Well-known member
Got one from jeg's. No complaints,it does what I need. I could use more air, but that's the compressor, not the plasma cutter.
Btw, it is a 15amp/20amp plug model. It's better hooked up to 20amps.
It was on amazon.
Btw, it is a 15amp/20amp plug model. It's better hooked up to 20amps.
It was on amazon.
I can't comment on those but i've got a non-amazon 50A plasma at home and at work. the one at home runs just fine on my little 1HP CAT compressor.
if you're doing more than sheet metal I would expect to be disappointed at a $200 price point. anything capable seems to be a bit more.
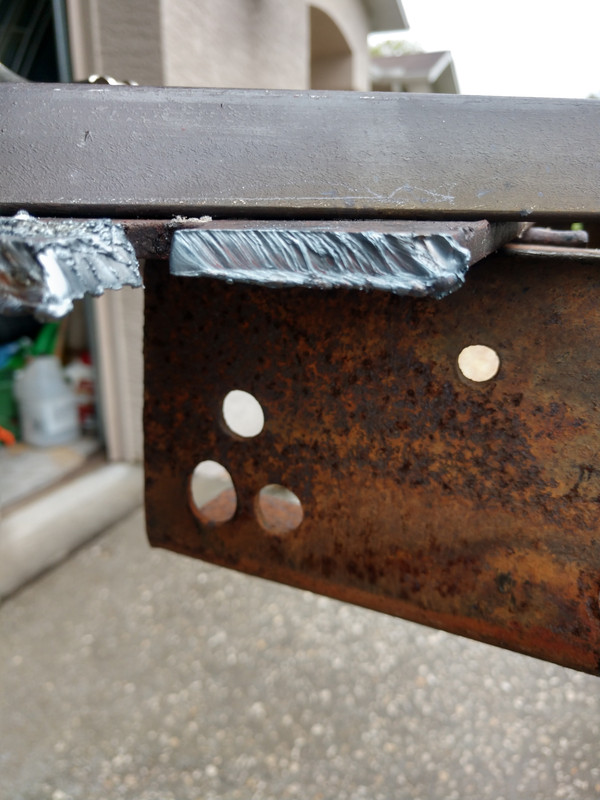
50A will do 3/4" by hand if you're patient, just make sure you use a fence. below is such an example, dross removed with a slag hammer, no grinding.

if you're doing more than sheet metal I would expect to be disappointed at a $200 price point. anything capable seems to be a bit more.
50A will do 3/4" by hand if you're patient, just make sure you use a fence. below is such an example, dross removed with a slag hammer, no grinding.
I have one. I bought it to cut up my above ground pool. Worked great. Since then I have used it to chop stuff up. I have not really used it to do anything close to a precision cut. I have it connected to a 60gal tank. I never ran out of air.
I bought a Forney from TSC on sale for $200, plus had a 10% coupon. Is it worth what I paid for it, yes. However I wish I had something bigger when I use it.
emeraldcoupe
Well-known member
i just bought one, got it yesterday. wanted something to play with, never used one before. paid $199 off amazon. this is my first try cutting, 1/4". non pilot arc. seems to work ok. i'm sure the cuts will get better once i learn how to use it.
240sxguy
Well-known member
Neat thread! I had no idea you could get one of these so cheaply now.
Jswain
Well-known member
Anyone just buying one do yourselves a favor & get a metal speed square that you don't care about & round over the two edges that stick out on each end of it. Now you have a wicked cutting guide to quickly cut 45's&90's on flat bar/tube etc.
You just need to round over the edges enough that they don't interfere with the torch as it passes by the end while making the cut.
Then for the longer cuts get yourself a 4ft and/or 8ft piece of 3/16 flat bar or angle iron & dedicate it to straight edge duty. If it isn't too long of a cut you can just clamp one end and hold the other down with your hand but any longer then 3-4ft cut you'll probably want to clamp both ends.
Mark a line on a piece of scrap, setup cutting edge directly on line and then make a cut and measure how far it is from the line and that's how oversized/undersized you will need to make your measurements ie: 12-1/4 x 12-1/4 = 12x12 finished
Then if you're looking to cut a lot of thicker material and using over 30 amps and going through tips a lot/not getting quality cuts before you're too invested in the pt-31 consumables I would buy the ag-60 torch from riverweld on Amazon. I think it is about 10 bucks for you guys in the states and you can get 40/50/60 amp tips for it which last much much longer and leave a much better finish in anything 3/16+. I believe I had to crimp on spade terminals for the microswitch in it but it's a 5-10 minute job to change the torch handle
Here's a link for a NON pilot arc version which replaces the pt31 torch most of them come with:
https://www.amazon.com/dp/B011E97MG0/?tag=atomicindus08-20
You just need to round over the edges enough that they don't interfere with the torch as it passes by the end while making the cut.
Then for the longer cuts get yourself a 4ft and/or 8ft piece of 3/16 flat bar or angle iron & dedicate it to straight edge duty. If it isn't too long of a cut you can just clamp one end and hold the other down with your hand but any longer then 3-4ft cut you'll probably want to clamp both ends.
Mark a line on a piece of scrap, setup cutting edge directly on line and then make a cut and measure how far it is from the line and that's how oversized/undersized you will need to make your measurements ie: 12-1/4 x 12-1/4 = 12x12 finished
Then if you're looking to cut a lot of thicker material and using over 30 amps and going through tips a lot/not getting quality cuts before you're too invested in the pt-31 consumables I would buy the ag-60 torch from riverweld on Amazon. I think it is about 10 bucks for you guys in the states and you can get 40/50/60 amp tips for it which last much much longer and leave a much better finish in anything 3/16+. I believe I had to crimp on spade terminals for the microswitch in it but it's a 5-10 minute job to change the torch handle
Here's a link for a NON pilot arc version which replaces the pt31 torch most of them come with:
https://www.amazon.com/dp/B011E97MG0/?tag=atomicindus08-20
Last edited:
i just bought one, got it yesterday. wanted something to play with, never used one before. paid $199 off amazon. this is my first try cutting, 1/4". non pilot arc. seems to work ok. i'm sure the cuts will get better once i learn how to use it.
looks like you need to move slower - you want a little more vertical in your cut lines, less angle. are you holding the torch mostly perpendicular?
in my post above i was using my left hand to help "inch" my right hand along the straight edge. I found that you can hear "turbulence" in the plasma jet if you're moving too fast - it might take a bit to be able to hear that, and any spray-back at you is also a sign to slow down.
cutting 3/4" you find out REAL fast the difference between "just right" and "gobs of hot metal blasting your torch hand".
emeraldcoupe
Well-known member
looks like you need to move slower - you want a little more vertical in your cut lines, less angle. are you holding the torch mostly perpendicular?
in my post above i was using my left hand to help "inch" my right hand along the straight edge. I found that you can hear "turbulence" in the plasma jet if you're moving too fast - it might take a bit to be able to hear that, and any spray-back at you is also a sign to slow down.
cutting 3/4" you find out REAL fast the difference between "just right" and "gobs of hot metal blasting your torch hand".
thanks for the tips
 i'm sure i had the torch at an angle.
if you hold the torch at too much angle, you're effectively cutting thicker metal, which doesn't help you out.
https://www.eastwood.com/plasma-cutting-guide-plasma-cutter-tips-plasma-cutting-techniques
https://www.eastwood.com/plasma-cutting-guide-plasma-cutter-tips-plasma-cutting-techniques
TIPS FOR BETTER PLASMA CUTTING
How can I make the most of this cutting tool? After you have selected the plasma cutting machine that is right for you, here are some tricks of the trade that will help beginners make the best possible cut.
A. SET-UP PROCEDURES
Before you start, check for the following items: A clean air supply without water or oil. Consumables that wear quickly, or black burn marks on the plate, may indicate contaminated air. Correct air pressure can be checked by looking at the gauges on the unit. Nozzle and electrode correctly in place. A ground connection to a clean portion of the work.
B. SAFETY GEAR SOME BASIC SAFETY PRACTICES SHOULD BE OBSERVED.
You should read your instruction manual thoroughly to understand the machine. Wear long sleeves and gloves while cutting since molten metal is generated during the cutting process. Eye protection such as dark goggles or a welding shield is required to protect your eyes from the cutting arc. Typically a darkness shade of #7 to #9 is acceptable. Finally, follow all safety tips and guidelines that are detailed in your instruction manual.
C. PIERCING THE WORK
Many inexperienced users try to pierce the metal by coming straight down perpendicular (90°) to the work. This results in molten metal being blown back into the torch. A better method is to approach the metal at a slight angle (60°) and then rotate the torch to 90°. This way, the molten metal is blown away from the torch.
D. DON'T TOUCH THE NOZZLE TO THE WORKPIECE
Do not touch the nozzle to the work when using current levels of 45 amps or more. Doing so will drastically reduce the nozzle life as the cutting will double arc through the nozzle. Double arcing can also occur if a metal template is used. In this case, the user drags the nozzle along the template. The result is the same as dragging the nozzle on the work: prematurely worn nozzles.
E. BEGINNERS SHOULD USE A DRAG CUP TO FACILITATE THE CUT
Many systems offer a drag cup, which snaps over the nozzle. This allows the torch to be on the workpiece and dragged along to facilitate a consistent cut.
F. TRAVEL AT THE RIGHT SPEED
When moving at the right cutting speed, the molten metal spray will blow out the bottom of the plate at a 15 to 20° angle. If you are moving too slowly, you will create slow-speed dross, which is an accumulation of molten metal on the bottom edge of the cut. When moving too fast, high-speed dross is created since you are not allowing time for the arc to completely go through the metal. Traveling too fast or too slow will create a low-quality cut. Typically, low- speed dross can be distinguished from high-speed dross by ease of removal. For example, low-speed dross can be removed by hand, whereas high-speed dross typically requires grinding.
G. SET THE CURRENT TO MAXIMUM AS YOU BEGIN
When setting the current, put it on the maximum output of the machine, then turn it down as needed. More power is usually better, except when doing precision cutting or when you need to keep a small kerf.
H. MINIMIZE PILOT ARC TIME
Because of the wear it creates on the consumables, try to minimize the amount of time spent in pilot arc mode. To do this, get ready by the edge of the work before starting the arc so you can get right to cutting.
I. MAINTAIN A CONSTANT WORK DISTANCE
Optimally, you should maintain a 3/16" to 1/8" distance from the nozzle to the work. Moving in a weaving, up and down fashion will only hinder your efforts.
J. TRAVEL IN THE DIRECTION THAT WILL GIVE YOU THE BEST FINISHED WORK
If you are making a circular cut and plan to keep the round piece as your finished work, move in a clockwise direction. If you plan to keep the piece from which the circle was cut, move in a counterclockwise direction. As you push the torch away from you, the better cut will appear on the metal that is on the right hand side, since it will tend to have a better, squarer edge.
K. END WITH A PUSH ON THICK MATERIAL
One trick to use on thicker material is to give a slight push as you cut through the last section of material. This increase in the push angle at the finish will cut through the bottom first and get rid of the bottom corner that is usually left at the end of thick plate. Never finish a cut by using the torch to hammer away the last corner of the work.