To avoid these ads, REGISTER NOW!

thoughts before the build.. welding cart

Mitchw123456

Well-known member
Joined
Aug 28, 2013
Messages
114
Location
kemah tx
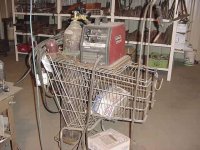
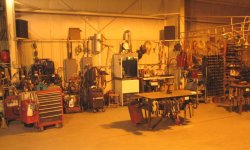
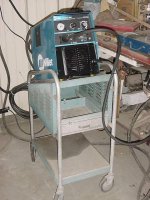
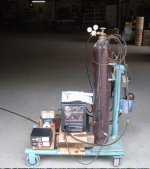
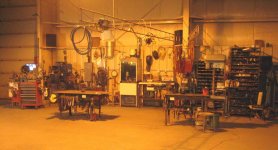
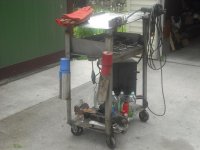
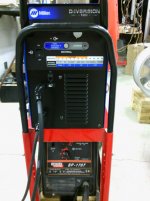
I'm really sick of lugging my 210mvp around and swapping bottles etc. I've been needing to come up with something for awhile and considering I've been half dead and can't work I started playing with ideas. What I'm going for is something space friendly, holds 2 bottles, and can easily be moved around. Here is where I'm currently. I still haven't come up with steering but I'm thinking the "red wagon" pull style handle with a single pivot may be the easiest route to go. Anything think its going to be too heavy to move around with two 125 bottles, machine, and odds and ends? I am leaning towards using the 10" HF wheel barrel type tires vs casters as it seems like there is always an airline or extension cord or pebble in the way.. Thoughts?
 

Attachments

  • Untitled.jpg
    Untitled.jpg
    16.2 KB · Views: 150
To avoid these ads, REGISTER NOW!

sberry

Banned
Joined
Jun 18, 2005
Messages
35,747
Location
Brethren, Michigan
You can see where we widened the cart front end to make it a bit more stable for shop floors. Its been abandoned but really worked well for a long time. Here is my take on carts. If you are really moving I don't want extra. I have a spool gun but have a piece of hose reaches a bottle that is out of the way and shared with my tig when I need it but the steel is 99%, I will rig up a couple minutes for the occasional job not to have to tote an additional bottle.
 

Attachments

  • shopping welder.jpg
    shopping welder.jpg
    49.9 KB · Views: 51
  • shopping blocks.JPG
    shopping blocks.JPG
    85.5 KB · Views: 49
Last edited:

Ohmthis

Well-known member
Joined
Jan 20, 2013
Messages
3,014
Location
Outside of Louisville KY
I think sberry has some solid advice. Do you plan to move it a lot? If you do most of your welding at a table or a specific area, then build it all for convenience. If you are moving around a lot build just for the welder, bottle, and a small kit of tools (wire brush, tips, pliers, and hammer). You can store the rest in an area out of the way for later. I have two tanks, 180 mig, larger tig, extra tig torch, heavy duty extension cord, and soon a water cooler. Yes it's heavy, but it's not too bad and I really only move it about 15-20' from where it stays full time. Before building really try an revise your plan several times. I thought and rethought and then made several drawings of what I wanted before the first cut or spark was ever made.
 

zkling

Well-known member
Joined
Jan 23, 2007
Messages
16,939
Get rid of the cage around the bottles, a simple tank strap or chain will be more than enough. This will save material cost, space and headache when trying to swap bottles. You could triangulate the main frame to the lower gas shelf if you wanted. Also move the axle forward so it is directly below if not slightly behind the centerline of the bottles. That will allow it to turn easier.

For that small of a machine a set of good swivel casters in the front is more than enough.
 
Last edited:

sberry

Banned
Joined
Jun 18, 2005
Messages
35,747
Location
Brethren, Michigan
It took me a long time to get mine down as simple as it is. I just made a simple footprint change that should have been obvious a long time ago and really smooth things up especially if my ocd lets me leave a short extension cord connected, lets me do a third of my shop without connecting anything.
 

sberry

Banned
Joined
Jun 18, 2005
Messages
35,747
Location
Brethren, Michigan
One ov my revs was to move my stick to where it should be. Its a couple more steps out of the way when working outside but its out of the way too. I actually removed 2 carts and set my plaz and the Hobart with the 25 ft spool gun in top of a 300 synch I really don't use.
 

Attachments

  • welding bay.JPG
    welding bay.JPG
    61.1 KB · Views: 56
  • welder group.JPG
    welder group.JPG
    69.8 KB · Views: 57
  • welding bay 2.JPG
    welding bay 2.JPG
    67.3 KB · Views: 59
  • plas cart.JPG
    plas cart.JPG
    43.4 KB · Views: 56
  • Hobart cart.JPG
    Hobart cart.JPG
    52.6 KB · Views: 64
Last edited:

sberry

Banned
Joined
Jun 18, 2005
Messages
35,747
Location
Brethren, Michigan
Another revision, you can see the carts gone and the AC/DC moved. I stole the cart from the plasma which was perfect (didn't have to fab a single thing but set it on it.) to replacing the shopping cart for the little Linc.

This all can move but doesn't. The SPT Linc in the last pic is my portable or I use a set of leads from the AC/DC that do outdoor duty also.
The setup time at my bench involves turning bottle and switch on and in the rest of the place a minute or so.
 

Attachments

  • bench shot.jpg
    bench shot.jpg
    143.3 KB · Views: 26
  • Welder group new.jpg
    Welder group new.jpg
    125 KB · Views: 27

sberry

Banned
Joined
Jun 18, 2005
Messages
35,747
Location
Brethren, Michigan
If I was a home brew outfit and had to buy the steel would start out with a HF engine stand.
Some of my faves in the small cart dept on here were those who used drawer cabs with the welder on top.
 

Attachments

  • eng cart.JPG
    eng cart.JPG
    30.8 KB · Views: 68
Last edited:

Engine

Well-known member
Joined
Jan 9, 2014
Messages
646
Location
Kentucky
If I was a home brew outfit and had to buy the steel would start out with a HF engine stand.
Some of my faves in the small cart dept on here were those who used drawer cabs with the welder on top.

You never let anything made of metal or wood go to waste, do you sberry?
 
To avoid these ads, REGISTER NOW!

sberry

Banned
Joined
Jun 18, 2005
Messages
35,747
Location
Brethren, Michigan
You never let anything made of metal or wood go to waste, do you sberry?

That is not totally accurate and its not really about waste as much as it is about ease and speed. There was a point I used to sit down and fuss, build it all from scratch but any more I try to avoid it.
Its expensive, time consuming and a lot of work as well as doesn't always turn out as well as we think, looking back its not worth the effort. In the end I stacked it and would be left with 2 extra custom carts instead of one which was near free and took an hour or 2 to put together.
A guy is more likely to make changes after the fact when its not pristine. So much sheet metal from appliances is free and the cleaning and finish/paint is already done, can scuff and top coat. You can take advantage of bends already made.

Building a tool box is a slow painful effort, sometimes days in waiting for paint to dry. Same for shelves, so much easier to hit the salvage or in the case of HF buy new. As I mentioned I would have a hard time getting away from the HF stand or similar as a starting point. You get clean painted steel, wheels all cheaper than you can buy new dirty steel for
 
Last edited:

sberry

Banned
Joined
Jun 18, 2005
Messages
35,747
Location
Brethren, Michigan
This table. same deal. We could have painted the frame, still could but it took an hour to get the basics together from something that was given to me.
It takes a lot of pain out of it when you don't have to buy everything. It doesn't always work out but the fit was perfect, came with wheels, didn't need to add structural work.
Later the left end shelf and hanger were removed, not a big deal. I want to add a drawer set yet for taps/drills.
 

Attachments

  • screw table.JPG
    screw table.JPG
    48.5 KB · Views: 35
  • Welder group 4.JPG
    Welder group 4.JPG
    57.2 KB · Views: 25
Last edited:

sberry

Banned
Joined
Jun 18, 2005
Messages
35,747
Location
Brethren, Michigan
I never really moved the plasma but when I went to convert it to the SP cart I made the rear weels straight. The biggest change I made was location and since moved it about 10 ft from there and added a short extension cord. Lets me still work the bench but don't have to move much to use it on the shop floor.
Point being is I like basics to start then add features as I go often with screw or bolt.
 

Attachments

  • SP Cart 3.JPG
    SP Cart 3.JPG
    69.9 KB · Views: 20
  • SP cart.JPG
    SP cart.JPG
    71.3 KB · Views: 25
Last edited:

sberry

Banned
Joined
Jun 18, 2005
Messages
35,747
Location
Brethren, Michigan
This is kind of a new shot. I dropped the cord which let it hang and is now never on the floor under home base use and I added clearer/catchers on the wheels to push it out of the way. The last pic was likely where I had just made the conversion and thought to pic it in its new home.
 

Attachments

  • bench welder.jpg
    bench welder.jpg
    142.8 KB · Views: 27

56rpm

Well-known member
Joined
Apr 19, 2012
Messages
354
Location
Bakersfield, Ca
When I bought the Miller tig I contemplated making another cart. Figured I could move the Lincoln mig to the lower shelf and extend the bottle shelf to hold a second 150 cf bottle. It rolls fine and is not tipsy.

Bob
 

Attachments

  • IMG_20141101_193733.jpg
    IMG_20141101_193733.jpg
    140.1 KB · Views: 32
  • IMG_20141031_201823.jpg
    IMG_20141031_201823.jpg
    142.7 KB · Views: 25

Engine

Well-known member
Joined
Jan 9, 2014
Messages
646
Location
Kentucky
If I was a home brew outfit and had to buy the steel would start out with a HF engine stand.

Looking at the HF engine stand, it would seem to be a great place to start building a welding cart. Thanks for mentioning it. If I were to build another cart I would definitely think about using that stand.

I understand what you mean about this:
There was a point I used to sit down and fuss, build it all from scratch but any more I try to avoid it.
Its expensive, time consuming and a lot of work as well as doesn't always turn out as well as we think, looking back its not worth the effort.
You're right. There is a lot of wisdom in that. If someone is a beginner and just wanting to see if he can do it, that's one thing. But, if you want something that "gets the job done" at the lowest cost of time, money, and effort then that's something else entirely.
 
To avoid these ads, REGISTER NOW!
Top Bottom