To avoid these ads, REGISTER NOW!

Time for Tile

hellspcangel911

Well-known member
Joined
Jan 3, 2010
Messages
232
Hi All,
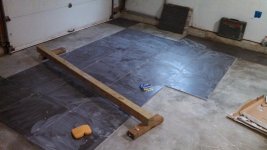
We purchased a house at the end of last year, and with it came my own two car garage. The house needed some time to make it ours. Between life and work there was little time to devote to fixing up the garage. In June I purchased tiles to cover the 24'x22' garage space. They are PEI4 rated Porcelain and are 2ft square. I have always wanted tile in my garage ever since seeing it in all the nice and clean repair shops in Europe.
Living in the North East I know im running out of time to get this project wrapped up, so this weekend, god willing, it will commence.
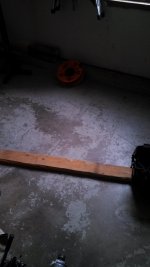
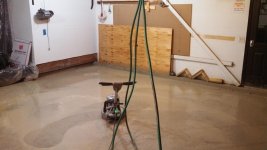
I cleared out the space, and will be renting the scarifier with carbide tips to score up the smooth concrete and remove any paint the scrapper couldnt take off. The house was built in 94 and it looks like the paint that remains in some areas is just as old.
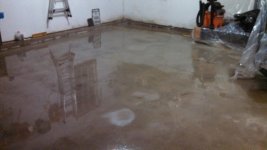
The next step would be to blow and vac out all the dust, then apply RedGard. If anyone has any experience on this i would appreciate you chiming in. I have one 1/8" by 3 feet long crack in one corner of the garage and figured the RedGard, with two coats in the area and 1 coat everywhere else would be sufficient.
http://www.homedepot.com/p/Custom-B...on-Membrane-LQWAF1/100169081#customer_reviews
Next step, let that dry till it turns red, about 24 hours, then start tiling.
I was planning on using these for the two garage door entrances. http://www.lowes.com/pd_457736-36265-RO60E_0__?Ntt=457736&UserSearch=457736&productId=4411307&rpp=32
Might have to go with the half inch version.
I plan to have the edge just before the garage door rubber..
I'll be tiling with a gap of 1/8" or less
Torn on whether to back butter or just trowel side to side carefully.

Excited to finally be getting this project done. Please let me know if i overlooked anything.

thanks,
george
 
Last edited:
To avoid these ads, REGISTER NOW!
OP
H

hellspcangel911

Well-known member
Joined
Jan 3, 2010
Messages
232
I watched the video before, very informative but it seems some people still think back buttering is the way to go? Thoughts from the pros?
 

slickgt1

Well-known member
Joined
Oct 11, 2010
Messages
1,674
I don't know, and I back butter. No you reduce the thickness by squeezing the excess out. I wiggle set the tiles in. I have been doing this for ever, and never had a single issue. Will never stop, really does not add much effort at all. I also don't trowel the back butter. I just plop a 5-6 globs of thinset on, and spread it a bit. Sometimes I burn thinset in, but that's when I am afraid a 2'x2' tile might fall 10' from a sealing shower.

I also would not call myself an expert, or pro, I just have no choice but to take on the masons job from time to time. Especially in my own properties and residence.
 

Gerald O

Well-known member
Joined
Mar 5, 2013
Messages
1,884
Location
NC
On that 2' x 2' tile I would backbutter/burn in the entire backside of the tiles and notch trowel the floor with 1/2" rectangular trowel. Especially since this will be a garage floor and you want maximum thinset coverage for possible high loads.
 

Dakota00

Well-known member
Joined
Mar 9, 2008
Messages
1,078
Location
Woodbridge, Ontario
I was planning on using these for the two garage door entrances. http://www.lowes.com/pd_457736-36265-RO60E_0__?Ntt=457736&UserSearch=457736&productId=4411307&rpp=32
Might have to go with the half inch version.
I plan to have the edge just before the garage door rubber..
I'll be tiling with a gap of 1/8" or less
Torn on whether to back butter or just trowel side to side carefully.

Excited to finally be getting this project done. Please let me know if i overlooked anything.

thanks,
george

Depending on the thickness of your tiles you'll probably be better off with a 3/8" edge protector. 1/2" will be too much.
Be careful with your grout joints size. Are the tiles rectified? Do the tiles have soft edges? This will affect the size of your grout joints.
As for back buttering, take the extra time and do the job properly.

I have a question. If you back-butter, do you cut the notch depth in half, or do you just accept the added thickness?

Jim :cool:

The notch depth stays the same when back buttering, any extra thinset will be squeezed out of the joints.
 
OP
H

hellspcangel911

Well-known member
Joined
Jan 3, 2010
Messages
232
I do not believe the edges are rectified. The edges look as if the tiles were just cut and nothing more.
Sounds like Back buttering is the way to go. Is there a right technique for it, should i be troweling the floor in one direction and the back of the tiles in the other?
Im having trouble locating a SS 3/8" transition piece, any suggestions?
What type of grout would be recommended? Its got to go through 4 seasons and its poured concrete but is the epoxy hype worth it?
 

Dakota00

Well-known member
Joined
Mar 9, 2008
Messages
1,078
Location
Woodbridge, Ontario
I do not believe the edges are rectified. The edges look as if the tiles were just cut and nothing more.

I suggest dry laying a few tiles with spacers in place to see how they line up. With my floor I used rectified tiles that have soft edges with 1/8" spacers.

Sounds like Back buttering is the way to go. Is there a right technique for it, should i be troweling the floor in one direction and the back of the tiles in the other?

The floor should be troweled in one direction, place a small blob of thinset in the middle of the tile then use the flat side of the trowel to spread and fill the back of the tile smooth and even.

Im having trouble locating a SS 3/8" transition piece, any suggestions?

I suggest looking at a Schluter Reno-U edge protector. It's available in 3/8" and Stainless Steel. This is what I used in my garage, take a look at my thread to see the pictures.

What type of grout would be recommended? Its got to go through 4 seasons and its poured concrete but is the epoxy hype worth it?

For my exterior jobs I use Mapei Ultracolor Plus grout. It's stain proof, waterproof and has excellent resistance properties to oils and acid. It's very similar to epoxy grout, but a lot cheaper and easier to work with.
 

slickgt1

Well-known member
Joined
Oct 11, 2010
Messages
1,674
I do not believe the edges are rectified. The edges look as if the tiles were just cut and nothing more.
Sounds like Back buttering is the way to go. Is there a right technique for it, should i be troweling the floor in one direction and the back of the tiles in the other?
Im having trouble locating a SS 3/8" transition piece, any suggestions?
What type of grout would be recommended? Its got to go through 4 seasons and its poured concrete but is the epoxy hype worth it?

Epoxy phhht. I have two links in my sig. One is why I consider tile is the only DIY floor for a working garage.
 
To avoid these ads, REGISTER NOW!
OP
H

hellspcangel911

Well-known member
Joined
Jan 3, 2010
Messages
232
Thanks for the prompt response. Not having to apply RedGard on the whole surface means i might be able to get this project done this weekend.
I'll post some photos soon
 
OP
H

hellspcangel911

Well-known member
Joined
Jan 3, 2010
Messages
232
so here are pictures of the current floor. its very smooth, flat but painted. I am about to go to home depot to rent a tool, should i get the scarifier or the floor polisher with a diamond blade?
 

Attachments

  • 2013-10-04 10.31.34.jpg
    2013-10-04 10.31.34.jpg
    138.5 KB · Views: 55
  • 2013-10-04 10.31.26.jpg
    2013-10-04 10.31.26.jpg
    137.1 KB · Views: 47
OP
H

hellspcangel911

Well-known member
Joined
Jan 3, 2010
Messages
232
Went to my local home depot, they didnt have the right disc, supposedly someone cracked it and they wont have another till next week. Wife tracked one down 20 miles away, I picked it up at 7pm for a 4 hour rental due back 9am tomorrow morning, $120.
Just finished about a half hour ago. works great, no dust, and no bending over with a scraper.
I see two 3 foot long cracks on the corners of the garage. Photo of one is attached. Do i have to use Redgard on those areas or can i get away with out it? I ask because if i apply it tomorrow it wont dry in time for me to tile sunday and im gone for the following three weeks by which time it will probably be too cold to tile. Worst case i leave those parts untiled till the spring?
 

Attachments

  • 2013-10-04 12.18.28.jpg
    2013-10-04 12.18.28.jpg
    148.7 KB · Views: 71
  • 2013-10-04 19.44.19.jpg
    2013-10-04 19.44.19.jpg
    136.1 KB · Views: 71
  • 2013-10-04 19.50.30.jpg
    2013-10-04 19.50.30.jpg
    138.8 KB · Views: 61
  • 2013-10-05 01.32.21.jpg
    2013-10-05 01.32.21.jpg
    141.8 KB · Views: 61
  • 2013-10-04 22.31.58.jpg
    2013-10-04 22.31.58.jpg
    137.4 KB · Views: 78
  • 2013-10-05 01.32.28.jpg
    2013-10-05 01.32.28.jpg
    143.2 KB · Views: 70
  • 2013-10-05 01.32.38.jpg
    2013-10-05 01.32.38.jpg
    143.9 KB · Views: 69

Dakota00

Well-known member
Joined
Mar 9, 2008
Messages
1,078
Location
Woodbridge, Ontario
Redgard should dry within 12hrs. If you go with 2 light coats it will dry faster, than one heavy coat. If applied this morning, You should be good to go for tiling tomorrow.
 

dealingdave

Member
Joined
Oct 13, 2012
Messages
7
Location
SE Wisconsin
Thanks for posting pictures of the Home Depot tools that you rented. It is nice to see someone that used the Diamabrush Prep tool. I need to do this myself in the next week or so.

Did you do the paint stripping wet or dry? Did that disc dig into the concrete at all or just go after the surface coating?
 
Last edited:
OP
H

hellspcangel911

Well-known member
Joined
Jan 3, 2010
Messages
232
Tiling no, I'm using a 3/8"x1/4" trowel, and back buttering with the straight edge of the trowel seems to be working well. Im getting thinset coming out the sides as I wiggle it in place. Had to remove one tile (wrong direction) and it was incredible difficult to remove due to the vacuum formed between the two surfaces. Im running a 1/8" spacing.

Dave, Home Depot has two discs that look similar. Get the one in the photo. When i picked up the machine the guy at HD gave me the other one which looks looks like it has twice as many blades on it but when you look closely you realize they arent blades but what looks like sand paper folded in half. Its basically a glorified sander. He told me it would remove the loose paint and 'scruff up' the paint the rest of the paint.
I took the other disc which aside from removing the paint, any imperfections in the concrete and painted over goops of plaster, it also removed about 1/32" of concrete. I felt this was important if there were oil stains in the concrete from before.
You can do it wet or dry - though, i cant imagine doing it dry. Its much quieter wet, produces no dust, its easier to see the surface as the water clears the area and the blades last longer (like a tile saw).
Once done, get the pressure washer and rinse it all clean.
 

Attachments

  • 2013-10-06 10.35.48.jpg
    2013-10-06 10.35.48.jpg
    142.9 KB · Views: 80
Last edited:

slickgt1

Well-known member
Joined
Oct 11, 2010
Messages
1,674
Looking mighty fine. why are you concerned about it being too cold to tile? How cold/warm is it in the garage in the winter. As long as you are above freezing, you should be fine. It will just take longer to dry.
 
OP
H

hellspcangel911

Well-known member
Joined
Jan 3, 2010
Messages
232
Well the past two years in a row we have had snow the third and fourth weeks of october, and I will not be around next weekend. As soon as I get back I have to winterize the boat so time is running quickly.
The garage is not heated, and as I found out when i was running electric and compressor lines - not insulated either. When I re-supported the joists of the attic and put down plywood I added insulation. After the floor is complete I will probably blown insulation into the walls. Next year I plan to setup a outdoor wood burning furnace which in addition to the house will heat the garage and the driveway coils (to be installed as well).
 
Last edited:
To avoid these ads, REGISTER NOW!
Top Bottom