on a pretty tight budget (have a baby on the way) but the wife wants a new laminate countertop in the kitchen. i can get a slap one from menards for under 150... seems pretty straight forward, but when i stick on the end cap.. how do i trim it without a router? would like to avoid buying or renting one if i can use a tool i have around the house (file, knife, etc..?) any ideas?


You are using an out of date browser. It may not display this or other websites correctly.
You should upgrade or use an alternative browser.
You should upgrade or use an alternative browser.
trimming laminate countertop endcaps without a router?
- Thread starter Sh40674
- Start date
shoot summ
Well-known member
- Joined
- Jun 8, 2010
- Messages
- 2,971
Been a long time since I've done one, so I'm not certain how much overlap there is on those.
You could carefully use a file, going towards the counter top, not away. With very much overlap it's going to be prone to chipping, so slow and easy.
You could carefully use a file, going towards the counter top, not away. With very much overlap it's going to be prone to chipping, so slow and easy.
95riosnake
Well-known member
Flat fine wood file, that's how I've done it in the past. It's slow but you can get it perfect. You want to rake it diagonally inward over the edge until it's flush with the top surface.

I have a router but whenever I've done a laminate end cap on a counter top I use a file because I prefer to take the material off more gradually. I used a router with a flush cut bit once but had a hard time keeping the base of the router truly flat against the end cap and ended up slightly tilting it... causing it to dig too deep and ruin the edge of the piece.
I have a router but whenever I've done a laminate end cap on a counter top I use a file because I prefer to take the material off more gradually. I used a router with a flush cut bit once but had a hard time keeping the base of the router truly flat against the end cap and ended up slightly tilting it... causing it to dig too deep and ruin the edge of the piece.
gregtwojeeps
Well-known member
I guess I put on these pre-cut " glue on" top endcaps on every house we lived in. Yep, the double cut wood rasp is the tool to use and go slow on the bevel. Always set it about a 1/32 in. above the top to give material to bevel....
More important even, that I found was the installation process of the cap. Whenever I did not take the time to put on some wood blocks and use a pair of these in the pic, I had a less than stellar..... end cap glue job. JMO
More important even, that I found was the installation process of the cap. Whenever I did not take the time to put on some wood blocks and use a pair of these in the pic, I had a less than stellar..... end cap glue job. JMO
Last edited:
I would cut the end to fit as close as possible with snips or scissors.(leave a bit larger) then glue it on and file it. it can be done of you take your time & patience
I just put one on for my FIL. There is quite a bit of overlap even on the precut versions. I used a router but believe you can slice off excess with sharp/new razor and finish with a flat file. Use a piece of painters tape to protect countertop from file.
Congrats on new baby! I'll send you a laminate router and trim bit if you promise to send it back, but return postage is likely to cost as much as a trim bit LOL. Anyway shoot me a pm if you want the router. Glad to help if I can.
Congrats on new baby! I'll send you a laminate router and trim bit if you promise to send it back, but return postage is likely to cost as much as a trim bit LOL. Anyway shoot me a pm if you want the router. Glad to help if I can.
ryan20021982
Well-known member
I have a full size router and a trim router and still use a file when doing the endcaps
I use a sharp razor knife to cut it close, then file to finish. Takes just a few minutes if I
forget to bring the router. Or just borrow a router, you must know someone who has one.
The cut on the end is more critical than the method used to trim the laminate, use a fine
tooth blade, I cut from the bottom so I can make the cut in one cut if it has the attached
backsplash, and put tape over the finished surface prior to the cut.
forget to bring the router. Or just borrow a router, you must know someone who has one.
The cut on the end is more critical than the method used to trim the laminate, use a fine
tooth blade, I cut from the bottom so I can make the cut in one cut if it has the attached
backsplash, and put tape over the finished surface prior to the cut.
glentre
Well-known member
Easy to do by hand. On a shop fabricated counter, the end would go on first with the top surface overlapping it so water would drip over the edge and not into the seam between the top and cap. With prefabricated tops, there's no choice but to glue the end on last. Make sure you use enough contact glue on both surfaces and wait til it's tack free before attaching the cap. Then use plenty of pressure to get it to stick well. A rubber mallet will do or even pushing on the corner edge of a 1x2 or similar stick where you can get a lot of leverage and pressure per sq in. Use a wide metal cutting file, not a wood file as a wood file or rasp will leave a rough edge. With the counter top lying flat, file upward at an angle with the top laminate, also holding the file at an angle and not perpendicular with the top. Then take long even strokes, lifting the file on each back stroke so as to not chip the end cap by filing backwards. File until the edge of the end cap is even with the top laminate, taking care not to file into the top laminate. Even with a router, the pros use a file to eliminate the chatter marks left by the router bit. If you have a particleboard core and the counter is subject to a wide range of humidity conditions, you may find the end cap you applied might project a little above the counter laminate as the core changes dimensions. A few strokes with your file will fix this if needed.
Glen
Glen
ez-duzit
Well-known member
I would cut the end to fit as close as possible with snips or scissors.(leave a bit larger) then glue it on and file it. it can be done of you take your time & patience
This is the way if you have no router.
A block of wood with a self-stick 40 or 60 grit disk stuck and wrapped around it works well for shaping while applying a 45* bevel. Wrap sandpaper around a wooden dowel for shaping inside radius at the molded backsplash.
gregtwojeeps
Well-known member
.......... The OP.....
on a pretty tight budget (have a baby on the way) but the wife wants a new laminate countertop in the kitchen. i can get a slap one from menards for under 150... seems pretty straight forward, but when i stick on the end cap.. how do i trim it without a router? would like to avoid buying or renting one if i can use a tool i have around the house (file, knife, etc..?) any ideas?
After reading the replies it seems everyone except me, is assuming the OP is building his tops and laminating them with sheet laminate. I am taking the text in blue to mean he is buying a premade laminated slab counter top from a box store...which will have the left and right hand ends in a pack ready to be glued on. I don't understand the scissor/ knife replies...these precut end caps already have the profile cut on them and need little shaping other than a bevel. Right or wrong ?
on a pretty tight budget (have a baby on the way) but the wife wants a new laminate countertop in the kitchen. i can get a slap one from menards for under 150... seems pretty straight forward, but when i stick on the end cap.. how do i trim it without a router? would like to avoid buying or renting one if i can use a tool i have around the house (file, knife, etc..?) any ideas?
After reading the replies it seems everyone except me, is assuming the OP is building his tops and laminating them with sheet laminate. I am taking the text in blue to mean he is buying a premade laminated slab counter top from a box store...which will have the left and right hand ends in a pack ready to be glued on. I don't understand the scissor/ knife replies...these precut end caps already have the profile cut on them and need little shaping other than a bevel. Right or wrong ?
Last edited:
I don't understand the scissor/ knife replies...these precut end caps already have the profile cut on them and need little shaping other than a bevel. Right or wrong ?
As I stated above, I just did one of these pre-cut / glue on end caps for my FIL (about 2 weeks ago) and there is quite a bit of overlap, probably 3/8" all around. Still needs to be trimmed even though rough shape is there.
gregtwojeeps
Well-known member
It has been awhile since I have done an endcap and you are right, they do cut them oversize some to allow for "adjustment".
evildky
Well-known member
I actually glued one on first then trimmed wiht scissors then filed the edge. It was easier than driving across town to fetch the router.I would cut the end to fit as close as possible with snips or scissors.(leave a bit larger) then glue it on and file it. it can be done of you take your time & patience
Firebrick43
Well-known member
I use a good hand plane. But it may have been more expensive than a router
weadjust
Well-known member
I used a sanding drum on my dremel tool. Made quick work of it. Don't slip or you add some character to your new laminate counter top 

I just put one on for my FIL. There is quite a bit of overlap even on the precut versions. I used a router but believe you can slice off excess with sharp/new razor and finish with a flat file. Use a piece of painters tape to protect countertop from file.
Congrats on new baby! I'll send you a laminate router and trim bit if you promise to send it back, but return postage is likely to cost as much as a trim bit LOL. Anyway shoot me a pm if you want the router. Glad to help if I can.
very nice of you, but i think i'll go with the file, i can't imagine it would be very hard, and thanks for the congrats!
After reading the replies it seems everyone except me, is assuming the OP is building his tops and laminating them with sheet laminate. I am taking the text in blue to mean he is buying a premade laminated slab counter top from a box store...which will have the left and right hand ends in a pack ready to be glued on. I don't understand the scissor/ knife replies...these precut end caps already have the profile cut on them and need little shaping other than a bevel. Right or wrong ?
yes a pre made slab from the box store. the end caps are larger than the ends of the countertop
thanks guys, just wanted to get peoples opinions. i'm a machinist so i have quite the selection of files. but theres a reason i'm a machinist and not a carpenter

thanks guys, just wanted to get peoples opinions. i'm a machinist so i have quite the selection of files. but theres a reason i'm a machinist and not a carpenter
Oh, in that case just rig up the countertop on the vertical mill and take off a few thou off the edge until flush with the top surface. Then put the 7-1/2 degree +/- 0.5 degree bevel on the edge too.

https://www.boschtools.com/us/en/boschtools-ocs/solid-carbide-bevel-trim-bits-85286-28193-p/
Low buck and low 'tech' approach as mentioned is a fine file or some relatively fine sandpaper on a hard sanding block. Only file/sand on a push-stroke towards the countertop.
Make sure you glue the endcaps on well. RTFM for the adhesive being used, let it cure properly (RTFM) and make sure the endcaps are tapped or rolled (laminate roller, but if you are doing this without a router you probably don't have one of those either) well onto the substrate.
Congratulations and best wishes on the new baby.
Firebrick43
Well-known member
Since you are asking I like building my own. Take two layers of mdf and glue/screw together on a flat bench. The screws should be from the bottom and removed after the glue sets. Drill the holes (od of screw threads) in the bottom piece so the screw threads don't jack the layers apart. Use titebond II Use contact cement to glue on the laminate and trim flush with the edges. Then I clamp and glue a white oak front edge and back splash. I use blue masking tape to protect the Formica and use a bench plane to bring the top edge down flush. Actually slightly proud. When you get a wisp of masking tape with you shaving you know your there. Chamfer the outer edge and the look like awesome. Everyone comments on them and they are about the same price but are stronger due to the real wood edge and mdf instead of chip board.
Empty Pockets
Well-known member
.......... The OP.....
on a pretty tight budget (have a baby on the way) but the wife wants a new laminate countertop in the kitchen. i can get a slap one from menards for under 150... seems pretty straight forward, but when i stick on the end cap.. how do i trim it without a router? would like to avoid buying or renting one if i can use a tool i have around the house (file, knife, etc..?) any ideas?
After reading the replies it seems everyone except me, is assuming the OP is building his tops and laminating them with sheet laminate. I am taking the text in blue to mean he is buying a premade laminated slab counter top from a box store...which will have the left and right hand ends in a pack ready to be glued on. I don't understand the scissor/ knife replies...these precut end caps already have the profile cut on them and need little shaping other than a bevel. Right or wrong ?
Having run a formica shop for several years, you've received some good advise. We would use a router in the shop, then finish with a file when making a top in the shop. On those rare occasions that we had to fabricate something on the field, we'd trim the end as close as possible before applying it, then SLOWLY AND CAREFULLY file by hand.
The best advise I can give in addition to what has already been posted, is:
1.) Don't rush. Take your time, or you may be permanently scarring the new counter top.
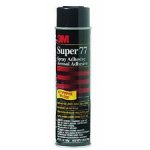
2.) Use plenty of contact cement. 3M makes a good spray grade as well as a good brush grade. I used their 77 spray grade when I built my kitchen.
3.) Wait until the glue is set up before attaching the cap to the top.
4.) Apply ample pressure to the cap to be sure it is firmly attached. In the shop, we used a steel roller to do this
Good Luck.... and Congrats