To avoid these ads, REGISTER NOW!

Above 1200 Sq/FT TX Homestead and Shop Build Log

Wokspaces above 1200 squarefeet.

brnctt

Well-known member
Joined
Apr 20, 2023
Messages
107
Hi guys! I'm pretty new to the forums but have been lurking and learning for a while. Putting this thread up to get advice along the way, and just to have a place to document our progress.

We acquired some acreage outside of town and will eventually put a house on it. But for now, I'm starting with a metal building and it'll be our weekend hangout. Signed a contract on a 30x50x13 with a 14ft wide lean-to which will be going in shortly.

I'll be doing a little bit of everything in the shop: cars, basic woodworking, fabrication, and just hanging out in it.

The land was undeveloped so I've been doing some basic development (culvert, basic grading, driveway, water meter).

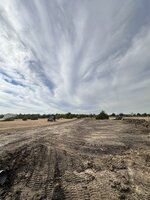
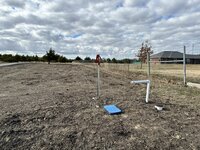
Here is a pic of the land as we purchased it a few months ago. It's unmowed so easy to see the property lines:

rawland.jpg

And here's my site plan so far, with the survey overlaid for help on dimensions:

Layout.JPG

The blue is my plan for the water main: 1.5" HPDE which should be enough to retain some good pressure even if we need a hydrant at the back of the plot someday (800ft back). It's only 450ft to the shop and will be about the same to the house when T'd off in the future. I'm planning to put it in 5ft off the fence.

The red is the plan for power line and poles, and the easement around it required by the utility (10ft all around). Planning to put the poles 15ft off the fence.
 

Attachments

  • Layout.JPG
    Layout.JPG
    236.5 KB · Views: 8
To avoid these ads, REGISTER NOW!
OP
B

brnctt

Well-known member
Joined
Apr 20, 2023
Messages
107
First thing we had to do was mow, so I got a tractor and mower and knocked it down.

Before the first mow. Not too bad, just some prairie grass getting up to about 4ft high:

IMG_0385.jpeg

IMG_0388.jpeg


And after the mow:

IMG_0752.jpeg

IMG_0769.jpeg


Next step was the culvert and driveway since I just had to drive through the ditch every time I got on the land. Here's me mapping it out:

IMG_0860.jpeg

And our dirtwork guy, who also had to cut in a significant swale for proper drainage:


IMG_4932.jpeg

IMG_0955.jpeg


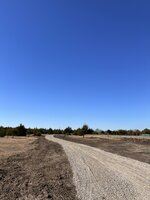
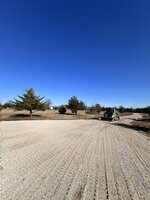
Finally, got some crushed concrete down:

IMG_5122.jpegIMG_5111.jpeg
 

Attachments

  • IMG_0769.jpeg
    IMG_0769.jpeg
    1.6 MB · Views: 7
OP
B

brnctt

Well-known member
Joined
Apr 20, 2023
Messages
107
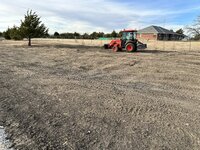
Some final grading with the tractor, and putting down some winter rye seed to try to prevent erosion before the natural grass comes back in:

IMG_1042.jpeg

IMG_0996.jpeg

IMG_1108.jpeg

IMG_1105.jpeg


Water meter went in, and I put in a hydrant for temporary use:

IMG_1046.jpeg

Finally, staked out the location for the shop:

IMG_1134.jpeg

The big hole at the front is where a tree came out. They'll compact it correctly before building the pad.

And that's where we are today! Dirt work starts tomorrow, as well as the plumbing.
 

Attachments

  • IMG_1105.jpeg
    IMG_1105.jpeg
    1.7 MB · Views: 6
OP
B

brnctt

Well-known member
Joined
Apr 20, 2023
Messages
107
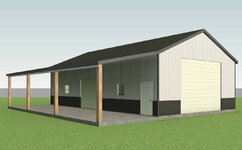
Here are some details on the shop plan. It's a tubular steel 30x50, 13ft eaves, 5/12 roof, with a 14ft lean-to on the side with 2/12 roof. 26 gauge vertical panels. Front door will be a 16x12, and two 10ft roll doors on the side and back.

1.JPG

2.JPG


View attachment 2044717


And here's our concrete plan:

View attachment 2044718

Slab will be 4" min, with #3 rebar on 16" centers, with 12x12 footers with #4 rebar. There's really no frost line here.
 
OP
B

brnctt

Well-known member
Joined
Apr 20, 2023
Messages
107
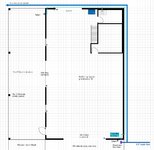
Here are my initial plans for inside the shop:

Building Plumbing Plan.JPG

The waterline will probably come in through the back now, but same concept. Two hose bibs, a supply and drain in the back for a bathroom sink and shop sink (going to a dry well) , and a drain box for winterizing. Shop won't be heated, we only get a few sub zero days a year here. The toilet will be electric incinerating since I don't want to put septic in just yet.

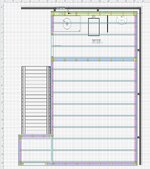
The small room can be for either an office or storage, and planning to install some stairs so I can use the area above for off-the-floor storage. I'm thinking of adding a window and a small window AC to that room, as it would be the only climate controlled area on the property for a while, and it gets hot here!

More detailed plan, with framing:


1.JPG

Plan to tie in a urinal when the house utilities go in. Maybe a flushing toilet at that point too, depending on how the incinerating toilet goes.
 

GlennSullivan

Well-known member
Joined
Mar 15, 2006
Messages
342
Location
Yorktown, NY
Looks like a nice plan and really impressed with the beautiful flat piece of property (coming from someone that had to excavate and remove dirt for many many days) Where are you located?

Edit: After seeing the interior plan, you may want to consider enlarging the second floor area. I built a 50Wx30D garage shop with a 12Wx30D second floor and wish I had extended it to 24W X 30D.
 
OP
B

brnctt

Well-known member
Joined
Apr 20, 2023
Messages
107
Looks like a nice plan and really impressed with the beautiful flat piece of property (coming from someone that had to excavate and remove dirt for many many days) Where are you located?

Edit: After seeing the interior plan, you may want to consider enlarging the second floor area. I built a 50Wx30D garage shop with a 12Wx30D second floor and wish I had extended it to 24W X 30D.

We're north of Dallas.

I've thought about how big to make the loft quite a bit, considering everything else I'd like to do or store in the shop. Do you spend time in your loft? Mine will only be for storage (boxes and such). Right now it's about 10x17.
 

GlennSullivan

Well-known member
Joined
Mar 15, 2006
Messages
342
Location
Yorktown, NY
We're north of Dallas.

I've thought about how big to make the loft quite a bit, considering everything else I'd like to do or store in the shop. Do you spend time in your loft? Mine will only be for storage (boxes and such). Right now it's about 10x17.
Mine 2nd floor is strictly for storage and I have it filled with racks. Our roof pitch is steep (snow zone), which uses up a lot of vertical space in the second floor. I don't have access to drawings now but the layout was 48w across the front and 53w across the back. The space is divided into 36' wide x 30' deep for vehicle shop area with cathedral ceiling and a 12' wide x 30 deep 2 story area for bathroom, HVAC, hot water, air compressor, equipment, and storage.

You can see this layout in the framing picture below which was taken taken from the cathedral shop area facing the 2 story area. What I should have done was extend the 2 story area out another 12' over the cathedral shop area.

1706714794380.jpeg

1706715406954.jpeg
 
Last edited:
OP
B

brnctt

Well-known member
Joined
Apr 20, 2023
Messages
107
Well, once the building is in I'll have a lot of time to think about it. Any structure I build inside will be freestanding. Thanks for the advice!
 
OP
B

brnctt

Well-known member
Joined
Apr 20, 2023
Messages
107
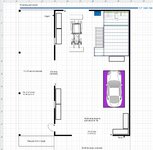
Here's some general ideas of how stuff will take up room inside. The purple box is a 4post lift, which I'll have on casters, and probably store my sports car on it and use it for family vehicle maintenance. All the boxes on the sidewalls are 24x72" to account for shelving, toolbox, workbenches as they're all about the same size. Fills up quickly!
I think in the future when the house is built, I'll park the tractor under the lean-to which will free up space, but needs to be inside for now for security.

plan.JPG
 

jbrentd

Well-known member
Joined
Jul 8, 2015
Messages
1,039
Location
Northeast Oklahoma
Looking forward to seeing how your build progresses. Is that a utility sink just outside the enclosed bathroom? If not, I would recommend adding one.
 
OP
B

brnctt

Well-known member
Joined
Apr 20, 2023
Messages
107
Good progress today.

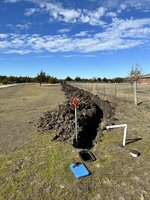
Putting the water main in. Moved this hydrant about 150ft up along the fence so I can reach anywhere between the shop and the street with 200ft of hose:

IMG_1148.jpg
IMG_1168.jpg

Run ends at a remote hydrant for future garden:

IMG_1164.jpg


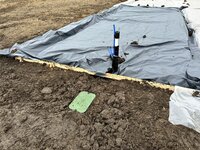
Dirt work complete. Vapor barrier is not complete, they just spread it to protect from rain. That's the water main running behind:

IMG_1163.jpg


Tapping the main for shop supply. There's a ball valve disconnect and also a drain valve:

IMG_1161.jpg


Drain pipe ending at the dry well (no gravel in it yet):

IMG_1159.jpg
 

Attachments

  • IMG_1167.jpg
    IMG_1167.jpg
    2.1 MB · Views: 7
OP
B

brnctt

Well-known member
Joined
Apr 20, 2023
Messages
107
Plumber finished today so I went out and backfilled the trenches and did some compacting and grading on my tractor. Didn't get it perfect but hopefully after a few rains it'll settle in.


IMG_1182.jpgIMG_1179.jpg

IMG_1178.jpg

IMG_1180.jpg


Shop disconnect/drain box:

IMG_1183.jpg


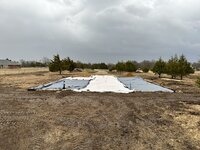
Covered the dry well hole with a pitched tarp as we're getting some good rain this weekend. Will fill it with drainage rock after the concrete is poured, as I plan to add any remainder from the truckload to the driveway after the concrete trucks tear it up.

IMG_1184.jpg
 

Attachments

  • IMG_1183.jpg
    IMG_1183.jpg
    1.9 MB · Views: 1
  • IMG_1184.jpg
    IMG_1184.jpg
    1.6 MB · Views: 3
OP
B

brnctt

Well-known member
Joined
Apr 20, 2023
Messages
107
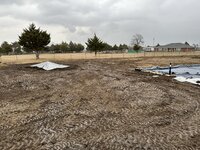
Since those last pics the pad flooded and we had to rework it. I also decided to raise the forms/pad a few additional inches so I could have better slope away from the building.

Also added 3 truckloads (about 30 yards) of 3-5" rock. My crushed concrete with lots of fines wasn't cutting it, the rock truck was sinking into the soft ground below, concrete trucks would have got stuck. Spread it with my tractor:

IMG_1218.jpg

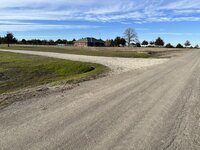
Unfortunately the road is super bumpy now, once construction finishes I'll top it with some more fines, maybe like a 2" minus.
 
OP
B

brnctt

Well-known member
Joined
Apr 20, 2023
Messages
107
BIg day! We poured today. Perfect weather for it, about 60 degrees and cloudy, and it'll rain all day tomorrow and the next day.

At the last minute I opted for 3500psi mix. The guys didn't add any water, and the worker I was talking to said it set up pretty quickly. I think that's a good thing? (good concrete to water ratio).

They cut/carved in the control joints on the driveway and the lean-to, and will come back tomorrow morning to saw cut the main slab. I went fairly large on the dimensions between the control joints, hope it's ok. Largest is about 16x14. I know you're not supposed to go over 10ft for a 4" slab. Wish me luck. But the dimensions I chose aligned with the columns which I also read is a good thing.

IMG_1226.jpg


IMG_1232.jpg

I'll get a few more photos when I go out tomorrow to check it out. Had to get home to do some work before they completely finished it.

Also did some dirt work on the tractor to build up the side of the driveway up by the building. It was flooding and the rocks weren't supported very well. You can see how far the concrete truucks pushed in that 5" rock, it's basically flat where the tires were:


IMG_1234.jpg
 
To avoid these ads, REGISTER NOW!
OP
B

brnctt

Well-known member
Joined
Apr 20, 2023
Messages
107
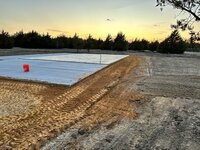
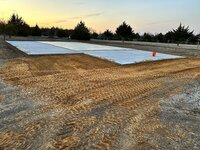
It’s two days later now. The guys came to do the saw cuts the next morning. It’s been raining all weekend. Great for the concrete but since the clay ground got all torn up around the pad, it’s a muddy mess everywhere.

Have 20 yards of select fill coming (might need 40) so I can do some grading away from the slab and fill in the equipment ruts in the mud, then 20 yards of 3” rock to set my base for the last part of the driveway coming up to the shop.

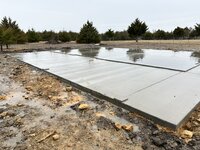
Driveway/parking pad (30x20):
83E27E1B-75FD-4DD9-8B04-9D587694AF1A.jpeg

Lean to pad (14x50), plus 4ft sidewalk in front to the driveway:
F37E2982-C362-4E81-AA36-62607069FFB8.jpeg

Main shop floor (30x50):

99E44A71-D626-472B-863F-AB741768AB6C.jpeg
 
OP
B

brnctt

Well-known member
Joined
Apr 20, 2023
Messages
107
One unfortunate event is they used red chalk line for the relief cuts, probably because it was raining when they did it. It’s stained the pad and I’m working on removing it. Magic erasers seem to work pretty well, and likely gentle enough not to damage the surface. I’m using evaporust as well but not sure if it’s contributing or not.
Before:
31E8E2DA-EB66-4610-A130-6581E94BFB0E.jpeg
4A723E01-A1A9-4D47-811E-B70AB7087363.jpeg
23AAF102-4679-41F7-9363-3B9056969C84.jpeg


After:
8B0531BD-FB4A-4065-98F1-377048829FED.jpeg
ECFE7D30-3DFA-4C98-B7B5-9FF5D64A1189.jpeg
F17BDCE9-15B5-4D0E-B8BA-B78D756803DC.jpeg


I don’t know if these are the exact same places but they were similarly stained.
 

Attachments

  • 64359059-35E8-4BAA-9ACC-E6E9DB7AA995.jpeg
    64359059-35E8-4BAA-9ACC-E6E9DB7AA995.jpeg
    925.4 KB · Views: 4
OP
B

brnctt

Well-known member
Joined
Apr 20, 2023
Messages
107
Side update on my dry well for the shop sink:

Right after digging the hole about 12" of water got in there (rain and runoff). Over a week's time, it didn't drain a single inch. I was hoping this clay had SOME percolation, but it appears I simply made a pond. Maybe it will percolate a bit in summer when it's dry. Ground is fully saturated right now.

Changing my plan to treat this more like a sump. I'll put a pump there on some kind of float switch, and run pipe to a sprinkler head circuit. Bit of a bummer as I was hoping for a passive solution but not too hard to implement. I'll just have to pump it with a gas powered pump until we get power ran for the shop.
 
OP
B

brnctt

Well-known member
Joined
Apr 20, 2023
Messages
107
I went out to water the slab yesterday, but can't get out there today. Hope it'll be ok (day 4 after pour).
 

thammel

Well-known member
Joined
Oct 3, 2005
Messages
2,254
Location
Maryland
Cool place!! Maybe too late for this suggestion....I really regret not putting a shower in my garage. What's your total acreage?
 
OP
B

brnctt

Well-known member
Joined
Apr 20, 2023
Messages
107
Cool place!! Maybe too late for this suggestion....I really regret not putting a shower in my garage. What's your total acreage?

Thanks! Yup, little too late for that as the trap would have had to be installed in a box. I'm glad I didn't do one though, as our ground percolation is close to zero and the drywell is already kind of sketchy with just the sink. Thinking I'll have to pump it in the wet season. Still might do a point-of-use tankless heater and connect a garden hose/sprayer to it to make a makeshift outdoor shower if I get really dirty.

The lot is just over 7.5 acres.
 

kj_mustang

Well-known member
Joined
Feb 9, 2011
Messages
1,213
Location
Harrisonburg, VA
Just dig a much bigger hole to fill with gravel. I have one that serves a section of rain gutter from my house roof and a drain from my basement mechanical room mostly water softner discharge. I dug it 3-4' deep and 3' wide by about 5-6' long. LIned with filter cloth and filled with clean 1" gravel.
 
OP
B

brnctt

Well-known member
Joined
Apr 20, 2023
Messages
107
Thanks KJ, the hole was already larger than that! This is just a hand sink on a remote property, I'll probably use a gallon or two per weekend. Probably will just dump to ground so it can evaporate (and use biodegradable hand soap) until the house is built and I can tie into septic.

FYI our septic systems here all have sprinklers rather than drain fields due to the poor draining soil
 
OP
B

brnctt

Well-known member
Joined
Apr 20, 2023
Messages
107
Not much progress since my last update, just waiting a few weeks for slab cure before we start the building. A lot will happen quickly then!

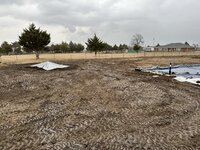
I need to get out there and do some grading work while it's still dry. I hired a skid steer to cut the big swale in for the driveway, but think I can probably handle putting some dirt around the slab perimeter myself with the tractor. I may cut some small ditches on either side of the building for additional channeling of water, too. Just need to angle the box blade and dig in. I also got a survey laser to help.
 
OP
B

brnctt

Well-known member
Joined
Apr 20, 2023
Messages
107
Took a day to do some basic grading, just to fix some of the construction damage and keep standing water from sitting against the slab. I also did the best I could with a tractor to level out where the driveway will be extended up to the concrete driveway.

I think what I'm going to do is angle my box blade and cut in some small ditches like 8ft away from each edge, just to help channel rain water from the roof. Not sure yet if we're doing gutters. Even if we do, I can put popups or pipes in the ditch to carry the water away.

I'm also getting quotes on fencing. Going to be quite expensive for 800ft of T post fence and 250ft of decorative wood fence, plus an entry gate. Might try to tackle the T post fence myself, but I'm a one man show.

IMG_1319.jpg

IMG_1320.jpg


IMG_1318.jpg
 
OP
B

brnctt

Well-known member
Joined
Apr 20, 2023
Messages
107
Also still having some issues with my gravel drive. When the dirt truck was tearing up the driveway, sinking in 6" inches, I asked him to bring some big rock to stabilize it for the concrete trucks the next week, and think I got a size or two too big. It worked, but the road is very uneven and bumpy for regular vehicles as it packed down kind of irregularly.

I guess all I can do is order enough smaller material to fill in the undulations. Would probably be cheaper than hiring a roller.

Also thinking of trying to tear off the highest peaks with my box blade and throwing those rocks in front of the pad before they dump the smaller rock there. Still going with ~2" solid stone to establish a base. Not sure if my tractor is powerful enough.

IMG_1321.jpg
IMG_1317.jpg
 

Spareparts

Well-known member
Joined
Mar 12, 2010
Messages
2,045
Location
Lansing Ks.
When you get that load of gravel slip the driver a few bucks to drive up and down to pack
the big rock more uniform before spreading the smaller gravel.
 
OP
B

brnctt

Well-known member
Joined
Apr 20, 2023
Messages
107
When you get that load of gravel slip the driver a few bucks to drive up and down to pack
the big rock more uniform before spreading the smaller gravel.

Thanks! Yeah I was planning on doing that in fact, and wetting it down beforehand to soften the soil up a bit. Any little leftovers hopefully I can push down with my tractor's front tires with a load in the bucket.
 
OP
B

brnctt

Well-known member
Joined
Apr 20, 2023
Messages
107
Got a load of select fill delivered and did some grading:

IMG_1333.jpg

IMG_1335.jpg

Still need to do the other two sides.

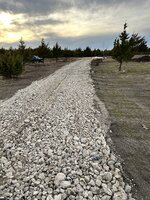
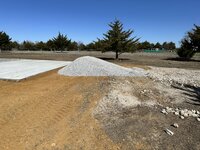
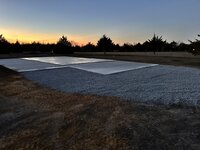
Then got some 57 limestone delivered and put it in front as a temp driveway. I'll cover with crusher run when construction is complete.

IMG_1342.jpg

IMG_1344.jpg


So much prettier than the crushed concrete! You can see them side by side there. I'm done with that stuff, it has it's place but I think the limestone is worth the small premium.

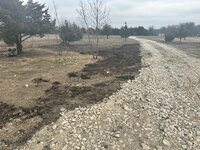
Also I began the process of tearing out most of the 5" rock on my driveway. Two reasons: Couldn't get it flat, even after the 40 ton rock truck drove over it about 10 times, and secondly, I don't want to be tearing it up and picking it out for decades every time I regrade my driveway's limestone topper. I'm using my box blade to rip it up and the bucket to move it to a pile. I won't get all of it but with 80% of it gone, the next rock truck running it over a bunch of times should smash it down flat nicely. It's a big pain and waste of time but I made a mistake using it, lesson learned.

I did leave some at the culvert entrance though since that's where we will still have concrete trucks coming in in the future for the house build.

IMG_1348.jpg
 

ybnormal

Well-known member
Joined
Jan 3, 2016
Messages
5,002
saw your hydrants and water lines, looks like you didn't bury them deep. what's the frost line in your area?
 
OP
B

brnctt

Well-known member
Joined
Apr 20, 2023
Messages
107
saw your hydrants and water lines, looks like you didn't bury them deep. what's the frost line in your area?

Local codes for nearby big cities are 6". The lines are about 2ft deep.

I do need to get the plumber back out as we have about a 1gal/day leak.. Luckily it's not under the slab as I shut off the cutoff and still got the leak.
 
OP
B

brnctt

Well-known member
Joined
Apr 20, 2023
Messages
107
Made good progress today removing that big rock. Neighbor is going to help me haul some of it away in exchange for keeping it.

Trying to beat some upcoming rain, want to get a layer of limestone down before the guys come out with their heavy trailers for the building construction.


IMG_1351.jpeg
 
OP
B

brnctt

Well-known member
Joined
Apr 20, 2023
Messages
107
Finished final cleanup of the riprap, driveway is now bare. Also had to build up an area by the shop with a bit of a dip that got soggy.

IMG_1359.jpg

IMG_1358.jpg

IMG_1362.jpg

Got some help from the neighbors in exchange for most of the rock. :)


IMG_1353.jpg

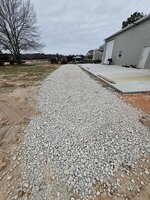
This weekend I am getting some of this stuff delivered to establish the new base. It's 3/4" to 1.5" clean limestone:

428340779_7686040908086090_8581611120057214223_n.jpg

I figure it'll pack/settle a little better than a single large size, and not be too big to manipulate and spread. If some sinks, that's ok, I can add a little more before topping. Also went with limestone instead of crushed concrete, looks a lot better in my opinion. Will top with limestone crusher run after this settles.

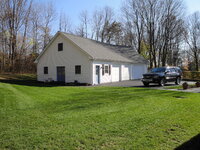
(not my shop, another customer)
 
To avoid these ads, REGISTER NOW!
Top Bottom