To avoid these ads, REGISTER NOW!

Unexpectedly long Craftsman tool chest restoration project

atlm

Well-known member
Joined
Jun 4, 2010
Messages
344
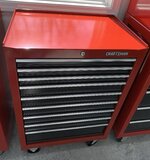
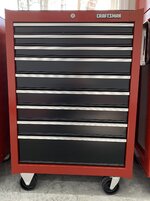
I wanted a tool box with a lot of drawers that would physically line up with my gen1 US General chest (39.5" high, 18" deep). Finding something that height proved to be a challenge. I eventually found this older Made-in-USA Craftsman (by Waterloo). In the sales ad pictures, it didn't look that bad. In real life, the rust was more widespread, especially the drawers. But it fit my requirements and the rust was all on the surface, nothing structural, so bought it.

"Quick weekend project" I figured. A bit of sanding, 2 or 3 cans of spray paint, done. Hahaha.

I just finished it. It took me a month, with total labor at about 60 hours and over $123 in materials (plus the price of the tool box itself):

$13 Rust dissolver gel
$14 2 cans Rust-Oleum rusty metal primer
$13 3 cans Rust-Oleum Regal Red (clearance price)
$15 4 cans Rust-Oleum charcoal gray (clearance price)
$16 2 cans Rust-Oleum satin black
$7 Rust-Oleum satin metallic aluminum
$7 Rust-Oleum clear satin
$4 Gulf paraffin wax
$12 box of latex gloves, gentle masking tape
$22 24' roll of drawer liner

additional items that I already had: new lock, super glue, towel (ruined with wax), sandpaper, steel wool, masking paper, mineral spirits, alcohol

Pictures from sales ad:
CM 9D ad toolbox front.jpg
CM 9D ad toolbox top c.jpg
 
Last edited:
To avoid these ads, REGISTER NOW!
OP
A

atlm

Well-known member
Joined
Jun 4, 2010
Messages
344
I removed the drawers, slider rails, casters, lock, and emblem from the cabinet.
I power sanded the rust areas, scrubbed the metal joints and crevices with a steel wire brush, treated the rust spots with dissolver gel, rinsed everything off, degreased with mineral spirits, and degreased again with alcohol.

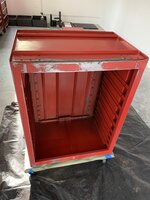
Bottom of the cabinet prior to paint:
CM 9D b bottom prepaint.jpg

I primed and painted the bottom, outside, and inside (everything but the top) first, with the cabinet upside down on a furniture dolly to move it around.

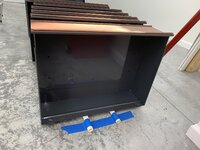
After primer and 2 coats of paint (Regal Red):

CM 9D c bottom painted.jpg
 
OP
A

atlm

Well-known member
Joined
Jun 4, 2010
Messages
344
I repeated the sanding, dissolver gel, rinse, degrease process on the casters. Taping the wheels off for paint was interesting.

I tried to find new caster retaining screws but was unsuccessful, so I soaked them in rust dissolver gel, rinsed, scrubbed, soaked them again, and rinsed them again. Then I drilled holes in a board to hold them for painting.

After the first coat of paint (Satin Metallic Aluminum):

CM 9D d screws casters cleaned painted.jpg

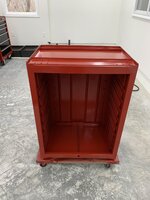
Remounted on the cabinet:

CM 9D e frame with casters painted.jpg

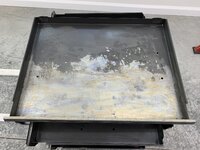
Then I flipped the cabinet, taped off the sides and bottom, and primed and painted the top.
 
Last edited:
OP
A

atlm

Well-known member
Joined
Jun 4, 2010
Messages
344
I removed the drawer handle aluminum trim pieces. The drawers were filthy inside, with rust inside and out, mostly at the fronts, with the lower drawers worse than the uppers. I began cleaning them with Krud Kutter, but found it was slowly softening and removing the paint. I eventually ended up using steel wire brushes on the metal joints and crevices, power sanding the larger rust areas, then hand-sanding the worst rust spots to get down to metal. Then I soaked all those areas in rust dissolver gel, rinsed off the gel (in my kitchen sink), washed the drawers with dish soap, rinsed again, degreased them with mineral spirits, and gave them a final wipedown with alcohol.

A couple of the drawers prior to paint:

CM 9D f drawer prepaint.jpg
CM 9D g drawer prepaint.jpg
 
OP
A

atlm

Well-known member
Joined
Jun 4, 2010
Messages
344
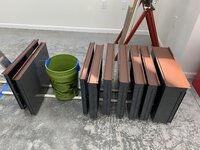
I painted the insides and outsides of the drawers, and primed their front panels.

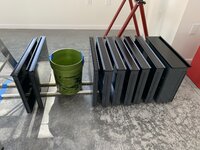
Drawers painted (Charcoal Gray, 2 coats) with fronts primed (Rusty Metal Primer, 2 coats):
CM 9D h drawers midpaint.jpg
CM 9D i drawers midpaint.jpg

With all the warnings to make sure the paint is dry before recoating (to prevent wrinkling), I waited 5 days to paint the front panels. I used delicate painters tape and masking paper to cover the somewhat fresh paint on the drawer bodies and insides.

Fronts painted (Satin Black, 2 coats):
CM 9D k drawers painted.jpg
 
Last edited:
OP
A

atlm

Well-known member
Joined
Jun 4, 2010
Messages
344
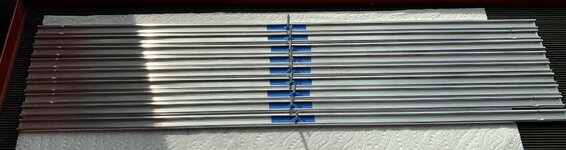
While all of that was drying I focused on the aluminum trim pieces for the drawers. They had scratches, some corrosion, and some staining from the drawer rust. I wet sanded the scratches and stains out with 320 grit and mineral spirits. Then I cleaned and polished all the surfaces with 000 steel wool, also wet with mineral spirits. After a final wipedown with alcohol, I painted them with 2 coats of satin clear.

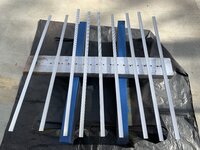
To enable painting of the fronts and backs, I taped roofing nails inside the back grooves. I held the nails while painting, and then inserted the nails into predrilled holes in a board to hold them while drying.

Nail "handles" taped in place:
IMG_1158c.jpg

Trim cleaned and painted:
CM 9D o trim painted.jpg
 
Last edited:
OP
A

atlm

Well-known member
Joined
Jun 4, 2010
Messages
344
After cleaning the drawer slider rails and their slots in the cabinet with mineral spirits, I read that wax is the preferred lubricant so I attempted to rub some on. That just made a mess of wax slivers. I finally ended up using a heat gun to melt the (Gulf paraffin) wax bar surface while rubbing the slides through the melted wax. The slides were covered but globby. Then I used the heat gun to melt the wax into a liquid on each slide, leaving the slides covered in a thin uniform wax film.

Done, with one towel ruined with melted wax soaked into it.

The "Craftsman" trim piece had one of its round retention pins broken off. I used Loctite super glue to fix that, which worked great. It also had some sort of paint blobs on it, which came off with alcohol and a plastic razor blade.

The tool box had no key, so I replaced the lock with a new one, from a set I purchased years ago from Sears.

Next was reassembly. That went quickly.

Reassembled:
CM 9D q reassembled.jpg
CM 9D s reassembled b.jpg
 
Last edited:

RTM

Well-known member
Joined
May 13, 2019
Messages
13,241
Location
SF Bay Area
Looking good. If I could get that done in a month, I’d clean up more of my boxes, but instead I use them rusty.
 

Wamsutta

Well-known member
Joined
Jan 8, 2014
Messages
10,888
Location
Amarillo, Texas
Rustoleum Sunrise red is a match as well. I've also used Cherry Red to paint pieces that seem to match the C-man Pro.
My experience with Regal Red is that it's much darker than Sunrise Red. I sprayed Regal Red over top of red oxide primer when restoring a wheel barrow. That was a mistake because it came out real dark like maroon. I have since learned that a very light gray primer is ideal for reds.
 

larry4406

Well-known member
Joined
Jan 27, 2006
Messages
19,560
Location
Northern Virginia
Very nice job on the tool box. That was quite the effort.

Regarding wax for slides, at the day-job, our window and door contractor actually uses spray Lemon Pledge on the slides due to the wax it contains. When I first saw it, I was WTF but it works. Smells nice too!.
 
To avoid these ads, REGISTER NOW!

Toold_up

Well-known member
Joined
Feb 9, 2019
Messages
640
Location
Attached
Very nice job on the tool box. That was quite the effort.

Regarding wax for slides, at the day-job, our window and door contractor actually uses spray Lemon Pledge on the slides due to the wax it contains. When I first saw it, I was WTF but it works. Smells nice too!.

I've known guys to spray pledge on motorcycle seats after "tuning" carbs...
 
OP
A

atlm

Well-known member
Joined
Jun 4, 2010
Messages
344
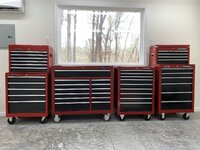
I had no idea that Regal Red looks so much like Craftsman Red. That's awesome. :)
I like it, too. 🙂 There are tiny differences between the Craftsman red, Regal Red, and Homak red, but they’re subtle and only noticeable if you're looking closely.
 
Last edited:
OP
A

atlm

Well-known member
Joined
Jun 4, 2010
Messages
344
Last edited:

Skellyii

ALLIANCE MEMBER
Joined
Nov 13, 2021
Messages
1,757
Location
KC Area
Great job!

I was looking for a CMan 9, or the 6 drawer you have on the right side to match my existing stuff. Unfortunately, after dealing with the idiots on CL and FB, and always getting 5 minutes late to estate sales, I just gave up and grabbed a Husky. :(
 

MarkH

Well-known member
Joined
Dec 19, 2005
Messages
1,353
Location
Kansas
Nice job

You discovered the big secret in used toolboxes. Seller says just needs a little paint. Unless you have no other options run might be a good option. Restoring them takes about 10 times longer than expected. The first one that I did took a couple months. I had expected about a week. Looks great but was very time intensive. Said I would never do it again. That was about 3 boxes ago.
 

Beerhippie

Well-known member
Joined
Oct 13, 2023
Messages
9,990
Location
Far NE Oregon
Shoot, you call that "unexpectedly long"?

I started restoring an suspected (but unproven) SO top chest two years ago. I repainted the tote that goes in the top, then the weather turned too cold to paint outside so I set it aside for the winter. Somehow, it started accumulating tools. Now it's too much work to find somewhere else for the all contents while I restore it.

Just like the other five toolboxes/chests in the shop....
 

kfainf

Well-known member
Joined
Jul 28, 2007
Messages
300
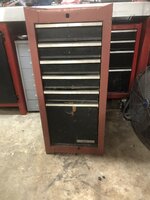
Great job on the restoration! Great inspiration for me too. I have several Waterloo made Craftsman top boxes and roller cabinets I’m planning to restore. I’m currently working on this side cabinet for the first restoration.IMG_4595.jpeg
 

Steve_P

Well-known member
Joined
Sep 15, 2010
Messages
5,185
Nice job OP, that looks like new! I have a red and black griplatch lower box, and a bunch of black griplatch boxes.
 
To avoid these ads, REGISTER NOW!
Top Bottom