To avoid these ads, REGISTER NOW!

Use your hands to make her smile

N8

Well-known member
Joined
Dec 2, 2006
Messages
314
Location
In a house
I am a big procrastinator and usually fail at getting my wife the right present for any given occasion.

So the last time I ran into this situation I decided I was going to head out into the shop and make her a Rose that would never die. I have seen it done before but I needed a good challenge so I decided to give it a hand.

I have a background in Hot Rod Fabrication, body work and all that fun stuff so here is how I went about it.

First I found my supply of 20 gauge sheet metal.
I prepped a pattern out of paper and scored it onto the metal.
I wanted something full so I decided to do 8 pedals total.

I then cut all the pedals with my hand shears.
All were different sizes so they would fold around each other as I beat them into shape.

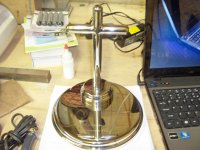
Next I set up my bag and wood post.
I used two hammers to get the forms I have shown below.
First hammer was a converted nail driver that has a ground rounded head.
Next I used a 3" round hard plastic body mallet to further work the shape.

Once I had the concave I wanted I use a few select hand tools to bend the pedal tips back.

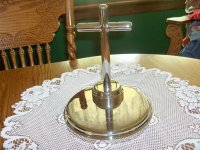
To finish it off I found some round stock, cut it to size. I welded a large nub on the end and ground it to shape. Then I started assembling the pedals, per size, to the round stock to get my shape.

Lastly I cut two lower pedals bend them in my break and did a lot of bending, shrinking and stretching. I also used an old blunt Phillips screw driver I had to tool some lines in the lower pedal.

All in all I had about 7 hours in this. I would rate it at an intermediate level but really think anyone could tackle it if they just gave it a try.

Let me know your thoughts.
rose%20%284%29.jpg


rose%20%282%29.jpg


rose%20%281%29.jpg


rose%20%283%29.jpg
 
To avoid these ads, REGISTER NOW!

Deltarat

Well-known member
Joined
Nov 29, 2006
Messages
341
You got me in trouble. My wife wants one and there ain't no way in hell I can do that. Nice job!!
 

c/o say

Well-known member
Joined
Mar 8, 2011
Messages
322
Location
Indiana
Man I have to get my mind out of the gutter lol. Great job on the rose so ya gonna get lucky.
 
OP
N

N8

Well-known member
Joined
Dec 2, 2006
Messages
314
Location
In a house
Thanks fellas. Like I said, you should give it a try. It's only metal...

And yeah...SHE REALLY LIKED IT.
 

uhohjim

Well-known member
Joined
Dec 29, 2010
Messages
127
Location
Crete Illinois
DELTA go on the Metalmeet website.....they have some awesome step by steps on how to build sheetmetal and sheet copper flowers..........Jim
 

NASTYZEN

Well-known member
Joined
Jun 11, 2010
Messages
2,823
Location
St-Colomban,Que. Canada
Aww that's so cute! She must be worth it!
I made one out of copper years ago for my mom. Funny, it looks like yours.....
Great workmanship!.:thumbup:
I know when I bash things out on the anvil for my missus,it gives me bonus points.:bounce:
 
OP
N

N8

Well-known member
Joined
Dec 2, 2006
Messages
314
Location
In a house
Thanks again all.

I have never seen the one from metalshapers. Thanks though, that's all I need is another web site to take me away from the shop..LOL

Come to think of it I did get the influence of someone on the HAMB. Maybe the same guy? He has some fantastic skill. I'm still learning!
 
OP
N

N8

Well-known member
Joined
Dec 2, 2006
Messages
314
Location
In a house
So not to hijack my own thread but I thought I would show a few other metal/wood/resin sculptures I have done.
Notice there is a theme. I do an annual Club trophy for the Grand National Roadster Show for the Suede Palace.

Let me know if your interested in any of the techniques.

sculpture3.jpg


picture.php


picture.php
 
Last edited:
To avoid these ads, REGISTER NOW!
OP
N

N8

Well-known member
Joined
Dec 2, 2006
Messages
314
Location
In a house
I how much do you charge for 7 hour's of work?

Hmm, I have never thought of that. It all depends on what I am doing. I don't believe I could ever charge my day rate.
Nobody wants a 1K flower. :lol_hitti

I am an industrial designer and spend most of my day behind a computer doing Architectural, Engineering and Design illustrations and concepts.

My speed shop is only open to special cars and restorations. We will be doing a movie car tribute soon just to give you and idea of the work.

This stuff is just a fun release for me. I have thought about making a few more. We will see how it goes. They are pretty big too if you can't tell from the photos. They are a little bigger than life size.


Of course we are interested in the techniques ! Bring it on !
Nice work by the too.


Cool. I will find some more photos of my process and post them up.
 

Zeke

Well-known member
Joined
Aug 13, 2009
Messages
17,176
Location
Long Beach CA, the sewer by the sea.
Well, now the cat is out of the bag. This simple little but extremely handsome rose was whipped up by the guy that makes a trophy for cars winning one of the most prestigious car shows of all time. Cars that can cost half a million to build.
 
OP
N

N8

Well-known member
Joined
Dec 2, 2006
Messages
314
Location
In a house
Well, now the cat is out of the bag. This simple little but extremely handsome rose was whipped up by the guy that makes a trophy for cars winning one of the most prestigious car shows of all time. Cars that can cost half a million to build.


Oh no MILT. I don't make THAT TROPHY!!!

I do make trophies for other vehicles in attendance though. I certainly don't want the credit or the misunderstanding there of for the big one. Mine are club trophies as shown above. Typically given to "low buck" cars in the Suede Palace.
 
Last edited:
OP
N

N8

Well-known member
Joined
Dec 2, 2006
Messages
314
Location
In a house
Process - Part #1

Of course we are interested in the techniques ! Bring it on !
Nice work by the way too.

Amity,

I found a bunch of photos of prcoesses of one of my last sculptures.
I will post a couple of each process and then go from there if there is interest.

Process - Part #1


Design:
Being that I spend most of my day designing on a computer I usually do most of my sculptures freehand, or free form, if you will. I have a vision in my head of what needs to happen, then set out without plans to develop as I go.


Sculpting:

I don't do this much and it shows. This is the first sculpture I had done in years. When I do them it depends on what I am doing .VS what type of clay I use. On this I used a disposable water based clay. I did it quick and had about 4 hours in this sculpt so I was not worried about dry time.
I also knew I was going to be molding it and it would be a complicated mold so I knew I was going to lose the original.

sculpt%20%281%29.jpg


sculpt%20%283%29.jpg


Molding:

I knew the end result needed to be a cast resin piece. In this cases It was going to be a translucent urethane red resin.

I decided to do it as a single enclosed inner mold. To do this I used platinum silicone and spread it about 2" around the clay master.

Once it was cured I did a two part hard shell. It is done with Fiberglass and gypsum.

Once the outer shell has cured it is removed.
Then the silicone is "key cut" from the back to release the inner sculpt.

The outer shell also has about 12 bolts through the outline to secure it together as I pour the resin in.

mold (1).jpg


mold (6).jpg
 
OP
N

N8

Well-known member
Joined
Dec 2, 2006
Messages
314
Location
In a house
Process - Part #2

Process - Part #2

Process:

I will take other elements that I have molded or found objects and start to re create the vision in my head.

This is where I start making any templates I know I will need for metal and begin my basic measurements.

DSC05932.JPG


DSC05965.JPG


Fabrication:

Once I have the idea flowing and basic parts assembled I start into the fabrication phase.
This usually means metal and wood work.
I use any manner of metal work I have gained through the years to create and form the metal. Most of is pretty basic as I don't have all the fun tools as I would love to have.
All of my wood work is had done via saws, routers, sanders, etc.


fab (2).jpg


fab (6).jpg
 
Last edited:
OP
N

N8

Well-known member
Joined
Dec 2, 2006
Messages
314
Location
In a house
Process - Part #3

Process - Part #3


Fab cont.:

I will continue to work through the sculpture and basically, keeping my vision in mind, let what I am doing direct me into the final form.

IMAG0060.jpg


IMAG0055.jpg


Final Assembly:

After a lot of hours of wood finishing. Painting and Metal Finishing I can do final assembly.
I very much like most of my pieces to show case the metal work so I tend to leave the metal bare / metal finished with a light coat of clear on it.
This is done with a lot of hand filing, small pneumatic air angle grinders and hand sanding.


IMAG0091.jpg


IMAG0089.jpg


I hope you enjoy the process.

Thanks,
Nate
 
Last edited:

dladcock

Well-known member
Joined
Jan 29, 2010
Messages
855
Location
North Carolina
Wow, N8, that's inspiring. The rose, the trophy shows imagination in practice.

It always amazes me how things evolve from our minds eye to our hands.

I've done a few projects like this, some short notice, some planned. Letting go and just allowing the finished form to "escape" from the material might be the most satisfying.

I like your work.

My latest "art" project was this past June. Our pastor retired after 40 years service. I wanted to show our appreciation and respect with a token he could refer to at will that was unique.

Machined from 316L stainless, polished here at home.

This is what developed: Images kinda stink.:confused:
 

Attachments

  • 006.jpg
    006.jpg
    141.1 KB · Views: 42
  • 009.jpg
    009.jpg
    149.9 KB · Views: 33
  • 011.jpg
    011.jpg
    154.6 KB · Views: 26
Last edited:
OP
N

N8

Well-known member
Joined
Dec 2, 2006
Messages
314
Location
In a house
Thanks Dlad and Bruce.

Dlad That cross and base is fantastic. What do you use to machine and polish it?
I wish I could get my metals that polished but I don't have a good buffing wheel.
 

dladcock

Well-known member
Joined
Jan 29, 2010
Messages
855
Location
North Carolina
N8, Thanks for the compliment.

My polishing set-up is frugal and effective, I guess. It's just a 1/2 HP 115 motor with a hardware store arbor, Scotch Brite wheel and a couple different cloth wheels.

The cross was counter bored to receive the arms, then TIG'd at the joints. The plate was flattened first with 180 and a DA sander. I used 320 from there to 400, 600, 1200, some 1500 finally 2000 grit.

The polishing is a white rouge from these guys: http://www.jestcoproducts.com/index.php?act=viewProd&productId=12

I like a sewn wheel because I can get better pressure and cut faster than using a loose wheel.

I've found, at least for me, that polishing the parts while still in stick form and before machining, I have better control and it's quicker to pre-polish then touch-up. Can't do that every time of course, but it helps when you can.

Here's the buffing equipment: http://www.garagejournal.com/forum/showthread.php?t=97441

Lynn Adcock
 

Amitygravel

Well-known member
Joined
Mar 26, 2010
Messages
1,188
Location
Claremont Illinois
Nate
Again , very cool. My tired old eyes can't tell from the photo , is the resin sculpture painted or polished ? Can it be polished , and does it come in different colors ?
I bet you could do pretty well making and selling custom shift knobs.

Craig
 
OP
N

N8

Well-known member
Joined
Dec 2, 2006
Messages
314
Location
In a house
Craig,

Good eye. The one above is actually translucent resin with a coat of trans metallic paint.
Most of the ones that I have done in this series for my Club are translucent red.
They can be done in any color you could imagine. You can either buy colored resins or mix you own custom colors. Just be careful with the chemical mixes as some paints will retard the curing of the resin if not destroy it all together.

To get the gloss I actually shoot them with a clear coat which brings out the sheen. You can detail them with acetone for cleaning but it will fog out. Clear coat (paint) really ensures the sheen.

You can also use different types of resins all of which have different characteristics for final appearance. Some are softer and can not be sanded or worked with easily, some are harder and clearer. (usually what ya want for the shift knobs)
 
To avoid these ads, REGISTER NOW!
Top Bottom