To avoid these ads, REGISTER NOW!

Veeps' Garage

bagged89s10

Well-known member
Joined
Mar 13, 2005
Messages
4,607
Location
CT
So I've decided to change the name one last time to "Veeps' Garage." It's a much simpler name and I can stick with it.

Previously, I named my Garage "The Little Vintage Garage." It all started when I re-purposed my knotty pine kitchen cabinets into my Garage. I installed them along the entire left wall of my garage making 2 workbenches. Then I acquired my first vintage US made power tool, a 1940s Duro Metal Drill Press. I fell in love with old american iron and It snowballed from there. Now I've started buying and selling vintage tools as a hobby and a way to fund my garage project. Once I finish organizing my garage, I will start working on my audi blue painted 1989 Chevy S10 pickup which I've already built a one off chassis on air ride. I hope you Enjoy the thread!

Current view. Almost as clean as I want it. A few things still need a home but I'm much happier.
39bab007c64ea96bf077756b9e0f6665.jpg

Current view. A little messy but nice and bright with the lighting finally installed.

12/17/2016


4/12/15

attachment.php


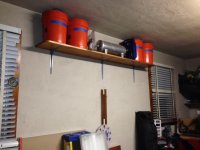
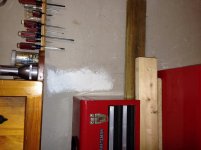
The top of the cabinets is being used for lumber storage for now. My plan is to put a 24" deep shelf for storage bins and put lighting underneath.

attachment.php


Here is my Wilton 9-500 vise. It's not bolted down yet but I am planning to make sliding mount so the vise can be pushed to the back of the workbench when not in use.

attachment.php


My Duro Metal Products V-3080 drill Press. Motor is not installed in this picture.

attachment.php


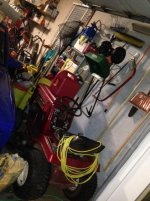
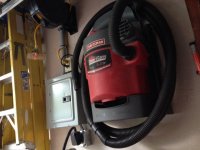
This is my smaller workbench on the same wall to the left, next to the garage door. It's separated from the main bench by a door. The vacuum will be moved to the left of the electric box. The small toolbox is going to be moved. I think the larger toolbox might be moved too. Not sure but I think it's a waste of bench top space with the toolbox on there. Then I can also put my Parker 974 on the left of this bench. This bench also houses my air compressor and will have hidden air hose and electrical cord reels.

attachment.php


attachment.php


Updated 6/27/15

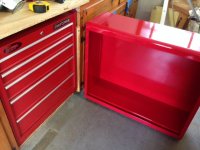
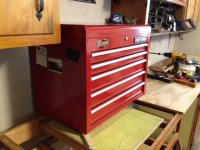
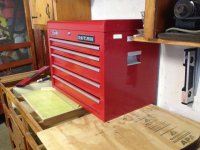
My newest addition and much needed parts organizer.

attachment.php


attachment.php


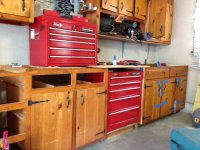
The 1970s craftsman boxes

attachment.php


And the cheap light duty parts cabinet that fits perfectly next to the cabinet. Also finally got all the drawers into the cabinets.

attachment.php


attachment.php


I've been browsing the forum for years but have not posted my garage. I have to say that there are some amazing garages on here and the ideas i've gotten are fantastic.


So I have a 20x22 attached garage on a ranch style house. Inside is about 21' deep x 19' wide with 8'8" tall ceilings. Not a terrible size but lacking organization. I also don't have a shed yet so I use the garage for all my garden tools and my son's outdoor toys.


So here are the pics of the house and garage.


I bought it 6 years ago with ugly faded vinyl siding/shutters and peeling paint on the doors. The 2 windows on the left are the garage and the driveway is in the back

attachment.php


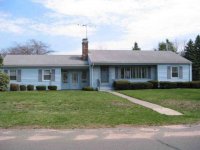
Here is the house now after I painted the exterior and redid the landscape with my wife. A few details are still left but I'm very happy with the results thus far.

attachment.php


attachment.php


attachment.php


attachment.php


attachment.php
 

Attachments

  • house front before.JPG
    house front before.JPG
    52.3 KB · Views: 4,625
  • house front after.JPG
    house front after.JPG
    140.4 KB · Views: 4,609
  • house left.jpg
    house left.jpg
    48.7 KB · Views: 4,514
  • house right.JPG
    house right.JPG
    98.1 KB · Views: 4,474
  • garage outside.JPG
    garage outside.JPG
    140.9 KB · Views: 4,442
  • house back.JPG
    house back.JPG
    116.9 KB · Views: 4,592
  • ImageUploadedByTapatalk1428790015.997654.jpg
    ImageUploadedByTapatalk1428790015.997654.jpg
    144.7 KB · Views: 15,321
Last edited:
To avoid these ads, REGISTER NOW!
OP
B

bagged89s10

Well-known member
Joined
Mar 13, 2005
Messages
4,607
Location
CT
Re: My little attached 20x22 budget renovation

So i just finished up the majority of my exterior house projects so it's time to de-clutter and get the garage setup the way I want it.

Here is the mess.
attachment.php


I can't get anything done with a garage looking like this. It's become a dumping ground and I can never find my tools. The mess is actually the perfect excuse for me to work on the garage as I don't have a place I can finish the other house projects. I have a half way built pull out kitchen pantry but no room to finish it. I think the wife bought it. :thumbup:

All the garden tools. This is after i went thru and threw out all the **** I didn't need. I'll be storing the wheel barrow on the wall and making hangers for the weed wacker, leaf blower, rakes, shovels, etc. I don't have a shed so all these will have to stay for now.
attachment.php

Here is my truck which is under buried in there somewhere
http://garagejournal.com/forum/attachment.php?attachmentid=350458&stc=1&d=1403586738
 

Attachments

  • mytruck.jpg
    mytruck.jpg
    75.6 KB · Views: 1,117
  • garden tools.jpg
    garden tools.jpg
    54 KB · Views: 4,560
  • garage mess.JPG
    garage mess.JPG
    114.4 KB · Views: 4,623
OP
B

bagged89s10

Well-known member
Joined
Mar 13, 2005
Messages
4,607
Location
CT
Re: My little attached 20x22 budget renovation

So now some progress. I'm trying to spend as little as possible by reusing old cabinets and shelving. I've been working on the garage for about a week now, a few hours a night. We gutted the kitchen a few years back so I saved all the old cabinets. They were custom built ins back in 1955 when the house wars built so It was a struggle removing them without destroying them. I had these cabinets just vertically sitting on the floor of the garage taking up space since I never had the motivation to hang them.

Got these hung last week. I used one of the old shelves as a cleat which was at the perfect height. I didn't remove the shelf yet because I used it to throw some tools on while I was going thru everything. I'll remove it in the next few days and then decide on what to do with that space. Not sure if I will just put a small shelf there or make hanging tool storage.
attachment.php


I had a craftsman cord reel and vac that were not hung up so i wired up an outlet and hung these. I had the electric upgraded when i bought the house from 100amp fuses to 200amp breaker panel with this subpanel in the garage. I needed a 220v outlet for my welder and plasma cutter. I have a feeling I'll be moving these around before I complete the renovation.
attachment.php
 

Attachments

  • vac and cord reel.JPG
    vac and cord reel.JPG
    112.3 KB · Views: 4,244
  • garage upper cabinets.JPG
    garage upper cabinets.JPG
    121.3 KB · Views: 4,122
OP
B

bagged89s10

Well-known member
Joined
Mar 13, 2005
Messages
4,607
Location
CT
Re: My little attached 20x22 budget renovation

Yesterday I hung up one of the old shelves on the back wall and started using 5 gallon buckets for storage and labeling them. I have a ton of buckets from when my wife was running a part time florist in our basement. The other shelf that is under the cabinets will go about 16" under this one. I can fit exactly seven 5 gallon buckets if i want to on these 7' long shelfs. The original owner of the house seemed to be handy and made that cord hanger on the wall under the shelf. I might be able to modify it a bit and use it to hang my welder and plasma cutter cables.

attachment.php
 

Attachments

  • top shelf.JPG
    top shelf.JPG
    105.3 KB · Views: 4,127
OP
B

bagged89s10

Well-known member
Joined
Mar 13, 2005
Messages
4,607
Location
CT
Re: My little attached 20x22 budget renovation

Tonight I mocked up the lower cabinets.

attachment.php

attachment.php


I'm thinking of putting my 5 drawer craftsman bottom toolbox in that space between the 2 cabinets and placing my 5 drawer upper cabinet on the bench where i have the 2 small upper cabinets. I think that will save a lot of space since i don't have the need to roll around my toolbox.

I have to make some cabinet filler strips on the upper cabinets and one for the lower right cabinet. I also have to cut the bottom back of the lower cabinets to fit over the 8" tall concrete lip.
attachment.php

attachment.php


I do need to epoxy the floor but I need grind the floor first. I'll have grind one side, roll my truck over to the other side on dollies, then grind the other side. My driveway is on a slight hill and the truck doesn't run under it's own power or have brakes so I can roll it out. Anyone have any suggestions on what to do with that rough concrete lip? It's too rough and uneven to use an angle grinder with a diamond wheel. I don't really want to mess with chemical strippers if I can avoid it. Other than that, I have a rustoleum epoxy shield kit that is a probably 5 years old because I never got to do it. It's never been opened. Do you think it would go bad? Or should I just go to Home Depot and return it? It looks like they still sell the same one.

I'm open to any suggestions. Thanks
 

Attachments

  • cabinet right side.JPG
    cabinet right side.JPG
    98.7 KB · Views: 427
  • back of lower cabinets.JPG
    back of lower cabinets.JPG
    124.9 KB · Views: 3,921
  • cabinet mockup.JPG
    cabinet mockup.JPG
    114.3 KB · Views: 3,965
  • lower cabinet mockup.JPG
    lower cabinet mockup.JPG
    143.9 KB · Views: 4,045
  • garage floor edge.JPG
    garage floor edge.JPG
    116.9 KB · Views: 3,938

NKlamerus

Well-known member
Joined
Feb 3, 2014
Messages
1,378
Location
Springfield, Or. (From Florida)
Re: My little attached 20x22 budget renovation

Not much help with the floor...but I wouldn't fill that wall/cabinet gap above the floor lip.

Those can be the best places for creepers, sheet metal, cable, extension cords, etc...

Otherwise it will be total negative wall space.

And the work on the house looks phenomenal! !
 
OP
B

bagged89s10

Well-known member
Joined
Mar 13, 2005
Messages
4,607
Location
CT
Re: My little attached 20x22 budget renovation

Not much help with the floor...but I wouldn't fill that wall/cabinet gap above the floor lip.

Those can be the best places for creepers, sheet metal, cable, extension cords, etc...

Otherwise it will be total negative wall space.

And the work on the house looks phenomenal! !

Thanks! Yea I might leave the space on the right lower cabinet. The rest will get closed up when I fit the cabinets over the concrete floor lip.
 

HSpencer

ALLIANCE MEMBER
Joined
Nov 28, 2010
Messages
2,854
Location
South Central US
Re: My little attached 20x22 budget renovation

What a beautiful and perfect setting. The home is fantastic. Just the style I love and you have it manicured perfectly. The shop will be a big compliment to your home. I am hoping you continue to post your progress. Again, that is a beautiful home and grounds!!

Fantastic!!!

Best Regards
Herb Spencer
 
OP
B

bagged89s10

Well-known member
Joined
Mar 13, 2005
Messages
4,607
Location
CT
Re: My little attached 20x22 budget renovation

What a beautiful and perfect setting. The home is fantastic. Just the style I love and you have it manicured perfectly. The shop will be a big compliment to your home. I am hoping you continue to post your progress. Again, that is a beautiful home and grounds!!

Fantastic!!!

Best Regards
Herb Spencer

I appreciate the compliments. It's a small shy of 1100 sq ft home on about a 1/2 acre. Behind me is a little league field and a senior center so at least no other homes will be built back there. Eventually We want to add a second story. For now we are just working with what we have and doing a little at a time. I'm really excited to finally get my garage done. I'm just trying not to spend much. Right now the only expenses on my list are.

1)Floor sander and diamabrush rental along with needed cleaners. I already have the epoxy which I might need more for a second coat.
2)Few sheets of plywood for the countertop/workbench
3)sunrise red spray paint to paint a few accents to match my craftsman toolbox
4)paint for the walls which I am trying to find some paint reminants to keep the budget down.
5)wiring and lighting will come last as the walls are already sheetrocked and I am going to run it in conduit. At least that's the plan for now and It will be easier to expand outlets and lights that way.

So sander rental, another epoxy kit and plywood are probably the 3 necesities right now. Maybe some 2x4s it the contractor reject pile all Home Depot to strengthen up the cabinets a little.

Less than $300 would be great!


Now I just need another vacation from work to finish it all!
 
Last edited:
OP
B

bagged89s10

Well-known member
Joined
Mar 13, 2005
Messages
4,607
Location
CT
Re: My little attached 20x22 budget renovation

Threw the toolbox in just now. Not sure if i like the top toolbox on the bench but the bottom one looks really good. Also the paint dried on this cabinet i got for free. Matches pretty good using rustoleum sunset red.
 

Attachments

  • cabinet painted to match.JPG
    cabinet painted to match.JPG
    117.6 KB · Views: 613
  • top toolbox 2.JPG
    top toolbox 2.JPG
    125.5 KB · Views: 600
  • top toolbox 1.JPG
    top toolbox 1.JPG
    131.5 KB · Views: 545
  • bottom toolbox.JPG
    bottom toolbox.JPG
    105.6 KB · Views: 586
  • toolbox in cabinet.JPG
    toolbox in cabinet.JPG
    138.5 KB · Views: 611
OP
B

bagged89s10

Well-known member
Joined
Mar 13, 2005
Messages
4,607
Location
CT
Re: My little attached 20x22 budget renovation

Made a quick clamp rack. It's temporary just to get them off the floor. I need to brace it in the center and make some notches so the clamps just fall into place.

attachment.php
 

Attachments

  • image.jpg
    image.jpg
    138.4 KB · Views: 16,387
OP
B

bagged89s10

Well-known member
Joined
Mar 13, 2005
Messages
4,607
Location
CT
Re: My little attached 20x22 budget renovation

Also found a good use for this cabinet for my jack stands. I'm missing one, at least. I do have to paint the shelf still.

attachment.php
 

Attachments

  • image.jpg
    image.jpg
    139.8 KB · Views: 16,370
OP
B

bagged89s10

Well-known member
Joined
Mar 13, 2005
Messages
4,607
Location
CT
Re: My little attached 20x22 budget renovation

Threw this cabinet on the back wall to see the fit. I think i'm going to cut off 6" in the back to make it 18" deep. I don't need it to stick out 24", it would just end up collecting junk on the back. I'll overhang the countertop 1" on the front, left, and right. I don't want it too deep as I'll have a 140" workbench on the adjacent wall. I am also going to put it on casters so I can move it around. I also want to make it so i can quick change the tools on it. It will be good use for the drill press, grinder, vise, bead roller, and maybe i can also incorporate my rounter table top somehow. I left just enough room under the red cabinet double thick 3/4" plywood top(1.5") and casters. If i make a quick change top inserts for my tools I can even roll it out side when having a party and use it as a bartop.

attachment.php

attachment.php
 

Attachments

  • photo 2.jpg
    photo 2.jpg
    136.9 KB · Views: 3,686
  • photo 3.jpg
    photo 3.jpg
    137.5 KB · Views: 3,666

taumac

Well-known member
Joined
Aug 30, 2011
Messages
8,104
Location
Brooksville, Fl
Re: My little attached 20x22 budget renovation

Nice transformation on house. The floor I would do after you do a lot of the work in garage and get things finalized. I say that because it would get alot of abuse during the build. I like the repurpose of cabinets and like the idea of inserts for the tools. Looking foward to seeing future projects and progress.
 
To avoid these ads, REGISTER NOW!
OP
B

bagged89s10

Well-known member
Joined
Mar 13, 2005
Messages
4,607
Location
CT
Re: My little attached 20x22 budget renovation

It looks nice. Real nice. :thumbup:

Thank you

Nice transformation on house. The floor I would do after you do a lot of the work in garage and get things finalized. I say that because it would get alot of abuse during the build. I like the repurpose of cabinets and like the idea of inserts for the tools. Looking foward to seeing future projects and progress.

Thank you. I agree. I plan to get everything major fabbed and the the layout set. Also want to get all my tools off the floor. Then I will rent the floor maintainer with diamabrush and go to town

The biggest tasks that I have left to do.

1)Building the bench around the toolboxes and cabinets. I have my layout set now.
2)build something for my garden tools.(rakes, shovels, trimmer, blower, chainsaw, etc)

3) build storage for my coolers and camping chairs.
 

taumac

Well-known member
Joined
Aug 30, 2011
Messages
8,104
Location
Brooksville, Fl
Re: My little attached 20x22 budget renovation

Than casters are best bet. I have everything possible on casters and I didn't break bank. Mine are 2" $2.25 one from Walmart but I got mine before they opened a HF down the road. I come in and hose down my floor and scrub it from time to time. I just wanted my stuff off the floor and be able to roll.
 
OP
B

bagged89s10

Well-known member
Joined
Mar 13, 2005
Messages
4,607
Location
CT
Re: My little attached 20x22 budget renovation

Than casters are best bet. I have everything possible on casters and I didn't break bank. Mine are 2" $2.25 one from Walmart but I got mine before they opened a HF down the road. I come in and hose down my floor and scrub it from time to time. I just wanted my stuff off the floor and be able to roll.


My main 140" workbench on the wall with upper cabinets will be built in but the smaller one will be on casters.
 

taumac

Well-known member
Joined
Aug 30, 2011
Messages
8,104
Location
Brooksville, Fl
Re: My little attached 20x22 budget renovation

That's cool just a suggestion. Whatever you can get on casters will surly help when you do floor
 
OP
B

bagged89s10

Well-known member
Joined
Mar 13, 2005
Messages
4,607
Location
CT
Re: My little attached 20x22 budget renovation

Made a screwdriver rack tonight with some scrap wood.
Bored some 1" holes with a smaller hole (I can't remember but maybe 19/64") in the center, the notched out the front. I also drilled smaller holes for smaller screwdrivers closer to to the front edge in between the bored holes.
Lastly routered a little detail. Too bad I don't have all my matching screwdrivers. Does the job and easier to find the right one than being in my toolbox. I might make a second.

attachment.php


attachment.php
 

Attachments

  • image.jpg
    image.jpg
    147.9 KB · Views: 5,940
OP
B

bagged89s10

Well-known member
Joined
Mar 13, 2005
Messages
4,607
Location
CT
Re: My little attached 20x22 budget renovation

Floor question?

Should I go tan or silver/gray on my floor. I'm thinking light tan/beige walls. I don't know if a tan floor would be too much because the outside of the house is. Goldish/yellow/tan color. But silver/gray might look funny.
 

taumac

Well-known member
Joined
Aug 30, 2011
Messages
8,104
Location
Brooksville, Fl
Re: My little attached 20x22 budget renovation

Well, I went with a off white which was close to my house color with white, tan, black flake. That said I would match the house or at least compliment the house colors imo
 
OP
B

bagged89s10

Well-known member
Joined
Mar 13, 2005
Messages
4,607
Location
CT
Re: My little attached 20x22 budget renovation

My father gave me this little craftsman box to add to my garage project. I think it will be perfect on the bench with all my drill bits. Trying to mock up so I can frame the workbench with the tool box under it. I disconnected the latch from the top so I don't need to make a lift top on the bench.

attachment.php
 

Attachments

  • image.jpg
    image.jpg
    142.5 KB · Views: 5,824

taumac

Well-known member
Joined
Aug 30, 2011
Messages
8,104
Location
Brooksville, Fl
Re: My little attached 20x22 budget renovation

That will turn out to be nice on bench somewhere. Those are always nice to store small odds and ends in.
 
OP
B

bagged89s10

Well-known member
Joined
Mar 13, 2005
Messages
4,607
Location
CT
Re: My little attached 20x22 budget renovation

Got a 5 gallon bucket of paint at Sherwin Williams for $75. Perfect off white I wanted. It should brighten up the place. Also got 2 kits of the solvent based rustoleum epoxy floor kits in tan.

attachment.php
 

Attachments

  • image.jpg
    image.jpg
    141.8 KB · Views: 5,784
OP
B

bagged89s10

Well-known member
Joined
Mar 13, 2005
Messages
4,607
Location
CT
Re: My little attached 20x22 budget renovation

I have not posted in a while but cleared over 10 ft of overgrown brush by my rear property line and then hired a company to cut down 6 trees in the yard this past September. I now have a nice spot to hopefully build a shed this spring and get all the yard equipment and toys out of the garage.

DSC_0389 (2).jpg

DSC_0387 (2).jpg

DSC_0391 (2).jpg

DSC_0395 (2).jpg

DSC_0398 (2).jpg

DSC_0403 (2).jpg

DSC_0404 (2).jpg
 
OP
B

bagged89s10

Well-known member
Joined
Mar 13, 2005
Messages
4,607
Location
CT
Re: My little attached 20x22 budget renovation

The guys made quick work with their climbing gear.

DSC_0405 (2).jpg

DSC_0406 (2).jpg

DSC_0407 (2).jpg

DSC_0408 (2).jpg

DSC_0410 (2).jpg

DSC_0411 (2).jpg

DSC_0412 (2).jpg
 
OP
B

bagged89s10

Well-known member
Joined
Mar 13, 2005
Messages
4,607
Location
CT
Re: My little attached 20x22 budget renovation

I spent my shed money but it was well worth paying these guys vs doing it myself. 3 guys+8 hrs+$1000 = better than my killing myself!:thumbup:

It's been a busy fall/winter/holiday season but hoping to get my workbench built soon. I was going to epoxy the floor first but that will have to wait until it's warm again.

DSC_0433 (2).jpg

DSC_0436 (2).jpg

DSC_0437 (2).jpg

DSC_0439 (2).jpg

DSC_0438 (2).jpg

DSC_0449 (2).jpg

DSC_0455 (2).jpg
 
OP
B

bagged89s10

Well-known member
Joined
Mar 13, 2005
Messages
4,607
Location
CT
Re: My little attached 20x22 budget renovation

Finally some progress on my garage. The lower cabinets are laid out and I bought two 6 foot and one 8 foot butcher block from the local sears parts store for $152. I Got a killer deal. I was going to permanently mount my lower tool chest in the workbench but I am going to keep it a rolling unit. I am going to have extra butcher block left to put on top of the toolchest to have an extra work surface.


The butcher block is 1.5" think x 24" deep but I want a 26" deep workbench. My fix is to take a 2x3 and lay it flat to add 2.5" to the depth.
My Next is to frame out the workbench.

ImageUploadedByTapatalk1424529146.079368.jpg
ImageUploadedByTapatalk1424529156.896340.jpg
ImageUploadedByTapatalk1424529190.779788.jpg
ImageUploadedByTapatalk1424529212.841189.jpg
ImageUploadedByTapatalk1424529224.163551.jpg
 
OP
B

bagged89s10

Well-known member
Joined
Mar 13, 2005
Messages
4,607
Location
CT
Re: My little attached 20x22 budget renovation

Looking good!


Thank you. It feels good to get back out there and see progress. It's tough making time for it sometimes when you have a family but midnight garage time a few times a week has been working.
 
OP
B

bagged89s10

Well-known member
Joined
Mar 13, 2005
Messages
4,607
Location
CT
Re: My little attached 20x22 budget renovation

Picked up my vise I left at my parents house and some other tools my dad gave me. I'm lucky that he likes to go garage sale shopping and picks up old tools all the time. And most of the time he just gives them to me since he doesn't need them.

My Wilton vise I bought about 10 years ago. Pretty sure it's made in China but it's a beast and it didn't cost me much. It looked good in my old garage where I everything was gray but doesn't match anything other than my truck. Maybe I'll repaint or sell it if I find a large USA vise for a decent price.
ImageUploadedByTapatalk1424797757.252710.jpg

Columbian No. 03 1/2 vise. It a nice small vise but missing the swivel base. I can't seem to find any bases for sale yet. Only thing I found was the same vise for $25 on Craigslist.
ImageUploadedByTapatalk1424797799.174007.jpg
ImageUploadedByTapatalk1424797843.312232.jpg

Small anvil. Did some research and found the same one on eBay. MILWAUKEE No.300 V58 ANVIL 8 lb 5.6 ozs 8-3/8" LONG 4" HIGH 2" WIDE
ImageUploadedByTapatalk1424797906.394114.jpg

Old Craftsman toolbox. Looks like it was for an old drill.
ImageUploadedByTapatalk1424797952.834857.jpg
ImageUploadedByTapatalk1424797976.547844.jpg
 
OP
B

bagged89s10

Well-known member
Joined
Mar 13, 2005
Messages
4,607
Location
CT
Re: My little attached 20x22 budget renovation

Got some work done. Mounted the left lower cabinet and lagged some 2x4s to the wall for the workbench. Next is finishing the frame and legs. I threw the top on before taking pictures but will get better pictures when I finish it.

ImageUploadedByTapatalk1425230117.952213.jpg
ImageUploadedByTapatalk1425230127.673225.jpg
ImageUploadedByTapatalk1425230134.842926.jpg
 
To avoid these ads, REGISTER NOW!
Top Bottom