To avoid these ads, REGISTER NOW!

Vintage sk tools tool chest can it be restored?

thecody59

Well-known member
Joined
Nov 4, 2014
Messages
1,860
Location
Twin cities, MN
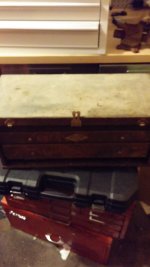
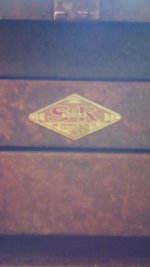
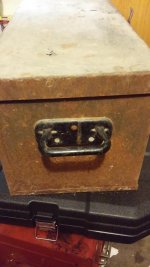
What do you guys think about this vintage sk tools chest as a restoration project? I paid $10 for it today pretty rusty but i think it is just surface rust i don't think i would put any tools in it but would look very nice restored in my garage. Thinking i need to take out the drawers sand down the paint and paint it green. Thanks for the help guys!
 

Attachments

  • 20150627_123130.jpg
    20150627_123130.jpg
    138 KB · Views: 347
  • 20150627_124536.jpg
    20150627_124536.jpg
    142.5 KB · Views: 265
To avoid these ads, REGISTER NOW!

AceofSpad3s

Well-known member
Joined
Oct 1, 2014
Messages
1,808
What do you guys think about this vintage sk tools chest as a restoration project? I paid $10 for it today pretty rusty but i think it is just surface rust i don't think i would put any tools in it but would look very nice restored in my garage. Thinking i need to take out the drawers sand down the paint and paint it green. Thanks for the help guys!

:needpics:
 

BDT/NWMN

Well-known member
Joined
Jan 22, 2012
Messages
3,762
Location
Erskine, Mn
If thought of as a hobby; There is no need to justify the time and materials that are put into a project.... If you like the box and would enjoy the restoration,,, go for it....
 

bonneyman

Well-known member
Joined
Apr 22, 2010
Messages
8,857
Location
Desert SW
Well, I've saved an S-K box in worse shape than yours.:lol_hitti

Just depends on how much value you put on your time.
 
Last edited:
OP
T

thecody59

Well-known member
Joined
Nov 4, 2014
Messages
1,860
Location
Twin cities, MN
Here are some better pics. Like i said it is in pretty good shape just some surface rust from sitting out in a garage for awhile.
 

Attachments

  • 20150627_181112_Night.jpg
    20150627_181112_Night.jpg
    133.4 KB · Views: 122
  • 20150627_181141_Night.jpg
    20150627_181141_Night.jpg
    127.5 KB · Views: 118
  • 20150627_181152_Night.jpg
    20150627_181152_Night.jpg
    136.3 KB · Views: 109
  • 20150627_181203_Night.jpg
    20150627_181203_Night.jpg
    133.9 KB · Views: 123
  • 20150627_181219_Night.jpg
    20150627_181219_Night.jpg
    138.8 KB · Views: 136

zkling

Well-known member
Joined
Jan 23, 2007
Messages
16,939
Anything can be restored, just a factor of time and money you want to invest. It doesn't look rotted out. Yes it appears you are missing the front cover. Please don't stack boxes like that especially that snap on box on the bottom. The top/front cover can easily get bent and when that happens they are a pain to get straight again.
 
OP
T

thecody59

Well-known member
Joined
Nov 4, 2014
Messages
1,860
Location
Twin cities, MN
I think i will give it a shot never did anything like this before but i think i can handle it. Really disappointed that it is missing the front cover that is a shame.
 
OP
T

thecody59

Well-known member
Joined
Nov 4, 2014
Messages
1,860
Location
Twin cities, MN
I have started sanding it but it is taking forever and not getting good results. First i tried by drill with the grinder attachment then the craftsmen sander and i using the wrong tools to get it done?
 

Attachments

  • 20150630_202500.jpg
    20150630_202500.jpg
    128.2 KB · Views: 95
  • 20150630_202452.jpg
    20150630_202452.jpg
    131 KB · Views: 95
  • 20150630_202444.jpg
    20150630_202444.jpg
    131.1 KB · Views: 97

Lx460

Well-known member
Joined
Oct 9, 2014
Messages
1,306
Location
Central Florida, USA
Wouldn't hand sanding it take to long to get to bare medal?

Why exactly do you think it needs to be down to bare metal?

When you get your car repainted, do they remove every trace of paint from it first?

I thought you said you can handle this? You need to ask first, then do. Every single thing you do, you jump in head first and then question why it turned out like total ****.

At least on the positive side, this has no chance of killing anybody 'cause you screwed it up...
 
To avoid these ads, REGISTER NOW!

taumac

Well-known member
Joined
Aug 30, 2011
Messages
8,104
Location
Brooksville, Fl
I thought if i wanted it to turn out nice i needed a clean surface.


If that's the case why the hell would you take a belt sander to sheet metal? Cody do use a favor please.... Go on YouTube and check how to do a paint job from sanding to finally paint and follow the steps.
 

firworks

Well-known member
Joined
Jun 29, 2015
Messages
4,080
Location
IL
Well, I've saved an S-K box in worse shape than yours.:lol_hitti

Just depends on how much value you put on your time.

Pretty impressive. That little box looks great. I've got a couple of small SK boxes rusted to hell that I didn't even think would be recoverable but they look way better than your starting point. Did you do anything to recover the riveted logo or was it just luck that it wasn't too bad?
 

DMAR

Well-known member
Joined
May 12, 2012
Messages
266
Seriously? A belt sander? Try a hammer next...

LOL, now, that's funny! :lol_hitti

OP, to re-paint, just hand sand to smooth the finish. Maybe a light touch with a palm sander on some of the larger sections. And yes, sometimes it takes a long time to do a project the right way, to get quality results. Half *** efforts = half *** results. :beer:
 

dngrmse

Well-known member
Joined
Mar 14, 2014
Messages
637
Location
Northern NJ
Sorry guys first Time ever attempting something like this.

Don't be sorry, some of these guys are like grumpy old men; but if you look past the sarcasm, most offer you some good advice. If you're itchin to use a power tool though, you could use an orbital sander for prepping stuff like that.
Nice box, have fun with it.
 

buba

Well-known member
Joined
Jan 27, 2015
Messages
135
Location
Bucksnort USA
What do you guys think about this vintage sk tools chest as a restoration project? I paid $10 for it today pretty rusty but i think it is just surface rust i don't think i would put any tools in it but would look very nice restored in my garage. Thinking i need to take out the drawers sand down the paint and paint it green. Thanks for the help guys!

I did a five draw SK Machinist box awhile back. As others have said just sand it enough to get the rust and crud off it and smooth the edges. I am sure you will get plenty of helpful advice from folks on this forum more experienced than me, but here are a couple of things that might help from my SK adventure.

1) The drawers in the older SK boxes were lined with 100% cotton cloth similar to single sided flannel (not sure if the non Machinist boxes were lined). I purchased 1/2 yard of dark green flannel from a fabric store and had plenty left over. Use an acid free fabric adhesive that dries clear and put it on very very thin, a plastic bondo spreader will help get it on thin. I then rolled up the fabric into a tube and then rolled it across the draw bottom. The glue I used must have been a fast setting type as it was not to forgiving for placement adjustments.

2) The backs of the draws of my box had the best/truest original color. I took one draw to a real paint store and they mixed up a quart of oil based satin enamel to match. I thinned it just enough to spray the box and draws (borrowed the spray gun from my brother). Two coats, 24 hours apart. I did use a 12 oz shaker can of etching primer first to put on a light coat, my main area of concern was the bare metal. From your pictures the paint color appears to be the older darker olive drab.

My goal was not to create a factory new museum piece, It was to put the stage two rust cancer into remission and return it to everyday use.

Good Luck
 
Last edited:
OP
T

thecody59

Well-known member
Joined
Nov 4, 2014
Messages
1,860
Location
Twin cities, MN
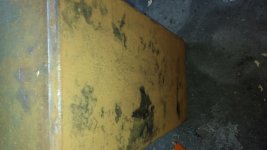
I sanded the outside of it by hand turned out pretty good but on the bottom there are alot of pit holes that won't sand out will they go away when i paint over it or is it pretty much gone? Also how do i remove the drawers from the chest i don't see a way how thanks guys.
 

taumac

Well-known member
Joined
Aug 30, 2011
Messages
8,104
Location
Brooksville, Fl
Cody Cody Cody.... That's a question you should have asked before starting this. I'll help you out. Take picture of the slide.
 
OP
T

thecody59

Well-known member
Joined
Nov 4, 2014
Messages
1,860
Location
Twin cities, MN
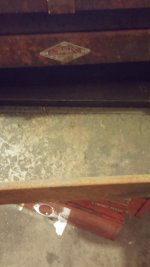
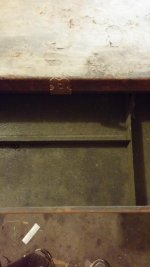
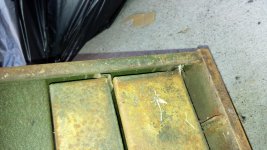
I sanded down the whole outside but the front by hand it is pretty smooth now and got all the surface rust off. Here are the pics of the bottom with pit holes and the drawer slides.
 

Attachments

  • 2015-07-03 19.52.45.jpg
    2015-07-03 19.52.45.jpg
    131.4 KB · Views: 76
  • 2015-07-03 19.53.55.jpg
    2015-07-03 19.53.55.jpg
    137.7 KB · Views: 72
  • 2015-07-03 19.54.09.jpg
    2015-07-03 19.54.09.jpg
    149.4 KB · Views: 72
OP
T

thecody59

Well-known member
Joined
Nov 4, 2014
Messages
1,860
Location
Twin cities, MN
Here is my progress so far. I tried lifting and pulling they won't budge.
 

Attachments

  • 2015-07-03 20.17.05-1.jpg
    2015-07-03 20.17.05-1.jpg
    131.9 KB · Views: 60
  • 2015-07-03 20.17.29-1.jpg
    2015-07-03 20.17.29-1.jpg
    129.7 KB · Views: 58
  • 2015-07-03 20.17.21.jpg
    2015-07-03 20.17.21.jpg
    130.8 KB · Views: 55

buba

Well-known member
Joined
Jan 27, 2015
Messages
135
Location
Bucksnort USA
I sanded down the whole outside but the front by hand it is pretty smooth now and got all the surface rust off. Here are the pics of the bottom with pit holes and the drawer slides.

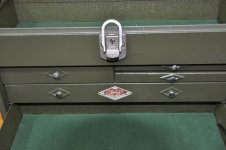
Look for a flat metal clip on the inside of the drawer near the back. Should be one on each side. Slip a flat screw driver in between the clip and the drawer side and pull the clip toward the inside of the drawer. They should pull in about a 1/4 inch and let the drawer slide all the way out
 

Attachments

  • DSC_0189.jpg
    DSC_0189.jpg
    142.5 KB · Views: 40
  • DSC_0188.jpg
    DSC_0188.jpg
    140.9 KB · Views: 36
Last edited:
OP
T

thecody59

Well-known member
Joined
Nov 4, 2014
Messages
1,860
Location
Twin cities, MN
I got the top one out that had the clip on the top but the bottom one has two one on each side and i have tried but it won't budge out. I will have to basically destroy the box removing the drawer whoever designed these didn't want you messing with them at all.
 

larryq

Well-known member
Joined
Jul 12, 2011
Messages
2,421
Not sure what state the paint is in, but a 4 1/2" angle grinder and a paint stripping wheel works wonders on flat surfaces. For the nooks and crannies you'll have to hand sand, or maybe use some 80 grit on a Rockwell or Ryobi or other brand of multitool. Take your time; this doesn't get done overnight.

Regarding the drawer slides, could you post pics of what the tabs and such look like? I'm sure they do come out fairly easily, just a matter of finding the trick.
 

Shelbylex

Well-known member
Joined
Jan 20, 2018
Messages
3,134
Location
MA
Small follow up: did it get done?
(yep, I know, it's few years later, but I suspect that author got discouraged, dropped it for some time and then eventually came back to it...)

...Got myself a socket box in poor condition similar to the one bonneyman pictured. Should make it to my house in couple of weeks... Reading old posts to gain some knowledge.
Will probably straighten, sand and use rastoleum hammer green or deep green...
 
Last edited:
To avoid these ads, REGISTER NOW!
Top Bottom