brokenjack
Member
At this point
1. I have chosen the 32' X 24' 3 car plans from 84 Lumber. They did an estimate for a 2 car version for an all inclusive price of $5650. Doors and windows seemed a little pricey, but as a whole thought it was a deal.
2. Modified the plans to one 12' garage door, relocated the man door and 2 windows and heightened walls from 8' to 10'.
3. Went downtown and applied for a building permit. Fun Fun Fun. Didn't know what to expect, but I had most everything I needed, then had to draw some elevation views, and fill out a building section form. Whole process took 1.5 hours which included me drawing and waiting in line. Seems like mid-morning around 10am was a good time to be there, since there weren't many people there.
4. Now I'm trying to find a concrete contractor to excavate and do the slab foundation. Called a few. One said he'd come by and do an estimate but never did. It's been almost a week. One place told me they wouldn't do a job that small. I need to call more I know, but it seems like this part is going to be difficult. Anyone recommend a concrete guy in Richmond, Virginia?
5. Finally got the permits a little over 3 weeks later.
6. Got a concrete guy to pour a monolithic slab. Wanted 24' 1" X 32' 1" but ended up with 24' 1" X 31' 11 5/8" but everything is square. Paid $7162.00 for it. Used reinforced concrete...Pics

Here's the spot...Looks peaceful don't it?

Footing trenches starting to take shape

Formwork and gravel added

Poly and wire on top...Ready for pour

We have slab

They applied a sealer. Not sure what it is though.
Final estimate on the 84 Lumber kit was 5458.12. That includes the 12' x 8' garage door and everything else but two, 48" x 36" windows and one entry door I'm getting from Lowes. First delivery should be Feb 23, 2006. Second delivery will be the roof materials and siding.
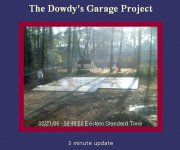
Check out a somewhat live webcam eastern time of the build at my web site 5 minute update. Should be some action Saturday Feb 25.
02/23/06 Well it looks as if the lumber fairies visited me today. Got a mess o' wood sitting in the backyard. Should start on Sat Feb 25. Going to have the roof trusses, garage door, shingles, felt, and siding delivered separately at a later date.
1. I have chosen the 32' X 24' 3 car plans from 84 Lumber. They did an estimate for a 2 car version for an all inclusive price of $5650. Doors and windows seemed a little pricey, but as a whole thought it was a deal.
2. Modified the plans to one 12' garage door, relocated the man door and 2 windows and heightened walls from 8' to 10'.
3. Went downtown and applied for a building permit. Fun Fun Fun. Didn't know what to expect, but I had most everything I needed, then had to draw some elevation views, and fill out a building section form. Whole process took 1.5 hours which included me drawing and waiting in line. Seems like mid-morning around 10am was a good time to be there, since there weren't many people there.
4. Now I'm trying to find a concrete contractor to excavate and do the slab foundation. Called a few. One said he'd come by and do an estimate but never did. It's been almost a week. One place told me they wouldn't do a job that small. I need to call more I know, but it seems like this part is going to be difficult. Anyone recommend a concrete guy in Richmond, Virginia?
5. Finally got the permits a little over 3 weeks later.
6. Got a concrete guy to pour a monolithic slab. Wanted 24' 1" X 32' 1" but ended up with 24' 1" X 31' 11 5/8" but everything is square. Paid $7162.00 for it. Used reinforced concrete...Pics
Here's the spot...Looks peaceful don't it?
Footing trenches starting to take shape
Formwork and gravel added
Poly and wire on top...Ready for pour
We have slab
They applied a sealer. Not sure what it is though.
Final estimate on the 84 Lumber kit was 5458.12. That includes the 12' x 8' garage door and everything else but two, 48" x 36" windows and one entry door I'm getting from Lowes. First delivery should be Feb 23, 2006. Second delivery will be the roof materials and siding.
Check out a somewhat live webcam eastern time of the build at my web site 5 minute update. Should be some action Saturday Feb 25.
02/23/06 Well it looks as if the lumber fairies visited me today. Got a mess o' wood sitting in the backyard. Should start on Sat Feb 25. Going to have the roof trusses, garage door, shingles, felt, and siding delivered separately at a later date.