What would you do in this situation. I started restoring a craftsman vise (506-51801). I was fairly rutsted so i took it apart and put in an electrolysis bath then wire wheeled to get what was left and the loose paint. I decided to try and remove the jaws after that to clean and paint everything nicely. Well i immediately broke the tip off a snapon screwdriver i was using. Tried with some ******/acetone mix penetrating, then some heat and an impact screwdriver. Turned the tip of the impact bit into and S shaped bit.. and moved onto the last resort.. my drill press. Drilled out the screw head and poped the jaws off finally. YAY... heres where i messed up. I proceded to drill out the rest of the screw with a 1/4 bit. I figured i would tap the next size up and be good to go. Well the next size up (5/16" - 24) flat head is as wide as the whole face of the jaw. I should have left them where they were.. now i think my best option is to make new jaws and drill and tap 1/4 28 holes for the right sized bolts... If anyone have a better idea please tell me.
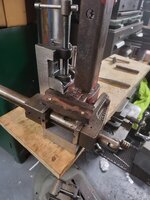
Heres some pictures of the exceptionally sketchy setup i used to drill the holes out. Its a Drill press vise holding up a float lock vise with setup blocks i had to prop up everything from tipping over.
Heres some pictures of the exceptionally sketchy setup i used to drill the holes out. Its a Drill press vise holding up a float lock vise with setup blocks i had to prop up everything from tipping over.