To avoid these ads, REGISTER NOW!

Walker jack - scored or stiffed?

6530

Well-known member
Joined
Oct 15, 2009
Messages
300
Location
East Coast
Walker jack - rebuild questions

Picked up a Walker 93657 jack this morning.

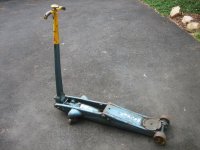
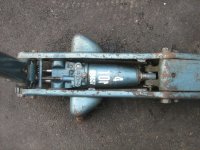
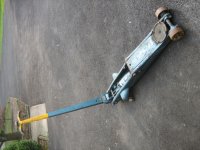
As I picked it up:

2010-10-24_11-39-51_210.jpg


2010-10-24_11-40-19_52.jpg


2010-10-24_11-40-36_452.jpg


2010-10-24_11-41-01_382.jpg


2010-10-24_11-41-10_796.jpg


When I got it home, I got a little nervous. It was in worse shape than I realized. The rust was pretty thick and left flakes all over the place, and the front wheel on top was stuck.

First item was to fix the wheel. Once I pulled the cotter pin, cleaned up the axle, put the washers back on the correct side (they were on the outside of the wheel rather than between the wheel & the frame), & put in a new pin, the wheel worked fine. OK, progress.

As I looked at it, I thought about how much it would cost to get it sandblasted and how I would take it apart for blasting. Then I realized that I had one wire wheel left, so I spent about 15 minutes of quality time with the grinder. After wheeling it looks about a thousand times better, and I have an appreciation for the thickness of the steel and the way this thing is put together.

This week I'll pick up a few more wheels to clean it up some more. Unfortunately the paint is toast.

2010-10-24_15-07-38_995.jpg


2010-10-24_15-07-51_583.jpg


2010-10-24_15-08-08_52.jpg


I uncovered some numbers stamped into the jack:

2010-10-24_15-09-21_529.jpg


The numbers horizontally on the left read "2851" followed by "3 59" and the numbers horizontally on the right read "861". The numbers vertically on the left read "550" followed by "806".

The only one I can figure is "3 59," which I'd guess is a March 1959 date.

It looks like this has been rebuilt at least once, and still leaks some oil so I'll likely need a rebuild kit. Plus the shaft inside the handle doesn't quite latch into any of the three handle positions, so I have to figure that one out.

I was considering the 3.5 ton Arcan jack from Costco, but have been on the lookout for a solid US-made rebuildable jack since I found the many threads on this board. I saw this one on CL yesterday morning, and when I picked it up the seller & his brother said that their dad used it in an auto shop from the 1960s through the 1980s. Interesting piece of history.

Thanks to Hiball for some counsel on what to look for.

So did I score or did I get stiffed?
 
Last edited:
To avoid these ads, REGISTER NOW!

Hiball

Well-known member
Joined
Apr 30, 2009
Messages
14,032
Location
Missery
Looks Good, Its gonna need a Little TLC in some departments but looks complete minus the Cover plate. It looks like the Cross Pin for the Release is Bent, Not sure how they did that but its a easy Fix. Im a little puzzeled by the 93657 sticker, Ive never seen one on the Resevoir and the Frame indicates a Earlier Model year such as a 884/J134. Its not Problem as most of the years are interchangable, Did it have a tag at the base of the handle?
 

vssjim

ALLIANCE MEMBER
Joined
Aug 5, 2007
Messages
2,713
Location
McLean Va.
First item was to fix the wheel. Once I pulled the cotter pin, cleaned up the axle, put the washers back on the correct side (they were on the outside of the wheel rather than between the wheel & the frame), & put in a new pin, the wheel worked fine. OK, progress.


On mine they came wih the washer on the outside new, so you may want to ask Highball about this.
 

jhelrey

Well-known member
Joined
Sep 15, 2010
Messages
7,254
Location
MN
I would wire wheel it again... then tape off the labels, etc. Prime and paint!
 

GeorgiaHybrid

Well-known member
Joined
Sep 9, 2008
Messages
3,763
Location
Extreme NW Georgia
Like Steve, I don't think the jack is original to the frame but it should work just fine. Those particular long frames are some of my favorite old jacks. They look great when cleaned up but finding the top plate will be hard. You might need to fab a simple cover for it until you happen across one. Looks great so far though.
 
OP
6

6530

Well-known member
Joined
Oct 15, 2009
Messages
300
Location
East Coast
Looks Good, Its gonna need a Little TLC in some departments but looks complete minus the Cover plate. It looks like the Cross Pin for the Release is Bent, Not sure how they did that but its a easy Fix.

I'd guess that's the topmost crosspiece that the shaft connected to the U-joint runs through, perpendicular to the frame pieces. How can I pull it out - do I have to separate the frame? And do you have a replacement part?


Im a little puzzeled by the 93657 sticker, Ive never seen one on the Resevoir and the Frame indicates a Earlier Model year such as a 884/J134. Its not Problem as most of the years are interchangable,

Judging by the color of the reservoir and the lack of rust relative to the rest of the jack, I'd say it's been replaced. The sellers did say that it's been rebuilt at least once. It's entirely possible that a recent reservoir was put into an older frame.

Did it have a tag at the base of the handle?

No, no tags anywhere. Just the stamped numbers that are pictured.

GeorgiaHybrid said:
You might need to fab a simple cover for it until you happen across one.

That's the plan. This is going to be stored in the garage so it won't be subject to as much dirt as it would in a commercial shop, but I'll probably do something.

It seems like there's a fluid leak when the jack comes down, and it leaked when I turned it on its side to wire wheel it. Next time I turn it over I'll probably drain the hydraulic fluid.

Hiball - where's the best place to start in rebuilding this thing once I get it cleaned up a bit?
 
OP
6

6530

Well-known member
Joined
Oct 15, 2009
Messages
300
Location
East Coast
On mine they came wih the washer on the outside new, so you may want to ask Highball about this.

Agree - there should be at least one washer on the outside between the cotter pin & the wheel. I'll fix that next time I take the wheel off to clean it up.
 

Hiball

Well-known member
Joined
Apr 30, 2009
Messages
14,032
Location
Missery
I'd guess that's the topmost crosspiece that the shaft connected to the U-joint runs through, perpendicular to the frame pieces. How can I pull it out - do I have to separate the frame? And do you have a replacement part?

Everything you want to do with that jack entails splitting the frame, Its pretty straight forward, Remove the wheels, Pull the pin holding the frame to the front axle, Loosen the 2 middle Nuts, Undo everything at the Handle area by removing Nuts and C-clips. I would buy some penetrating oil and allow it to work for you, That frame is not gonna split easy...Rust is Bad. Ive actually had to use Porta powers to aid in splitting abused jacks. Once you get the Unit outside the frame give me a shout.
 

CRTDI

Well-known member
Joined
Jan 11, 2010
Messages
1,533
I never will understand why people sometimes leave these old jacks out in the elements to rust to death. Sure, they take up some floor space and they're a mess when they start to leak, but they can be expensive to replace, and when you need one, you REALLY need one.

I don't know how many times I've come across a CL ad where the jack is pictured in an open field or on a gravel drive. :headscrat

Recently, I picked up an old rusty S-4 Blackhawk jack for some obsolete parts. A week after spraying it down with some penetrating solvent, and trying not to destroy any hardware, it still took me nearly 3 days just to get the handle off and the jack torn down enough to get at what I needed.
 
Last edited:
OP
6

6530

Well-known member
Joined
Oct 15, 2009
Messages
300
Location
East Coast
Re: Walker jack - rebuild

I split the frame and pulled out the ram today. It came out easier than I expected, though the last little bit needed a little persuasion.

Skeleton
2010-10-30_17-20-45_978.jpg


Pins & such, now soaking overnight in vinegar
2010-10-30_17-25-33_472.jpg


Ram out of the frame
2010-10-30_17-25-49_689.jpg


2010-10-30_17-26-07_861.jpg


2010-10-30_20-16-03_209.jpg


2010-10-30_20-16-12_447.jpg


2010-10-30_20-16-36_470.jpg


2010-10-30_20-16-47_728.jpg


Set screw of some sort on one side
2010-10-30_20-17-14_923.jpg


On the other side
2010-10-30_20-17-41_712.jpg


Closeup of the back
2010-10-30_20-18-43_145.jpg


Tank nut
2010-10-30_20-41-32_686.jpg


2010-10-30_20-41-39_497.jpg


2010-10-30_20-41-55_670.jpg


The frame definitely needs blasting, as I can't reach all the rust with my angle grinder. Guess I'll be making a trip to Northern or HF...

The filler bolt looks like it's vented and has a copper washer, which is where it was leaking before I drained all the hydraulic fluid (not sure how much came out, but it was more than a quart).

My favorite part of today was pulling out the front axle and finding that one of the pins holding it in place was a 16d coated sinker. Go figure.

So, Hiball, where do I start? How can I tell what needs replacement? I can't seem to pull either of the shafts out of the ram, though they didn't look too bad when the jack was together. I was able to straighten the cross pin for the release pretty easily.
 

Hiball

Well-known member
Joined
Apr 30, 2009
Messages
14,032
Location
Missery
Re: Walker jack - rebuild

So, Hiball, where do I start? How can I tell what needs replacement? I can't seem to pull either of the shafts out of the ram, though they didn't look too bad when the jack was together. I was able to straighten the cross pin for the release pretty easily.

It depends on what your intensions are, Did the Jack work Previously? Do you want to Rebuild it? If your Not gonna Rebuild it, I wouldnt bother with removing the Pump Pistons, Nor anything else.
 
To avoid these ads, REGISTER NOW!
OP
6

6530

Well-known member
Joined
Oct 15, 2009
Messages
300
Location
East Coast
Re: Walker jack - rebuild

It depends on what your intensions are, Did the Jack work Previously? Do you want to Rebuild it? If your Not gonna Rebuild it, I wouldnt bother with removing the Pump Pistons, Nor anything else.

I'd like to fix the leaking fill bolt. Other than that it's in good working condition. Since I was able to straighten the release cross pin I won't need one, and there were several various pins (& nails) that I can replace out of my inventory. Other than that I'd say all it needs is a blast, prime, & paint.

The handle needs some work. The release for the pin that locks the handle into the 3 positions was stuck, and now that I've got it out I can see what's what. I may need a few parts here or there. The universal joint is a mess and needs cleanup, but it seems functionally fine.

Looking at the photos what else would you suggest?
 
Last edited:

toolnut

Well-known member
Joined
Jul 19, 2009
Messages
756
Location
Lockport,NY
I think it's going to turn out all right. Those style jacks are always of good quality and I think it's great that you have saved it from the scrap pile. When your done it will be worth at least twice as much. I like the blue and yellow color choice. Can't wait to see it finished.
 

Hiball

Well-known member
Joined
Apr 30, 2009
Messages
14,032
Location
Missery
Re: Walker jack - rebuild

I'd like to fix the leaking fill bolt. Other than that it's in good working condition. Since I was able to straighten the release cross pin I won't need one, and there were several various pins (& nails) that I can replace out of my inventory. Other than that I'd say all it needs is a blast, prime, & paint.

The handle needs some work. The release for the pin that locks the handle into the 3 positions was stuck, and now that I've got it out I can see what's what. I may need a few parts here or there. The universal joint is a mess and needs cleanup, but it seems functionally fine.

Looking at the photos what else would you suggest?

LOL.. Im sorry to Laugh but the only reason that fill bolt would leak would be because there is Too much oil in the Jack. On that subject those jacks are hard to fill with oil due to the small passage between where the fill hole is and the resevoir. This is why they changed it up and put the fill hole on the Resevoir on Later Models. After you clean it up you can then verify where the leak is coming.
 

CRTDI

Well-known member
Joined
Jan 11, 2010
Messages
1,533
You've torn it down this far and are going through the trouble to refinish it. Why not just send the hydraulic unit to Hiball for an overhaul and end up with a reliable tool for the next 30 years?
 
OP
6

6530

Well-known member
Joined
Oct 15, 2009
Messages
300
Location
East Coast
This was mine "before"

Wow, nice. I hope to get mine looking that good.

Quick update:
I invested in one of these this morning (around $22 on sale and less 20%)
image_449.jpg


along with 50lb of 80 grit glass bead
image_153.jpg


After an overnight soak in vinegar, using my small 5.5 CFM compressor and the blaster/media I went from this
2010-10-30_17-25-33_472.jpg


to this.
2010-10-31_15-34-39_350.jpg


It's hard to believe how much better that looks. While there's a good bit of rust pitting, overall they're in much better shape now and will prime and paint up nicely.
 
Last edited:
OP
6

6530

Well-known member
Joined
Oct 15, 2009
Messages
300
Location
East Coast
This is how I'm going to paint it:
HW93657.jpg


Hiball - in thinking about it, is there any reason I can't bead blast the ram itself? The hydraulic seals seem to be pretty well protected by steel nuts.

I am also going to need at least one new part - a hat for the handle.
 
OP
6

6530

Well-known member
Joined
Oct 15, 2009
Messages
300
Location
East Coast
I believe that these jacks were blue and white. There is a great looking restored model in the 1930's Autoshop thread. http://www.garagejournal.com/forum/showthread.php?p=1010045&highlight=walker+jack#post1010045
Good luck, Dave

Good point. For me, I can see from what paint is left on the frame, wheels, and handle that it was originally yellow & blue. That's why I'm leaning more towards that color scheme.

I read through the 1930s garage thread after seeing your post, and I had no idea that there were such experts on the board (though I should know by now!). That thread has been very helpful in figuring out exactly what I have here. Thanks for the reference.

Based on the ads in that thread I think mine may be a little newer, since there are two bolts on each frame at the end of the lifting arm (the side away from the saddle) rather than one as on the ones pictured. It's closer to the model pictured in the September 1954 advertisement, except the handle doesn't have the "batwing" design - it's more like the current straight design.
 
Last edited:

Jack90210

Well-known member
Joined
Nov 2, 2009
Messages
304
Location
VA, USA
Great pics. Finally, someone who knows how to use the "macro" setting on their camera. :lol:

Amazing how much of a difference the bead blasting made.
 
OP
6

6530

Well-known member
Joined
Oct 15, 2009
Messages
300
Location
East Coast
OK, another update. I primed the pins, washers, & nuts but didn't take any pics. I won't be able to work on them for a while due to other commitments & didn't want them to flash rust.

I got one of the rear casters off.
2010-11-02_20-49-23_225.jpg


2010-11-02_20-49-47_55.jpg


Pretty bad shape, with some crazy wear on the spindle. See to the left of and above the pencil point. You can also see it in the photo above.
2010-11-02_21-09-15_726.jpg


Other angles
2010-11-02_21-14-13_940.jpg


2010-11-02_21-14-25_65.jpg


Bearings and races after cleaning off 50 years' worth of caked on grease. At least one bearing was missing.
2010-11-02_21-17-24_542.jpg


2010-11-02_21-13-12_877.jpg


The upper race is loose on the spindle. It's hard to see in this photo, but there's a lot of slop between the spindle & the ID of the race.
2010-11-02_21-13-54_940.jpg


Anyone know if that's normal or is it worn out?

Photo looking up into the caster mount. The smaller silver circle in the center looks like some kind of Babbitt or some other bearing press-fit in there along with the caked grease. Wonder how I'm going to get it out.
2010-11-02_21-18-34_386.jpg


I'm all ears as to how to get this screw out...it's why I only got one caster off today. The liquid you see is penetrating oil.
2010-11-02_21-17-59_527.jpg


That's it for now. I've also got the rearmost pin stuck in one side of the frame, and I'm wondering how I'll get that out. Wish I knew someone around here with a press!
 
Last edited:

BB767

Well-known member
Joined
Dec 24, 2009
Messages
3,724
Location
Philo, IL
OK, another update. I primed the pins, washers, & nuts but didn't take any pics. I won't be able to work on them for a while due to other commitments & didn't want them to flash rust.

I got one of the rear casters off.

2010-11-02_20-49-47_55.jpg


Pretty bad shape, with some crazy wear on the spindle. See to the left of and above the pencil point. You can also see it in the photo above.
2010-11-02_21-09-15_726.jpg


Other angles

2010-11-02_21-14-25_65.jpg


Bearings and races after cleaning off 50 years' worth of caked on grease. At least one bearing was missing.

2010-11-02_21-13-12_877.jpg


The upper race is loose on the spindle. It's hard to see in this photo, but there's a lot of slop between the spindle & the ID of the race.
2010-11-02_21-13-54_940.jpg


Anyone know if that's normal or is it worn out?

Photo looking up into the caster mount. The smaller silver circle in the center looks like some kind of Babbitt or some other bearing press-fit in there along with the caked grease. Wonder how I'm going to get it out.
2010-11-02_21-18-34_386.jpg


I'm all ears as to how to get this screw out...it's why I only got one caster off today. The liquid you see is penetrating oil.
2010-11-02_21-17-59_527.jpg


That's it for now. I've also got the rearmost pin stuck in one side of the frame, and I'm wondering how I'll get that out. Wish I knew someone around here with a press!

Jonathan I am so glad you are going to recondition this jack. If you are seeing evidence of blue and yellow paint that would suggest it was made in the late 50's. My research shows Walker's color scheme changed in the late 50's from an earlier blue and white to the aforementioned blue and yellow combination. Retaining that combination is a great idea.

As to the wear on the rear casters, did you happen to note how much play or wobble was present before you took them apart. Typically there is very little side loading on them. Most of the force is compression and rarely were the jacks moved when they were supporting a load so they normally didn't received much dynamic side load force. If they weren't too bad, which is terribly subjective I know, I would be inclined to replace all the bearings as a set since one is missing, hand file the worn surfaces, use some high quality grease and use them as is. If too much play was present or you are planning on using the jack in a commercial environment where it will get a lot of use then you might need to have it repaired as I doubt you will find a replacement. A highly skilled machine shop can guide you. It's good metal so repair is possible unlike todays disposable tools.

For the rear screw holding the caster. Look to see if the factory staked or dimpled the metal on the frame in the 4 - 5 o'clock position of the screw hole seen in your picture. On mine they staked the screw head but yours looks like the frame was staked. They did this to displace the metal slightly into the thread to keep the screw from coming out. File that out as best you can so the screw won't back into the displaced area. Next use some p & p. Patience and penetrating oil are your two best friends. Don't force anything until that is a last resort.

JackWheels1sm.jpg


Above is one of mine and I soaked it for several days by turning the jack on it's side so the oil wouldn't run down the side but rather stayed put and worked it's way down the threads. It was cumbersome propping the jack on it's side, but that's the only way to get the oil in there and keep it there. Remove any material from the screw slot. Use a pick to thoroughly clean it out. Very, Very Important-make sure the screw driver you use is a proper fit for the slot! You may need to grind the blade to the correct width and or thickness. Don't be afraid to modify one. Get that wrong and you'll just chew up the screw head. Walker used good metal so with enough oil and a proper fitting tool these will come out. As rusty as your was it might take some time but it will come out. P & P. I used a large screw driver that had a square shaft so I could get a wrench on it to rotate it while putting a lot of force down to keep the blade in the screw slot. Work with the jack on it's side so you're pushing straight down on the screw. Get a friend to help if need be. Once the screw moves a little stop, more penetrating oil and wait.

WalkerJackSm4-1.jpg


Nobody said this would be easy, that's why many people discard them when they need some service. Check the restored 1930's auto shop thread from time to time as I'll be posting my work on restoring mine. These were exceptionally well made pieces of equipment and worthy of your best efforts! :thumbup: Enjoy the work.

Thomas
 

CRTDI

Well-known member
Joined
Jan 11, 2010
Messages
1,533
The rear caster design is nearly identical to what I have on my Blackhawk jacks. After replacing the ball bearings on my S-17 I still had a lot of back and forth slop that I was not happy with. Most of my problem appeared to be some very worn bearing races. I went to my local Ace hardware store and was able to find some thin machined washers to place under the bottom race of the caster. One washer on both sides did the trick, really tightened things up, very little play after the install.
 
OP
6

6530

Well-known member
Joined
Oct 15, 2009
Messages
300
Location
East Coast
As to the wear on the rear casters, did you happen to note how much play or wobble was present before you took them apart. Typically there is very little side loading on them. Most of the force is compression and rarely were the jacks moved when they were supporting a load so they normally didn't received much dynamic side load force. If they weren't too bad, which is terribly subjective I know, I would be inclined to replace all the bearings as a set since one is missing, hand file the worn surfaces, use some high quality grease and use them as is. If too much play was present or you are planning on using the jack in a commercial environment where it will get a lot of use then you might need to have it repaired as I doubt you will find a replacement. A highly skilled machine shop can guide you. It's good metal so repair is possible unlike todays disposable tools.

I was just thinking about that tonight and I decided to put them back in service as is after blasting & painting. I'm going to replace all the bearings and use some better grease. If they're too wobbly it's easy enough to take off just the casters since that wouldn't require taking the whole jack apart. The bearings I took out are 1/4", and I may replace them with slightly larger 9/32" or 5/16" bearings to tighten things up. They're cheap enough - something like $4 per 100 at McMaster.

On another note, here are the newly primed pins, etc. with the last unprimed pin that I got out tonight. Quite a before/after comparison. I thought I'd need a press to get the pin out, but all it took was a few solid hits from a 5# sledge. You can see the pin is mushroomed at both ends so I may have a little trouble reinstalling - but it will stay put once in place.
2010-11-04_21-23-24_725.jpg


Above is one of mine and I soaked it for several days by turning the jack on it's side so the oil wouldn't run down the side but rather stayed put and worked it's way down the threads. It was cumbersome propping the jack on it's side, but that's the only way to get the oil in there and keep it there. Remove any material from the screw slot. Use a pick to thoroughly clean it out. Very, Very Important-make sure the screw driver you use is a proper fit for the slot! You may need to grind the blade to the correct width and or thickness. Don't be afraid to modify one. Get that wrong and you'll just chew up the screw head. Walker used good metal so with enough oil and a proper fitting tool these will come out. As rusty as your was it might take some time but it will come out. P & P. I used a large screw driver that had a square shaft so I could get a wrench on it to rotate it while putting a lot of force down to keep the blade in the screw slot. Work with the jack on it's side so you're pushing straight down on the screw. Get a friend to help if need be. Once the screw moves a little stop, more penetrating oil and wait.

This screw came right out tonight. I was fully prepared to fight it, but I had left penetrating oil on for 5 days and I guess either it worked well enough that the screw slipped past the stake or the stake wasn't done as well as it looked to have been. It took less than 30 seconds to get out and I couldn't even tell it had been staked.
2010-11-02_21-17-59_527.jpg


Now the frames are completely disassembled and are ready for wire wheel, blast, & primer this weekend. The dark spots in the center are leftover penetrating oil.
2010-11-04_21-19-42_194.jpg


If you are seeing evidence of blue and yellow paint that would suggest it was made in the late 50's. My research shows Walker's color scheme changed in the late 50's from an earlier blue and white to the aforementioned blue and yellow combination. Retaining that combination is a great idea.

That's what I'm planning on doing. As best I can tell this jack was made in March 1959, so the blue & yellow paint scheme would fit with the vintage you suggest.

CRTDI said:
The rear caster design is nearly identical to what I have on my Blackhawk jacks. After replacing the ball bearings on my S-17 I still had a lot of back and forth slop that I was not happy with. Most of my problem appeared to be some very worn bearing races. I went to my local Ace hardware store and was able to find some thin machined washers to place under the bottom race of the caster. One washer on both sides did the trick, really tightened things up, very little play after the install.

That's a great suggestion & I will try that. Did you use zinc-plated or stainless washers? And it seems to me you mean one washer on each side between the bottom race and the caster once the casters are in place.

These were exceptionally well made pieces of equipment and worthy of your best efforts!

I agree. Since I've been on this board I've developed a taste for USA tools of every stripe.
 

CRTDI

Well-known member
Joined
Jan 11, 2010
Messages
1,533
The bearings I took out are 1/4", and I may replace them with slightly larger 9/32" or 5/16" bearings to tighten things up. They're cheap enough - something like $4 per 100 at McMaster.

That's a great suggestion & I will try that. Did you use zinc-plated or stainless washers? And it seems to me you mean one washer on each side between the bottom race and the caster once the casters are in place.

You may find out that the over sized bearings won't physically fit, but give it a shot, they seem to be cheap enough.

I'm pretty sure that the washers were just zinc plated. For sure, nothing fancy like stainless or unobtainium. And yes, install one washer between the lower race and caster assy for both L and R sides.
 
OP
6

6530

Well-known member
Joined
Oct 15, 2009
Messages
300
Location
East Coast
Short update for today. Got the side plates, 2 casters, 2 wheels, & the last pin wire wheeled, blasted, & primed.

The casters actually both cleaned up nicely. As it turns out there should be grease fittings inside both front wheels and in the middle of the lift arm at the pivot point in the middle of the jack. I'll see if I can figure out what size they are and replace them.

Work area:
2010-11-06_14-11-47_153.jpg


Frame blasted & ready to prime
2010-11-06_14-17-30_449.jpg


Frame primed:
2010-11-06_14-24-04_205.jpg


Various parts primed
2010-11-06_17-13-18_517.jpg


I'm going to try to get the lift arm blasted & primed tomorrow but don't know if I'm going to be able to do it - busy day. Plus I still have the handle to do, and it needs a lot of work.

So far so good!
 
OP
6

6530

Well-known member
Joined
Oct 15, 2009
Messages
300
Location
East Coast
You may find out that the over sized bearings won't physically fit, but give it a shot, they seem to be cheap enough.

I'm pretty sure that the washers were just zinc plated. For sure, nothing fancy like stainless or unobtainium. And yes, install one washer between the lower race and caster assy for both L and R sides.

I'm not sure it'll work either, but I figure I'll try. Thanks for the clarification.
 
OP
6

6530

Well-known member
Joined
Oct 15, 2009
Messages
300
Location
East Coast
Since the main parts are drying I decided to take a look at the handle.

Not sure this is factory - it's hard to tell from the drawings I have.
2010-11-07_11-53-20_597.jpg


2010-11-07_11-41-28_456.jpg


2010-11-07_11-41-55_393.jpg


Lower portion with U-joint
2010-11-07_11-53-34_824.jpg


My helper today, blowing out his Jeep:
2010-11-07_11-45-18_17.jpg


Hiball - will shoot you a PM with a few questions.
 

jonnies

Member
Joined
Apr 16, 2010
Messages
6
You've got a great jack - these things last forever if properly maintained. I've had one for over 20 years.
Do you know if the cylinder is in good working order? That's the tough part. Parts are available, but openning and sealing the cylinder takes a LOT of torque. Don't recall the spec, but I couldn't budge mine, and ended up bringing it to a hydraulic repair shop, and had them do a rebuild just last year.

Mine is now for sale. I recently installed a 2-post lift in my garage and just don't need it anymore. Its in very good shape. I'd like $300 for it if anyone's interested. Would have to picked up I think, as these things weight a ton. I'm near Princeton, NJ.


Jon
 

Attachments

  • IMG_3704.jpg
    IMG_3704.jpg
    146.8 KB · Views: 103
  • IMG_3705.jpg
    IMG_3705.jpg
    147.1 KB · Views: 86
  • IMG_3706.jpg
    IMG_3706.jpg
    145.5 KB · Views: 80
To avoid these ads, REGISTER NOW!
Top Bottom