To avoid these ads, REGISTER NOW!

Walnut & Steel End Table

aggierailroad

Well-known member
Joined
Jan 8, 2012
Messages
581
Location
Houston, TX
Wife wanted a table she saw in a home magazine. Listed at nearly $800 :pimpflash

Went to the local steel yard and got some "less-than-prime" rusted relics for a little less than half price. 24 feet of 3/4" bar and 20 feet of 3/4"x1.25" bar.

The floor model at the store was made of solid legs and tubing bottoms. I have about $50 into the steel.

I got the steel cut up using my dry cut saw - Northern tool brand, cut through it like a hot knife in butter.

DrySaw_zps1ada873d.jpg


I used a saw stop to cut everything. Cobbled it together with some plywood. Worked perfectly - the table came out square within 1/32".

StopBlock_zps93d0f9e3.jpg


Here's a shot of the cut ends:

BarStock_zpsd70bb8fe.jpg


Welded her up - outside dimensions are 24"x24"x26" tall.

Cube_zps9885bd29.jpg


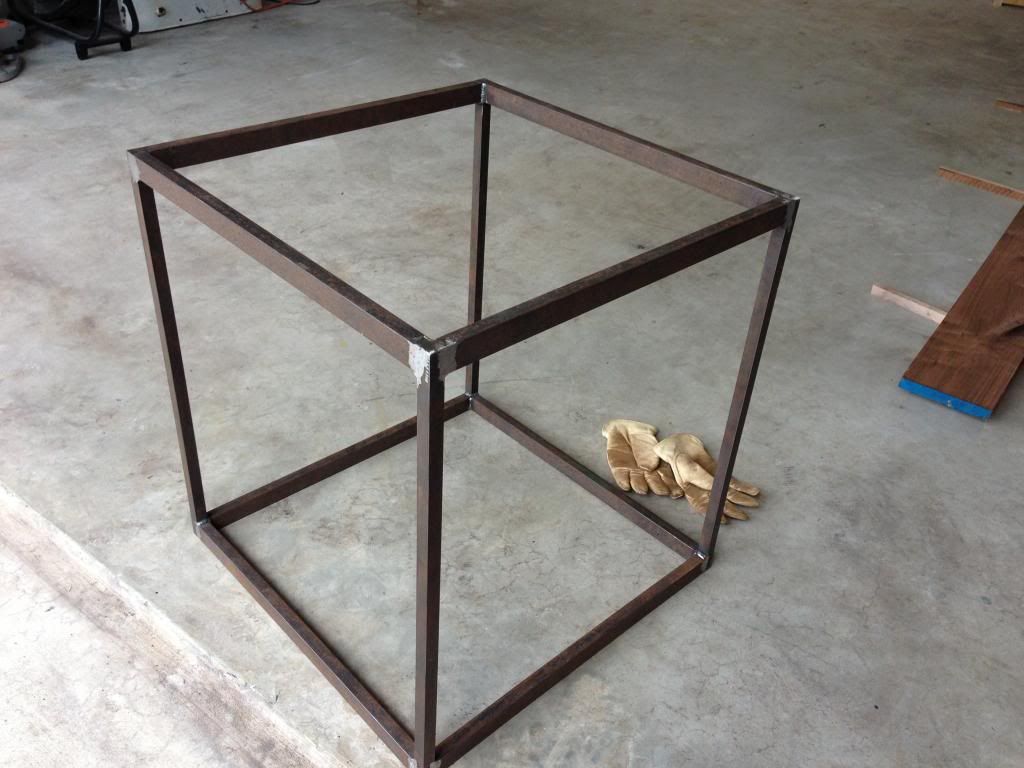
Vertical-Up weld with the Millermatic 211. I think I had the voltage on 7 or 8 with the wire speed around 50ipm; 0.030 wire diameter with 75/25% gas at 15cfm on 110V line input. I didn't bevel it quite enough - which I think is causing the raised edges. All in all, the welder handled the thicker stuff better than I thought it would.

VertUp_zps7514f97b.jpg


Finally went down to the lumber yard and after hours of looking with the wife she finally settled on walnut. My pick was wormy chestnut, but I have to admit, the walnut looks fantastic. The other debate was to use a parquet style top or just planks.

Walnut_zpsda5ca297.jpg


Another shot of them ripped and squared on the jointer.

Walnut2_zps2e55201c.jpg


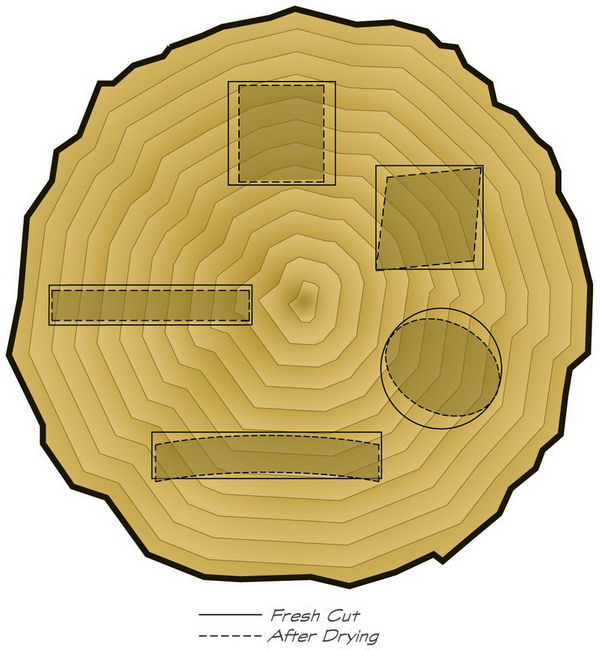
Here it is being test "fit" to check the grain orientation and overall look. The boards will be inset into the top - the trick will be to have an even expansion area around the wood to allow for the crazy humidity down here.

TestFit_zps047d8985.jpg


Tabs are to be welded in once I have the final top size cut out.

Picture of the glue spread over the edge. I have started using a silicone brush to spread it around and have really enjoyed not getting the glue all over my hands!

Glue_zps9dc20f1e.jpg


Here's a shot of the board edges and cauls used during tonight's glue-up. I used Gorilla Wood Glue because it's waterproof - an important thing for a side table. Typically I would use Titebond, but didn't have any of the level II kind on hand.

It's a good tip to alternate the cup of the boards. This means you should try to orient them with the grain curling up (like a smiley face) then next to it should be one with the grain curling down (like a frowney face). This helps the whole thing from curling up like a Pringles chip down the road. Sometimes it's unavoidable to get the grain how you want it, but try to do it when you can.

Cauls_zps33d4f7ca.jpg


The cauls (board strips clamped above and below the walnut) are clamped on first. They stop the big clamps from lifting the boards and making it want to bow. They also help to keep everything flat. Use wax paper or slick tape to keep the cauls from being glued to your work due to the glue squeeze out.

Here's the whole thing clamped up.

GlueUp_zps4922d3f1.jpg


I still could use some more clamps...

Another trick is to leave the ends wild. This basically means that you shoudl cut your boards a little long and glue them up fairly straight but without too much worry. If you cut them to length and then try to glue them up it will be nearly impossible to align them. The glue acts like ice and the boards want to slip when you start squeezing on the clamps. We'll trim them up square after the glue is dry. Also have to make sure, because the glue wants to make the boards slip, is to not accidentally glue the top into a parallelogram...

Let it sit for a day and start un-clamping.

That's where I'm at as of right now. Any questions or comments I'm here to help! Thanks for reading.
 
To avoid these ads, REGISTER NOW!

ADSR

Well-known member
Joined
Jan 12, 2013
Messages
10,713
That's going to be awesome! What are the plans for stain? Any plans to expose more grain by going over the surface with a propane torch?

Great work!
 
OP
A

aggierailroad

Well-known member
Joined
Jan 8, 2012
Messages
581
Location
Houston, TX
Nice work, does anyone use biscuits for joining boards?:thumbup:

Was discussed at length with someone whom I consider a master craftsman and his advice was to just glue it and support the wood on the cross ends. The one inch thick boards should handle any normal loads. Thanks for the ideas.

Probably wont stain it - will just use clear. The torch is an interesting idea...
 

DoghouseForge

Well-known member
Joined
May 11, 2013
Messages
374
Location
Lakeland, Fl
Great post!

You've demonstrated exactly what I needed to see to correct alot of the issues I've been running into. The tips will be put to good use.

That walnut is beauty enough, please don't stain it.... oil it untill its what you want...

Thanks again!

JP
 
OP
A

aggierailroad

Well-known member
Joined
Jan 8, 2012
Messages
581
Location
Houston, TX
Great post!

You've demonstrated exactly what I needed to see to correct alot of the issues I've been running into. The tips will be put to good use.

That walnut is beauty enough, please don't stain it.... oil it untill its what you want...

Thanks again!

JP

Glad I could help out. I saw that you were dealing with this for the cutting board (I think that was you) and figured some pics wouldn't hurt. Also worth mentioning is to reverse the direction of your clamps - 1 over the piece and the next under. For this layup I did the two outer ones under and the two inner ones over.

Say that 10 times fast.
 

muibubbles

Well-known member
Joined
Apr 24, 2009
Messages
685
Location
nj
LOL, i read the first sentence wrong.. i thought u said your wife wanted a 800 table saw and u went and built her one LOL

table looks awesome!
 

drmarkr

ALLIANCE MEMBER
Joined
Feb 5, 2006
Messages
4,209
Location
Tucson
Excellent....I love walnut with a nice oiled finish.

What are your plans for the frame finish??
 

bsaint

Well-known member
Joined
Apr 26, 2010
Messages
5,109
Location
Manchester, CT
My 170 amp is on "min 2" with .035 wire for most of my welding projects with .100 - .125 material. There's no doubt your 211 could handle that lol.

Nice project!
 
OP
A

aggierailroad

Well-known member
Joined
Jan 8, 2012
Messages
581
Location
Houston, TX
LOL, i read the first sentence wrong.. i thought u said your wife wanted a 800 table saw and u went and built her one LOL

table looks awesome!

I wish I was that good...

Excellent....I love walnut with a nice oiled finish.

What are your plans for the frame finish??

I think I will just wax the frame. I really like the pitting and was lucky to find pieces that had it. I thought about satin clear, but don't want it to look eternally wet. Heaven forbid my wife touch it and get a smudge of rust on it. The bright grinded parts will get a quick acid bath so that they will flash rust and blend in with the rest. I don't want to blacken it and never really liked how gun bluing the steel on my last table turned out.

My 170 amp is on "min 2" with .035 wire for most of my welding projects with .100 - .125 material. There's no doubt your 211 could handle that lol.

Nice project!

It did pretty well, no complaints here. Getting that machine dialed in is always a problem as it's new to me and I'm more used to having an amperage readout rather than a random number.

Looks nice so far!

How will you finish the steel?

Thanks! See above for the steel finish. I've got about 4 hours into this thing over a couple of days and beers. Anyone with basic tools can do it, if you are unsure how to convert what I did to your circular saw or whatever you have, just ask - glad to help.
 
OP
A

aggierailroad

Well-known member
Joined
Jan 8, 2012
Messages
581
Location
Houston, TX
Got a lot done but could have done more sans mosquitoes..

First, got the top squared up and ran through the thickness sander. The walnut had some internal stresses that were discovered when ripping them down. Stress risers are inherent in the wood where conditions change - areas around knots, cracks, and the sap/heartwood interface. This was my problem as we liked the grain figure and contrast of the light and dark but had to deal with the wood behavior.

You can feel these stresses under some certain cutting conditions - like making a square cut on a good saw. While ripping the wood it really wanted to bind the blade and kick back right around the knot/sapwood interfaces. Once cut it curled up like a potato chip (maybe not quite as much....:thumbup:) when the internal stresses were released. This is similar to the process where you want to drill out the middle of bar stock (if required) before cutting the diameter profile on a lathe because you release internal stresses first which can then later "move" your part around.

Anyways, the cauls flatten the top for gluing, but once removed I had a little bit of twist in the top from those boards, maybe 1/16" from corner to corner.

You can combat this two ways - plane the board first and glue them perfectly flat (yeah right) or run them through a thickness planer/sander after glue up. I like the easy way, and ran it through the sander.

photo_zps0b37b246.jpg


If you don't have one, you can use a belt sander, hand plane, block of wood & sandpaper, or a hand electric planer. Lots of options here.

Then I cut down and tacked on the flange that the top will sit on. Just some 1/8"x1/2" flat bar. I will square it up to the frame tomorrow. More to come on this on how to attach the top and allow for seasonal movement of the wood.


Also hard to see here, but I ended up grinding down the vert. up welds in the inside corners and spent some quality time with my hand file squaring the up. I wanted to wood tight without too many gaps. This is because the wood has a higher moisture content (~11%) and I am predicting that it will only shrink, not expand. Do some digging online for tools to help you calculate wood expansion for your area's humidity levels.

Lastly, here is a shot of a test piece of walnut with Minwax Antique finish. It comes in a red can. I'm torn between this and Waterlox - which is a tung oil finish.


Sorry for the bad pics - snapped them in the dark garage on the way out the door this morning.
 
Last edited:

tarbellb

Well-known member
Joined
Apr 17, 2011
Messages
5,750
Location
Oregon
I love a natural finish, Tung oil is a great way to go.

Not sure if your aware, but the wood top will want to move and shift over time. When considering how to fasten your top, think about a hole larger then your screw/bolts allowing the hardware to move within the hole. Doesnt need to be much larger.
 

DoghouseForge

Well-known member
Joined
May 11, 2013
Messages
374
Location
Lakeland, Fl
I wish I was that good...

I think I will just wax the frame. I really like the pitting and was lucky to find pieces that had it. I thought about satin clear, but don't want it to look eternally wet. Heaven forbid my wife touch it and get a smudge of rust on it. The bright grinded parts will get a quick acid bath so that they will flash rust and blend in with the rest. I don't want to blacken it and never really liked how gun bluing the steel on my last table turned out.

Just wanted to throw this out there.. When a repurposed or upcycled materials project,with natural patina and paint wear that makes the piece what it is instead of just a new construction, get finished at the shop I have found shellac to be kinda perfect. The clear makes the item cleanable without damaging the sometimes fragile patina and the amber shelac is awesome on rusted materials. Again sealing it so it can be wiped down and cleaned without having the rust dust wipe off as well.

Im sure your wax idea is similar, and im looking forward to seeing it... But if you have a chance check out the shellac idea on some scraps...

Thanks again for the pics and post!!!

Im going at another cutting board this weekend and admittedly am quite excited to try the new tricks. Leaving out the hour long "fixing the curl" will be nice!

JP
 

ilovevocs

Well-known member
Joined
Jun 26, 2009
Messages
1,966
Location
Toledo, Ohio
I like the square edge from the bar stock; gives a cleaner appearance and the corners are nicely detailed as a result.
 

240sxguy

Well-known member
Joined
Jan 6, 2009
Messages
1,158
Location
Madison, wi
That looks fantastic. Let me ask you, how did you keep everything square when you welded it? It seems like everytime I do something like this it ends up in a parallelogram.
 
To avoid these ads, REGISTER NOW!
OP
A

aggierailroad

Well-known member
Joined
Jan 8, 2012
Messages
581
Location
Houston, TX
Just wanted to throw this out there.. When a repurposed or upcycled materials project,with natural patina and paint wear that makes the piece what it is instead of just a new construction, get finished at the shop I have found shellac to be kinda perfect. The clear makes the item cleanable without damaging the sometimes fragile patina and the amber shelac is awesome on rusted materials. Again sealing it so it can be wiped down and cleaned without having the rust dust wipe off as well.

Im sure your wax idea is similar, and im looking forward to seeing it... But if you have a chance check out the shellac idea on some scraps...

Thanks again for the pics and post!!!

Im going at another cutting board this weekend and admittedly am quite excited to try the new tricks. Leaving out the hour long "fixing the curl" will be nice!

JP

JP - do you mix your own shellac or have a preferred brand? It will probably be more durable and have a similar sheen as the carnuba wax that I was going to use. I will definitely do a side by side for everyone to see. I'm happy to swap woodworking for iron working tips any day of the week! Just remember to look at the natural twists of the board and try to line them up so they help you out after glue up. Here's a pic to show you how you might can divine how your pieces will move based on their grain patterns. A few other factors including how it was dried, moisture content, blah blah blah.

NOW_2_5.jpg

Good luck!

Tarbell - no worries. I've definitely thought about movement and attachment methods. Worst case scenario I can expect the wood to move +/- 3/32". Over the entire length. This is factoring in a swing of moisture content from 1 to 21%. Individual board movement is smaller and can be used to calculated slot size for each board if one wanted to get that fancy. One would expect that wood at 11% brought indoors and sealed would only lose moisture and shrink. I'm not too worried about the piece pushing against the metal and buckling as I am shrinking and creating a gap. We don't want this to happen to my pretty (and expensive!) walnut:

0125111730a.jpg

For anyone interested, wood moves primarily across the grain direction. This is why you see gaps in a wooden floor tighten and expand throughout the year.
Moral of the story - yes, I'll be addressing the issue. Take a look at this tool to help anyone guess at wood movement:

http://www.woodworkerssource.com/movement.php
 
OP
A

aggierailroad

Well-known member
Joined
Jan 8, 2012
Messages
581
Location
Houston, TX
Sorry if I missed it, why did you choose solid steel stock, was it for the ends?

Solid steel because I wanted nice crisp edges (corners). Tubing is rolled over and has a faint radiused edge on it. I wanted it to be "modern" with the crisp lines but look vintage. Also, buying scrap steel, tubing wasn't too much cheaper.

I like the square edge from the bar stock; gives a cleaner appearance and the corners are nicely detailed as a result.

Thanks - if I would have used tubing I would have mitered the corners if that's what you are referring to. As it was, I only had to make easy square cuts.

That looks fantastic. Let me ask you, how did you keep everything square when you welded it? It seems like everytime I do something like this it ends up in a parallelogram.

Couple of tricks here. The first one is to make sure your pieces are the exact same length. Look at the first page and my mention of using a saw stop. I clamped the saw to the table, the steel to the saw and the stop to the table. The pieces were more accurate than what I am able to measure to with my tape. Before you do that, re-check that your fence on the saw is square to the blade. I do this before every setup. Your saw is like a piano, if you move it, expect it to get out of tune.

When cutting - apply only vertical pressure. On my cheap saw, you can push the head down at an angle. Push down lightly and focus on not pulling the handle to one side or the other.

When welding it, I only used two of those red corner magnets from Harbor Freight. Laid it out on my table (an old solid core door) and used one magnet. Two tacks. Do the other side, (forming a U shape now) and make two tacks.

Now lay in the top piece with the magnets and use a straight edge to make sure the ends are flush. It should line up nicely here as your pieces are all the same size because you used the saw stop.

Tack and tack. Check for square. Tape from one corner to the other, making sure you have the end of the tape in the same place and read from the same side of the tape measure. I had one piece out a bit and clamped one leg to the table. Tap the corner that's out with a hammer until it's in line. Make another tack if needed.

Make the other square frame the same way.

Now you have two squares that need cross pieces. I'll stop here as it's getting confusing. When I get home I'll try to take some pics to describe this.

Pictures being worth 1000 words and all.

Thanks all for the questions.
 

DoghouseForge

Well-known member
Joined
May 11, 2013
Messages
374
Location
Lakeland, Fl
Any time. Happy to help.

this is the brand we use in the shop..

Zinsser Clear and Amber -
http://www.rockler.com/product.cfm?...campaign=PLA&gclid=CIbK_fv787cCFWrl7Aodbi4AZA


Now :) Before I get crucified by the "finish purist" this brand does have wax in it. The wax apparently can cloud up over time but we have never had it do that on the metal or painted surfaces. Perhaps the woods porosity lends the shellac to clouding...Im not sure

as an example on metal -

Here is a piece that has been clear shellac coated to protect the patina. Its Old kerosene gas lamps converted to electric lamps with edison bulbs. The clear doesnt really make the metal look "wet" but it does protect all the awesome aged finish while keeping it cleanable...


I unfortunalty cant find any of the rusty stuff with the amber shellac used. Thats about normal since its the ones you need for reference...:(
the color diference on the rust isnt very noticable but it does lend some camouflage to the fresh welds and grinder marks...

Thanks for the grain flow chart. Should I try to place each row of the boards in opposition to the others grain flow? basicly reversing the pull onto itself? Will that keep the board straighter over time, especially with it getting wet when cleaned?

JP
 
OP
A

aggierailroad

Well-known member
Joined
Jan 8, 2012
Messages
581
Location
Houston, TX
Thanks for the grain flow chart. Should I try to place each row of the boards in opposition to the others grain flow? basicly reversing the pull onto itself? Will that keep the board straighter over time, especially with it getting wet when cleaned?

JP

Ugh... You're going to make me commit to predicting wood movement aren't you? Fine. Have it your way!

After shaking my magic 8 ball, here's what it said:

Yes, alternate the grain pattern if you don't have quarter sawn wood (the board in the middle left in the cartoon). This will help a lot. Another big thing is how the wood was stored before glue up. On a concrete slab? Forget about it. Cut them to length and bring them inside with ample air flow on all sides to acclimate to their environment.

Wood stored on concrete is more moist on one side and will curl right up on you once it dries out. Now, it [alternating the grain direction] won't pull against itself more than even out the tendency to cup. I'm convinced your main problem was from clamping technique.

Lastly, don't final finish cut up your project and let it sit around a few days before sealing it. You want to lock in that fresh flavor! Or the current flat state moisture content. Semantics. You'd find my table top on its end grain edge standing against a table leg nearly straight up in a nice and comfortable dark 73F room right now... If you looked.

Lastly, use this reference to get you going down the path. Not too relevant for glue ups but it gets you started thinking about wood movement.

http://http://csfs.colostate.edu/cowood/library/02_Warp_In_Drying.pdf

Good luck this weekend! Hold off if that wood's been on the concrete!
 
Last edited:

F-117HWK

Well-known member
Joined
Apr 17, 2012
Messages
283
Location
Virginia
Hopefully yall don't mind me asking a question relating the the shellac, but I just stripped an old GE refrigerator down to bare metal and used the flap disc to make patterns in it. Would the clear shellac be a good choice to cover the bare metal in to keep it from rusting? As it sits, anywhere you touch will produce rust within a few days.

The table is beautiful btw :drool:
 

240sxguy

Well-known member
Joined
Jan 6, 2009
Messages
1,158
Location
Madison, wi
This is a great thread, I love this stuff. My other hobby is woodworking. I am pretty good at it, but I really don't have the eye for design.
 
OP
A

aggierailroad

Well-known member
Joined
Jan 8, 2012
Messages
581
Location
Houston, TX
To be honest, and I'm as new to the shellac over metal as you are, I'd use plain old "automotive" clear coat. I've done that over bare metal with good result as the flap wheel provides plenty of "tooth" for the coating to adhere to.

I don't mind deferring this one to our resident blacksmith.

Glad you like the table, it's turning out surprisingly nice for the low time and money investment I have in it.
 

F-117HWK

Well-known member
Joined
Apr 17, 2012
Messages
283
Location
Virginia
To be honest, and I'm as new to the shellac over metal as you are, I'd use plain old "automotive" clear coat. I've done that over bare metal with good result as the flap wheel provides plenty of "tooth" for the coating to adhere to.

I don't mind deferring this one to our resident blacksmith.

Glad you like the table, it's turning out surprisingly nice for the low time and money investment I have in it.

Good deal. I actually have some already, so I may give that a go. Worst case, I just strip it off again i suppose. Thanks.
 

DoghouseForge

Well-known member
Joined
May 11, 2013
Messages
374
Location
Lakeland, Fl
I think the clear coat would be the way to go on your fridge... either rattle can or spray gun if ypu have one.
I'm pretty sure the shellac on our metal pieces is improper but I'm also sure that nobody on the shellac think tank was saying " lets find a way to keep paint peeling, rusty stuff exactly as rusty as it is and still be able to clean it. "

My buddy started using it because the polystuffs was to thick and the clearcoat paint doesnt stick to the poorly/nonpreped surface.. for some reason the shellac does and it can be thinned to vary the tickness and in turn the gloss. We use a cheap brush to apply.

I've seen auto shows where they degrease old paint jobs and clear coat it so I'm sure your fridge would work as well.

I'm personally a big fan of try it on a scrap section with the same finish and keep a log of how it worked out. Often the nonconventional application yields unexpected but better results than I originally envisioned.

JP
 
Last edited:
OP
A

aggierailroad

Well-known member
Joined
Jan 8, 2012
Messages
581
Location
Houston, TX
Looks great so far!
How will you finish the steel?

I'm leaning towards the shellac. Please read the previous posts to get an idea of the selection thought process.

@ 240SX, no worries man, I'm still going to get some pics of how I fit everything up to weld squares instead of parallelorhomboidusipses shape things.
 
OP
A

aggierailroad

Well-known member
Joined
Jan 8, 2012
Messages
581
Location
Houston, TX
Took two steps forward and one backward this weekend.

I had the tabs tacked at the wrong height, probably due to my mosquito issue that I mentioned http://garagejournal.com/forum/showthread.php?t=205074&highlight=mosquitos here.

Anyways, fixed that by using a custom alignment bracket:


A concrete slab and some aluminum angle and speed clamps. Worked great.

Drilled some pilot holes (1/8"):


And then "ovalled" them out with a hand file, after drilling to 1/4".


Was pretty easy. I intend to use brass machine wood screws with washers.

Finally got the first coat of "practice" finish applied to the bottom. Couple of things here - it's a little bit too yellow for my taste - might try to use a water based finish to even that tone out. Won't make too much of a color difference, but I only sanded this to 150. The final top will be done to 180 with foam backed paper on a block. Suggestions welcome here. I really like how the dark heartwood turned out. Also, be aware that this pic was taken before it was dry. Hopefully it will lighten up a bit by the morning.

Here's a shot to compare the color versus the end grain.


Last one here is for all the walnut lovers out there - this is the next piece that will be cut down for the next table - probably 18"x24" and possibly shorter. This board has a little bit of warp in it end to end. It will be challenging selecting where I want to boards cut from given that fact and the big knots and checks.


DoghouseForge

Well-known member
Joined
May 11, 2013
Messages
374
Location
Lakeland, Fl
Coming right along... the contrast is nice . I didn't even notice the different tones during the previous post... crazy how different such a subtle difference is after the oil...

Do they make the Danish oil in light and dark variety . For some reason I feel like I saw that but it might have been the restorer .. thought if they did you could do some mad lab style mixing and create what you were envisioning ..

Im wondering why you are only sanding to 180... I take most of my stuff into the four digit s...just makes it look and feel so smooth... are you going for the rougher look? Im personally a sucker for the mega contrast from rough rusty metal to ultra finished w
ood stuff...

Looking forward to the rest!

JP
 

clarky456

Well-known member
Joined
Feb 11, 2011
Messages
129
Location
Central Ohio
I bought a country house a few years back with my now ex-wife. The previous owner had the home in their family from the day it was built (1910). The home had all of its plaster removed for insulation when the owner was growing up. He mentioned that it was impossible to drive a nail in the solid walnut studs. Walnut studs?! Sure enough, every stick of lumber in the home is black walnut. The 6+ acre property is still littered with very large and healthy black walnut trees. I always dreamed of finishing the floor joists when I walked through the basement. That house, along with the wife, is now gone!

Joe
 
To avoid these ads, REGISTER NOW!
Top Bottom