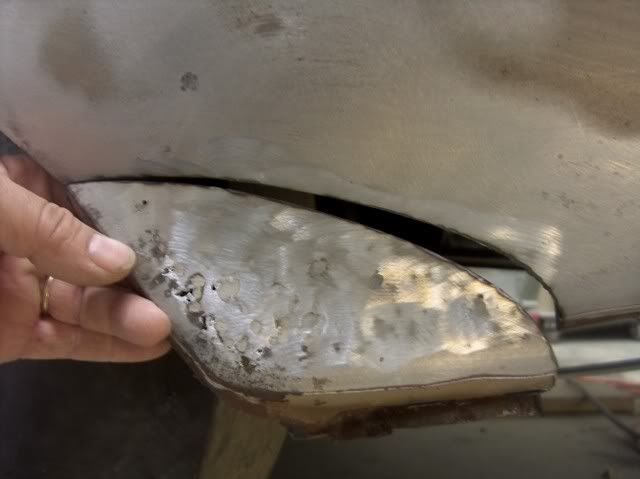
I'm new to welding and would like to fix some rust spots on my project Miata. When doing a **** weld, what is the correct technique for the weld? Using a MIG, do you do a circle pattern for the tack weld? I've tried a few times but everytime I pull the trigger it seems to just feed into the gap and not actually tack the piece together. Any suggestions?
Scott, none of the following statements are intended to pick on anyone's technique or profess something to be the only way it can be done. (my disclaimer) If anyone has something that works for you, by all means use it. But this is the method I follow, and seems to work now that I have the hang of it. There are always exceptions you run into that will require deviating from your "norm" to tackle an oddball situation.
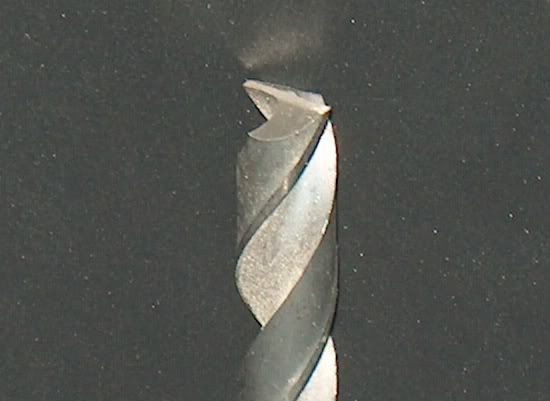
Most hobbyists only have a MIG welder in their shop to work with. Where you will hear from many professional sheetmetalists (I aspire to be in that category one day) that TIG or O/A gives you a better weld, a softer weld, a this or that, I am not at that stage yet in my abilities to be able to confirm it as gospel. I have a TIG to go along with my MIG, but the TIG is a lower end machine that does not have as precise control on the lower amperage scale as some of the bigger machines. Thus, for me it does not play nicely with auto sheet metal, and I find it relegated to use when welding up something on the welding table. So, like most other guys out there, I work primarily with my MIG when it comes to actually welding on the car. So the following will be based primarily on using the MIG, and applications will likely differ if you are using O/A or TIG. (my second disclaimer) Now, if you have ever welded thicker steel, let's say 1/8" or thicker, you have seen that this metal will tolerate heat fairly well and permits you to weld in one continuous pass. Automotive sheet metal on the other hand, typically in the neighborhood of 19 ga, is too thin to provide these exact same results. If you were to have your welder heat and wire feed set up for doing a pass on 19 ga steel, you will notice that the initial start is likely a cold weld, with lack of panel penetration. Looking at the back side, you would still see two separate panels.....until the metal starts to heat up, and then you will see the weld penetration as you would expect, and contining, the metal heats up further, until you blow out a hole. Point being, sheet metal is not as friendly to continuous weld passes as you would see with the thicker metals.
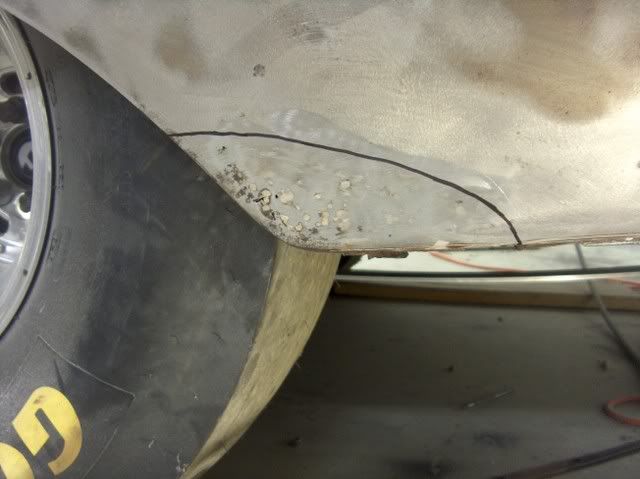
So before we get into actual welding, let's talk about your panel preparation. Clean, rust free, no paint, oil, etc, that's a given. I typically cut out any rust damage until you get to good metal. Sometimes that involves going three or so layers deep to get to good metal, but while you are welding, do it right or you'll be doing it again in a year or so. Welding is cheap compared to paint products.
")
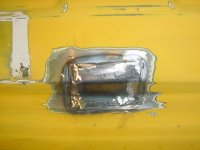
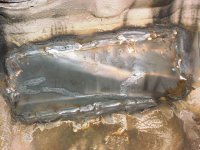
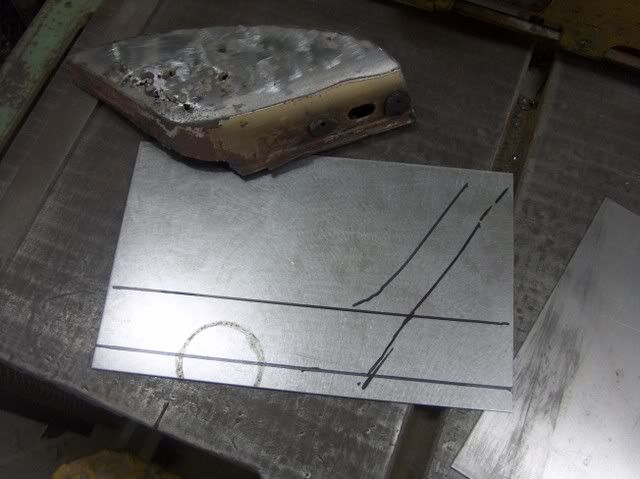
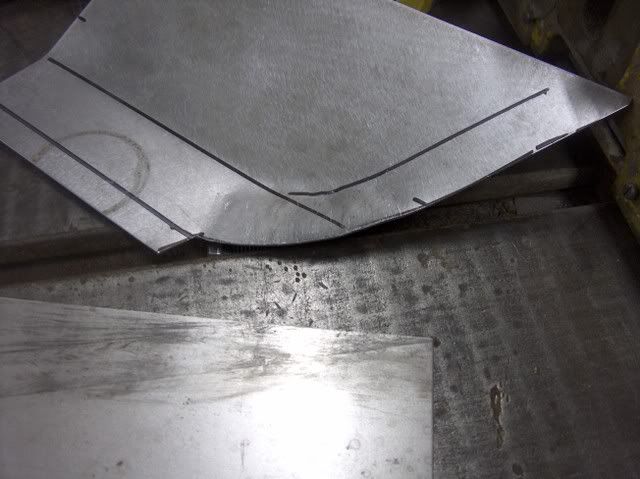
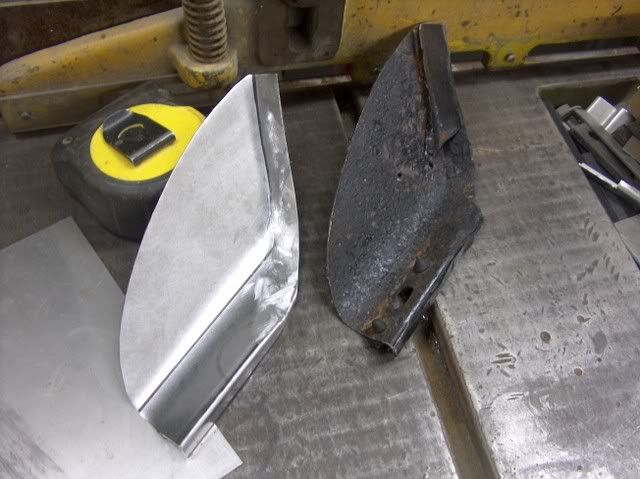
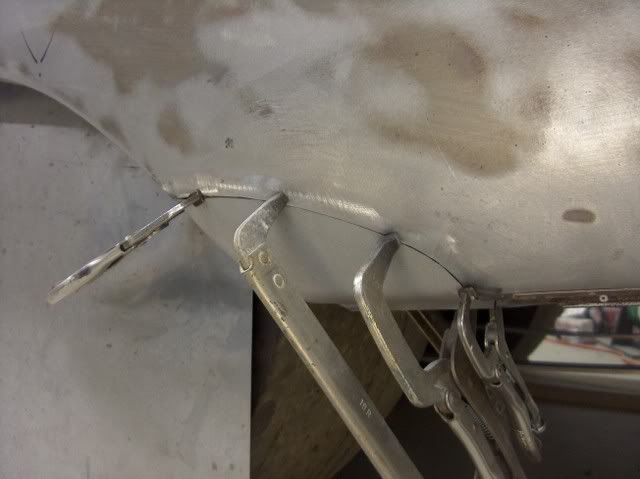
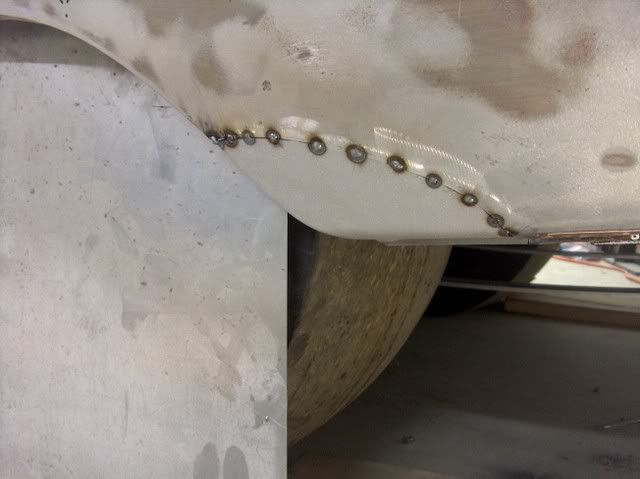
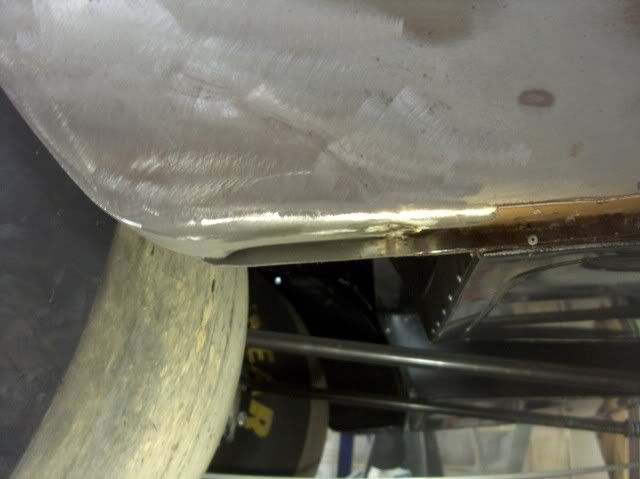
For the typical repair panel I am fabricating, I will cut it out about 3 times (hopefully all on the same panel). Tool of choice is offset snips, you'll need left and right handed. Initial cut is a rough cut, a good 1/2" or so oversized. Now it will fit against the adjacent panel a little better without all the extra metal in the way. Trace an outline from your hole/opening to make another cut. Here I'll use a sharpie or similar device, and trim again, leaving about 1/8 extra this time. Fit and trace once more, this time marking with a scribe, ice pick, or similar sharp device, and trim just to the outside edge of the scribe. Test fit again, using your 3" sander to touch up any areas that aren't fitting tightly together. Oh yeah, in case you just missed that, NO GAPS. Any weld is going to cause some shrinking. The wider the gap, the more filler, the more heat, the more shrinking, the more your panel just moved from where you intended the edge to be. And as you have seen, hard to fill and weld a gap with about .023 wire. So here's where we work in the welding scenario. I hope no body gets offended, by my personal view is people set gaps (and use backer plates) because they can't get a full penetration weld otherwise, because the machine is not set hot enough and the panels aren't tight together. Think of the weld pass we discussed earlier. The initial part of the weld does not produce a full penetration weld. So to fix that, let's turn up the heat. We want full panel penetration, the first time, every time. But wait, you say. If I keep welding, it will blow a hole in the panel. So true, That is why in welding sheetmetal, the process I use is more heat (I normally set my machine for the next thicker metal....18 ga, set the heat for a 16 ga panel, etc), but only weld one dot at a time. If the panels are tight together, the feed wire can "feel" the joint even if you're blindfolded! Now, one zap and the panel is tacked. I know this may be different for some, others may have tried it and still found themselves blowing holes due to the "excessive heat". Before giving up hope, first try increasing the wire feed speed a bit more. Think of it this way.....there is enough heat to cause the weld, but not enough filler material going in, so somethings gonna give, hence the blowout. So more heat, more feed, single dots only, and no gaps. I'll follow this post with a small patch I did on a quarter panel to hopefully show the process a little better.