To avoid these ads, REGISTER NOW!

west of Philly - barn saving

OP
R

rieferman

Well-known member
Joined
May 18, 2009
Messages
2,586
Location
Collegeville PA (30 min west of Philly)
ha ha, sorry for the roller coaster ride! :) thanks for commenting!!

--

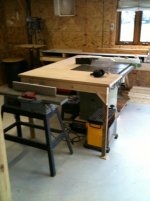
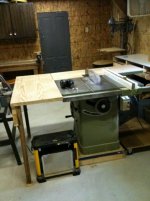
Got the outfeed and side table built for the table saw this weekend. The planer will live underneath the side table and will be pulled out when needed. Since the planer will sit on a cart that raises/lowers with hydraulic lift, it'll be an easy setup each time.

The table surface is solid core, oak wrapped doors that someone misordered, Normally $100 apiece, they're mine for $10 total. Worked out pretty well.
 

Attachments

  • table saw outfeed front.jpg
    table saw outfeed front.jpg
    56.4 KB · Views: 479
  • table saw outfeed side.jpg
    table saw outfeed side.jpg
    46.5 KB · Views: 432
To avoid these ads, REGISTER NOW!

curdy

Well-known member
Joined
Mar 20, 2009
Messages
124
Location
Charlotte, NC
Nice work on the outfeed and side tables for the TS. I need to do that for mine as well. Waiting for now until I move the shop out to the new place.

Let me know what fittings you need for the DC. I was out at a farm this weekend that is a forced sale by the bank. They had all sorts of goodies in one of the barns...including a bunch of 6"x6"x4" PVC wyes. I made sure to speak up for them if they...ya know, need them picked up so they didn't have to mess with them :)
 
Last edited:

graffix000

Well-known member
Joined
Nov 23, 2007
Messages
872
Location
Philly
Just got done reading through your build. It is pretty impressive what you were able to accomplish. I live right up the road in Limerick.
 
OP
R

rieferman

Well-known member
Joined
May 18, 2009
Messages
2,586
Location
Collegeville PA (30 min west of Philly)
Thanks guys!

Productive weekend, but no pictures to share today. I know... Booooooo

Anyways, pics next week hopefully.

In the meantime:
- Jim (intimidatorsquizz... check his build thread!!!) HOOKED me up!!!!! PVC pipe and fittings for my dust collection system. I pretty much will only need to purchase a few fittings and one length of pipe to be done. ALSO, he gave me some sweet speakers to add to my stereo system, so now I can hear nicely on both the workshop and woodshop side. Plus, we had a couple beers and chilled out. A good night for sure!

- I also hit the local Habitat Re-Store. WOW, what a place. I'll be going every other saturday pretty much for the rest of my life I think. Got a solid core door (no door knob hole drilled) for $1.50. That will be my assembly table until I feel like building a proper one (possibly permanently as it works great). Damn near bought a Delta grinder for $15, but I didn't have cash on me.

- Got the wall by the sub panel studded and insulated (insulation also courtesy of Jim... I think I'll name the building after him) I just need to close it in with OSB.
 
OP
R

rieferman

Well-known member
Joined
May 18, 2009
Messages
2,586
Location
Collegeville PA (30 min west of Philly)
Well, still no pics, but progress occurs nonetheless.

Last night, I finally came to terms with the fact that my under-the-stairs lumber storage is a colossal waste of space. And came to terms that I'm going to be far happier expanding the woodshop into both sides of my barn (whereas now, I have 1/2 woodworking shop, 1/2 homeowner type of workshop).

Of course, my stupid previous self built the lumber storage with ring nails fired from the framing nailer, so it was a total pita to disassemble. Crow bar and sledge and lots of sweat and cursing. I saved as much of the lumber as possible by banging nails out or cutting off the ends of sticks.

Now, I have nice easy access to stud the walls beneath/beside the stairs, insulate, and close the walls. While I'm back there, I'll run a few receptacles and a light.

AND, under the stairs is where my new workshop work table will be. Charging station, fasteners, tool drawer etc. All the stuff that's currently on my 8 foot table and shelf, will now live on a 6 foot table and shelf under the stairs. This allows me to free up the space where the existing table is... thus expanding woodshop footprint.

It'll all make sense in a week or two when it comes together. More to come

edit: oh yeah, I also got the lawn mowed, worked a full 8 hour day, played with the kids, read bed time stories, and hung out with the wife for awhile. :)
 
OP
R

rieferman

Well-known member
Joined
May 18, 2009
Messages
2,586
Location
Collegeville PA (30 min west of Philly)
I better start getting some pics with my posts! I appear to be putting "the crowd" to sleep here! ha ha

Anyways, for sake of remembering later:
- finished studding and insulating the first floor last night. glad that's done.
- cleaned up, and setup for OSB work, I only need 4 sheets but there's lots of intricate cuts, so it'll be a bit of a pain.

Can't wait to build my new workbench and get my woodworking tools into their final resting spots!!!!!
 
OP
R

rieferman

Well-known member
Joined
May 18, 2009
Messages
2,586
Location
Collegeville PA (30 min west of Philly)
Should have pics next week I think. But I may wait until we're painted.

Anyways, lots of progress this weekend.

Turns out that it was 6 sheets of OSB not 4 as originally guessed. And man oh man were there a lot of cuts. The barn is crooked in all four directions, plus you have electrical boxes and other obstacles to work around, so each piece was a puzzle exercise. I wasn't surprised by this, as the entire barn project has been this way, but it really just slowed me down more than I realized (and I triple most of my time estimates to begin with!). Took me about 6 hours to get the walls closed in. But, it's done, and boy is it nice to be thinking about painting (despite that I hate painting... but wife has agreed to help!).

I also got my storage hutch and locker moved to a place where I think I'm finally going to be happy with them permanently.

Got the $1.50 solid core door that I picked up a week ago turned into my workbench under the stairs. For supports, I build two simple triangles out of 2x4's and made a floating style of bench. Lots of room underneath for storage.

Got the electric work all roughed in, need to be ready for Jim to come help me on Friday night.

----
This week, move workbench stuff to new workbench.

Shorten length and height of old workbench so that it will now become my assembly table.

Move my vice/grinding bench to support planer. Move vice to other side of table too.

Use up some sheetrock I have laying around to cover some miscellaneous interior openings.

Go through all remaining construction materials and decide keep vs. burn vs. give away. (sadly, most will be "keep" because I can never bear to get rid of stuff... and then I always find a purpose for it later, which reinforces bad habits)

Some minor reorganizing and shelf hanging etc.

Wire with Jim.
 
OP
R

rieferman

Well-known member
Joined
May 18, 2009
Messages
2,586
Location
Collegeville PA (30 min west of Philly)
Anymore thoughts on getting the upstairs finished?

Yep, definitely. Here's approximately how the upcoming barn projects will go, in order (these all will probably take about 5 years to complete):

- exterior siding, and upstairs windows (downstairs windows already done)
- three shed/lean to extensions - kid's storage, garbage can storage, lumber storage
- Deck on front of barn
- by this time it will be time to put a metal roof on the barn. Existing shingles should last me nicely until then.
- Finish second story


To blow that last bullet into more detail:
- new subfloor throughout
- stud, insulate, close walls
- electric, heating (perhaps mini-split), lighting, entertainment (TV, bar etc.)
- storage area shelving.

Basically, the 2nd story will have an open area about 18 x 24 in size, with nice high ceilings. Heated/cooled and finished nicely (but tough.. OSB walls, plywood painted floors). It will serve as a rec room type of family space with a ping pong table and TV and bar. Much of the furniture in this space will be stuff that I've built and am selling. Why store it all when you can use it?

Behind the finished space is the storage space which is about 12 x 24 in size. General storage, and additional woodworking-for-sale space.
 

intimadatorsquizz

Well-known member
Joined
Feb 12, 2010
Messages
245
Location
Telford,PA
Let's go slacker I can't be there to hold your hand all the time....lmao
Just kidding Bob. Your kicking *** on that thing. I'm glad i could help hook you up with some free stuff... If only I could get some cheap stoce pipe for my garage...
I'll check out the progress this Friday night over a few cold ones.
 

NUTTSGT

Super Moderator
Staff member
Joined
Sep 14, 2009
Messages
51,059
Location
Northern Central Ohio
As much as you're putting into the barn again, are you not selling your property for the new job? I take it you decided to keep it then or is it just a continual build process ?
 
OP
R

rieferman

Well-known member
Joined
May 18, 2009
Messages
2,586
Location
Collegeville PA (30 min west of Philly)
House is off the market, we decided to stay... so, it's back to work on the barn.

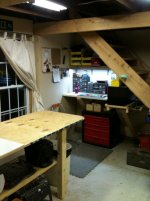
Anyways, here's a sneak peak of the new layout. This is the new under-the-stairs workbench, and the edge of my temporary assembly table (one of my first woodworking projects will be to build a nice assembly table).

I'm happy with how it's turning out.
 

Attachments

  • photo.jpg
    photo.jpg
    133.5 KB · Views: 482
  • photo1.jpg
    photo1.jpg
    135.3 KB · Views: 581
OP
R

rieferman

Well-known member
Joined
May 18, 2009
Messages
2,586
Location
Collegeville PA (30 min west of Philly)
The jutting portion of the square is above my head by a few inches (I'm 6'2") and the hammer survived rigorous testing without any risk of falling. 3" drywall screw held my grandpa's hammer for 50 years, it ought to work ok for mine too ;)
 

Timo

Member
Joined
Oct 28, 2009
Messages
13
Location
Peterborough Ontario
reiferman

Great build and congrats on bringing the building back to life. Someone once told me that we don't really own anything but we are only its current keeper, nice job on keeping that barn up!

And the tools, I got some tools from my grandfather when he passed away last year. Better than any money I could have received - I think of him everytime I use them.

Cheers

t_
 

markviii

Well-known member
Joined
Jan 25, 2010
Messages
1,310
Location
east central IL
Hi rieferman,
The barn restoration looks very good. Tom and I agree with Timo that "we don't really own anything but we are only its current keeper". We're still having fun discovering Mr. Johnson's treasures at our (his) Restored 1930's Auto Shop. We also still have the original tool box with tools of Tom's Great-grandfather who was a master carpenter.

Do you get the journal Fine Woodworking? Every issue is packed with great info. The current issue (the annual Tools & Shops issue) has more specific info about tool chests and equipment. Roy Underhill's article pictures many of the tools in our toolbox.

Congratulations on being able to stay in your place and make it your own. Our family has been in the 100 year old home for 51 years now. It'll be hard to leave in a few years when we build our retirement home (unless one of the kids has a miraculous turn-around in their earning power to be able to buy the old homestead!). There's also something very satisfying about being able to go to work at home. If you enjoy it, it's not really "work" anyway.

Chris
 
OP
R

rieferman

Well-known member
Joined
May 18, 2009
Messages
2,586
Location
Collegeville PA (30 min west of Philly)
Well, Jim and I got the wiring finished on friday night, he's a great teacher. And he also helped me muscle the new addition to the shop out of the truck... Then we chilled out for awhile. It was a great time, and exactly why I love having the barn out there.

Chris, thanks for dropping in again :) I haven't gotten any woodworking magazines yet, but I'm planning on signing up when the niece's magazine drive comes around this year.

Anyways.. here's the latest addition to the shop! YAY

(bummer, last minute business trip has me away from shop time for a full week! ugh)
 

Attachments

  • bandsaw.jpg
    bandsaw.jpg
    115.1 KB · Views: 227
To avoid these ads, REGISTER NOW!

mpracing

New member
Joined
Nov 7, 2010
Messages
1
What opens the garage door, is there a torsion bar with spring, and does it go over the door opening ?
 
OP
R

rieferman

Well-known member
Joined
May 18, 2009
Messages
2,586
Location
Collegeville PA (30 min west of Philly)
Hey, it's the normal garage door spring type of system. The garage door covers where the sliding barn door used to be. Works pretty nicely for my needs.


--------------

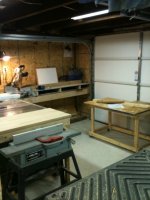
Btw, here's a vid of my space as of today, please let me know what you think


Woodfiddler

Member
Joined
Nov 22, 2010
Messages
6
Location
Atchison, Kansas, USA
It took me a while, but I made it thru your thread. Great job saving the barn and making things useful for you and the family. :thumbup:

I keep checking back, but haven't seen a new post :(, so it was time for me to chime in and bump this thread off page 4.

I, too, love the winter photo during the snow from the back of the garage. I set it as a background on my work computer as a reminder of what lies ahead.

So what is eating up your time? I hope it's woodworking work and not a medical complication from the open-heart surgery you had years ago.

Come back rieferman, we miss your updates. :bowdown:
 
OP
R

rieferman

Well-known member
Joined
May 18, 2009
Messages
2,586
Location
Collegeville PA (30 min west of Philly)
:) Hey woodfiddler! Thanks! Sorry, I've been on woodworking forums mostly these days, but try to get over here and make posts on other people's builds whenever I can. This site was big time motivation for me during my build, so I feel like the least I can do is come back and encourage others.

Health is great, I've just been doing woodshop setup these days. I should have my dust collection in place within a few weeks, and will definitely plan on posting pics when I'm done with that.

In the spring, siding on the exterior of the barn, and beginning of work on the 2nd story (which will be a recreation room ultimately) will start up. Funds are always a problem, but that will be helped when I start selling furniture on the side.

Thanks for reading!
 

drooartz

Well-known member
Joined
Jan 26, 2010
Messages
228
Location
Utah, USA
Just used up my lunch hour working through your thread. Very nice work on the old barn -- you have much to be proud of.

Both sorry and glad that you weren't able to move. My wife and I tried to do a move last year to no avail, and have decided that we'll be staying put where we are for a long time. The advantages are that now you *know* you'll be staying so you can feel good about the energy you're putting into your projects. Besides, that's a tough barn to leave.
 
OP
R

rieferman

Well-known member
Joined
May 18, 2009
Messages
2,586
Location
Collegeville PA (30 min west of Philly)
Hey drooartz! Sorry I spent your lunch hour :) I'm a bit wordy! ha ha Thanks for the compliment!

----

Painted the wood shop last night. It was actually sort of funny..

On saturday I went to Habitat Restore, and got 3 gallons of white base paint for a grand total of $0.75. Yep, three shiny quarters bought me all my paint.

So, I have the space all prepped and my buddy comes over to give me a hand. We open the first can, and the paint is long since spoiled. Damn. All of them are shot.

Luckily, I had 4 partial gallons of various shades of tan in the basement. So, we did a witch's brew of paint and got to it. I had primed the OSB before he came over, and then my wife came out to help after the kids were asleep. Start to finish, I had the entire space primed and painted in 4 hours flat. Not bad. Then again, in a barn like mine, cutting in is not a jack olsen affair - you just eyeball it as close as you can, wipe any paint drips on your shirt and move on. Two coats? What's that? Close enough is sometimes good enough. :thumbup:

We have to stain the new posts and beams to match the old post and beams this week still, and paint one cabinet an accent color, but then we'll be ready to put everything back where it goes (and do my dust collection setup!!!!! yay!).


Pics soon, thanks for reading
 

intimadatorsquizz

Well-known member
Joined
Feb 12, 2010
Messages
245
Location
Telford,PA
cool Bob.
this should be interesting to see the color. did you repaint the other walls that were already tan?
i'll see it on the 18th so make sure your done by then.
 

Jack Olsen

Super Moderator
Staff member
Joined
Mar 22, 2009
Messages
6,678
Location
Los Angeles
Then again, in a barn like mine, cutting in is not a jack olsen affair - you just eyeball it as close as you can, wipe any paint drips on your shirt and move on. Two coats? What's that? Close enough is sometimes good enough. :thumbup:
Ha! If you saw me at work, you wouldn't be able to help but laugh. I'm fast, cheap and out of control -- and I know the pictures will be taken from 20' back. :beer:

You should paint a white piece of wood or foam core or something with your custom-brewed color just in case you need to get it shot and matched at some point in the future.
 

traveler4717

Member
Joined
Nov 22, 2010
Messages
11
Location
upstate New York
WOW!!! First; thank you for saving a piece of history. and yes I'm so envious, you should be very proud. I also enjoy finding things to "re-purpose". I don't need shiny brand-new. it just has to work.

Thanks for the thread I enjoyed very much and got many great ideas.
 
OP
R

rieferman

Well-known member
Joined
May 18, 2009
Messages
2,586
Location
Collegeville PA (30 min west of Philly)
Hey guys! Thanks for the comments, as always it's very motivating to have friends drop into the thread and give some encouragement!! :thumbup:

Jim - some pics for you below. The tan turned out just fine. We did end up painting the walls that were already painted a different shade just to keep it somewhat consistent. I'm mostly concerned with functionality, but even I have my limits of how cheap I'll be! ha ha

Jack - your name has become an adjective, noun, verb, adverb. You should be proud :)

traveler - really glad my build could generate some ideas for you. I always like it when I get someone's "first post" on this forum - you'll become addicted, it's an informative place here. Welcome!

--

anways, a couple paint pics. I rubbed some grease on the lens ahead of time so as to fool you into thinking I did a good job. ha ha. seriously, it's the worst paint job I've ever done, but it works. The space is much brighter and cleaner feeling. And now I can start working on the dust collection setup without having to paint around it later.

I tell ya, it was a pain in the **** unorganizing everything to paint, and then reorganizing everything again. But I like how the space is shaping up.
 

Attachments

  • paint 3.jpg
    paint 3.jpg
    51 KB · Views: 380
  • paint 2.jpg
    paint 2.jpg
    59.4 KB · Views: 361
  • paint 1.jpg
    paint 1.jpg
    53.5 KB · Views: 374

fergus

Well-known member
Joined
Oct 4, 2009
Messages
1,620
Location
Yolo County CA
Dude, your barn has become a totally solid shop! Right on. Your thread was one of a few that inspired me to resurrect my heap. Keep it up.
 
OP
R

rieferman

Well-known member
Joined
May 18, 2009
Messages
2,586
Location
Collegeville PA (30 min west of Philly)
hey fergus, thanks for the compliment, it's really motivating to hear comments like that :thumbup:

----
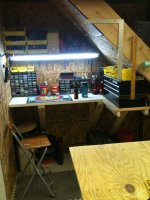
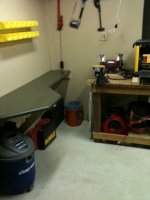
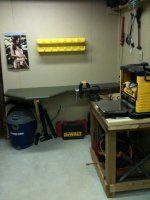
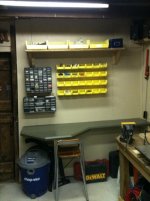
tonight, I took an odd shaped piece of free corian counter top that I got from my brother in law, and turned it into my "fastener and sorting station"... where all things fastening and sorting will be. Built some slat wall with some scrap material and hung some of my bins. More to do, but it's far enough along for a fun post :)


(edit on 12/3/13 - I still love this counter design. It has really worked out wonderfully over the years.)
 

Attachments

  • fastener station.jpg
    fastener station.jpg
    107.3 KB · Views: 357
  • fastener station1.jpg
    fastener station1.jpg
    109.3 KB · Views: 330
Last edited:

e-tek

Well-known member
Joined
Dec 19, 2007
Messages
10,690
Location
Saskatoon, SK
Wow - great story - reads like a roller coaster at times: I laughed, I creid, I kissed 5bucks goodbye!!!

thanks for the updates - nice to see you stickin' around!
 

65Stang

Well-known member
Joined
Sep 25, 2008
Messages
240
Location
Washington State
Nice restoration/use of the barn! My shop was a rickety storage place a previous owner built and is now a nice little shop.

I wish I had your communte. I am currently 80 minutes one way, *****.

What wood builder forums do you frequent?
 
OP
R

rieferman

Well-known member
Joined
May 18, 2009
Messages
2,586
Location
Collegeville PA (30 min west of Philly)
hey e-tek, thanks for reading and commenting :)

65stang, do you have a thread on your place that I can read? I'm over on sawmillcreek mostly, but I browse lumberjock forum sometimes too. I'm a newbie when it comes to woodworking, so I don't post a lot, just mostly reading.


---
edit:
Btw, so the wife and I finally agreed that siding the exterior of the barn needs to be prioritized to happen this spring. During cold weather when the boards on the barn shrink, I get leakage during cold rains. The building can handle it for a short while, but I don't want to go multiple years with insulation getting wet and drying out etc.

In order to do the siding, I must first stud the 2nd story, frame and install windows, and then tighten up the exterior by screwing into the new studs. Then trim, gutters, siding etc. etc. etc.

I'm picking up 4 pump jacks today and will begin climbing the building in March or April. It will probably take me all summer and fall to get the work done. I'm dreading it actually.
 
Last edited:
OP
R

rieferman

Well-known member
Joined
May 18, 2009
Messages
2,586
Location
Collegeville PA (30 min west of Philly)
Well, fairly unproductive weekend. The sorting station took more shape, and it's becoming clearer to me how I'll use the space. With all fasteners (including tapes and ties) moved to the sorting station I now have lots of room in "the nook under the stairs". so it looks like that area will be dedicated to design/drawing and hand tool storage.

I also messed around with building my own shelf bracket. I wanted something simple, strong, repeatable, and able to be made out of scrap that I always have laying around. Yesterday's scrap material of choice was a short piece of 2x10. First, I cut two 45/45/90 triangles using the miter gauge on the table saw. Then, I ripped a 1.5" piece from the remaining scrap. I cut the 1.5" piece into two pieces to match the side of my triangles, and cut a 45 into the end of it so it would sister up nicely. Used the drill press to pilot two holes for attaching the 1.5" pieces to my triangles, and another two holes for connecting to the wall. Worked very nicely, very strong, very easy to hang, very fast to make. And you could do this with just about any sized scrap you want depending on shelf size needs.

edit: also, forgot, I got my $11 work cart in better shape. Basically, I spent $11 on casters at harbor freight, and the rest of the cart is constructed from scrap. I forgot to take a picture, but will soon. All 4 casters are 4" swivels so that it's very easy to navigate the tight alleys in the shop, or to spin it in place to rotate your work. I still have to top it with scrap corian, but it's shaping up to be that "temporary solution" that gets handed down for 5 generations since it's built like a tank, and it just plain works.

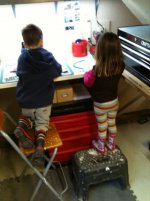
Also, "the helpers" got some drawing done this weekend too. :)
 

Attachments

  • fastener sorting station2.jpg
    fastener sorting station2.jpg
    51.5 KB · Views: 254
  • helpers.jpg
    helpers.jpg
    50.9 KB · Views: 302
Last edited:
OP
R

rieferman

Well-known member
Joined
May 18, 2009
Messages
2,586
Location
Collegeville PA (30 min west of Philly)
Exciting night in barn land. Got a great deal on 4 pump jacks, roof straps, and work benches. The guy Tim was super cool and was previously in siding for a living - so we talked shop for about an hour and he gave me a thumbs up on my project plan. In other words, "siding the barn in 2011" is officially ON. NICE.
 

Attachments

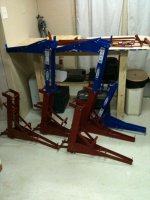
  • pump jacks.jpg
    pump jacks.jpg
    126.1 KB · Views: 356
OP
R

rieferman

Well-known member
Joined
May 18, 2009
Messages
2,586
Location
Collegeville PA (30 min west of Philly)
The sorting station has become the everything station. I just kept looking at the small space, and more and more stuff just kept on naturally fitting there. And as I was working around the shop, I kept finding that it would be useful if more stuff was over there.

So, the nook under the stairs is completely empty now! ha ha I suspect the nook under the stairs will become my planning/design/office/desk/computer type of area.

I guess it's good that I'm not too proud to change my plans! :lol_hitti
 

Attachments

  • fastener sorting station3.jpg
    fastener sorting station3.jpg
    139.7 KB · Views: 252

kpc655

Active member
Joined
Nov 22, 2010
Messages
34
great barn! good to see these old buildings getting restored and not knocked down!
 
To avoid these ads, REGISTER NOW!
Top Bottom