To avoid these ads, REGISTER NOW!

west of Philly - barn saving

shopnut

Well-known member
Joined
Feb 22, 2006
Messages
4,237
Location
Florida
Oh, and I made my first sale :)

That wasn't Mrs Shopnut was it? She's been checking over the finances pretty closely lately and that usually means one thing - BIG PURCHASE! Maybe a surprise holiday gift for your's truly? The timing is about right.

Seriously - that's great news rieferman! Keep um coming.
 
To avoid these ads, REGISTER NOW!
OP
R

rieferman

Well-known member
Joined
May 18, 2009
Messages
2,586
Location
Collegeville PA (30 min west of Philly)
coyote red wrote:
Wow Rieferman, your place is really looking good.

It's all trickery, camera trickery. :) Thanks for the compliment!


Omphaloskeptic wrote:
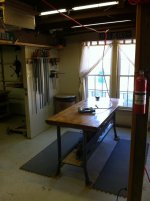
That last photo almost looks like a dining room setting with the curtains, table, and 'rug' runners. lol The only thing missing is a shop chandelier, a couple of candlesticks, and maybe of bouquet of flowers.

Ha ha, nice, I like that. I'll have to see if I can repurpose something appropriately "barn-y" to turn into that chandelier!


colt zantop wrote:
yeah...looks great! nice work

THANKS! (but again, it's all camera angles... and the fact that I cleaned the space immediately before the pics!)


oilslick wrote:
I like it all x cept maybe the curtains, they seem like something my friends would poke fun of if I had them[friends,curtains], just consider me a friend!


I should go through this entire thread and find all the digs at my curtains. At this point, I'm keeping them up just to bug everyone. :lol_hitti

Do I get a pass on this man-violation since the curtains have water stains from being in a basement corner, and being free since they were from a previous home and don't fit any windows in our new house? Or perhaps the fact that they're held in place by a couple drywall screws and some cable ties? That's gotta win me frugality points or something... I'm reaching here aren't I...


flybefree wrote:
Looks good, congrats on your sale.

Thanks Shaun! The sale is only final when I pickup the check.. but it's looking good.


shopnut wrote:
That wasn't Mrs Shopnut was it?

<insert evil movie laugh here>
 

shopnut

Well-known member
Joined
Feb 22, 2006
Messages
4,237
Location
Florida
Do I get a pass on this man-violation since the curtains have water stains from being in a basement corner, and being free since they were from a previous home and don't fit any windows in our new house? Or perhaps the fact that they're held in place by a couple drywall screws and some cable ties? That's gotta win me frugality points or something... I'm reaching here aren't I...
No free pass from me - curtains are curtains :)
 

BigWil

Well-known member
Joined
Jun 26, 2011
Messages
443
Location
Canada
The only way the curtains are not a violation is if they are covering the windows so the neighbors can't see the stripper on the stripper pole
 

flybefree

Well-known member
Joined
May 18, 2008
Messages
1,111
Location
Ohio/Kentucky
Hurumph! No free pass on the curtains...absolutely a MANCARD violation. Remeber the "toten chit" from the scouts? Each time you were unsafe with a knife you lost a corner of the "chit" and once you lost all four corners you lost your knife? It's like that with the MANCARD...maybe.
 

Omphaloskeptic

Well-known member
Joined
Oct 11, 2008
Messages
2,346
Location
Ultima Ratio, Wa.
OK guys, maybe we shouldn't razz Rieferman about the shop curtains anymore, but if we happen to spot a vase of fresh cut flowers in there, he will definitely lose his man-card! I mean, nobody gave Superman any lip about his cape and leotards, did they?:supergay: :lol_hitti

By the way, he too could lift tall buildings!
 

BigWil

Well-known member
Joined
Jun 26, 2011
Messages
443
Location
Canada
and if you did that, Rieferman, your mancard will be overnighted to you, instead of regular mail. :D
 
OP
R

rieferman

Well-known member
Joined
May 18, 2009
Messages
2,586
Location
Collegeville PA (30 min west of Philly)
ha ha, my bad!

Got the table up and running last night.

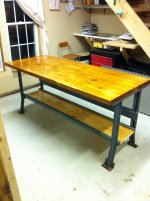
First, I used leftover nuts/bolts from installing my garage door to get the frame back together. It's in great shape!

There was a 2x4 used as a spreader/cross bar. Being the frugal nut that I am, I ripped it in half to create front and back rails for a shelf under the table.

I had a pine plank laying around from a craigs list lumber score awhile back, so I put that between the rails for the shelf.

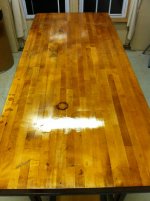
I loved the character of the butcher block top, so I only sanded enough to take off anything that had texture or profile to it. Everything else is permanently preserved under a coat of poly (the water proof variety).

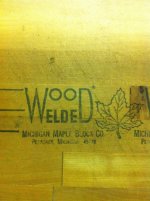
On the underside of the table I found "Welded Wood" logo, and looked them up on the web. I was happy to find they are based in Michigan and seem to be focused on quality, so I'm glad I'm supporting their product in a 2nd hand way. I have no idea what they'd normally cost, but I paid $75 for the entire setup.

http://www.mapleblock.com/


Left to do, I'm just going to add a 2x4 chunk under each leg to bring it up higher due to my height. And I will be adding a woodworker's vice. Otherwise, time to use it. Heavy as can be, solid as can be.
 

Attachments

  • butcher block.jpg
    butcher block.jpg
    148.4 KB · Views: 183
  • butcher block 2.jpg
    butcher block 2.jpg
    140.9 KB · Views: 243
  • butcher block 1.jpg
    butcher block 1.jpg
    141.3 KB · Views: 315

shopnut

Well-known member
Joined
Feb 22, 2006
Messages
4,237
Location
Florida
What a great find, especially considering the top is finished like that. Spills should wipe off easily. And those stamped steel industrial legs will hold a ton. (literally, I think!). Enjoy.
 
OP
R

rieferman

Well-known member
Joined
May 18, 2009
Messages
2,586
Location
Collegeville PA (30 min west of Philly)
:) I know! What a find is right! I've been keeping an eye out for ages. He had 2 more of the same exact table... I was sooooo close to buying all three with the intent of fixing up and reselling the others. But I need to be more busy like I need a hole in my head.

edit: and I love the new asylum logo!
 
To avoid these ads, REGISTER NOW!

shopnut

Well-known member
Joined
Feb 22, 2006
Messages
4,237
Location
Florida
I would have had a tough time refraining from dropping another $150 down to get the other two tables. But I hear you about the busy thing and can fully understand.

Thanks. The logo will someday become a sign to hang on a rafter in there. Now I just need to figure out how to fit another side project in!
 

BigWil

Well-known member
Joined
Jun 26, 2011
Messages
443
Location
Canada
Nice work...I'm impressed. Congrats on the sales, too...I think I forgot to post that the other day.
 
OP
R

rieferman

Well-known member
Joined
May 18, 2009
Messages
2,586
Location
Collegeville PA (30 min west of Philly)
Thanks guys! This was a fun project actually. Start to finish, it cost almost nothing to end up with a table built like a tank, and it took me under 2 hours to complete the entire thing. Fast, cheap, AND quality? My favorite combination!
 

sgfarm

Active member
Joined
Oct 22, 2011
Messages
32
Location
Ottawa, ON
Wow!

Incredible amount of work.

I joined the forum just to see the pictures. I too have a old barn that I would like to fix up but I have roof issues in the valleys that need to be repaired.

Is there a barn / timber frame repair forum for more detailed guidance on barn stuff?

Thanks for the inspiration.

Mike
 
OP
R

rieferman

Well-known member
Joined
May 18, 2009
Messages
2,586
Location
Collegeville PA (30 min west of Philly)
Hey Mike, Thanks for the kind words! :)

I learned everything I know by visiting local barns, talking with builders, and MOSTLY by reading "Barns Sheds and Outbuildings" by Nick Engler. It's well-written if you have some construction understanding.

Depending on where you are, there are companies capable of saving the barn for you. The company I work for, as an example, does this sort of work a few times per year (most of our work is new construction).

----------

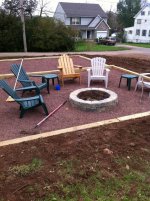
Well, I did some "barn related" work this weekend... sort of.... We had some excavation performed to create a level spot. In the level spot, I edged with 6x6's and filled with patio gravel. Built a fire pit. The 6x6's have lap joints cut (by me) for strength.

The 2nd rectangle you see behind the patio is where the new shed will go. This is why this is barn related. The new shed allows me to clear space in the barn. My Kistler office will then be built into the freed-up space.

Ha ha, it's a stretch of a connection, I know.

Anyways, a cedar fence and some trees will finish up the patio/shed project nicely.

See ya!
 

Attachments

  • new fire pit area.jpg
    new fire pit area.jpg
    150.4 KB · Views: 377
OP
R

rieferman

Well-known member
Joined
May 18, 2009
Messages
2,586
Location
Collegeville PA (30 min west of Philly)
Well, the exercise room in the barn has not been what I dreamt of when setting the space up initially. The primary issue being that the floor is not properly geared towards our activities.

I really need a surface with some cushion. Foam mats (or similar) slide around too easily, so did carpet. I tried horse stall mats which did not slide around at all, but are also not precision cut, so the seams looked like junk.

Also, since the barn slab is not insulated underneath, and since the space is only heated on demand, the floor gets ice cold. Not a problem during wood working. But for getting down to do some pushups or situps, it's no fun (literally, whatever part of me is near the floor steams during workouts).

So, I had the lumber yard deliver some tongue and groove plywood, some 1x3's and some 3/4" rigid foam. I glued down sleepers, cut the foam to fit between the sleepers, cut the plywood to fit all the "character" of my imperfectly shaped space, edged it with some stair edge, and put down some tough carpet (secured with screws and washers).

Great spot for some cardio, stretching, pushups etc. All for about $200 and 3 hours spent.
 

Attachments

  • new exercise floor.jpg
    new exercise floor.jpg
    148.1 KB · Views: 444
OP
R

rieferman

Well-known member
Joined
May 18, 2009
Messages
2,586
Location
Collegeville PA (30 min west of Philly)
You're close.. those are Rod Lavers.. A bunch of pages back in this thread I shared that one of my hobbies is that I'm a professional level hacky sack player. Anyways, the shoe of choice for that sport is Adidas Rod Lavers.. I was getting ready to test the floor ;)

To save you time from having to go back and find the video link, this is me awhile back. Over the years, I've performed and taught the sport all over the place. I've hosted competitions that brought in players from around the world. We were a featured demo at the X-Games a bunch of years ago. Used to entertain the kids during the walk to cure diabetes etc. A lot of fun and a great way to keep in shape.

Bob playing hacky sack
 
OP
R

rieferman

Well-known member
Joined
May 18, 2009
Messages
2,586
Location
Collegeville PA (30 min west of Philly)
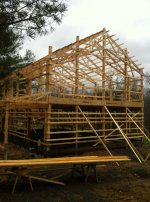
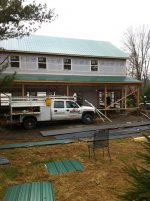
Here's what I've been spending a lot of time on lately. Sadly, it is not mine (but happily, I get paid to design it and manage the project).

30x50 footprint with front and side wrap around porch covering.
2nd story is a full appartment with back deck and vaulted ceilings.
We used wood i-beams to build the floor of 2nd story so that 1st story workshop has no posts in they way.
Workshop has 1/2 bath, 10 foot ceilings, carriage house style garage doors with side mount lift master openers, and a propane powered reznor heater.
Steel is on the roof, and going on the walls shortly.


Stay tuned for the "car museum" type of build that I have starting now. Going to be a very slick building. AND, this guy has a separate shop where he does all his own work - so none of those "That pencil pusher can't even change his own oil" comments are allowed when I post that one. ;)
 

Attachments

  • first building.jpg
    first building.jpg
    128.9 KB · Views: 265

shopnut

Well-known member
Joined
Feb 22, 2006
Messages
4,237
Location
Florida
That building looks like a nice one that many here would love to own. Sturdy too! I'm sure that guy will be happy the workshop is a clear span without columns

Looking forward to seeing the next "museum".
 
OP
R

rieferman

Well-known member
Joined
May 18, 2009
Messages
2,586
Location
Collegeville PA (30 min west of Philly)
Hey Shopnut! I finally was catching up on some of my favorite threads on GJ and saw about your injury! I feel like a jerk for not commenting sooner, being busy is no excuse, get well soon!!!!!!

------

Building progress continues, it's really taking shape now. Walking through the upstairs is great. What a neat building this will be.

Also, I've been building animal houses lately to make the wife happy. I grab scrap steel from my company whenever I can and put it to use.

The bunny has a nice new home that he'll be moving into shortly, and then I went a little overboard on building the cat's house. (he's an outdoor cat).

The front porch is PT lumber, T111 siding, 28 gauge steel roof, three "trusses". Rain flap allows the cat to enter his food/water area - the wife can access a hinged door on the side of that area to change the food and water easily. Then, there's an interior divider which acts as an additional wind block and has a door leading to the cat's sleeping quarters. The sleeping area is insulated all around and again has an access hatch for the wife to change out hay bedding.

Total cost for both of those projects? $0 (all made from scraps I had laying around).

Ha ha, yeah, I should call my place the Asylum too eh?

(edit: Oh, and I also scored a drill press and a sanding station this weekend from craigslist. $50 total for pro level items. Probably my best bargain ever. Once I have them cleaned up and presentable, I'll take some pics)
 

Attachments

  • first building progress.jpg
    first building progress.jpg
    149.2 KB · Views: 314
  • cat house.jpg
    cat house.jpg
    145.1 KB · Views: 353
Last edited:
OP
R

rieferman

Well-known member
Joined
May 18, 2009
Messages
2,586
Location
Collegeville PA (30 min west of Philly)
Thanks impala! :)

---------

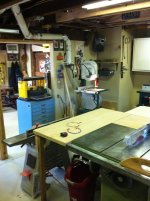
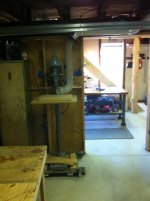
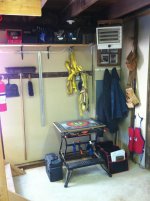
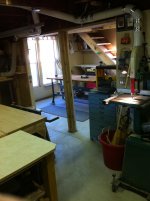
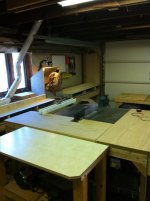
Well, I reorganized the shop AGAIN. And it's so much better.

What triggered the change is that I acquired a cabinet full of useful drawers, and a sanding station.

I ended up taking my old beater bench and it will move to the shed - it can take mower parts, planting/dirt, and general brute force tasks nicely down there.

Removing that table, and a couple other changes allowed me to fix some flow issues I was having in the space, so I'm happy about that.

The kids gained a work area out of this as well. They have their own coat hooks, shop aprons, their own scrap wood, their own nails and screws, small hammers, wrenches, pliers, screw drivers, tape measures, square, clamps... They're "rule followers" and I have many rules, so safety will be observed, but it's time (and they've both expressed a strong interest) to let them start banging on stuff. COOL.

The assembly table that I picked up recently has been awesome. It's so solid, I can really abuse it. Now I also have a convenient air pickup for finish nailer at this station. The end attached to the ceiling is on an old screen door spring so I can get a little stretch out of it as needed. Eventually I'll get a hose reel, but until then, this frugal solution is working. I also finally whipped together a free and effective clamp rack.

Where you see the router table now, that door is going to be a wall soon. The door will be relocated into the exercise room when I create my office. Gaining the wall space in the shop means that I will be building a router station just like my miter station in that area. Can't wait!

Otherwise, stuff you've seen basically. This is just my version of a holiday open "house". Happy Holidays GJ!!!

edit: rest of the pics in the next post
 

Attachments

  • shop tour Dec 2011 assembly area.jpg
    shop tour Dec 2011 assembly area.jpg
    133.4 KB · Views: 251
  • shop tour Dec 2011 band saw new home and planer new cabinet.jpg
    shop tour Dec 2011 band saw new home and planer new cabinet.jpg
    144.2 KB · Views: 243
  • shop tour Dec 2011 desk under stairs.jpg
    shop tour Dec 2011 desk under stairs.jpg
    139.6 KB · Views: 244
Last edited:
OP
R

rieferman

Well-known member
Joined
May 18, 2009
Messages
2,586
Location
Collegeville PA (30 min west of Philly)
and the rest of the annual holiday tour CHEERS
 

Attachments

  • shop tour Dec 2011 drill press in new spot.jpg
    shop tour Dec 2011 drill press in new spot.jpg
    144.4 KB · Views: 222
  • shop tour Dec 2011 fastener counter.jpg
    shop tour Dec 2011 fastener counter.jpg
    146.4 KB · Views: 243
  • Shop tour Dec 2011 kids area.jpg
    Shop tour Dec 2011 kids area.jpg
    143.2 KB · Views: 220
  • shop tour Dec 2011 look back to non machine area.jpg
    shop tour Dec 2011 look back to non machine area.jpg
    138.7 KB · Views: 211
  • shop tour Dec 2011 looking into machine area.jpg
    shop tour Dec 2011 looking into machine area.jpg
    141 KB · Views: 213
  • shop tour Dec 2011 miter station and table saw.jpg
    shop tour Dec 2011 miter station and table saw.jpg
    139.1 KB · Views: 203
  • shop tour Dec 2011 router table new spot.jpg
    shop tour Dec 2011 router table new spot.jpg
    144.3 KB · Views: 192
OP
R

rieferman

Well-known member
Joined
May 18, 2009
Messages
2,586
Location
Collegeville PA (30 min west of Philly)
Yay, the shed is moved in!

This is barn/garage related because... Well, the barn currently has an area containing the 48" walk behind mower, garden tools, potting soil, bunny food, etc. etc. etc.

All that stuff will be moving to the shed, thus allowing me to convert the area in the barn to my Kistler office. That conversion will involve moving a door in my woodshop, thus gaining more wall space (and ultimately a router table station).

Soooo, shed is step 1 in a multi-step barn improvement. :)

The shed is also largely for the wifey. She loves the animals and wants a vegetable garden. So I'm setting her up real nice in the shed to have her own little work area. I saved the cabinets from the kitchen remodel, so she'll have lots of storage. I have some scrap corian counter top, so she'll have a nice easily-cleaned work top. Jim and I are running electric and water down to the shed in the spring time too. This will be a fun project and will make her happy. Happy wife = happy life right? Right!

next week, the privacy fence goes in
 

Attachments

  • shed moved in.jpg
    shed moved in.jpg
    148.7 KB · Views: 205

fergus

Well-known member
Joined
Oct 4, 2009
Messages
1,620
Location
Yolo County CA
Awww yes. The shed. The secret to actually being able to work in a garage! I need to build myself one so I can get all the yard equipment out of the garage.
 
To avoid these ads, REGISTER NOW!
Top Bottom