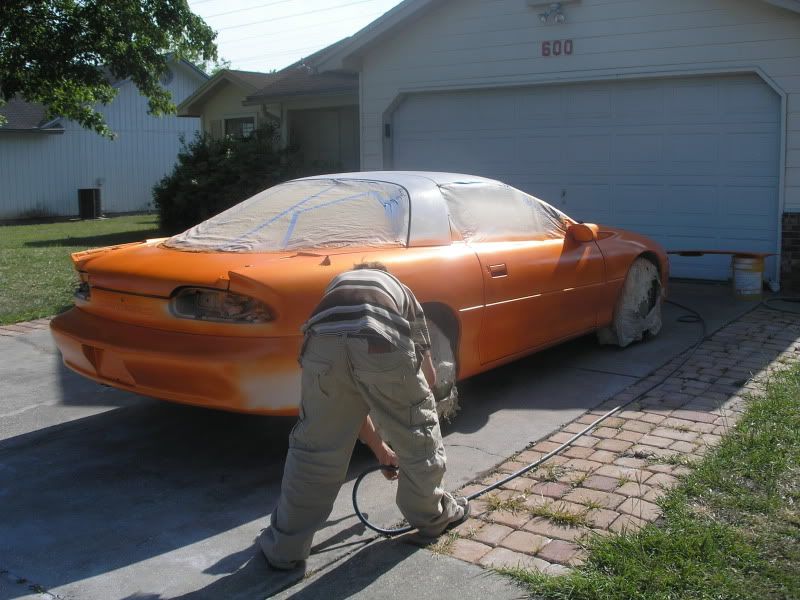
Got a question for you guys who are old pros on wet sanding and buffing new or old paint. Recently i have been having swirls or circles ending up in my recently sanded and buffed paint jobs, they look amazing like a mirror but at a certain angle in black paint under just the right light you see the c's , break down: brand new makita 9227c (love that tool) brand new wool buffing pad 3m products on compound and polish and swirl remover, as far as sand paper 3m i start with 1000, than i wipe with cloth and mild soap, than 1200 repeat than 1500, than 2000 than 2500, all along squeeging to look for blems with a clean bucket and micro fiber towels, i do rake the buffing wool with screw driver between, i let the buffer do the work im not forcing the shine but low and behold when im just about done with the polish and foam pad (blue) there they are WTF!!! AND HELP? heres some pics of the shine looks amazing just in certain light you see swirl c marks.


You are using an out of date browser. It may not display this or other websites correctly.
You should upgrade or use an alternative browser.
You should upgrade or use an alternative browser.
Wet sanding and buffing help.
- Thread starter mad57
- Start date


MrMark
Well-known member
nature of the beast - that's what it does, it leaves fine swirls. You just might not have seen them before, either because of fillers or bad lighting.
Stargeezer
Well-known member
If you block sand it won't leave swirls. The swirls are from the Makita-right?
I hand sand everything, im guessing here its gotta be from build up on the wool pad that i can not see or feel but its there, im going to try a foam pad from the start a cutting foam pad and see how that goes on the next patch of buffing ive gotta finish.
darkk
Well-known member
If you block sand it won't leave swirls. The swirls are from the Makita-right?
Who the hell told you this? The swirls are from buffing. You just need a better polishing/waxing procedure/system if you are getting almost invisible swirl marks in your finished waxed product. Try hand coating with Swirl away or Mequires or some other similar product. There are some really good tips in the car care sections of most auto related forums.
mikester
Well-known member
I would try a foam waffle pad instead of wool. I used wool pads for years because I was a hardhead and didnt want to try something new.
Being retired, I haven't done any paint work in the last few years, but while I worked at a large auto mfg. company, we had lots of problems with swirls showing up in the darker colors. We had glazes that would look ok until the finish was washed and the swirls would show back. We found that a 3M product called Final Finish applied with a foam pad on a da would eliminate the swirls. After the application we would spray the finish with a 50/50 mix of water and alcohol to see if the swirls were indeed gone.
I don't know if the 3M product is still available. I'm sure that there are other brand products that are supposed to give the same results.
Back in the 60's and 70's we used a product called Fill n Glaze, also a 3M product. It made the finish look great out the door on a new paint job, but the swirls would show up after a couple washes.
Most of the guys that I know don't even use wool pads anymore. It seems that foam pads are the way to go today.
Drew
Kepner
Member
do you use 3M's Ultrafina Se. We use 3m products at my body shop and use this as third step after the swirl mark remover with a very soft foam bad.
zmotorsports
ALLIANCE MEMBER
Your swirl marks are from the buffer. How many steps are you doing from that sanding to the final completion?
I think you may be going too fine on the wet/sanding, but that could just be my opinion. I start out sanding with 1200 grit and if I run into somewhere that I am having issues with I will drop down to 1000. I then go over everything with 1500 grit fairly quick just to remove the 1200 grit scratches.
After the sanding is completed I wash the vehicle to remove any/all sanding grit which can get into the buffing stages and cause scratches.
I use a white wool 3M compounding pad with the 3M Microfinishing compound as my first step. The first step will is to merely remove the sanding scratches from the sanding process but will not leave a high gloss. It is still somewhat dull as the Mircrofinishing compound is fairly 'gritty'.
Once the compounding process is completed I wipe the panel down with a soft cloth and proceed to step number two which consists of a yellow 3M buffing pad and 3M Finesse-It compound. This is where the gloss really starts coming on. During this step I am removing the marks from the first compounding step and eliminating the swirl marks from the previous step. I usually spend a little more time on this step as the swirls from step one are usually pretty bad.
The third step is a foam pad, I have used either the Meguirs yellow pad or the 3M black foam pads with great results. During this step I use the 3M Imperial Machine glaze to remove the small swirls left from the yellow pad/Finesse-It step.
Once the Machine Glaze step is completed I wash the vehicle again to remove any/all splatter residue. After reassembling the vehicle I go over the entire thing by hand with Rumple cloth and 3M Imperial Hand Glaze for the final shine.
I have seen people use too coarse of wet sandpapaer such as 1000 grit and try to go right to compounding which is too hard to remove the scratches with compound. Many times this results in burnt edges as they are having to create too much heat to get rid of the scratches. This is why I like the 1200 then 1500 grit.
It also depends on what kind of paint you are using. Urethane clearcoat is pretty hard and you have to generate a little heat to get it to polish out but too much heat such as too high RPM or concentrating on one area too long and you can ruin a perfectly good paint job. I tend to like the RPM around 1000-1500 depending on flatness or curves of the panel and how many small areas.
I have also seen people use the proper grit sandpaper but then go too fine too soon on the compounding/buffing and not get rid of the previous steps swirls.
Mike.
With all due respect, ignore what everyone else has posted. The methods posted are very out dated or incorrect. If you want the best possible finish, follow the steps in this video. This is now the industry standard that we created.
http://3mcollision.com/library/sops/detailing-department/paint-finishing-full-panel
If you have any questions after watching it, let me know. The "shop" in the video, is actually our testing/training lab, and let's just say that I've spent a good amount in there.
http://3mcollision.com/library/sops/detailing-department/paint-finishing-full-panel
If you have any questions after watching it, let me know. The "shop" in the video, is actually our testing/training lab, and let's just say that I've spent a good amount in there.
Last edited:
yellowdartdave
Well-known member
Practice is the best teacher...along with a great instructor.
My son is a painter, mostly does motorcycles.
Here are a couple of his jobs. I was given the sanding task on my bikes and he did let me do the initial buffing but he did the final, all with foam pads.
My CBR1100XX Blackbird got knocked over in a parking lot.
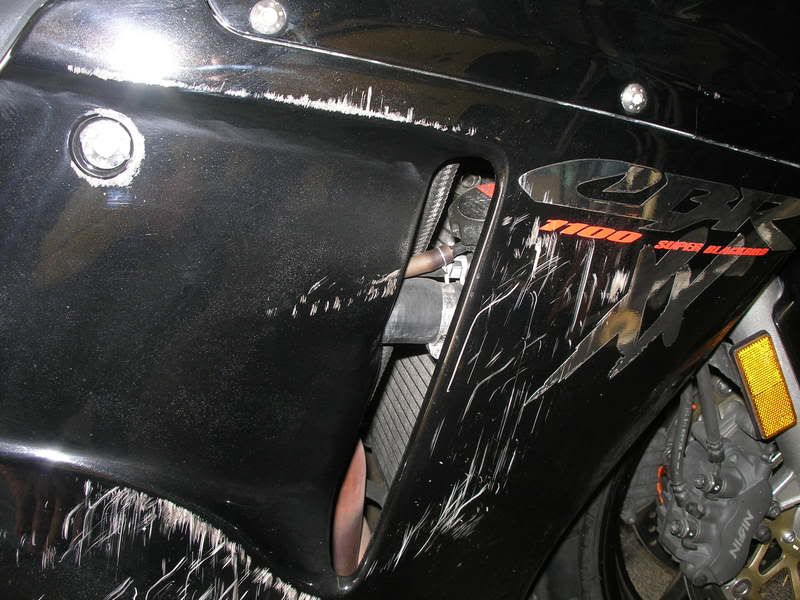

Fixed

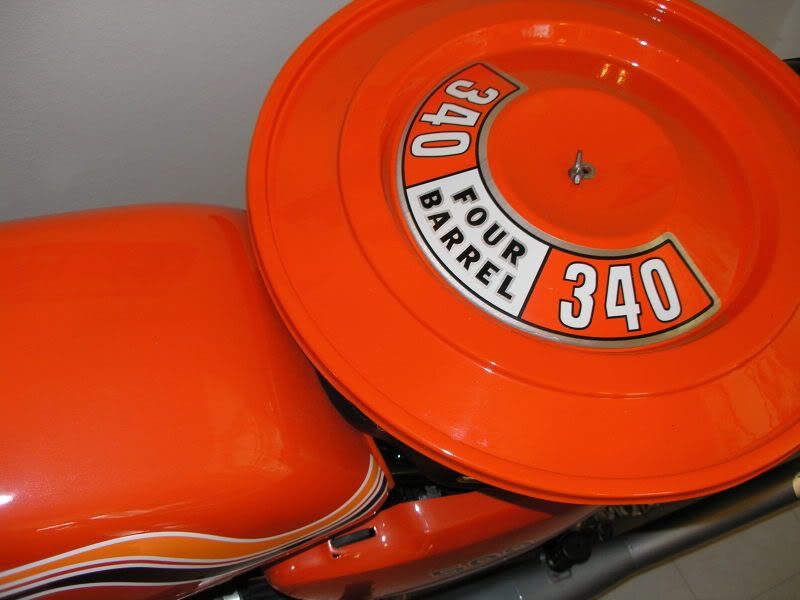
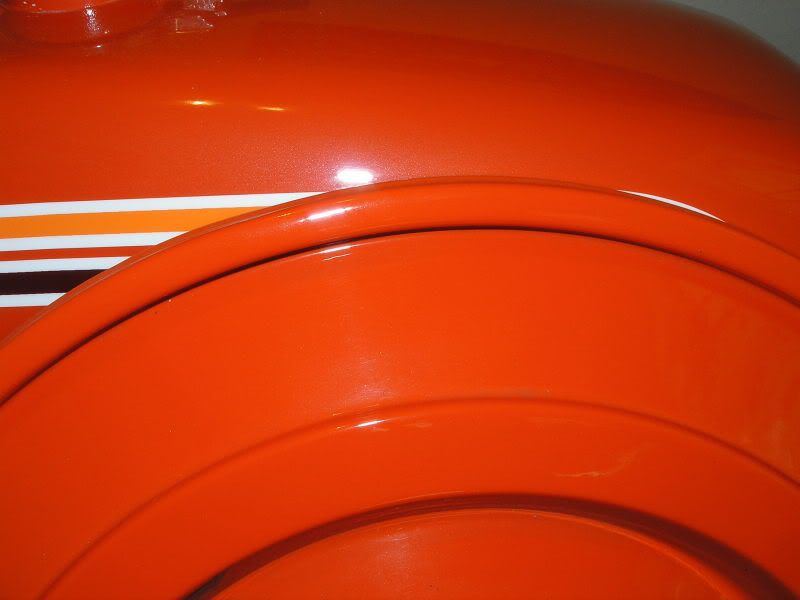
My Kaw 500 and the air cleaner for my 340 Dart.
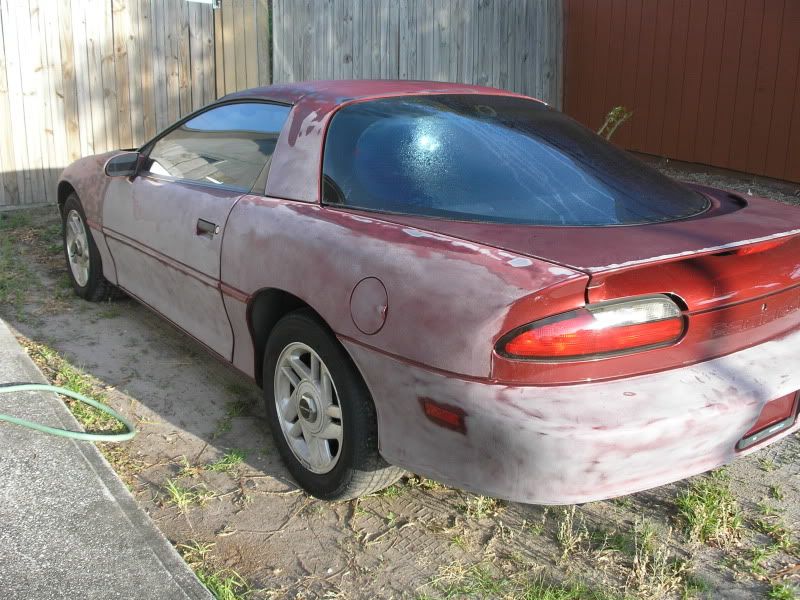
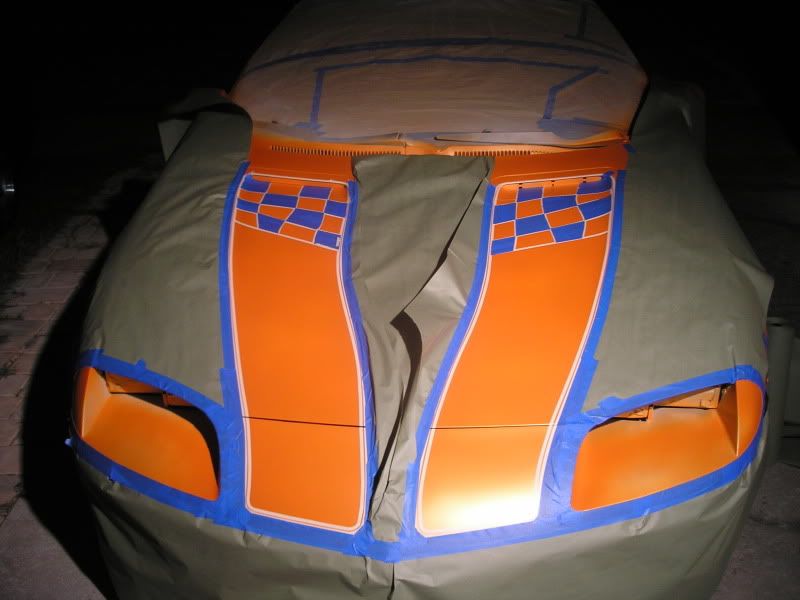
His girlfriend's Camaro-Lambo Orange-Painted Outside.

His R6 Dodge Intense Blue and Lexus Pearl White

My son is a painter, mostly does motorcycles.
Here are a couple of his jobs. I was given the sanding task on my bikes and he did let me do the initial buffing but he did the final, all with foam pads.
My CBR1100XX Blackbird got knocked over in a parking lot.
Fixed
My Kaw 500 and the air cleaner for my 340 Dart.
His girlfriend's Camaro-Lambo Orange-Painted Outside.
His R6 Dodge Intense Blue and Lexus Pearl White
BADSIX
Well-known member
mike, zmotorsports gave a good outline your swirel marks are from the wool cutting pad their is nothing wrong with using a wool cutting pad i use them all the time you just need to follow up with the right pad
Justin C
Well-known member
make sure when you go from compund to the ultrafina that you get all the compound off the panels. I always take a wet rag and wipe all the residue and compund thats on the edges then polish, works every time.
BADSIX
Well-known member
try a 50-50 mix of alcohol and water in a spray bottle spray on wipe off
With all due respect, ignore what everyone else has posted. The methods posted are very out dated or incorrect. If you want the best possible finish, follow the steps in this video. This is now the industry standard that we created.
http://3mcollision.com/library/sops/detailing-department/paint-finishing-full-panel
If you have any questions after watching it, let me know. The "shop" in the video, is actually our testing/training lab, and let's just say that I've spent a good amount in there.
You should update the video to indicate the use of a foam backer pad on the DA. Very important and critical component, especially for the novice. Nice videos though.
For fine swirls, I use Zaino Fusion. It's a water based cleaner/swirl remover. I'd use my Makita 6040 or PC with a polishing foam pad. Since the product is water based, what you see is what you get. There's no oils left behind to hide defects.
Update: well i bought a foam compound pad and it was a huge diffrence from the swirls left with that compared to the wool, very few swirls were in the finished product with the foam pad. Looks like ill be using foam for all my black paint jobs. Im still on my quest for the perfect finished product, but as stated all good advice above thanks for the help and always open for new ideas or tricks of the trade.
ChrisStarks
Banned
- Joined
- Apr 23, 2011
- Messages
- 102
I wetsand with 800 dry, 1500 wet, 2000 wet, 2500 wet. Then buff with the above mentioned 3M system. I use a different pad for each compound, which there are 3 of. I only use the wool pad for the first round of the first compound, then switch to foam for the second round with the first compound. For the final step, the machine glaze, I buff with medium pressure, then go over everything with light pressure with another round of buffing with the glaze. No swirl marks. In my experience, the swirls are caused by the buffer - too dry, left over compound, dirt, dust. Even light dust or waterspots during the final polish will leave swirl marks.
BADSIX
Well-known member
your swirlies are comeing from the wool pad. use the cutting compound with the wool pad then use the same cutting compound with a med foam pad. this will remove the swirls the wool pad made. then its up hill from then on with your finner pads and compounds. if you don't get the swirls out from the wool pad your going be fighting it trying to buff them out with the finner stuff.
Or........you could hand wipe it down with Swirl-X and be done.
swirl x by who?
swirl x by who?
Meguires..