To avoid these ads, REGISTER NOW!

What did you do "IN" your garage today?

To avoid these ads, REGISTER NOW!

Arne73

Well-known member
Joined
Mar 20, 2010
Messages
1,477
Dont know why they put the drain up the side of the float bowl, doesnt do much good when you can drain with the bowl bolt. Loosen up a bit and push the bowl up to drain the fuel. If that is a honda engine check your sediment bowl - separate from the float bowl. If I am just running unit dry-ish, when it starts dying, add some choke to keep it running until it has pulled all the fuel it can from bowl.
Thanks for the advise. It's a B&S Vanguard with a Mikuni carb.
 

nadogail

Well-known member
Joined
Jan 23, 2009
Messages
32,032
Location
Coronado, CA
I am trying to give to a good home a Pressure Washer that I bought for the engine. I have since been given an engine and have no need for the 5 Horse Tecumseh. The engine started and ran before I paid for it and several times after. The fuel in the tank is probably gotten old.

The whole thing is free to a good home. Delivery is not available. PM me for the address.
 

welder4956

Well-known member
Joined
Apr 8, 2010
Messages
3,072
Location
Birmingham, AL USA
Plugged in the battery chargers for the boat and trolling motor batteries. Took apart the trolling motor to clean and check for internal damage after it collided with a pier post, no loose wires or obvious issues.
20230602_173010.jpg

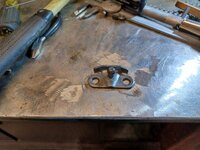
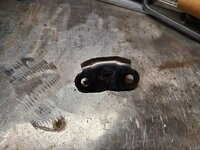
Then took one of the gas lift brackets off the Mustang and replaced the pitted and worn ball stud with a new 316 SS ball stud. The new stud had threads and larger base than the old one, so I chucked it in the drill press and used a grinder to remove the hex base and reduce the diameter down to 1/4", then cut off the remaining threads and TIG welded into the original bracket hole.

20230602_150705.jpg

20230602_152930.jpg

20230602_172953.jpg
 

DGersic

Well-known member
Joined
Mar 12, 2017
Messages
6,367
Location
DeKalb, IL
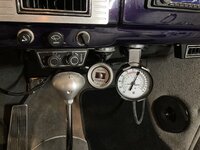
Made a somewhat quick and dirty mount for my vacuum gauge.

IMG_2752.jpegIMG_2753.jpegIMG_2754.jpeg

Harbor Freight 2” magnet mount for the underside of the dash.

Chasing a surge / backfire that happens accelerating just off of cruise. Swapped the accelerator pump discharge nozzle from .31 to .29. Short test drive, it may have helped, but still getting some surging.

More work on it tomorrow I guess.
 

Luntz

Well-known member
Joined
Jul 13, 2020
Messages
212
Location
Franklin TN
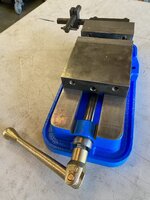
Finished up a Kurt mill vise. Was extremely crusty, but not chewed up.
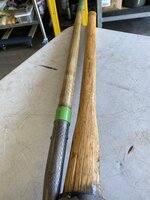
Then I needed to repair a broken sprinkler that neededIMG_5943.JPGIMG_5955.JPGIMG_5953.JPG my pick axe to break the ground. I then realized how neglectful I have been towards my every day garden tools. Shame on me. After an hour of sanding and boiled linseed application, I will sleep better tonight.
 

Fav Onefour

Well-known member
Joined
Jul 14, 2022
Messages
712
Location
MN cold and hot
I'm a **** with the garden tools. My wife is a digger gardener and she plops shovels in the corner with half a yard of dirt and mud stuck to them. I wire brush them clean and wipe down with fluid film. They are so much easier to use the next time.

For some reason, I hate rusty tools and shovels are no exception.
 

Copymutt

Well-known member
Joined
Sep 3, 2016
Messages
3,402
Location
Colorado
Jumped into another antique furniture restore for my better half. She’s more than capable to execute sanding and refinishing w/ her special treatments. This one is a late 1800’s drop leaf table that has been severely neglected. $5.00 yard sale. Swing out legs support the double 2’ wide drop leafs.
Never seen a 2’ wide 5/4 piece of cherry that wasn’t joined. Well here they are. Those trunks don’t exist anymore. Out of 6 brass leg wheels, one was missing. Went so far as to run a metal detector over the ground where we bought it! No luck.
Ended up recreating one out of scrap steel for the frame, cut the wheel material out of an old 3 way brass coupling. Wheel hub was interesting. Two weather proof electrical box screw in plugs were modified. They were the same thread as the ID threads of the brass coupling. I think this is the first time I’ve seen threads from an electrical device match anything else.
Left to do is patina the brass, tried salt & vinegar, no go.97827CC7-7802-4DC2-AA3F-59432E785CD7.jpeg0BF3D509-94D0-40DD-9F08-5AE0CED1A324.jpeg7DB40A65-4516-4176-95D7-FFF18C876459.jpegC8D653D8-A211-4E8D-BD77-9C42980FCBF0.jpeg
 

kaymccampbell

Well-known member
Joined
Feb 27, 2015
Messages
29,595
Location
Upstate New York
Jumped into another antique furniture restore for my better half. She’s more than capable to execute sanding and refinishing w/ her special treatments. This one is a late 1800’s drop leaf table that has been severely neglected. $5.00 yard sale. Swing out legs support the double 2’ wide drop leafs.
Never seen a 2’ wide 5/4 piece of cherry that wasn’t joined. Well here they are. Those trunks don’t exist anymore. Out of 6 brass leg wheels, one was missing. Went so far as to run a metal detector over the ground where we bought it! No luck.
Ended up recreating one out of scrap steel for the frame, cut the wheel material out of an old 3 way brass coupling. Wheel hub was interesting. Two weather proof electrical box screw in plugs were modified. They were the same thread as the ID threads of the brass coupling. I think this is the first time I’ve seen threads from an electrical device match anything else.
Left to do is patina the brass, tried salt & vinegar, no go.97827CC7-7802-4DC2-AA3F-59432E785CD7.jpeg0BF3D509-94D0-40DD-9F08-5AE0CED1A324.jpeg7DB40A65-4516-4176-95D7-FFF18C876459.jpegC8D653D8-A211-4E8D-BD77-9C42980FCBF0.jpeg
Sometimes this works. Kinda depends on the alloy.

1-Soak your thing for 1 hour in vinegar n salt. 1 tbsp salt to 1 cup vinegar. You can try hot vinegar n salt, too.

2-Bake in the oven. 450 F for 20 minutes.

3-Soak the hot thing in the vinegar solution until you get the color you want

4-Shake off the excess and allow it to dry. You can do it in the oven.
 

Roger M

Well-known member
Joined
Oct 11, 2022
Messages
151
Location
Snohomish, WA
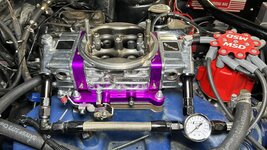
I learned a bit about Holley carburetors this afternoon, watching YouTube. I was able to cure some stumbling with some accelerator pump adjustments and moving the position of the little plastic cam, along with a float adjustment. Surprised to have a significantly better running 289.

On to find a transmission leak next, and then learn to weld a floor pan in...

If anyone wants to point me in the right direction of 'learn to mig weld in three easy steps', I am all ears/eyes. 20230602_172329.jpg
 

Mike65

Well-known member
Joined
Mar 7, 2007
Messages
3,099
Location
Horse Pasture, Va.
Finished working on my laptop shelf, installed two side pieces to the shelf so it is the same width as the brackets, & got my small router with a round over bit & got rid of the sharp top edge. The lap top works great there since it will pick up the wi-fi from the house. Now if I am doing any repairs & need to check something out on the computer I have a place for it to keep it safe & out of the way.

100_2107.JPG
 
To avoid these ads, REGISTER NOW!

Roger M

Well-known member
Joined
Oct 11, 2022
Messages
151
Location
Snohomish, WA
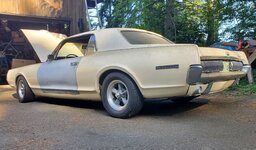
@Roger M Is that a 67 Mustang? Check out these teach yourself to mig weld videos I found on You Tube. Hope they help you out. I taught myself to mig weld when I got my 69 Mustang 20 years ago so I could do the sheet metal replacement that was needed.
Thanks for sharing those links, Mike65! I will watch them over the next few days. I bought a used welder a few years ago for this project, but have been a little gunshy about pulling the trigger on it...

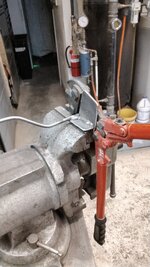
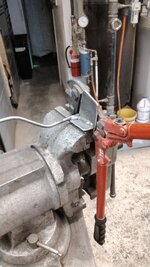
The car is a 67 Cougar that belonged to my dad.

20230602_172351.jpg
 

kaymccampbell

Well-known member
Joined
Feb 27, 2015
Messages
29,595
Location
Upstate New York
Thanks for sharing those links, Mike65! I will watch them over the next few days. I bought a used welder a few years ago for this project, but have been a little gunshy about pulling the trigger on it...

The car is a 67 Cougar that belonged to my dad.

20230602_172351.jpg
It's not hard. Imagine a caulk gun for welding. Even old ladies with tremors can melt **** together.IMG_20230603_134648.jpg
 

rd65

Well-known member
Joined
Sep 29, 2017
Messages
2,813
Location
Granite Falls, WA
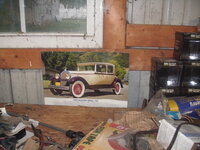
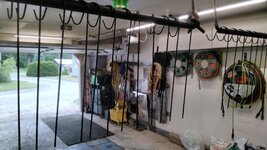
Put away some tools that I was using in the garage. Swapped out the 45T rear sprocket on the KTM for a 50T. Had to do some sketchy chain work, hopefully it doesn't come back to bite me later. Suspension is done, will pick up sometime early next week. Moved calendars to the new month. Been recycling the Wurth calendars for years. 2006 this year.
 

Attachments

  • 20230602_195728.jpg
    20230602_195728.jpg
    796.7 KB · Views: 31
  • 20230602_192333.jpg
    20230602_192333.jpg
    438.1 KB · Views: 51
  • 20230602_192316.jpg
    20230602_192316.jpg
    450.8 KB · Views: 52

rd65

Well-known member
Joined
Sep 29, 2017
Messages
2,813
Location
Granite Falls, WA
Thanks for sharing those links, Mike65! I will watch them over the next few days. I bought a used welder a few years ago for this project, but have been a little gunshy about pulling the trigger on it...

The car is a 67 Cougar that belonged to my dad.

20230602_172351.jpg
Factory air, nice. My 67 Mustangs had bags for washer fluid, didn't know Courgars had tanks. Nice old school license plate too. You're just down the road from me.
 

kaymccampbell

Well-known member
Joined
Feb 27, 2015
Messages
29,595
Location
Upstate New York
Made ticky-tacky on the kid's rotten exhaust. Put a band clamp round it, cause it was gonna leak no matter what. Improved his ground terminal.

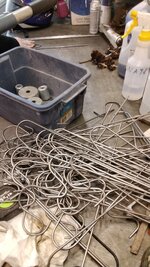
Made an improved cutoff jig for shepherd's crooks wire. Cut, deburred, washed, bent, and painted the wires. Wore the super helmet the whole time.

IMG_20230603_134648.jpg
IMG_20230603_154515.jpg
IMG_20230603_160056.jpg
 
Last edited:

nadogail

Well-known member
Joined
Jan 23, 2009
Messages
32,032
Location
Coronado, CA
Ran the generators, fabricated a box to keep the Jumper Cables with the 12 Volt Power Unit. The box will be sanded and painted after the glue cures for 24 hours.
Cobbled together a Throttle Control for the 5 Horse Honda Engine from some of the good junk that has accumulated.
Dropped into Harbor Freight and picked through their bargain bins.
Some Grocery shopping.
 

JEFFREYWisconsin

Well-known member
Joined
Oct 9, 2021
Messages
380
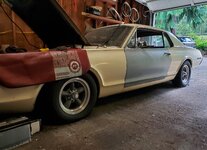
Cleared four years of piled up junk from around this car. It's been dormant since before covid, needing a driver's floorplan replacement and some carburetor tuning. Among plenty of other things.

Will pull it out of the garage tomorrow.
20230530_154849.jpg
Nice, I have a 67 also. I used to have those exact same wheels the first time I redid the car. I am about to start going through it again now that I have a large enough garage to do it right this time. I have had the car stored for nearly 40 years.
 

JEFFREYWisconsin

Well-known member
Joined
Oct 9, 2021
Messages
380
I learned a bit about Holley carburetors this afternoon, watching YouTube. I was able to cure some stumbling with some accelerator pump adjustments and moving the position of the little plastic cam, along with a float adjustment. Surprised to have a significantly better running 289.

On to find a transmission leak next, and then learn to weld a floor pan in...

If anyone wants to point me in the right direction of 'learn to mig weld in three easy steps', I am all ears/eyes. 20230602_172329.jpg
That mercury head cap on the washer reservoir is a pretty rare part especially if the little plastic strap is intact.
 

PassnThru

Well-known member
Joined
Jan 5, 2010
Messages
6,512
Location
Bowling Green KY
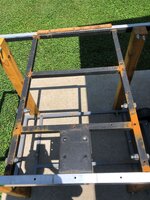
Took the top off of the outdoor table I built a month or so ago. I thought the boards would be tight enough on top to prevent water getting through but no luck on that. Water was getting into the square tube and then leaking rust on the concrete when I moved the table. Rust stains on concrete are not a good thing.
I redid the shims to level it (replacing the glass that was there before for the backboard) with the same decking material so that won't hold water anymore as opposed to the plywood I used before. The tubes were welded on three sides - the side not welded is facing up so I'll seal that and when I put the decking back on I'll seal between the boards.
Hopefully that will take care of it. I don't think it's leaking through the screws - they are tight in the decking and countersunk.
Table rust.jpg
 

welder4956

Well-known member
Joined
Apr 8, 2010
Messages
3,072
Location
Birmingham, AL USA
Plugged in the battery chargers for the boat and trolling motor batteries. Took apart the trolling motor to clean and check for internal damage after it collided with a pier post, no loose wires or obvious issues.
20230602_173010.jpg

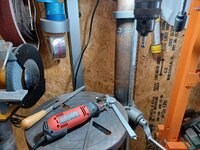
Then took one of the gas lift brackets off the Mustang and replaced the pitted and worn ball stud with a new 316 SS ball stud. The new stud had threads and larger base than the old one, so I chucked it in the drill press and used a grinder to remove the hex base and reduce the diameter down to 1/4", then cut off the remaining threads and TIG welded into the original bracket hole.
20230602_150705.jpg

20230602_152930.jpg

20230602_172953.jpg
Fiddled with charging the boat batteries some more today. The trolling motor battery is definitely dead, but the battery for the motor seems to be taking a charge. Since I had to buy a new battery for the trolling motor, I just went ahead and bought a new one for the motor as well. Don't want to get stuck on the water with a dead battery.

Also pulled the other bracket for the hatchback gas struts and replaced the pitted ball stud with a new 316 SS ball stud. I had to modify the new stud to fit and weld it in the hole on the back side like the previous one.


20230603_111912.jpg

20230603_113155.jpg

20230603_115609.jpg
 

N_Jay

Well-known member
Joined
Nov 1, 2016
Messages
1,175
Did a quick check over of the Cayman for my drive to Fort Lauderdale tomorrow.
Put my travel tool bag back together.
Then hung the soundbar on the TV, and programmed a couple of new grarage door remotes.
 

Outlawmws

Well-known member
Joined
Aug 9, 2011
Messages
39,305
Location
The Badlands
Cleaning up new to me tools and putting them away.

I finally got a good system for using the USC and different cleaning/derusting chemicals without making the USC filthy. I'm using repurposed sanitizing wipe containers (tall and big enough for most things) and using those in plain water in the tank. It's working out well
 

Brent T

Well-known member
Joined
Sep 29, 2018
Messages
459
Location
Arizona, USA
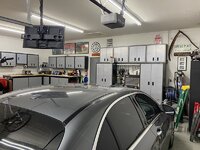
Hung the last three cabinets. Just need to clean up all the junk now. I'm bothered a little that the paint on the center cabinet on the left wall doesn't have the same sheen as the others. It looks worse in the pics than it is. They're all the same brand, but the silver/grey on that one door definitely has a different look to it depending on the lighting. Now I can get back to working "in" my garage instead of "on it.

52949068980_89c01d05a5_c.jpg
52948688371_dfb3dec369_c.jpg
 

kaymccampbell

Well-known member
Joined
Feb 27, 2015
Messages
29,595
Location
Upstate New York
Cleaning up new to me tools and putting them away.

I finally got a good system for using the USC and different cleaning/derusting chemicals without making the USC filthy. I'm using repurposed sanitizing wipe containers (tall and big enough for most things) and using those in plain water in the tank. It's working out well
Ziploc baggies work well, too.
 

CoogarXR

Well-known member
Joined
Jan 11, 2016
Messages
6,867
Location
Ohio
Not my garage, but a garage nonetheless... I set up my B&D workmate in my late father in law's garage, plopped my delta miter saw on it, and cut 3 rooms worth of baseboards. Then took my portable air compressor and brad nailer inside the house and installed them.
 

rd65

Well-known member
Joined
Sep 29, 2017
Messages
2,813
Location
Granite Falls, WA
Changed the oil in my wife's CX5. Checked out yard area for the play set we are picking up tomorrow. Just hung out in the shop for a bit. Really do love having that space.
 

Attachments

  • 20230603_172621.jpg
    20230603_172621.jpg
    785.5 KB · Views: 92
  • 20230603_182422.jpg
    20230603_182422.jpg
    823.3 KB · Views: 74
To avoid these ads, REGISTER NOW!
Top Bottom