To avoid these ads, REGISTER NOW!

What did you do "IN" your garage today?

Outlawmws

Well-known member
Joined
Aug 9, 2011
Messages
39,344
Location
The Badlands
I thought I was all finished with the holes, cutting, and slotting on the T-saw, and just got back from the hardware store with the new shorter belt. I need another 1/2" on one end of the belt access slot - so maybe tomorrow (requires full disassembly, cutting the metal top, and the 3/4" ply...
 
To avoid these ads, REGISTER NOW!

Deadsquiggles

Well-known member
Joined
Nov 3, 2014
Messages
769
Location
Chesapeake, VA
Organized my main tool cart to the point that I think I’m happy with it. Also cleaned a set of impact sockets I found. It’s old but good ****. SK 5/16”-7/8” and Snap-On 15/16” and 1”.
 

sweetk30

Well-known member
Joined
Jan 2, 2011
Messages
2,306
Location
finger lakes area upstate ,ny
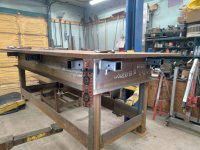
More finish work on my LIFE TABLE builds . Cleaned and oiled 1 table top . Then 6 more reciver hitches on another . And cut up some rubber pads from old conveyer belting for the feet to sit on off the floor .
 

Fortress68

Well-known member
Joined
Oct 23, 2012
Messages
56
Location
Norfolk, VA
In dad’s garage today instead of mine, but we got a round to turning out some projects. (See what I did there?)

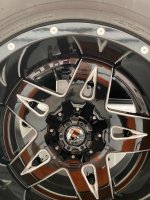
We got a propane line run to the Hvac in the overhead of the workshop, dragged a blazer for my son out of some brush so he can start cleaning her up, organized and cleaned up a ton around the lathe and mill, cleaned up some mating surfaces on a B&M blower for our 40 Ford, and dusted around the 67 Camaro a bit while checking out wheel fitment.
20974e9b3afe45e061d98c97a89b7cbd.jpgdf078c4c8fa03f1d33aad3ee65b72728.jpg0fb58bd9e15760d389154eeb30a804d0.jpg


Sent from my iPhone using Garage Journal
 

Attachments

  • df078c4c8fa03f1d33aad3ee65b72728.jpg
    df078c4c8fa03f1d33aad3ee65b72728.jpg
    198.3 KB · Views: 2
  • 0fb58bd9e15760d389154eeb30a804d0.jpg
    0fb58bd9e15760d389154eeb30a804d0.jpg
    210.4 KB · Views: 1
  • 20974e9b3afe45e061d98c97a89b7cbd.jpg
    20974e9b3afe45e061d98c97a89b7cbd.jpg
    178.3 KB · Views: 4

BonzoHansen

Well-known member
Joined
Jun 24, 2005
Messages
1,744
Location
NJ
Re: What did you do "IN" your garage today?

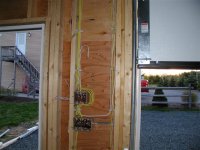
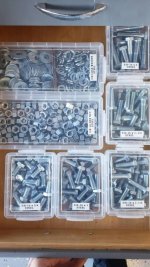
Spent some time on the 67 camaro. going through the factory wiring harness to see what I have to work with. Figuring out what i need to do to get by for awhile until i decide what I am doing with this thing. Need to make it mobile. Also ran to McMaster to get button head bolts for my shifter. This ST10 4 speed wasn't stock in these things.
 
Last edited:

SuperCat

Well-known member
Joined
Jan 6, 2012
Messages
1,100
Location
Sacramento, CA
Spent another half an hour on the drilling hammer handle replacement. Watched a great video on YouTube yesterday that made me change what I am doing, hence I spent some time reshaping the handle to fit better, and making the wedge slot deeper.
Yeah, I'm an amateur, but I take the time to do the best job I can. :thumbup:
Check out this video, it's short and this guy does a great job:
How to set a hammer handle - Brent Bailey Forge- Tool Making Tutorial, 8 min. 34 sec.
 

tmorris1

Member
Joined
Sep 22, 2019
Messages
11
Location
Highview KY
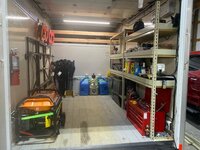
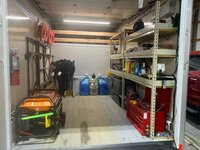
Got the “Track Van” cleaned and reorganized, now to get the car ready!
44c7a021c951d2760861a2e5f3e26b27.jpg
bc5d26ead81cb9f0719026eef09a8019.jpg


Sent from my iPhone using Tapatalk
 

Attachments

  • bc5d26ead81cb9f0719026eef09a8019.jpg
    bc5d26ead81cb9f0719026eef09a8019.jpg
    223.9 KB · Views: 4
  • 44c7a021c951d2760861a2e5f3e26b27.jpg
    44c7a021c951d2760861a2e5f3e26b27.jpg
    128 KB · Views: 1

BonzoHansen

Well-known member
Joined
Jun 24, 2005
Messages
1,744
Location
NJ
Cleaned up tools from yesterday. Sorted through a few boxes/crates of various wiring harness and materials so I can start patching this harness together. Went through more parts. Threw some junk out, found some stuff to sell. I just listed & sold some billet plug wire looms. :)
 

Bigbird

Well-known member
Joined
Nov 16, 2019
Messages
55
Location
New Hampshire
Swept, Cleaned the bench, rigged an easy to breakdown line for drying stuff. Cleaned my “work” chairs, grilled and watched football.
 

Outlawmws

Well-known member
Joined
Aug 9, 2011
Messages
39,344
Location
The Badlands
I may still have time for a trip to get parts, But:

o Disassembled the T-saw project AGAIN...
o Corrected the belt slot on the T-saw,
o Reassembled - NOW the belt Clears!
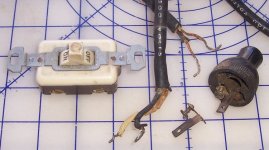
o took the old power cord/switch apart - the plug disinterested (one prong fell out...), the white line is crumbling apart - I think this is the ORIGINAL cord only two prongs so no ground (on the old stand I wasn't worried as long as I didn't touch the motor, as the rest was insulated from the motor by the wood stand...) - The switch also stopped working - (looks to be original from the 30's? Art Deco on the switch case...) The cord from the motor to the switch in fine and is three wire so probably from the 60's/early 70's (crown Craftsman logo) I need to verify its grounded inside the motor...
o I spent some time figuring out how and where I want the new switch and what kind to power the saw.

I'd like a mushroom head E-Stop switch, but those seem pretty iffy for inexpensive ones on line... I have a slap off toggle from an old Radial arm I scrapped, so how to do that?:

o I think I've settled on mounting the switch to the folding extension on the "front" side of the saw, and using an extension box for house it, then another extension box on that with a duplex receptacle.
o Power cord to the switch:
o Switch to the receptacle and
o The motor plugs into one receptacle.

This will also allow me to put the extension in the up position and still easily use the switch!

I need the two boxes, and a metal duplex cover (under $10)


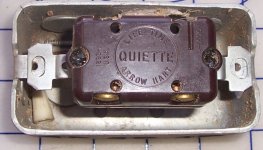
The old parts - Plug was rock hard rubber, and the screw fell out that held one blade. the switch is now dead, (I used this saw and switch just recently...) and the white wire is just scary... (Black is still flexible as is the outer sheath? :dunno: ):

attachment.php


Back side of the old switch:

attachment.php


The "New parts as I was deciding what to do for the power and switch:

attachment.php


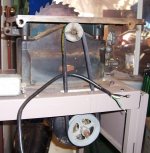
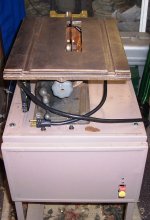
The Saw where I am now with the new belt ready to start cutting...:

attachment.php


And the start of the "dust collection" (I need some plastic, and to sort out the vac hose connector...):

attachment.php
 

Attachments

  • Back of old switch.jpg
    Back of old switch.jpg
    117.9 KB · Views: 819
  • New power cord.jpg
    New power cord.jpg
    126.5 KB · Views: 819
  • T-Saw Progress.jpg
    T-Saw Progress.jpg
    106.9 KB · Views: 821
  • T-Saw dust Coll Progress.jpg
    T-Saw dust Coll Progress.jpg
    97.4 KB · Views: 816
  • old power cord.jpg
    old power cord.jpg
    103.7 KB · Views: 818

jforb

New member
Joined
Jul 3, 2009
Messages
2
Stared at it, measured things, thought about where I might put some partitions, and about how I might finish the inside of some of the exterior walls and ceiling. And drove my wife's Dart out of it for the last time...she sold it, after 40 years.
 

Bessy

Well-known member
Joined
Dec 18, 2012
Messages
995
Location
Ontario, Canada
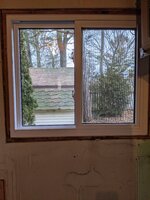
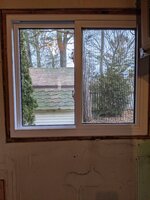
Windows finally came in, so Dad and I got to work putting them in this afternoon. Old six pane windows were only held in with four bent over nails and had brutal drafts. New sliders installed and it was immediately warmer inside.2a9423d4cb04a9762d38599dd267c682.jpg2377154adfc89b856cacbe8900150b16.jpgfc6fe726f414e7be34059555f09b48f5.jpg15bb90679cc573c724b65494c5f4d50e.jpg

Sent from my Pixel 3a using Tapatalk
 

Attachments

  • 2377154adfc89b856cacbe8900150b16.jpg
    2377154adfc89b856cacbe8900150b16.jpg
    376.2 KB · Views: 1
  • fc6fe726f414e7be34059555f09b48f5.jpg
    fc6fe726f414e7be34059555f09b48f5.jpg
    606.2 KB · Views: 1
  • 15bb90679cc573c724b65494c5f4d50e.jpg
    15bb90679cc573c724b65494c5f4d50e.jpg
    639.4 KB · Views: 1
  • 2a9423d4cb04a9762d38599dd267c682.jpg
    2a9423d4cb04a9762d38599dd267c682.jpg
    522.3 KB · Views: 3

sweetk30

Well-known member
Joined
Jan 2, 2011
Messages
2,306
Location
finger lakes area upstate ,ny
Made the first set of equipment mounts for my LIFE TABLES in my shop . Just need to set and weld together in the AM . They let my clip in the tool in place were i need it .
 

Attachments

  • 20210117_194944.jpg
    20210117_194944.jpg
    152.5 KB · Views: 105
  • 20210116_184425.jpg
    20210116_184425.jpg
    151.1 KB · Views: 89

Flat Thunder Channel

Well-known member
Joined
May 4, 2020
Messages
402
Location
Ohio
Finally back in the garage. I spent too much time trying to manipulate the motorcycle lift on the top shelf of the pallet rack. Tried to lift the mast into the ceiling in the process. Gonna have to rethink that one. Spent what was left of the night moving stuff around, cleaning organizing, and throwing excess stuff away.

I had a box that was completely disintegrating because a battery leaked acid on it. It created little pieces of cardboard all over the place. After I got that all picked up I combined multiple jugs of partially used engine oil. I had several that I was able to get rid of! Score 1 for me!

At the end of the day I merely created a better pile of stuff. My garage is overloaded with stuff. I need to get this pallet rack system completed. I also need install this truck cab. This would be very helpful!
 

Attachments

  • IMG_20210118_013647_154.jpg
    IMG_20210118_013647_154.jpg
    142.3 KB · Views: 80
  • IMG_20210117_220736.jpg
    IMG_20210117_220736.jpg
    152.5 KB · Views: 78
  • IMG_20210117_232225.jpg
    IMG_20210117_232225.jpg
    89.4 KB · Views: 76
  • IMG_20210118_002758.jpg
    IMG_20210118_002758.jpg
    158.9 KB · Views: 84

soloz2

Well-known member
Joined
Jun 30, 2012
Messages
862
Location
Western NY
What did you do "IN" your garage today?

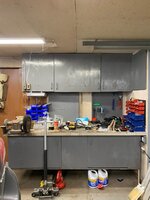
Yesterday, I used up the last of the charcoal paint I had on cabinets. Will need to get a picture, but I'm slowly making my garage presentable. When I moved in, everything was this 40yr old beige that's just brown and nasty. I haven't decided on a color for the walls, but I'm thinking light gray and white ceiling. I would love to do a medium gray, but with 7' ceilings I need all the light I can get.4b7faca717590a1f0e12c0985c164323.jpg
8b7e37b77caecac319bcb7844a9ea8d0.jpg
 

Attachments

  • 8b7e37b77caecac319bcb7844a9ea8d0.jpg
    8b7e37b77caecac319bcb7844a9ea8d0.jpg
    99.2 KB · Views: 2
  • 4b7faca717590a1f0e12c0985c164323.jpg
    4b7faca717590a1f0e12c0985c164323.jpg
    26.4 KB · Views: 3
To avoid these ads, REGISTER NOW!

Deadsquiggles

Well-known member
Joined
Nov 3, 2014
Messages
769
Location
Chesapeake, VA
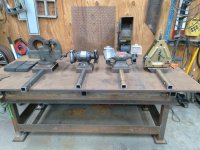
Installed the last oil gallery plug in my 351 Windsor and stacked some metal I picked up so I can finish the stands for my belt sander and bench grinder later this week. Also let my 1.5 year old son walk around and look at stuff, plus let him roll the engine over on the stand with the gear drive.
 
Last edited:

nateo

Well-known member
Joined
Jul 4, 2018
Messages
186
Location
Embrun, ON
Still no pics.

I switched to my cell to see if they’d show up. Still no pics.

Ok, last try. If you can't see them in my original post then they're lost forever. I'd repost the whole deal but I don't want to clutter up the thread!
 

k-os

Well-known member
Joined
Dec 29, 2012
Messages
995
Location
WI
Yesterday got the frame for a floating bathroom vanity glued and screwed. Need to get it all sanded, stained, and sealed. Then plywood cut, stained, and sealed also.
 

Attachments

  • IMG_20210117_125617.jpg
    IMG_20210117_125617.jpg
    104.5 KB · Views: 87

nateo

Well-known member
Joined
Jul 4, 2018
Messages
186
Location
Embrun, ON
They’re showing now.

Thanks for getting them posted. Lathe looks good!

Thanks! The stand needs a bit of love, I'm thinking a new top, some levelling feet, and a coat of paint. Of course, that's well onto the back burner until the temps get high enough for paint to cure.

I also need to come up with a cheap (i.e. free) way to get a chuck mounted to the oddball thread on the Beaver lathe (7/8" x 14 TPI) so I'm not limited to spindle turning. Just another project for the list!
 

bazzateer

Well-known member
Joined
Oct 8, 2009
Messages
6,075
Location
Watford, Great Britain
Laid some primer down on the various parts of an old Swedish Nike 3 tonne floor jack I'm restoring and started stripping down an old Record 36" stilson wrench (pipe wrench) for restoration.
 

ZRX61

Well-known member
Joined
Aug 15, 2006
Messages
28,716
Location
Solar Blight Valley, SoCal
Discovered that the battery in the Accord had completely **** the bed since the last time I drove it on Thursday or Friday. Totally dead, no idiot lights or anything. Not the first time the car has done this, in fact it's the 3rd time.
Last time was Oct 1st 2017 as I wrote the date on the new battery.
My first Honda is liable to my last.


AVO meter is showing 4.2v, checked battery on bike to make sure AVO was working, it showed 13.4V
 
Last edited:

Badgerstate

Well-known member
Joined
Nov 15, 2020
Messages
484
Location
Columbus, OH
I built a rack for all my rakes, shovels, brooms etc out of 2x4s. I cut them to length with the Ryobi miter saw, cut notches in the top to hold the tools with my Craftsman jig saw and nailed everything together with my Craftsman 16 oz hammer that I just bought.
I couldnt quite finish it because I need some more wood but Ive got a good start and its going to take me about 20 minutes to finish it next weekend.
 

Outlawmws

Well-known member
Joined
Aug 9, 2011
Messages
39,344
Location
The Badlands
Got the power sorted on the T-Saw - This whole thing has been a "design in place", as many of my projects are. I'm satisfied with the result - the power switch is in reach with the side table (I guess its now a "front" table) up or down, the legs and supports don't interfere with the cords in use or movement. It's grounded finally, the cords and plug aren't rotting away and I think its actually quieter in this configurations that on the old wood stand:


The power parts (less the cord) - The switch is the "slap off" type (salvage from a Craftsman RA saw) and I wired the poles in parallel so it should last. It needed that rectangular hole do after layout I used the Nibbler to make it so.

attachment.php


The inner holes are for the switch, the outer to hold the first box on.

The second box houses the receptacle, and the black wire goes through the switch. the white neutral and ground goes right to the receptacle.


Switch done - Power ready (I even tested the receptacle with a polarity tester) its height here is perfect for tapping off with my knee if needed.

attachment.php


And in the Up position - still pretty handy

attachment.php


And the Boxes Mounted:

attachment.php
 

Attachments

  • Power Parts.jpg
    Power Parts.jpg
    98.4 KB · Views: 770
  • Side Table down.jpg
    Side Table down.jpg
    86.8 KB · Views: 764
  • Side Table Up.jpg
    Side Table Up.jpg
    68.1 KB · Views: 766
  • Power Boxes.jpg
    Power Boxes.jpg
    83.9 KB · Views: 766

Outlawmws

Well-known member
Joined
Aug 9, 2011
Messages
39,344
Location
The Badlands
Thanks Kay! I like the Dogeater addition you did to the Dingo!

I've actually been using the saw for about 5-6 years, but it was definitely not an ideal setup. Now it has a small enough footprint to make space in the garage, and should be easy to wheel out and stable when the wheels are up. Still a ways to go to complete though, but this was the big step. Now its belt guards and dust collection.
 

Flat Thunder Channel

Well-known member
Joined
May 4, 2020
Messages
402
Location
Ohio
Not in the garage, but just outside of it. I helped my father in law replace the low beam headlight bulbs on his 2012 Ford Fusion. If I my l knew it was going to take so long I would have moved it inside. We accidentally removed the high beams first and they were a pia to reinstall. The passenger side low beam required the inner fender wheel to be removed. What a pia. Next time I think the whole headlight housing should be removed. It might be easier!
 

Glemon

Well-known member
Joined
Aug 29, 2020
Messages
2,203
Location
NE
Can't believe how difficult the make some headlights to replace these days, used to be a 5 minute job and universal part on most any car or truck.
 
To avoid these ads, REGISTER NOW!
Top Bottom