To avoid these ads, REGISTER NOW!

What's your workbench look like?

daveinind

Member
Joined
Sep 13, 2011
Messages
8
Location
Indiana
Here are my benches. One is an old work counter from the back of a Subway Restaurant from a friend when he remodeled. It has a formica butcher block top, an old Wilton USA vise I got from a garage sale for $7.00, a 8" piece of railroad rail as a small anvil (also a garage sale find), and an articulating architects light for a task light.

Nothing fancy, but I like it.
 

Attachments

  • photo.jpg
    photo.jpg
    39.3 KB · Views: 956
  • photo2.jpg
    photo2.jpg
    39.1 KB · Views: 677
To avoid these ads, REGISTER NOW!

sberry

Banned
Joined
Jun 18, 2005
Messages
35,747
Location
Brethren, Michigan
The set sink is nice. I have changed them out when dirty even, they are so cheap. I usually modify them to take kitchen faucet vs laundry. Didn't screw to the wall but did make a base to raise them and screw legs to it and a screw thru the leg to the sink. This one leans against wall, is plenty strong, the other one I have this way is free standing, with it screwed its good. As I mention you need to slightly modify for single handle kitchen faucet, I believe a hand grinder did it. Nice to be able to use back of hand or elbow, this is a shop feature I would be lost without. No easier way to keep the mess down than being able to wash right on the spot. Paper towels are a saver too.
 

Attachments

  • yellow desk front r.JPG
    yellow desk front r.JPG
    59.4 KB · Views: 385

JMartel

Well-known member
Joined
Jan 4, 2009
Messages
1,403
Location
Seattle, WA
My $10 workbench. Got the cabinets free from work, and the top is a used solid wood door that I bought from the Habitat for Humanity store for $10. A little construction adhesive and it's good. Put the hole for the doorknob up front so I can just sweep everything through the hole and into a garbage can below.

201684c5-eefa-498c-ad42-ae73a4478034.jpg
 

gmwelder86

Well-known member
Joined
Dec 8, 2010
Messages
463
Location
Oakdale , ca
Heres my work area, not much but it kinda works for now.
DSC02619.jpg

DSC02624.jpg


Here is the old mans area, big into reloading and such
DSC02620.jpg

DSC02622.jpg

And his old snap on box from when he used to be a honda bike mech. All the metric is snap on as well and most standard, the rest is craftsman.

DSC02623.jpg

DSC02621.jpg
 

onesight1

Well-known member
Joined
Aug 25, 2011
Messages
55
Location
Erie, PA
(been posting my progress builds here:http://garagejournal.com/forum/showthread.php?t=125436)

just sharing my bench:

yD6uW.jpg

temporarily using tape to hold 2x4's as a resting point for the bottom shelf
a6Nbx.jpg

TQllM.jpg

this thing is heavy duty!
cEqy8.jpg

Top is on: 3/4" cdx
gI1tU.jpg

1" hole cut at 12" and 24" marks from both ends of the tabe.
these holes will later be used in assisting the user remove the floating melamine top
mtUoC.jpg


and here we are.... finally done (with malmine top)..I figured I would use melamin because 1.) feels nice 2.)nothing really sticks to it 3.) I can simply remove and cut a new one to size after it gets all banged up and needs replaced.

ONqXb.jpg


now, I need to coat the bench in sanding sealer, then sand it and paint it "Gloss Smoke Grey" just like the doors and cinderblock.
 

fury9

Well-known member
Joined
Mar 4, 2012
Messages
1,277
Location
Mchenry, IlLaHnoYs
this is mine currently a work in progress. Looking for ideas to make the top more durable... pic is from a cell so its not the best quality
 

Attachments

  • IMG_20120311_115023.jpg
    IMG_20120311_115023.jpg
    134.1 KB · Views: 374
OP
D

dittle fart around

Well-known member
Joined
Jan 9, 2011
Messages
2,455
Location
Vancouver, Washington, USA
this is mine currently a work in progress. Looking for ideas to make the top more durable... pic is from a cell so its not the best quality

Tempered Hardboard (the same stuff pegboard is made from) is a great surface. 1/4" thick, easy to replace and cheap. If you want a more permanent solution nothing beats sheet metal. 14 gauge bent down to cover the edges of the plywood and up to form a back splash.
 

Mikelc10

New member
Joined
Dec 14, 2011
Messages
2
This is my first post.., hope I do it correctly.
Here are a few pics of my new work bench. The first pic was the mess that needed to to cleaned up. I still have a little work to do but the major stuff is complete.
 

Attachments

  • G1.jpg
    G1.jpg
    142.3 KB · Views: 353
  • G3.jpg
    G3.jpg
    138.8 KB · Views: 657
  • G4.jpg
    G4.jpg
    143.3 KB · Views: 568

kywildcat

Well-known member
Joined
Nov 2, 2010
Messages
726
Location
Western KY
These are in the shop side of my garage. Holding up very well so far.
 

Attachments

  • almost finished1.jpg
    almost finished1.jpg
    137.9 KB · Views: 288
  • almost finished.jpg
    almost finished.jpg
    139 KB · Views: 331

Mikelc10

New member
Joined
Dec 14, 2011
Messages
2
Thanks fury9! BTW, that's not oil spots in my garage.., I pulled the wet car out before I took the pic.
Any ideas on a vise? Mount it on the bench or maybe some kind of a stand??
 

fury9

Well-known member
Joined
Mar 4, 2012
Messages
1,277
Location
Mchenry, IlLaHnoYs
I would mount it on the bench just use some 3/16 flat stock or angle iron on the underside of the bench and make sure that whatever you decide to use that you use a solid piece for each pair of bolts, I mean don't just use little pieces on each bolt span the two bolts with a solid piece
 

fury9

Well-known member
Joined
Mar 4, 2012
Messages
1,277
Location
Mchenry, IlLaHnoYs
as for a vise many would recommend a wilton but they can be pricey. get something that will suit what you know you will be holding,bashing,smashing,banging,re-shaping on. Wiltons are heavy duty and made in USA, big plus,but I have a palmgren rotary head vise and for the price i couldn't go wrong and I bought mine new.It works for me
 
To avoid these ads, REGISTER NOW!

Scuba Steve33

Well-known member
Joined
Jan 10, 2012
Messages
535
Location
Bay Area, CA
Nothing special but then again it is my first space and at 22 I don't think I'm doing too bad. Have to make due with what I have for now, the '70 Chevelle is taking up everything!!

My toolbox and most other stuff is on the opposite end. I wish I could have everything together but this works for now. I'm definitely going to build my own workbench eventually, the half shelf top is a decent size but nowhere as big as I'd like.

Yes, that is a branch holding the shop towels but it works flawlessly. Gotta improvise!


mdbeck1

Well-known member
Joined
Mar 7, 2010
Messages
2,297
Location
Norman, OK
How the heck does he find anything on there :shocking:

I'll bet you an e-beer that the "old man" can walk right out there and pick up ANYTHING he's wanting.

Just don't touch anything before you make the bet. He'll probably whoop you.
 

gtixpress

Active member
Joined
Jun 22, 2011
Messages
31
Location
Mahomet, IL
Nothing special but then again it is my first space and at 22 I don't think I'm doing too bad. Have to make due with what I have for now, the '70 Chevelle is taking up everything!!

My toolbox and most other stuff is on the opposite end. I wish I could have everything together but this works for now. I'm definitely going to build my own workbench eventually, the half shelf top is a decent size but nowhere as big as I'd like.

Yes, that is a branch holding the shop towels but it works flawlessly. Gotta improvise!


I had the same shelves for my first bench as well. The only difference is that I used some 2x4s and made a bench top. That way I could pound on things and not damage the cheap fiber-board that it comes with. :thumbup:
 

Jack Olsen

Super Moderator
Staff member
Joined
Mar 22, 2009
Messages
6,678
Location
Los Angeles
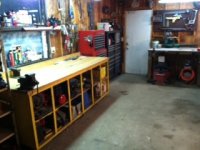
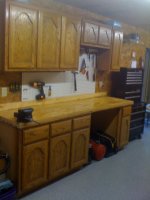
I'm going to post an update. I recently got rid of the bench you see in this picture:

dsc0433m.jpg


It was a tool box with a solid-core door on the top of it.

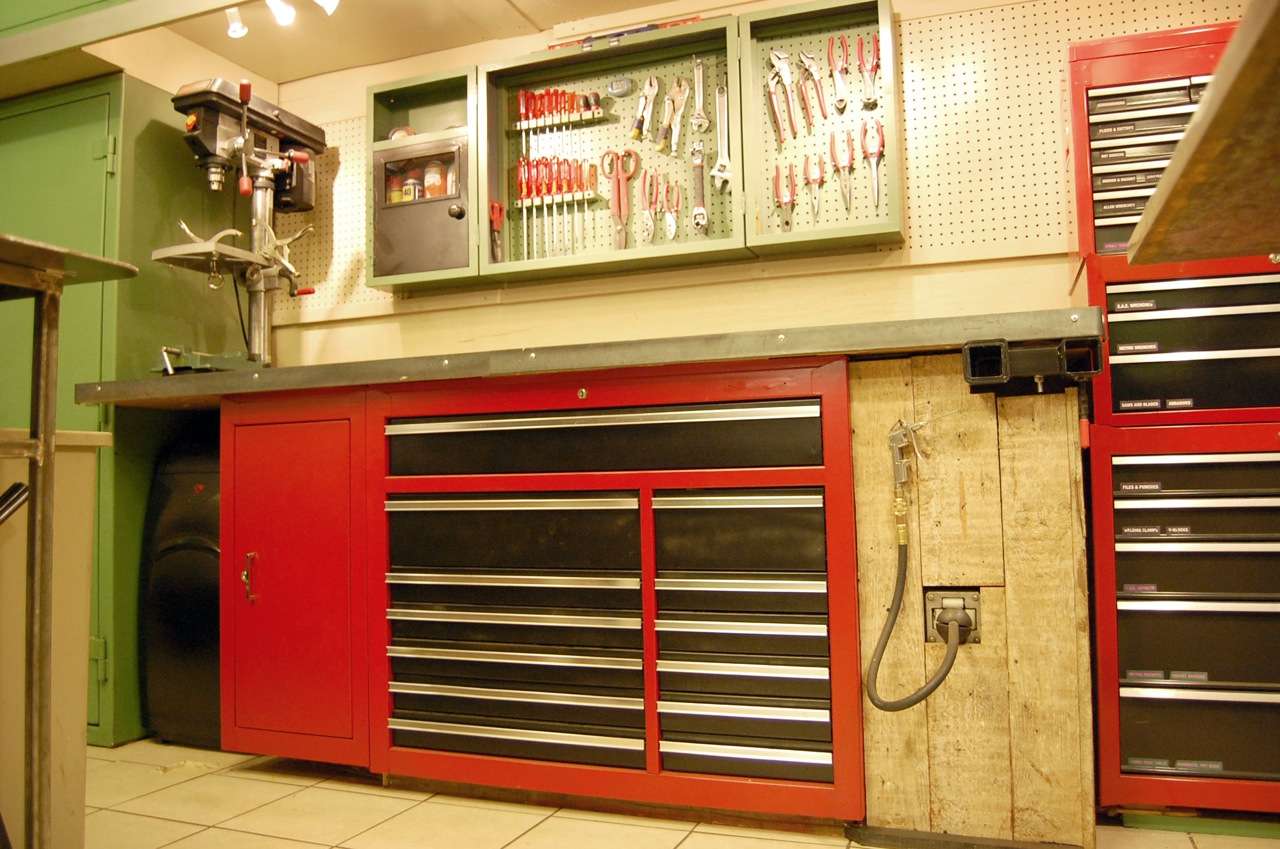
In its place, I wanted a bench with more storage (since the toolbox was only 18" deep, and left space behind it) and also to have a comfortable place to sit while working on smaller stuff.

I made the new bench out of a taller set of drawers that I chopped in half and added one false front where I put my air hose reel.

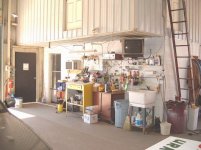
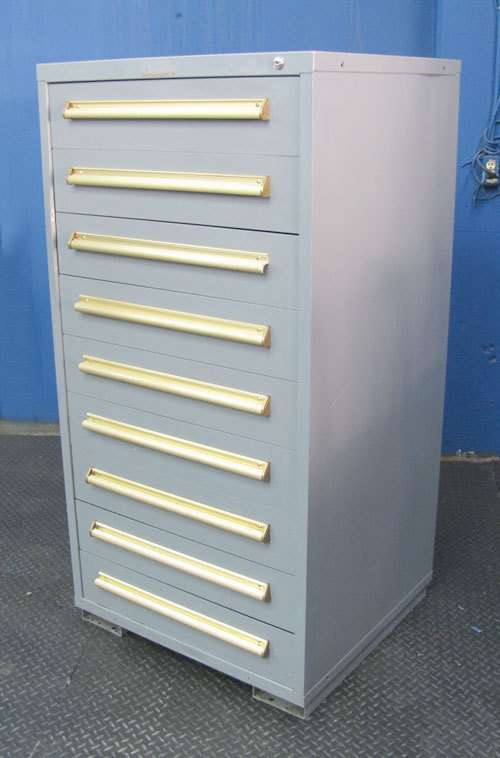
Here is the donor cabinet:

equipto.jpg


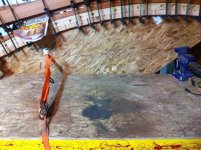
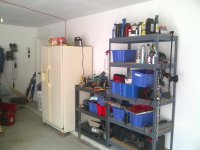
And here are some pictures from the transformation:

anklesandshoulders.jpg


reelkk.jpg


drawers.jpg


trimmedblock.jpg


I re-painted and then had the chair re-upholstered for it. This is where it started:

backofchair.jpg


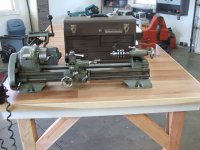
In the process of building the bench, I also added a vise and replaced my old drill press. Here's the vise:

softjawreverse.jpg


The drill press started out like this:

tallshot.jpg


And ended up like this:

finisheddrillpress.jpg


At the end of the whole deal, this is what it came out like:

newbenchangle.jpg


newstuffhighup.jpg
 
Last edited:

Scuba Steve33

Well-known member
Joined
Jan 10, 2012
Messages
535
Location
Bay Area, CA
I had the same shelves for my first bench as well. The only difference is that I used some 2x4s and made a bench top. That way I could pound on things and not damage the cheap fiber-board that it comes with. :thumbup:

I was going to do something like that. I have a table with fold out legs that's pretty sturdy and can take a thrashing that I pull out if I need to do heavy work. Hopefully soon I'll have my own full built bench. For right now it gets the job done.
 

Mmfh

MEMBER EMERITUS
Joined
Oct 8, 2011
Messages
1,423
Location
Portland Oregon
Nice Job Jack! That is one hell of a upgrade, nice upgrade on the drill press as well! I didn't read about what you used for the new work surface, looks like maybe a solid core door? Is it the same door as you used before?

The old picture showed a metal wrap around the edge of that table top, is that just steel that you bent to fit the door edge?

Again, nice work!

Mm
 

Jack Olsen

Super Moderator
Staff member
Joined
Mar 22, 2009
Messages
6,678
Location
Los Angeles
I'm no leg humper, but damn Jack, that is nice!

Jim :cool:

yeah, it's beautiful.

Thank you very much.

Jack,

Is there a separate thread somewhere on the drill press refurb?

No. I just painted it and buffed out the metal parts. And re-wired it. And added a different kind of switch. And a new handle.

Maybe I should have done a thread on it? :)

Most of the details are in my main garage thread, starting right about here.

Nice Job Jack! That is one hell of a upgrade, nice upgrade on the drill press as well! I didn't read about what you used for the new work surface, looks like maybe a solid core door? Is it the same door as you used before?

The old picture showed a metal wrap around the edge of that table top, is that just steel that you bent to fit the door edge?

Again, nice work!

Mm

Thanks. I sold the solid core-door with the old tool box. For this bench, I sprung for a piece of Oak butcher block at Ikea. I knew I wanted to give a shape the edge of this bench so the chair wouldn't be sticking out and tripping me and also so I wouldn't be hitting a corner every time I leaned over to the Craftsman tool box stack. So the solid core door wasn't going to work for that -- it would have exposed the heart of the thing, which was basically particle board.
 

Kevin54

MEMBER EMERITUS
Joined
Jan 12, 2005
Messages
29,341
Location
Urbana, Ohio
I just finished this up yesterday so I could mount my small lathe to it. I added some HF rollers to the bottom. I also mounted my vise that hasn't been mounted to a bench for years. I was going to use Masonite for the top but then figured if things were going to be bolted down, then I couldn't swap it out too easy, so I picked up two packages or laminate flooring. Easy to wipe off. And if I do any dirty work, I can toss the Masonite on top to do it. BTW....the table is 4'x8' so I didn't have to rip anything down other than cut the ends off of the flooring,
 

Attachments

  • DSCF4688.JPG
    DSCF4688.JPG
    113.2 KB · Views: 4,435
  • DSCF4686.JPG
    DSCF4686.JPG
    114.6 KB · Views: 429
  • DSCF4681.JPG
    DSCF4681.JPG
    111.2 KB · Views: 381

Wingnut65

Well-known member
Joined
Apr 21, 2010
Messages
3,170
Location
Tampa Bay, FL
Kevin, I love that workbench. That top is almost too nice to work on. I will seriously consider wood flooring for a work surface. Congrats. Nice lathe, too. Hoping to get the motor for mine fixed today.
attachment.php
 

DoyleDee

Well-known member
Joined
Jun 17, 2007
Messages
689
Location
North Texas
Jack, why red??? your shop looks so cool and old school/high tech that the green went so well.

Kevin, how's the shoulder?
 

Plump

Well-known member
Joined
Dec 22, 2009
Messages
537
Location
SE Wisconsin
IMG_0006.jpg

It's a complete mess due to some drywalling and rewiring that I'm doing....not that's it's ever real clean.

This is the first bench I built when I bought my house. It's funny when you need to build something to build everything else. I would change a few things about it but a sold core door top makes it plenty strong, lagged into the wall studs to keep it stable.

I've got a lightweight bench on the adjacent wall for small projects, food line, junk.

IMG_0017.jpg
Also a "bar" island that we watch games around, prep food, and hang out at. It's also my de facto cutting table for larger pieces since it's usually pretty clean and I can get something large actually on it! It's a mess since I'm doing some work in my kitchen right now. Excuses, excuses!
 

crowesnest

Active member
Joined
Feb 6, 2011
Messages
31
Jack like the way the bench turned out. Also hoping to pick up a rockwell drill press that is like the one you just done. It is on craigslist and i am going to look at in the next few days when we both could set it up. Dont think $65.00 is bad for it. Has some rust but not something that will not clean up. And i will say it again you have done a great job on everthing in your gargage. Scott
 
To avoid these ads, REGISTER NOW!
Top Bottom