For what it's worth, it's easier to mud the horizontal seam than climb up and down a ladder!
If installing vertically, you better hope the studs are exactly on 16" centers so you have some material to back the vertical DW sheet with, along with something to screw into!
AL
vertical is for those who don't know better.....:)
I hang by myself and use a lift - much easier to carry and place horizontal sheets on a lift as well.
 You watch the youtube vids and watch the pros do it and they all thin the compound. Using it unthinned will tend to put more compound on the wall.
 If you watch a pro they do very little - I MEAN VERY LITTLE - sanding after first and second coat. If you do not put on excess you do not have to sand it off.
My drywall guy has been in the business for 40 years and comes very highly recommended by all around the county. He is busy every single day.
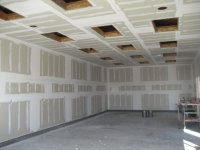
It is no easier for him going horizontally than it is vertically. It depends on the room size which way he runs his drywall. And for the comment of running it vertical is for the ones that don't know any better, I call B.S. on that. It sounds to me like you may have hung drywall once or twice, or was only showed one way to do it. When drywall came about, the beveled edge was designed to be run vertically and hit the studs on either 16" or 24" spacing. One reason according to my drywall guy for going horizontal, was that more area could be covered quicker by an individual doing it himself. The first piece went down to the floor, or spaced up with a couple of wood shims, then the piece above could rest on the lower sheet.
When it comes to compounding the joints, most of the time when you see them thin it out is when they are feathering the joints out on the second or third coat. Or when they are doing what appears to be thinning, they are mixing faster drying mud from a dry mix. My drywall guy uses Joint Compound out of a bucket for his first coat. Joint compound has a mild glue in it and binds the joints together. If he has a new bucket, he does not thin it, but he will mix it thoroughly. If it is a bucket that has been opened and used out of and maybe has set up a little over a brand new bucket, he may thin it some. The thickness does not have anything to do with how much gets put on a seam. The thickness depends on whether the individual is doing it correctly or not.
What he will thin a little is the Topping Compound. Topping is just what it says, it is for the top coat. It is a finer mix so it will not have pores in it and it is a whiter mix. Put Joint Compound and Topping Compound down the wall side by side and the Topping will be pure white and the Joint compound will be slightly yellowed.
As far as going horizontal when hanging the drywall, as I said above, when you have two **** seams, the drywall compound needs to be feathered out so you DON'T see a hump in the wall. But if you would run a long level or some sort of straightedge, there will always be a hump at the **** seam. My drywall guy may feather out **** seams 4' or so to get everything transitioned to a smooth looking wall. Also when he is compounding a room, no matter the size, it takes three days.
Day one is taping and using joint compound and a narrow knife. All he puts down is enough to embed the tape, whether it be fiberglass or paper. He prefers paper tape because it does not stretch and end up with cracks in a joint like you can with fiberglass mesh tape. If he does happen to use fiberglass mesh for some reason, all corners and the seam at the wall and ceiling are always paper tape.
Day two is to come in and lightly sand any place that may need it which is a rarity for him. Using care when first putting the tape and joint compound down on day one eliminates most if not all sanding. Day two involves a little wider trowel and still using joint compound. Just using enough to bring the beveled edges almost up to or at level.
Day three involves some sanding to insure there is no compound going out past the beveled edges and to also make sure it is slightly below being level. Day three also involves using the wide bladed trowel, or depending on the seams, if it is a **** seam with two ends when the sheets are put up horizontally, he will use a smooth concrete trowel, and he used Topping compound because it is white and has tighter pores than the joint compound. He spends more time making sure **** ends are feathered out and smooth. If he adds any water, it is to allow the compound to have a little more workable timeframe. This allows him to make sure that things are smooth to eliminate a lot of sanding.
Day four is sanding day. It doesn't take him a lot of time because he took steps previously to eliminate the sanding times which everyone hates.
So as far as people not knowing what they are doing when hanging drywall vertically, or saying that the drywall compound has to be thinned because you will put it on too thick if it isn't thinned, are not words coming from a drywall professional. My drywall guy has done everything from patching a hole in a wall to doing everything complete in million dollar homes. It's all he knows and all that he has ever done. I've had him do work on our house before, when he is also working on four other houses in the same day. He knows how to figure up the time and schedule things so that he has mainly his three day compounding work. Don't get me wrong though, if he is doing a whole house, that may be the only thing he works on for a few weeks. Most drywall compounding, he does solo, but when it comes to hanging drywall, he has a list of ones he's worked with before that he knows are the best of the pick. When we had the wifes Craft Shed done, he had two guys that did nothing but hang the drywall. The Shed is 20'x20'x8' ceilings in 16' of it and the other 4' was 6 foot ceiling height. Multiple lights and outlets in the ceiling, quite a few outlets around the walls, panel box in the wall. Two guys hanging it complete and trimming around all of the outlets and other boxes....they were in, cleaned up, and out in 4 hours. The Craft Shed has been completed for almost 7 years now and there is not one nail pop or crack at all.


")