To avoid these ads, REGISTER NOW!

Wire edging for fenders?

myredracer

Well-known member
Joined
Nov 1, 2015
Messages
557
Location
Langley, BC
Wondering what to use for doing wire edging on fenders. I was thinking of using some 1/8" welding rod as being copper plated would be a good thing except that standard lengths are only 36" and I need about 32". Don't think I want a splice part way in the edge as it could make folding the edge over the wire harder and could show.

What is usually used for this? Would plain 1/8" steel rod be okay? I'd assume I should epoxy the inside lip and rod first?

The fenders I'm working with are only 22 ga. and the edge should fold over easily but I think could be easier to damage in the process? I'm planning to do it by hand. Don't want to buy any special tools as this is a one time project. Is all I need besides a bunch of vise grips and hammer, a dolly with a thin leading edge that I'd make up from a piece of flat bar? I'm installing the new front fenders on the car. Can I do the edging after they are installed or would it be better to to them on the bench?

Thx
 
To avoid these ads, REGISTER NOW!

K13

Well-known member
Joined
Oct 24, 2007
Messages
2,251
Location
St. Albert, AB Canada
I have heard a lot of guys use 1/8" fence wire as it is less likely to corrode given the galvanizing. What type of vehicle are you working on that has wire edged fenders that are only 22 ga?
 

Kaizen

Well-known member
Joined
Jan 9, 2015
Messages
6,949
Location
New England
How are you going to attach? Galvi or copper don't play well with mig


Sent from my iPhone using Tapatalk
 

Kaizen

Well-known member
Joined
Jan 9, 2015
Messages
6,949
Location
New England
If done correctly wire edging should involve no welding.


Maybe I'm picturing something different. How do you attach wire to the fender without brazeing or welding?


Sent from my iPhone using Tapatalk
 

kwschumm

Well-known member
Joined
Feb 13, 2016
Messages
1,220
Location
Olympia, WA
Maybe I'm picturing something different. How do you attach wire to the fender without brazeing or welding?


Sent from my iPhone using Tapatalk

Probably a crimp. Place the wire maybe 3/8" from the edge and then fold the sheet metal over to hold it in place. My brother is restoring a 60s car that had that technique used at the factory
 

Kaizen

Well-known member
Joined
Jan 9, 2015
Messages
6,949
Location
New England
Probably a crimp. Place the wire maybe 3/8" from the edge and then fold the sheet metal over to hold it in place. My brother is restoring a 60s car that had that technique used at the factory

ahh thanks. I thought of that but then thought that's one heck of a rust pocket and no one in their right mind would do that.
 
To avoid these ads, REGISTER NOW!

MP&C

Well-known member
Joined
Oct 21, 2009
Messages
4,411
Location
Leonardtown, MD
WiredEdge_Page_01.jpg


WiredEdge_Page_02.jpg


WiredEdge_Page_03.jpg


WiredEdge_Page_04.jpg


WiredEdge_Page_05.jpg


WiredEdge_Page_06.jpg


WiredEdge_Page_07.jpg


WiredEdge_Page_08.jpg


WiredEdge_Page_09.jpg


WiredEdge_Page_10.jpg
 

readhead

Well-known member
Joined
Dec 8, 2012
Messages
6,198
Location
Durango, Co.
I had to do a wired edge in school when I was a sheet metal apprentice in 1973. Haven't done one since. I used all those tools. Unfortunately most of those processes are lost now. If the new bunch of "tinners" can't buy it at the supply house and zip screw it together they are lost. You guys make me and my trade proud. Keep up the good work.
 

prostreetamx

Well-known member
Joined
Dec 19, 2016
Messages
222
Location
Las Vegas
I added flares around the fenders on my custom Javelin. I used a combo of 1/2" and 3/4" square tubing bent with my conduit benders to shape them. I added sheet metal over that framing. I have purchased some 1/8' rod to experiment with for a new custom spoiler.
 
OP
M

myredracer

Well-known member
Joined
Nov 1, 2015
Messages
557
Location
Langley, BC
A wire edge looks like the diagram below. I calculated the outer diameter of the 1/8" wire plus a 3/4 wrap/layer of my .03" sheet metal (22 ga.) around it as in the diagram and the outer circumference works out to be close to 1/2"! Means I need to be very careful not to trim away too much of the fender.

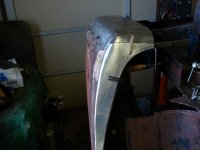
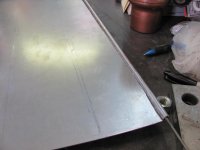
First photo is what it should look like. Second photo is the Eastwood how not to do it way. What I don't like is that the concealed rod is a moisture trap but this is on a vintage car that will hopefully never see rain ever again and will always be stored indoors.

MP&C, thanks for the link and the old info.on doing it by hand.
 

Attachments

  • WireEdge.jpg
    WireEdge.jpg
    41.2 KB · Views: 45
  • Picture009.jpg
    Picture009.jpg
    37 KB · Views: 78
  • hammer_034.jpg
    hammer_034.jpg
    23.7 KB · Views: 84
Last edited:

MP&C

Well-known member
Joined
Oct 21, 2009
Messages
4,411
Location
Leonardtown, MD
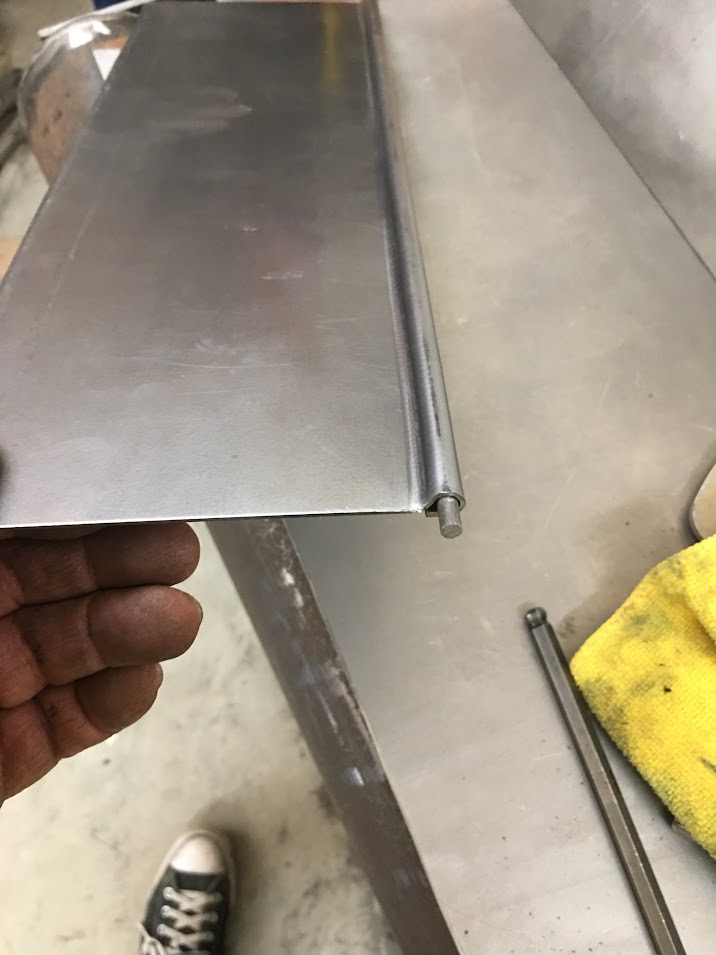
Just to add a sample of wire edging we recently did in the shop to this thread, here is a hood side that, along with the hood, did not fit after a replacement cab was installed. A newly fabricated hood will correct the issues. Note the wire edge at the bottom protrudes outward from the panel surface, which will require an offset.


zd1gGDJW2f1p4_rNpnvJhRre7YX7A1VB8FaWIkD78afWV35FPSrpN_2aEwfNfW1eDHwSLj7sKr79Yddxayb8zfZy4YsIll9fRZww8w-jcfyRfmegjH7BUAcrLW3UNRjvMY0fWYjqZ_5cOghRcxneSHEA1ELAWgL0GjRwWHLlGf_E6qIem-WqY7UABmiCO7umRDHLmNxkQrRt75ty4qjWoOWYs4NwokBJwOwHyfyuBcBmK4OR_3lJhu4XAbEB_s0ZwjTbq_SXipI3IN_fEnkUDQmz2Kd-OIulOnXiHVYqyzYCJJnWtypPw2XK1rgtVziIWwYcAsDGEnnspBfJvrqHapQBusy0qFvWNYpQDCzIJJogAPAwiuZjCnBD-P38BBgvIXJrmeBCq2k4JEfyeIWELPvLRe3_XEPBWFHskJFBWnH0Wirp1-CtNfH4H6AZTRPfozDP8mBolaDkVl-hDD8e7EHVV2RQSAlNFHoxEOSQCTJmjq_uRv8VVlSHc0OTu35sf-OVmA8S1MyPj6bw4bY2RzCRFLlOuxqRUXUzOtVhxdn3p1QueYLV4jde0UdU8EhH8qCy0RK-i-yCRoG2WhzR4szZLFEavDMIn8y0LkLjAyuYkX1E8CWG0quJyvzajDzHONrFVKNA98UxMcWYW0m3mofez_zeWOSG=w1274-h955-no


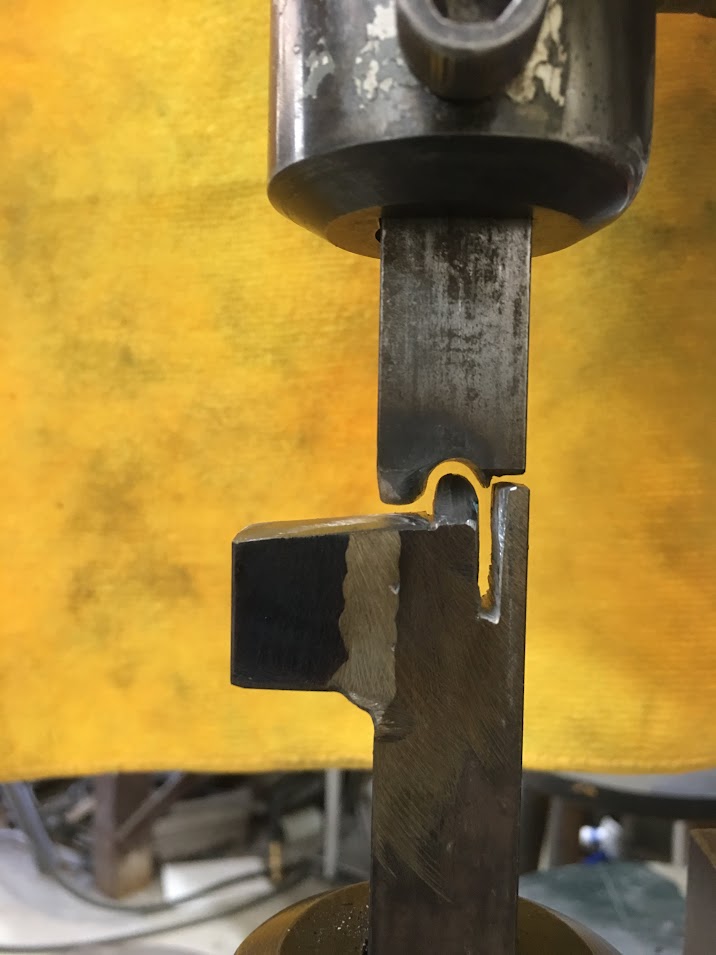
So we made a set of dies to add the joggle needed for the external wiring, using 3/16 solid rod for the wiring.. I would add that those sourcing wire for such a task should look to round rod, most machine shops or metal suppliers will have 20' pieces, so you can tackle most any wiring job without the need for welding shorter lengths together. Most will also cut off what you need for easier transport.


TzRpCFT4fAlxa0hsPwID69d-TqJiRBwZlQcNXkuqSjDbcCWdF_uqqkoQJRg1NFqISglNBa6vF3i8GWtH_uFDj7sCW6W_YE_P-Htdkw4bOQYmiAkq7aS5u2VG5Tqz3DHeOTTHJ0wYbivTrjTA3IRrItZkfVEKkO7EUgpsDAfKTeEtNVGKmJ7twMR31z8lXxcwMVMHa6Zgj7qvy_eFA2_JgA9CM7ExoxK_AO9B1Fe2IUihJFj853CKQAD7rFTW--ywWqDpFZJWyxgOrgrAcR1dgcWXqD7n92OpDN-PZDoiVQbrN0HSv_srkB0FuxppHQEHil1wzsyg7O6ny0fQXrUZYy28lU0OFPqmvB0oEZ-Mta1D7v7Dvf1ixa3Tbz7vzd4uDfbDDjMpcZ9IjddubtTO3Vt-z_s-9P2pmOHLG--1-DTPhPpH0XtTwiAwQ6ZPptU4mvT74dZgo4LPrwpkD26Q6QIIeXiXM9dpD9PDjh7thvmgIiAmtyDXY1n6wc94tX_umlfawUAk7Iqk9XWuU9fd74CyWWQWG5J7tQ5uyomyz2LhNC2_muD4WpGeaqL5aIRq1U27JfKyDSldgxbJ75DAkHpqogc3Uk7Nfiis7EGGsgcjPxJZVevjPc_Kh4KqzZdwA9k32PV2sTV3z-pxE9hBkHrOW9NhwDic=w717-h955-no


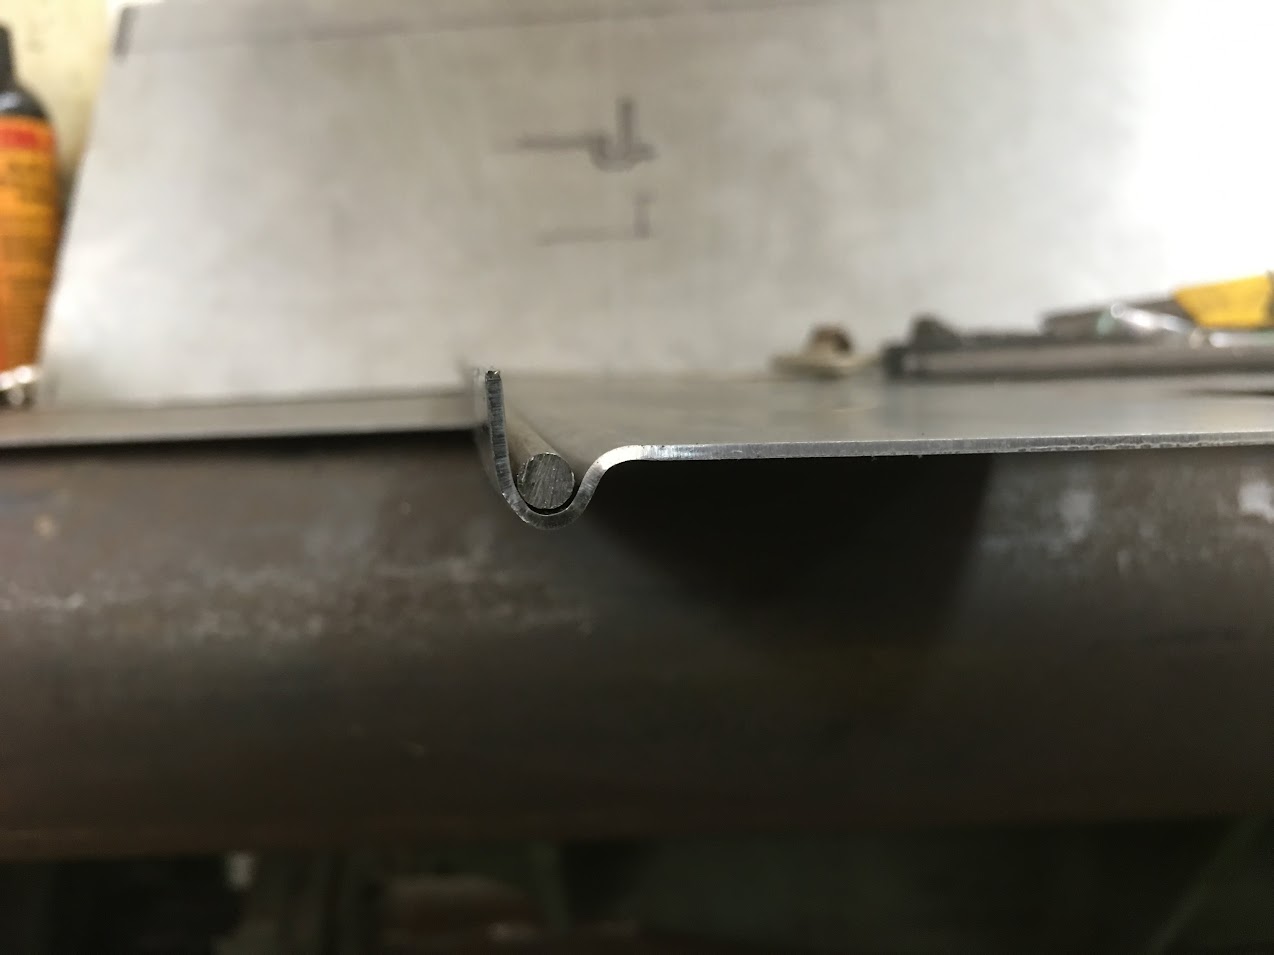
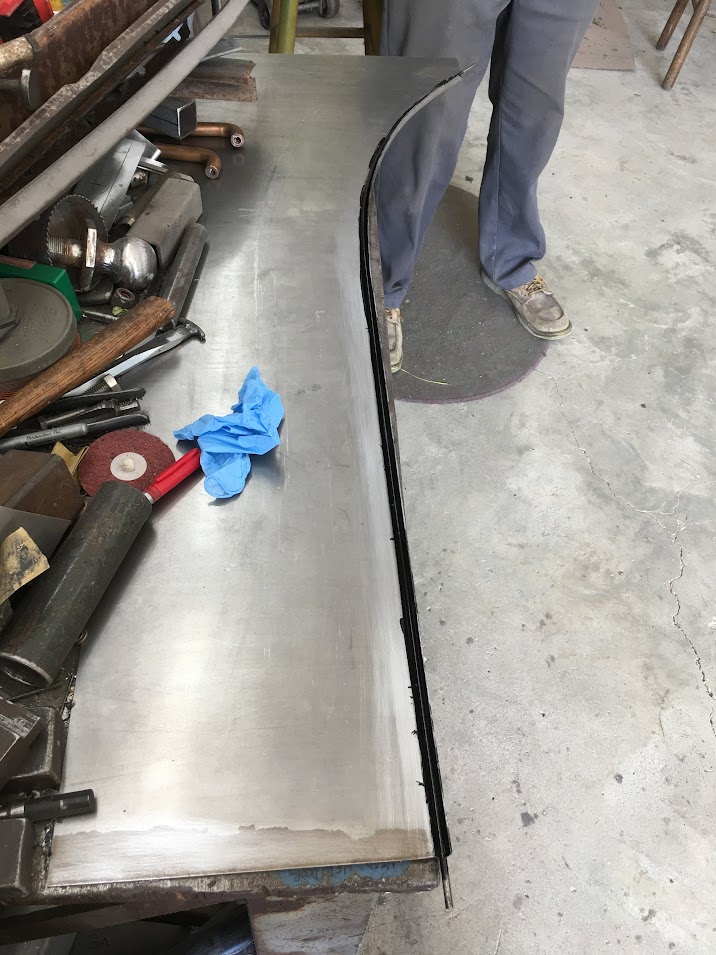
Practice sample:


bqZFBicCo-NDYwzc5WPUO8X7ZksCVllciXgPLmuitO89hYjk3AGIg_0vs9ljInw5gadHkUXfKQrIXC-Z_bH3WLL0twLh6wbA_opDhUeQ_2iiQmv1Q0yUhPSFsx5afOxXrrXQktNNV0NVPC9qMuXWA4gk6qdeW2mZJCMzX62xeoBM5Q4jPODESquH2MB50df8OI5-iyTFhXxdE7ACnVE1UKaz1dLzf8HcfFAlIvsFQkSmPoL6H48sfYbQnG67bIyoMUsUk7u2LjDmwboL73Myk_iZADP-PDCTNIslAd8aP9sUHv6s4T4CFRnWHgdpX1sJoAK_52igki5uuztjOHRuc7AZZ_dMwUrcU8Uogzj0_42drRf9LsEnGL9L91TIExHeX2EK8tf1lF2OesLUll39CVnhqoj-bJDoqWHoK7pL6p6wjoAZ2PGctxGj8V7hEMqVpX_5QYryd1ggG3quvIXZ1QUxyeEE4869KeVdXQ3X_aqZBCmnHi8w3J4r1y8cV-9KANGuomS_2Vad1TQRyQ8hkfxO6PD_mERu8uuUJPbZL-R4AwrEt59qTBQThwBnWgHgp6fekQtnDUtCxJA1rAg61g7EWBcFneCnsPrIOjyT4YPBbxpQgb811EvA0yWVYHaBpbKx7xxCaF5eRFgnOQfv59BahYtDPWtA=w1274-h955-no


JTpXX5P5LZ2vImbYOzSqxKVbd5gjXWenVgNCYIUXOFuN2bsd4fAJj5t4uibVffyF6Zzwfg37UmQx8ssCs-SlU2Q9tZGltdwkPMivF7og10ws4WvwyDlDJGnZFnBQPR_jyKs0kWE8wKCGmya2OifdZ2dcTJLuAYX3Ni6HM58qvwvUHCVg1E5-j1Ym-Yt7DDisz-VibHbKCxA3xUrts0PnGTesYj7ZhYXVwQPJ45Bwgge9TEZZENopG49QM_J87MQWvqxbVzAzjIvIw1I6SS1AAmQiBCQyVyOvgRPRdtpN3nVyDvb1inPttPwuYQqXQYW31OaK1wIO91zB4HnjjxfKG0dpTHFFD2P1mgqBWpM8mier7-Ab7lQHHlV_9j7rlQCPinzfVMcIEd_1GXpxvveYf2u84TEJaQ-X_Fr9431c1B02d3RRcszusMb3q_VVqnz5Ya26je28UV6JqSdbaoQnKJbANXRUdu0Y9phzVgXdWDbgx2OvFnJsT0vbNDdM-driQcQoMofki7u3bAqVdybqro_iL2zoYO1yNdaaS0444IFVrJb7ZgBLfODjcT7e9jr4eYhfeCgJjHUxb-Mn2nlbLm1DRP70gPsHzcHMWyf6OQHrU0LH5am7-5BZUSDLw72uGoZnaaIPVMM2dh147JuYjkUgK_NR6O77=w717-h955-no


With that complete, we tipped the lower edge to run through the joggle die..


The wiring and inside of the joggle were both degreased, scuffed, and SPI epoxy added prior to folding the remainder..


pFEt_mYqDA-XqrTrmzy7n4ayHgoQNop9N_z5mAwe65jgDj6_1CLtRhGBmjgLlgnODk1dVJgb8wjJq15i5uQglx-kIIDX_zzqMWBM3gwAkyiFoOeOaVV30-pBjIsKL0pNH22j7I3Zx70cH05SrguJE2-JmmC--H2n69ZpyeUK3l3HjAIKo1_KCOSn9gJ76SQFLPGm8Dq6qqeA_vY9mdhPaeS4itqQPTXB5lu3uEs_CQrdGEepV7FbxLXUsZvMOevSdlLBhUUkOM6niRfEEYf1GEo1Wl2OQGVqdkmQaDsxxrxLx67mfEjTvwxfuPTunPhjWsOf9B-gTn5f0kEnkJyGljxHHsO0LmOyFEuQ9qr89p3brueJeU9wQUqi8kEQ7ESqacf59yGLqva0bkTjLh-kn0SgEOQmp73cKS6IbsNebrxpc7YJR94STH6Abau9BX-Y2TPk80o1vpoNe9oibdWWmtn7abpMGQktIjUB_yJA9wkArwMBPAbDnBH49LARrAU2Y5tOglzDOowyCumFheJX86P5axC-WKcM1LM-kuffFIfdsuXokKZNcI8TxLkJa5-au70WhS8jaRkTNHdjP-lVRWDwNDKldW-vTpq0BQJ-gN6CbWvDOfbMnwA4eRO1SXH4XUi6Esw5OxMkAMm4aauyEno2OTsuhvz0=w717-h955-no


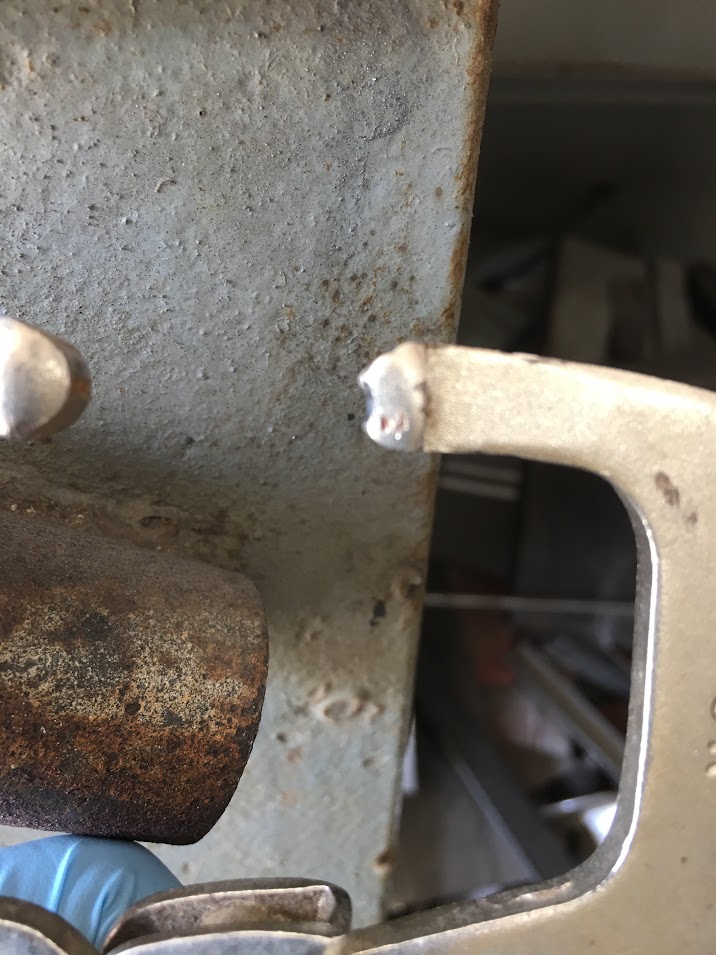
Vise grips modified so they wouldn't slip off the wiring..


9MBTeDOpsWxzuJOVotWLh0aHpV6Pvsb4Lsx04Q69jVeAmUBfWzaO6HDkdr6fYITTdpwKBNIbXGpIPKOtMtwfp5quqO4lJENpjPwKgx8CkOU-SbFTQKiUzTWanUjjHkWfsSK3CBadT-tz0e91_XrArEO_uynEVCVGzB_NfrokoGjDQU5FctwXQWKtTIMfQvwhvNlF3dJVubAyCQsQply5J3cozvxZtSRZHAUjhqI9SRTEDdoI3G31Ojbht08ldy2CQFYHSx-wUwQmP0MAZnNPS9y4f56khTHo5-iWuPuq6uK6M5Er6ws_W6t-XIpWV1HNUERk5B03HsX1f5gBvZSVuOgzShbUtFHqyZh5Fhpt74eUU97QD5obtIxZC0hn7njttK2ymYueHbjJoQmvvOABnEWBtfIql6O9wA2nNf9mGYd2e9uFZBTVCgwGtOND7Rmhs0KNnq8Flb1RhcGELyfO7Qz7JYGFUb5XMzYB-6BXxEItOkzF9PCHTM30dxtCmiotIMD26N-bepmgFjcC77-0XSz5zHAw7UNc96cdv4oa7HOlkI10sopQZmEO9xcZCS87Tjp10El6GO50BqHLbXLr9Fu6EAu09o3zwXLci48pXosUVnR9OcrlVwVHX7bLxhZoJB6ivPGAGkDb6eg5Lnhd6Kmjg3T4PG-4=w717-h955-no


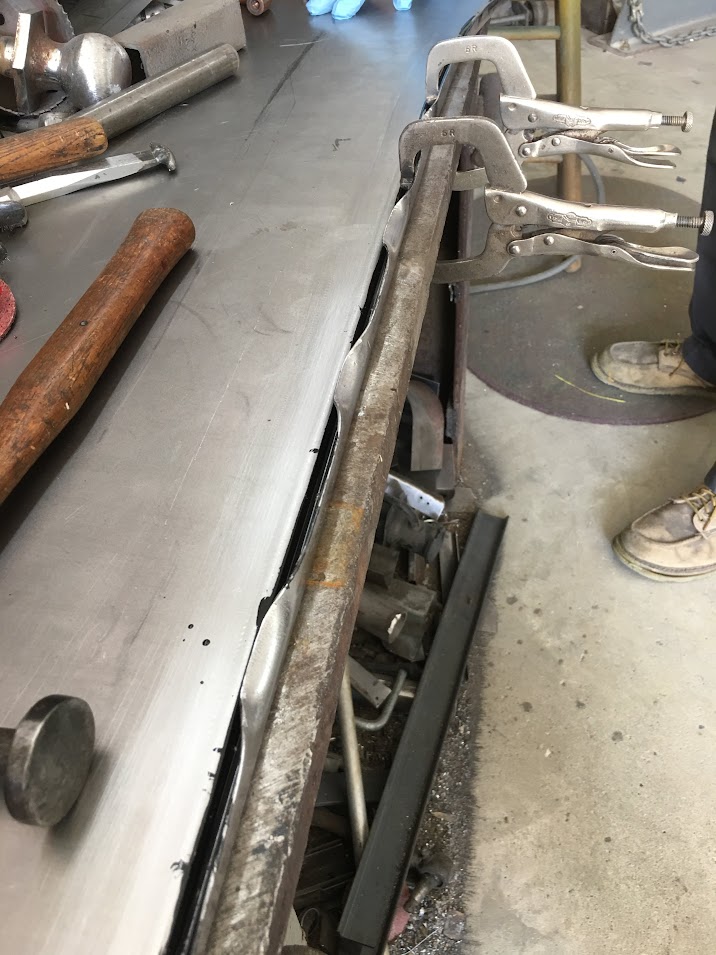
Wiring locked in place with some hammer action...


S9kwaC1UyyfiinW_d4wFHwBppWYyLBmY0QKVhbPj9GFi4SgBcsKa7pm0oOQANOeycCXS18dPj23RnmC6lji6Z5eVxXP30W9I_LAnRX1y7FqE7DqA9GCswxeEAXupYygriq_h2Rczg1CH3QNh9GAoZ_FTlK9H7mzMrfKYx0pLEl6rzXGieISp-nRjCLfcjqpq8yWulZ67hqZyMauzz2z2uiFWPpRyLTN0SX6MbHSzn9O4BUPQVgJYubJLEltQ51mIwvLj0QQj_cOFkhRHcXc8H8qYNXslh6Zl6rXR3rocWl28dw1S1liaBYZYJVXlEsbxTnecH-eBdetSdjwT0tudVZeuH0-ZIAKhLXClxWl6Px44Wskfrn763sEqggQmGrWFUDgPZZzIR7__pjuQ7vKFqjX3HUys4bw8kC_vHPjBgCK5sxMp6FUB-aOns_J5a2VAzwgVtWI3M8qbRtgrIWUU05xVlaGCfowN11N62OyD_h5FUZpkiwQvO2Jde7x2hG3nF2olD_MkjcAoTOXGgeSbdetf9HwFqsX7bT3YKuWCSyIY_IaAGCXvovWuG5jtOY21NdWsDMpUZmaWT0WaNPJd5QslPjp-Letvg7KHrIuHBg4IKMLEzB7bI9v1OtTOUp8c_vOOuMyIRZshcDCb2X9J8oqQhp0mT2gi=w717-h955-no


Video version shows the hammering used to lock the wire in place:


Hood side is tacked to the hinge, mocked to the hood, and trimmed for gaps


To avoid these ads, REGISTER NOW!
Top Bottom