To avoid these ads, REGISTER NOW!

Between 265 & 485 SQ/FT Woody's Works Garage

Workspaces sized between 265 and 485 squarefeet.
OP
D

Denwood

Well-known member
Joined
Sep 22, 2014
Messages
4,224
Location
Thunder Bay, Ontario, Canada
The IKEA cabinets use a rail system that makes mounting them super simple. You just need to get the heights and location etc of the rail correct!! I had to lower the upper rails 1" after realising that the high base cabinets (90" high) that house the wall oven/microwave were sitting too high for the feet to work correctly. You really need to plan for a 36" counter height, and 18" of space from that to the upper cabinets. So from the floor to the bottom of the top rail is 91 3/8" when using 40" upper cabinets. The kitchen floor (remember it's in a 120 year old house!!) varies by an inch in level, so some careful planning with a laser level and notepad was required.

I picked up a 100ft roll of "Ramboard" which is basically a vapour permeable floor protective material. It seems pretty tough and took just a few minutes to roll out and tape with their paper based tape. Hopefully that will keep the new floor pristine as we install the cabinets.

IMG_7121.jpg

It is finally time to assemble cabinets. It only takes about 10 minutes per cabinet with some very nicely designed hardware. Before fastening the back (which keeps the cabinets square) I like to check them with a square and tweak on them a bit with these super handy third hand extendable supports.
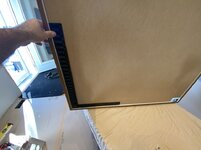
IMG_7132.jpg

I've used these supports a lot (I have two). They extend out via a spring clip quick adjust, then you twist them to extend/retract the feet. Super handy to have in the shop! In this case, it's a simple way to tweak the cabinet square while fastening the back board.
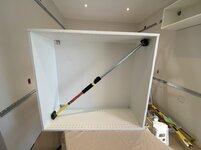
IMG_7131.jpg

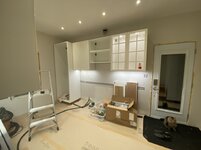
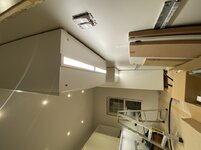
Finally we have a few cabinets hung. I tied two new 20 amp circuits into the house panel (for the counter receptacles and LED lighting) and then installed the AFCI/GFCI receptacles. This in turn allowed getting one bank of LED under counter and cabinet lights fired up. They are managed by two 30w Tradfri LED drivers on the top of the left bank of cabinets. Both LED drivers are attached to SmartThings (they have an integrated Zigbee chip for inclusion to house automation) which brings on the overhead and cabinet lights together when motion is sensed in the kitchen. At night, all the lights come on with motion, but at 10% brightness. There are two more LED drivers to be installed on the right bank of cabinets.

It is going a lot faster on this project as I figured out most of the bits and pieces in the IKEA system with the basement kitchen reno last year.

IMG_7134.jpg
 
Last edited:
To avoid these ads, REGISTER NOW!
OP
D

Denwood

Well-known member
Joined
Sep 22, 2014
Messages
4,224
Location
Thunder Bay, Ontario, Canada
The LED lights for the right bank of cabinets are good to go.

IMG_7143.jpg

Lighting under the left bank. The IKEA STRÖMLINJE LED lights all come with wire for each fixture, however they also include connetion bits to gang them together. The lights are typically 6 watts each, so you gang 5 together and connect just one wire (instead of five) to a TRADFRI 30 watt driver. The cabinet round lights use the same connection. It makes for a very clean installation. The glass cabinet lights can be surface mounted, but I choose to drill a 3" hole and mount them flush. This way the wire is running over the cabinet for nice clean look.

Only two connection wires were required for this bank, and IKEA includes a cover/track system for each light (if you need them) to conceal the wiring.

IMG_7144.jpg

The right bank. There is a 30" gap for the exhaust hood over an induction cooktop to come...

IMG_7145.jpg

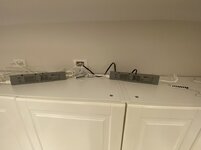
Looking to the top of the cabinets, these are the TRADRI LED drivers (30 watts each) which integrate Zigbee chips to allow controlling via home automation, or IKEA's wireless dimmers and switches. You can see the connection blocks only have a few wires connected as the under counter LED banks are ganged together. I'll clean these up and mount them properly once the cabinet crown etc. is done.

IMG_7146.jpg

I had to order some more IKEA bits to ensure the built in oven/micro combination are correctly supported as the design tool omitted one reinforced shelf (you need two) for the 90" tall cabinet to support the oven and microwave. More on that later.
 

drivesitfar

Well-known member
Joined
Oct 23, 2013
Messages
36,077
Location
Pacific Northwest
You’re a pro at this stuff. Nicely done sir!!

just curious is that steel support for the lower cabinets? Also what product are you using to cover your amazing floors and was floor finish completely dry before you put on this?
 
OP
D

Denwood

Well-known member
Joined
Sep 22, 2014
Messages
4,224
Location
Thunder Bay, Ontario, Canada
Thanks Drives :) It's definitely going faster now that I have some experience with the IKEA stuff. Both upper and lower cabinets hang from those rails, making it very easy to align them. The lowers also use four adjustable feet, but some build bases wooden for them. I prefer to be able to access under the lower cabinets (more for cleaning down the line) and am using IKEA's stainless steel adjustable feet.

capita-leg-stainless-steel__0625785_pe692460_s5.jpg

The standard adjustable feet are plastic, however I much prefer the metal ones. I also find the feet are much better for levelling in an old house vs building bases :) IKEA's toe kick system clips onto the legs, so you can pop them off to clean, or access something that's fallen behind a cabinet etc. It's an excellent system.

I need to do a few filler strips (the rest come later when the cabinet lower valence trim arrives) next, and then sort the oven/micro cabinet and exhaust hood.

The floor covering is basically rolled cardboard from HD. The product is called RAMboard and is vapour permeable..so ok to put over "newer" finishes. My last coat was catalysed so I left it for three days and then rolled out the floor protection to begin work again.

From www.ramboard.com :
Protecting floors during construction and renovation has never been easier. Ram Board is heavy-duty, breathable, temporary floor protection engineered for contractors and was designed with cost and efficiency in mind. It rolls out fast and flat and it’s re-usable! Ram Board’s exclusive Spill Guard technology protects floors against paint, water, mud, and more.

Ram Board protects all types of flooring surfaces: Hardwood floors, tile, concrete, linoleum, VCT, terrazo, marble, laminate floors, and many more.

Avoid damage to your floors during construction and renovation – protect your flooring investment with Ram Board. Let our temporary floor protection help you avoid costly repairs.
 
Last edited:

wasfast

Well-known member
Joined
Apr 10, 2014
Messages
874
Location
San Diego CA
I didn't know IKEA had the metal version. I used the plastic one's for the kitchen and they're on the wimpy side. Good info.
 
OP
D

Denwood

Well-known member
Joined
Sep 22, 2014
Messages
4,224
Location
Thunder Bay, Ontario, Canada
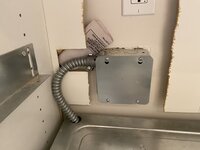
Some weekend progress. The cabinet cover panels and valence trim are all done. The range hood installation required cutting some holes in a set of stacked cabinets, running my wiring down etc. I also had some time to configure the 90" cabinet with the oven and microwave. This tall cabinet configuration has easily been the most complicated part of installation as the web design tool did not correctly spec ( the first time this has happened) all the correct parts. The one video I did find on Youtube makes some errors as well, which I'm sure leads many folks astray. The good news is that my rough in electrical for the stove (240 volt) and the microwave dedicated circuit worked out, with one mod to the stove to bring the armoured cable up behind the stove. IKEA (which is actually Whirlpool on their appliances) designs the stove electrical and housing with the expectation that your junction box will be under the stove, not over it!

When roughing in the electrical (2 months ago!) I had to look at the cabinet order summary (which includes the parts list for each component) and then figure out where the appliance was exactly in the room with respect to position and height. Then I had to look at the manuals for each appliance online to see where the recommended electrical box location would be. I missed the stove spec, although managed to sort this out with a stove mod. The good news is there were zero issues with any electrical, now all 100% live in the kitchen, and all done to code spec.

IMG_7151.jpg

Here are a few notes if anyone comes across this post via google. There is no overall manual, so you have to read them all, then sort out the whole assembly. These notes would save you hours of work :)

How to Install IKEA tall cabinet with oven and microwave , installation notes (2021):

1. 240V electrical rough in for the stove should be at on the left side, under the stove. Assuming a 4 1/2" kick, the bottom of the box should be 6" off the floor and would be at the rear of the bottom drawer. The ideal spot for the microwave receptacle for easy access would be at the back of upper storage area, about 70" off the floor, again assuming a 4 1/2" kick panel.

2. Assemble the cabinet but do not install any shelves. These notes assume you are installing a stove and microwave.

3. You need 2 (not 1) Utrusta Ventilated shelves. One goes under the microwave, the other under the stove. The design tool does not spec the 2nd shelf that you need. These are reinforced shelves that can support 331 lbs each. Here are the links to the Utrusta Ventilated Shelves x 2. You can install the upper (2nd) shelf steel rails, but then remove the upper shelf (leaving the rails in place) to make the oven install easier.

4. Follow the Utrusta installation manual to set your shelf heights for the ventilated shelves which in turn will correctly locate the two reinforced shelves for your setup. The manual covers pretty much any variation on your configuration and specs the height for each shelves. Shelve heights are specified to a 16th of an inch, and you'll need to be accurate here.

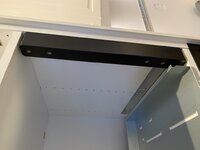
5. Now install the 2 x 60484453 NYTTIG fillerpiece for walloven/micro which attach to the ventilated shelves and fill the gaps above and below the oven. These are just black metal filler strips about 3 inches high. The NYTTIG manual shows you where to install these on the ventilated shelves for your configuration. Follow it exactly.

Cut out the tall cabinet backing board (right to the edges) where the stove will slide in...you'll need that space.

6. Remove the oven door (follow the manual for the stove here!!!) I had a hinge snap back leaving one side of the oven door attached and another drooped, nearly wrecking the door. Slide in the oven, then attach with two screws as per the stove manual. Wire it up, test and then attach the door. This video works for stove door removal:

The hinges are under a lot spring pressure, so make sure you pay close attention to the video link above. Leave the two screws that hold the oven in place until after the microwave (UTRUSTA ventilated shelf) above it is installed so you can slide the filler piece (NYTTIG black metal strip) in place. Now fasten the two stove screws.

7. The microwave trim kit has instructions that you will now follow to install the microwave (10466003 - HUVUDSAKLIG for built-in microwave, Stainless steel) It is not a cheap component at $380 but you need it to located and trim out the microwave.

8. Now you can install your upper doors and shelf that came with the tall cabinet. That shelve will sit just above the microwave. No filler strips should be required, although the design tool will confuse you by specifying one.
 
Last edited:
OP
D

Denwood

Well-known member
Joined
Sep 22, 2014
Messages
4,224
Location
Thunder Bay, Ontario, Canada
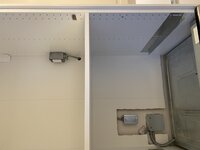
A few more pics to flesh out the setup. It's a lot easier to wire the oven with the 240V box up top, but I did have to remove the oven rear access panel (6 screws) and drill a few holes in the oven rear shell to reroute it. This is a non issue really as the area in the back of the oven is ventilated and houses wiring already...the metal in that area is just there to keep clearance from any combustibles.

The oven cable is 1" BX, so you'll need a big clamp and correct cable gland (the red insulator inserted in the end of the BX). I added some cable insulation and tape for good measure in combination with the plastic cable gland insulator.

IMG_7152.jpg

All buttoned up :)

IMG_7154.jpg

You can see where the microwave plug was roughed in. Because it is behind the microwave, a ground fault reset would a very big hassle, so I moved the plug to the cabinet area above the microwave.

IMG_7156.jpg

IKEA includes these wooden bits in the build kit which are quite a mystery until you actually assemble things. They provide materal for the microwave frame screws to anchor in.

10484455 - NYTTIG support bracket for micro trim kit:

IMG_7158.jpg

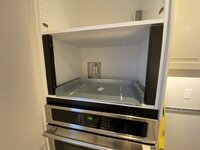
Now the base of the microwave trim kit is in place and you're ready to slide in the microwave.

IMG_7157.jpg

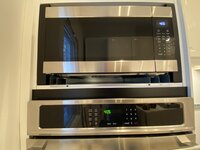
The trim kit attaches with screws at the four corners and you're done :)

IMG_7159.jpg
 

drivesitfar

Well-known member
Joined
Oct 23, 2013
Messages
36,077
Location
Pacific Northwest
Woody: your last post was worth much more than a LIKE so wanted to give you a few more KUDOS. are you trying to finish this by Christmas or was it Jan. 1st, 2022 your original goal. in any case it's coming along nicely and hard to believe that's an IKEA cabinets kitchen cause it's looking AMAZING.

also wanted to wish you and your family a very Merry Christmas and here's to a great 2022 and maybe Covid won't be part of our language ever again.

also hoping you don't have any more bear episodes at the lake or camping (hee hee).

cheers
 

DJL1967

Well-known member
Joined
Dec 13, 2016
Messages
97
Location
Northern Ontario
Great job as usual. I love reading your posts as they are very informative and well written. Your mention of Winston Hall brought back a lot of memories as my father and I went there during demolition about 25 years ago and picked up lots of quality items for cheap. Thanks for posting that as it brought back good memories of my father who is no longer with us.
 
OP
D

Denwood

Well-known member
Joined
Sep 22, 2014
Messages
4,224
Location
Thunder Bay, Ontario, Canada
Drives, strangely the family has gotten used to the "temporary kitchen" on the main floor, so I'm just working through the tasks without too much concern for deadlines. That said, I figure we'll be done around the 1st as I have a few days off to work on things.

Merry Christmas to you and your crew as well :)

DJ, we may have crossed paths at Winston Hall as I picked up the floor bits during demolition as well. My dad was there with me as we loaded up many trailer loads of the maple flooring...about 1500 square feet of it to be exact. I'm glad the post brought you some good memories.

Now, on to the project!

My wife is still deciding on quartz (although I believe we're down to the winner), so for now, I'm just putting in some inexpensive IKEA laminate counters that will be there for the 4-5 month lead time for quartz. The nice thing about a full gut, is the counter (98" right out of the box) just fired right up there with no need for wall scribing, or even touching the ends. The sister-stud walls are about as perfect as you'll find in a house. I laid out the induction cook top cut pretty carefully with no drama :)

IMG_7163.jpgIMG_7164.jpg

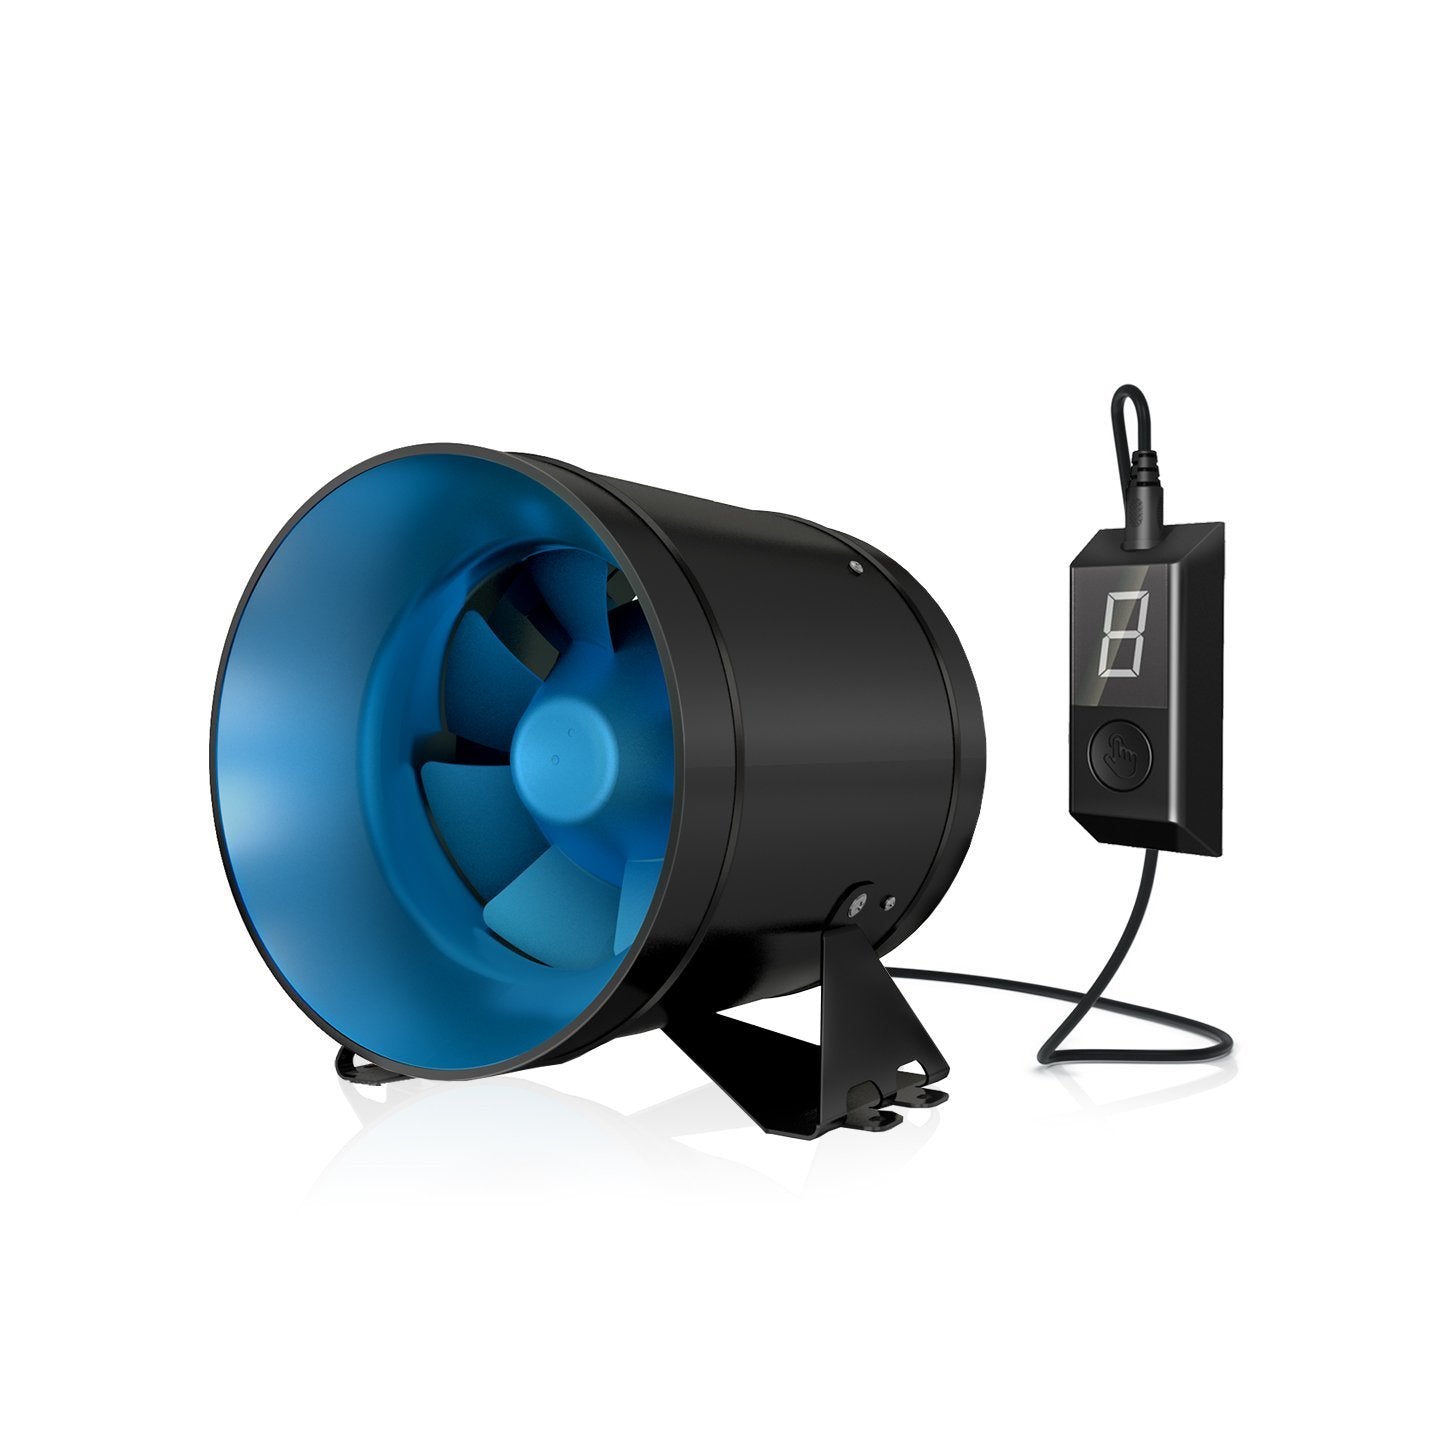
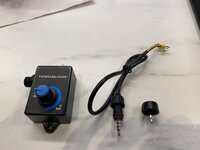
Another little piece showed up today to boost (or replace) the exhaust hood fan..namely a brush-less inline fan and speed controller. More on that "hack" later. The 6" fan moves a ton of air (288 CFM) and only uses 36 watts at full power. It has a metal outer shell with a 140 degree rated motor...so is to code for a kitchen fan. It came with two controllers, one variable, one digital. I'm either going to wire it as a booster, or pull the OEM hood fan altogether and just use this one, powered by the hood switch. The typical hood fan does not do well with any static pressure. I have a high efficiency 4" foam/ball insulated vent hood at the exterior, with about about 12 feet of 5" duct. So the stock exhaust hood does move air for sure, but not as much as it should when cooking. This inline fan should be quieter, and move a lot more air.

The IKEA stainless hood fan uses 240 watts and is rated at 188 CFM
The brushless fan uses 36 watts on high speed, and is rated at 288 CFM.

Neither will move anything close to that of course in real world installations, but my bet is the ducted fan will do far better in a resistive duct setup like mine. The difference in power use for the EC motor is quite impressive.


-speed-controller-ecmf-150-288-cfm-36w-690230_600x.jpg
 
Last edited:
OP
D

Denwood

Well-known member
Joined
Sep 22, 2014
Messages
4,224
Location
Thunder Bay, Ontario, Canada
One of my goals for this new kitchen install was to figure out a more effective exhaust. The typical hood exhaust fan does not do well with resistance (static pressure) and the new fan was not moving a lot of air by the time it got to my high efficiency 4" exhaust port. There is a foam ball in that hood that falls back to insulate the opening (we see -35C in winter) so you can visualise air flow by seeing how high the foam ball is riding in the hood. With the stock IKEA GENOMDRIVA exhaust hood fan on high speed, it was just barely lifting the foam ball. Now my ducting is not ideal, where the 6" pipe from the hood reduces to 5" in the attic, and then 4" right at the hood. There are 2 elbows and about 12 feet of duct length. With a short run and 6" ducting all the way, the stock hood would certainly exhaust more efficiently...but alas, that is not my setup.

The fan "hack" worked out very well indeed. I tried a few variations leaving the OEM fan in place, and then decided to remove it entirely as it didn't really increase flow a lot, but it did make a lot more noise at the high speed setting. The IKEA GENOMDRIVA stock exhaust hood is rated as follows:


160 CFM (likely with zero static pressure, so no resistance)
Motor power: 240W. ( I believe this is incorrect as the fan is clearly labelled 38 watts and doesn't move a lot of air)
5.1 Sones (about 52db on low speed, high speed likely ~65db)

The Terrabloom 6" inline fan is a very nice unit for $100. Importantly, it has a metal case and temperature rated motor which makes it suitable for a kitchen exhaust where most code dictates metal ducting within the house envelope.


This is from their site, but if you visit, they also have videos showing the noise measurements for each unit.
  • MEET OUR NEW 2021 MODEL: Now featuring an 8-speed digital controller with numeric display. Added support for 110-220V power supply and switchable IEC socket power cord.
  • INDEPENDENTLY TESTED SPECS: Independently lab-tested performance verified by the Home Ventilating Institute (HVI) and Energy-Star Most Efficient certification. See product documentation tab for more details.
  • ENERGY SAVINGS: Built with a cutting edge brushless EC motor and dual jet type impeller, our new 6" ECMF series fans deliver 288 Cubic Feet per Minute (CFM) of Airflow using only 36 Watts.
  • QUIET & FULLY ADJUSTABLE: Choose from 2 included speed controllers. Analog granular type or digital with 8-speed presets and numeric screen. Adjust the motor speed from 0%-100% without creating any additional hum or background noise. Wireless and programmable thermostat speed controller add-ons available.
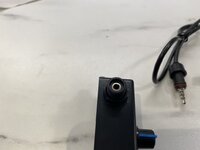
  • PWM, 0-10V CONTROLLER SUPPORT: Our EC fans support external speed controllers with popular PWM and 0-10V signal types. The fan can be connected to an external controller using a 3.5mm TRRS wire supplied with the fan.
  • COLD ROLLED STEEL HOUSING: Resists accidental damage, harsh elements and reduces maintenance in demanding applications such as ventilation of grow tents, gardens, farms, crawl spaces, attics, etc.
  • COMPACT: Only 7.25" (L) x 4.9" (W) x 6.95" (H). Ideal in applications with minimal clearance available. Mounting bracket, screws, and anchors included.
  • ETL LISTED WITH A 2 YR WARRANTY: ECMF series fans are ETL listed and Conform to UL standard 507, Certified to CSA Standard C22.2 No 113. Covered by a 2-year warranty.
-speed-controller-ecmf-150-288-cfm-36w-690230_600x.jpg

I was impressed that the fan included two speed controllers and a DIY harness as well with instructions for wiring if you want to go that way. This means you could connect it a Zwave dimmer with 0-10V (they are out there) outputs to fully control this fan. That opens up a lot of uses for these fans in my book for automated heating/cooling etc.

The fan is solidly built with a powder coated metal case, and the digital, rotary and DIY speed control bits are all included. A 120V power cord was included but I removed the plug and stripped back the ground/neutral/hot wires to connect the inline fan directly to the IKEA fan switch.

The power connection to these hoods are typically direct wired, so you'll likely have the AC power just running directly in. The connections are all behind a metal access plate accessed from under the hood.

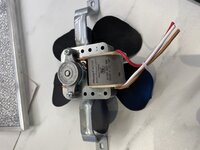
Cutting power at the breaker, I removed the two bolts holding the 2 speed OEM fan in place and cut the three wires going to it to completely remove the OEM fan.

IMG_7174.jpg

IMG_7175.jpg

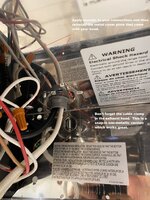
This is a pic looking underneath the range hood. Basically the range hood switch now powers up the inline fan the same whether you use the low or high speed settings on the range hood switch. Note that I wanted the OEM hood fan switch to just power up the Terrabloom inline fan to keep it simple for the family to use so wired it up as follows.

IMG_7167.jpgIMG_7168.jpg

IMG_7170.jpg

IMG_7177.jpg

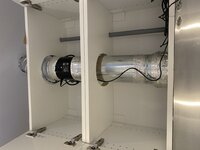
This is the fan in place. If you were willing to build a duct muffler and install this in your attic space, you could likely reduce noise even further. Terrabloom also sells these fans in a silenced version which is likely well worth a look!

IMG_7171.jpg
This is the rotary speed controller for the ECM inline fan motor and DIY harness that is also included. The controllers all plug with an 1/8" plug that has a 0-ringed connector and cap. This is a nice touch for humid environments.

Speed on the fan is controlled by one of three controllers, all included in the box.

IMG_7178.jpgIMG_7179.jpg

This digital controller could be mounted beside the hood to just ramp things up if required, however I found that 5 or 6 (of 8 speeds) on the digital controller is the best balance of flow vs sound. The ECM inline fan retains the last setting when powered off, so I'll likely just set the controller on 5 or 6 and leave it in the cabinet to keep it simple for the family.

IMG_7180.jpg

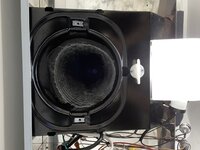
This little mod makes a significant sound difference. I have made duct mufflers before for my home theatre setup so I had some acoustic duct lining (lined fibreglass, non-flammable) and galvanised screen on hand. I lined the now empty range hood box (where the OEM fan used to be) with this duct liner and placed the screen there to hold it in place. This is the view looking up underneath the range hood. The grease filter covers this opening up in normal operation. Moving the inline fan to your attic with a proper 2-3 foot long duct muffler preceding it would make a huge difference in sound, likely less than 50 db at the hood, but I am happy with 60 db as all the bits are accessible from inside the room for servicing etc. The attic space over the new kitchen is spray foamed and then filled with R80 of blown in fibreglass so is not super convenient to access.

In any case, this mini muffler setup makes a very noticeable difference in sound at the cook top.
IMG_7173.jpg

It's hard to see the foam ball floating in the external vent housing, but with the ECM inline fan at speed setting 5 on the digital controller (8 is max speed) the ball is "pinned" at the max height in the housing, and you can feel the jet of air standing below the duct which is about 10 feet off the ground. The range hood at high speed with the OEM hood fan just barely lifted the ball.

IMG_7183.jpg

Once the upper area and cabinet duct are boxed in / sound insulated, I suspect the system will quiet further.

IMG_7185.jpg

I measured the sound output of the setup about 3 feet away at 61 db (set at speed 6 on the digital controller). This is definitely quieter than the stock fan at high speed and is moving easily 2-3 times the air. I ran a quick smoke test under the hood and 100% was captured using speed 6 (of 8) on the controller. The inline fan is much better at overcoming the static restrictions in the ducting and is therefore moving a lot more air than the stock fan. Having the exhaust fan inline also eliminates the blow back turbulence around the edges of the OEM hood fan where air is actually moving in the wrong direction. With the inline fan setup there is only suction at the grease filter so it absolutely does a better job of extraction.
 
Last edited:

drivesitfar

Well-known member
Joined
Oct 23, 2013
Messages
36,077
Location
Pacific Northwest
You are thorough I’ll give you that. Nice thinking with the fan making it quieter. Also since you’re granite top is delayed most would not make a temp top to make kitchen functional but congrats on you for doing so.

keep up the great work and stay warm.
 
OP
D

Denwood

Well-known member
Joined
Sep 22, 2014
Messages
4,224
Location
Thunder Bay, Ontario, Canada
Drives, the kitchen "temp" laminate counter is likely the easiest component to install as you just have to cut a hole in it :) It's only $85 for an eight foot piece so makes for a good solution where long lead times would be expected. The upside is that the quartz/granite installers will only measure the counter with the cabinets in place, so essentially I have created a template for them.
 
OP
D

Denwood

Well-known member
Joined
Sep 22, 2014
Messages
4,224
Location
Thunder Bay, Ontario, Canada
I made some decent progress over the holidays so the old appliances were sold off as a package and the old cabinets donated to a chap doing a garage setup for his business. After three months living with a main floor in chaos the family (including two cats) are quite happy to have some space back and more importantly a working kitchen. I have a new appreciation for the kitchen in a home not just as an essential work area, but also as a family convergence point for quite a lot of time. Not only has our main floor been de-congested (hard to describe how nice that is) by removing the old cabinets and appliances serving as a temp kitchen, but we've also gotten back the use of our high efficiency fireplace. That is pretty nice as temps outside dip into the -25C range...

The IKEA Spolad dishwasher is surprisingly roomy inside, (21" square tray) and is set up to accept door panels for a truly built in look. We've been using a portable dishwasher in the old kitchen (for 20 years or so, ack) so again, one doesn't appreciate how nice it is to have a built in right beside the sink instead of rolling over a portable. It was not a big deal to connect and plumb in either, despite HD being completely out of 1 1/2" ABS and 1/2" copper...I had material on hand in the shop thank goodness.

dishwasher_cover.jpg

The induction cook top is pretty amazing. I did a boil test on a medium pot of water, half full. It was boiling water in 45 seconds...crazy.

img_right_kitchen.jpg

The dishwasher is hiding out to the right of the sink.

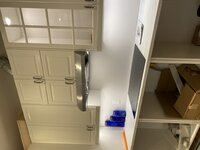
I did make one rookie design mistake that is already addressed...just waiting for the material to arrive so I can modify the setup a bit. Can you spot the mistake?

left_side_kitchen.jpg

There is refinished floor hiding under that Ram Board covering which has proved quite durable. I'll remove it once the cabinet crown, window and door trim are done. There's also a fridge cabinet in progress, again waiting on some new cabinet bits after a design change.
 
Last edited:
OP
D

Denwood

Well-known member
Joined
Sep 22, 2014
Messages
4,224
Location
Thunder Bay, Ontario, Canada
Chris, we should be good there...the drawer faces are 2 inches off the wall. The issue is over the sink. Most folks have a window over their sink...so top cab clearance is not an issue. The cabinets over the sink should have been 30", not 40" tall. I'll post a pic of the "fix" once complete.
 

Bob Heine

ALLIANCE MEMBER
Joined
Oct 24, 2009
Messages
10,709
Location
Boca Raton, Florida
Dennis, that makes perfect sense. Our kitchen sink has a window over it so I hung an island light fixture with utensil/pot hanger to fill the void.
Lighting 4 800.jpg
When I installed the upper cabinets in the garage first, I chose a kind of standard 54-inch off the floor position. Then I set the base cabinets and ended up with a 37-inch counter height. Completely forgot the sink cabinet counter was 41-inches so I really limited the style faucet I could use. There's about a half-inch clearance!
Garage Sink Replacement 22 - 2021.jpg
 
OP
D

Denwood

Well-known member
Joined
Sep 22, 2014
Messages
4,224
Location
Thunder Bay, Ontario, Canada
Bob, with the common setup being a window over the sink, like yours, the whole clearance thing isn't an issue....until it is. I'm just glad that we can fix it with a quick cabinet swap!

Your kitchen looks like a pretty warm and friendly place to hang out :)

Another step forward today was actually being able to fit the EV back into the garage. With low temps at -25C (-13F) the EV batteries keep a lot warmer in the garage than outside, even with the shop heat off. I can also charge 16A@220V in the shop vs 12A@120V in our driveway...which makes a big difference not only in charge times, but also preconditioning the car. The car power management will only use the max available via AC power to heat the car, so at -25C and plugged into 120V (at only 12 amps) there is not a lot of power there to preheat the cabin if outside temps are very low.

The garage has been jammed with kitchen stuff since September so it was a welcome milestone to get my workspace back.
 
Last edited:
To avoid these ads, REGISTER NOW!

Skinny_Blinky

Well-known member
Joined
Sep 23, 2007
Messages
53
Back in the day (early 60s) I can remember my Grandma saying to always have a window over the kitchen sink for daydreaming while doing dishes.
 

markushofer27

Well-known member
Joined
Feb 4, 2012
Messages
114
Say not hijack this thread Denwood, I thought I read on here a while back about u installing a ceiling air exchanger in ur house to lower c02 levels.
Do u still run that unit? Can u run it below freezing? I'm looking at the panasonic one.
 
OP
D

Denwood

Well-known member
Joined
Sep 22, 2014
Messages
4,224
Location
Thunder Bay, Ontario, Canada
Skinny, I had a version of the remodel with the sink swapped to the outside wall and a window added…the boss was not into it. I should have insisted as during a complete gut it is really not any more work. That said, we do have a full 36” wide of storage over the sink which will get used for sure in this small space.

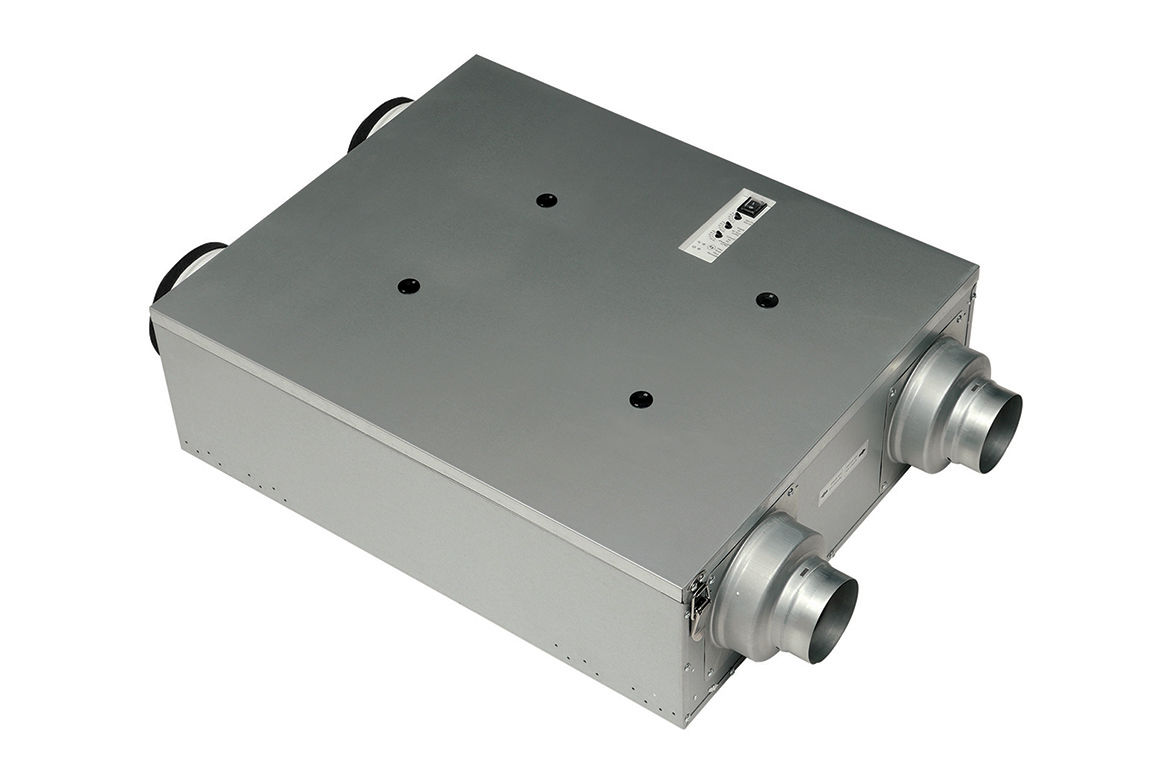
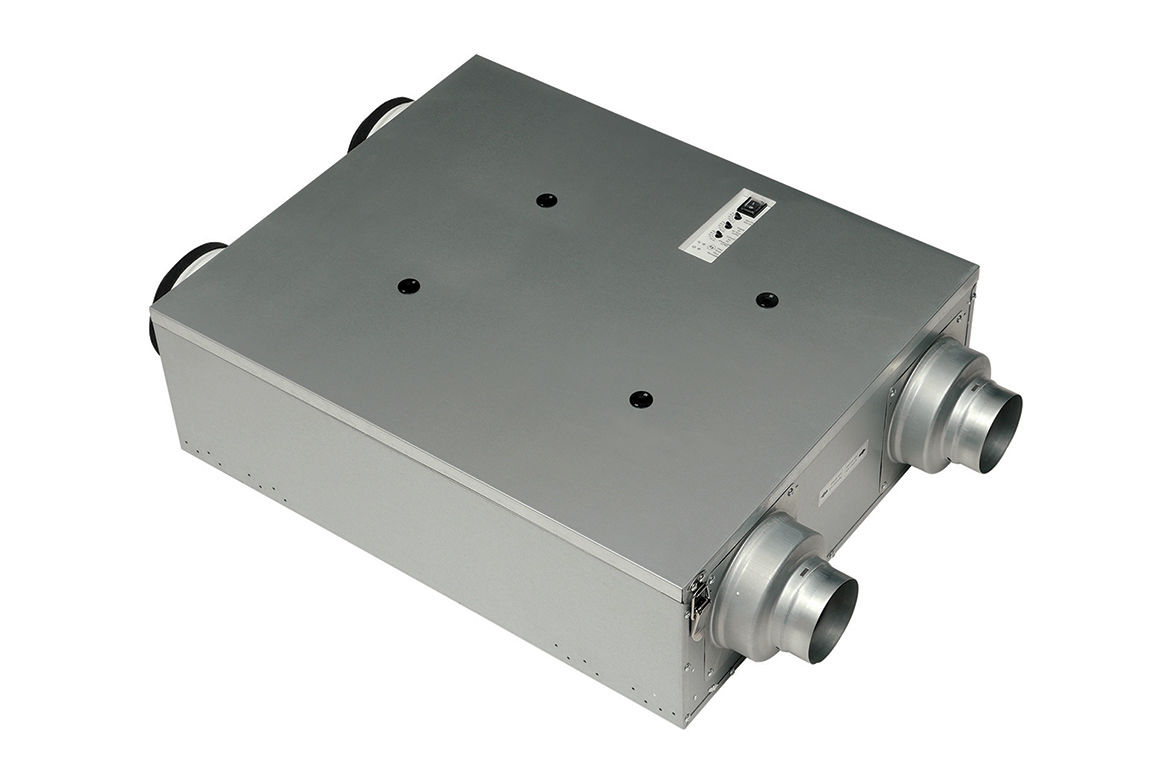
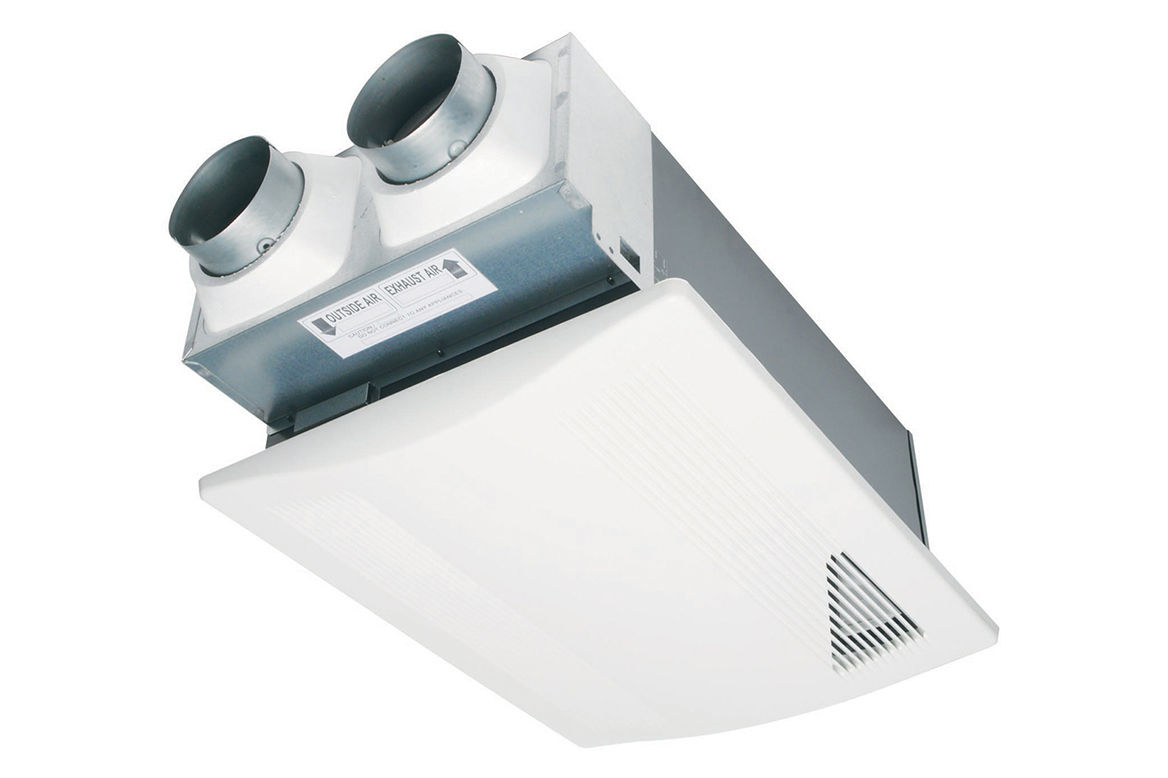
Marcus, yes, we have the Panasonic unit which runs 24/7. As it gets cold it cycles into exhaust only mode for a percentage of time each hour. It is not as efficient as a whole house unit, however that is not an option for us given the current HVAC setup and even larger units aren’t doing much exchanging at -25C. The little Panasonic does 40CFM. It’s mounted in the ceiling over the stairs heading to our basement. Zero issues now into year 4-5. I have it automated, but have found it best to just keep it running. At very cold temps and high winds, even our hyper efficient commercial space did not need any added air exchange based on a few weeks of CO monitoring. This is the unit: https://na.panasonic.com/ca/home-bu...rv-balanced-air-solution-4020-cfm-or-2010-cfm

Manual is here..you’ll see a section on cold weather operation on page four: https://www.berriman-usa.com/pdf_brochures/op_manuals/panasonic_erv_fv-04ve1_op_manual.pdf

Doing a new house I would certainly do a ground brine loop and use this to preheat HRV air in the extreme cold..that is the only way I’ve seen to actually ensure a very high exchange rate in the -20s while avoiding using aux heat on the inbound air stream.
 
Last edited:

markushofer27

Well-known member
Joined
Feb 4, 2012
Messages
114
Skinny, I had a version of the remodel with the sink swapped to the outside wall and a window added…the boss was not into it. I should have insisted as during a complete gut it is really not any more work. That said, we do have a full 36” wide of storage over the sink which will get used for sure in this small space.

Marcus, yes, we have the Panasonic unit which runs 24/7. As it gets cold it cycles into exhaust only mode for a percentage of time each hour. It is not as efficient as a whole house unit, however that is not an option for us given the current HVAC setup and even larger units aren’t doing much exchanging at -25C. The little Panasonic does 40CFM. It’s mounted in the ceiling over the stairs heading to our basement. Zero issues now into year 4-5. I have it automated, but have found it best to just keep it running. At very cold temps and high winds, even our hyper efficient commercial space did not need any added air exchange based on a few weeks of CO monitoring. This is the unit: https://na.panasonic.com/ca/home-bu...rv-balanced-air-solution-4020-cfm-or-2010-cfm

Manual is here..you’ll see a section on cold weather operation: https://www.berriman-usa.com/pdf_brochures/op_manuals/panasonic_erv_fv-04ve1_op_manual.pdf

Doing a new house I would certainly do a ground brine loop and use this to preheat HRV air in the extreme cold..that is the only way I’ve seen to actually ensure a very high exchange rate in the -20s while avoiding using aux heat on the inbound air stream.
Thanks Den,I have 1800sq ft between 2 floors, with a air handler in the main floor in a closet with no extra room for anything.
I'm in SD by the way so our climates ate similar.
 
OP
D

Denwood

Well-known member
Joined
Sep 22, 2014
Messages
4,224
Location
Thunder Bay, Ontario, Canada
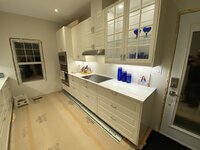
It took about 3 hours to remove the 40" cabinet, install the 30" and add filler panels to the sides. I also had to redo the LED lighting wiring a bit, and recut the valence trim. Adding the two filler panels also meant I had to move the cabinets over an inch and recut the wall filler. Having the cabinets hung from a steel mounting rail makes the moving part very simple :) In any case, the issue is resolved...

Before:

left_side_kitchen.jpg

after:

IMG_7220.jpg
 

drivesitfar

Well-known member
Joined
Oct 23, 2013
Messages
36,077
Location
Pacific Northwest
Wow that was a quick cabinet change. looks a lot better and even though you lose some shelf space your heads will be happier. AND i like how it's lit up a bit better too.

as far as the cabinet top goes the TEMP ONES look great so is it a certainty that they have to go and be replaced?

once you take the flooring cover off and a few pieces of trim added i bet your bride (and you) will be smiling big time. WELL DONE!!
 

tjpavlov

Well-known member
Joined
May 18, 2012
Messages
1,280
Location
Providence, RI
Marcus, yes, we have the Panasonic unit which runs 24/7. As it gets cold it cycles into exhaust only mode for a percentage of time each hour. It is not as efficient as a whole house unit, however that is not an option for us given the current HVAC setup and even larger units aren’t doing much exchanging at -25C. The little Panasonic does 40CFM. It’s mounted in the ceiling over the stairs heading to our basement. Zero issues now into year 4-5. I have it automated, but have found it best to just keep it running. At very cold temps and high winds, even our hyper efficient commercial space did not need any added air exchange based on a few weeks of CO monitoring. This is the unit: https://na.panasonic.com/ca/home-bu...rv-balanced-air-solution-4020-cfm-or-2010-cfm

Manual is here..you’ll see a section on cold weather operation on page four: https://www.berriman-usa.com/pdf_brochures/op_manuals/panasonic_erv_fv-04ve1_op_manual.pdf

Doing a new house I would certainly do a ground brine loop and use this to preheat HRV air in the extreme cold..that is the only way I’ve seen to actually ensure a very high exchange rate in the -20s while avoiding using aux heat on the inbound air stream.
I'd just like to add that after seeing Dennis' original post on this spot ERV I put the same Panasonic model in my basement renovation. At the time, our local utility was offering a $500 rebate on any ERVs, so it worked out to being free. We've been running it for about three years and keep it running pretty much 24/7. I do turn it off in January and February since it just exhausts in that mode. I ran insulated flex duct to the concentric vent that Panasonic sells. I may just add another ERV upstairs on our second floor at some point.

I still love our unit, but it does seem to make a bit more ambient noise then it did when it was brand new. If I could do it all over again, I would put some Rockwool in the joist cavity above and around it. You can actually hear a little hum in our first floor hallway, directly above where the unit is.

It's worth noting that since Dennis and I did our installations, Panasonic has come out with a bigger unit. I think that it costs close to $1,000, but it allows you to run pipes anywhere you want it. I like the idea of pulling air 24/7 from a bathroom and putting the fresh air into a hallway. I think Matt Risinger had videos on both units on his Youtube channel. Panasonic also makes recessed can lights that with hidden vents above the lamp.
 
OP
D

Denwood

Well-known member
Joined
Sep 22, 2014
Messages
4,224
Location
Thunder Bay, Ontario, Canada
Drives, it is a bit brighter now with LED cab lights higher up. There is so much light from the cabinet lights overall that I've found the girls manually turning off the ceiling lights. I replaced the exhaust hood light with a HUE 60 watt equiv LED, so that too is automated on motion in the kitchen. I figure if you were to add some up lights (top of cabinets) one could do away with the overhead lights entirely. It certainly says something for lighting design where task areas are well lit.

TJ, yes Panasonic has the FV-10VEC2 which is a much larger unit but is a dual motor (ECM) unit that can be setup standalone. It is about twice the price, but advertises "all climate zone" compatibility and can do up to 100 CFM. It has separate CFM controls for both intake and exhaust so you can negatively or positively pressurize the home..and doesn’t hit defrost mode until -30C…it is very impressive.

 
Last edited:

markushofer27

Well-known member
Joined
Feb 4, 2012
Messages
114
Thanks folks for the responds, I thought long enough,I think I found a way to vent the unit out the side wall instead of running it 40' to either gable end.
 
OP
D

Denwood

Well-known member
Joined
Sep 22, 2014
Messages
4,224
Location
Thunder Bay, Ontario, Canada
Great
I'd just like to add that after seeing Dennis' original post on this spot ERV I put the same Panasonic model in my basement renovation. At the time, our local utility was offering a $500 rebate on any ERVs, so it worked out to being free. We've been running it for about three years and keep it running pretty much 24/7. I do turn it off in January and February since it just exhausts in that mode. I ran insulated flex duct to the concentric vent that Panasonic sells. I may just add another ERV upstairs on our second floor at some point.

I still love our unit, but it does seem to make a bit more ambient noise then it did when it was brand new. If I could do it all over again, I would put some Rockwool in the joist cavity above and around it. You can actually hear a little hum in our first floor hallway, directly above where the unit is.

It's worth noting that since Dennis and I did our installations, Panasonic has come out with a bigger unit. I think that it costs close to $1,000, but it allows you to run pipes anywhere you want it. I like the idea of pulling air 24/7 from a bathroom and putting the fresh air into a hallway. I think Matt Risinger had videos on both units on his Youtube channel. Panasonic also makes recessed can lights that with hidden vents above the lamp.

:)

TJ, you got me thinking about the duty cycle of the FV-04VE1 "spot" ERV ventilator in cold weather. If you look at the manual it's not 100% clear what happens below -7 C. The literature states that the unit opens the OA (outside air) damper to check temperature for 10 minutes every hour, then goes into low speed (20CFM) exhaust mode, but it looks like there is no fresh air exchange if you look at the diagram in the manual. I threw a SmartThings sensor in the exhaust (where fresh air enters the room after going through the ERV) as it occurred to me that with only 1 motorised damper on the outside air intake, and a single fan, that the unit must be exchanging air during this test. Indeed it is. So at temps below -7C, you are getting 10 minutes of fresh air per hour. That is actually not terrible if compared with a full size ERV/HRV which will spend much of that hour in recirc mode to defrost.

The temp out side right now is -27 C (-16 F). At 9:55 pm the SmartThings temp sensor on the ERV started dropping from 64 F (meaning the OA damper must have opened), dropped further to 48 F at 10:00 pm, and reached a low of 35 F at 10:06 pm. Then the temp started to climb, meaning the OA damper was closed. Clearly the unit still exchanges air for 10 minute each hour, but it is pretty cold air after 5 minutes! That said, the unit at its worst was still increasing outside air temps by 61 F, which is surprising for such a small ERV core. This test was run at the low speed setting, 20 CFM. I'll try it again at 40 CFM.

I mentioned before that even a tight building is likely doing enough air exchange (with no HRV/ERV running) at very cold temps due to both wind and stack effect on the structure. This is based on a logging over several weeks using a CO2 sensor and laptop, both in our older retrofitted home, and also on our hyper efficient commercial property (now sold). I'm finding now with this extreme cold/wind that the upper floor of our home CO2 level ranges from 700 ppm to a high of 1000 ppm CO2 (morning, with four adults and 2 cats upstairs) with no ERV running, and about 550 ppm to 850 ppm with the small ERV (which is on the main floor) at it's cold weather duty cycle.
 
Last edited:

Klokwerk

Well-known member
Joined
Jan 1, 2010
Messages
205
Location
Spokane, WA.
The new space it really looking good. Damn impressed with the flooring!
I might have to try some of those Tradfri lights. They make LED panels too.
The Sengleds that I have have not been the most reliable.
 
OP
D

Denwood

Well-known member
Joined
Sep 22, 2014
Messages
4,224
Location
Thunder Bay, Ontario, Canada
Klok, the Tradfri GU10 lights (Zigbee enabled) have been as reliable as our HUE lights over the last 2 years, with about 20 of them in service now. The Tradfri drivers (2 of them powering basement bar/study area) have required 1 or 2 resets to rejoin the SmartThings hub over the last 2 years. I have four of these drivers in the new kitchen, but so far zero issues. I picked up a few of their wireless button dimmers, a bargain in the automation world at $8. These can be added to the SmartThings hub and are quite versatile as a single button press can trigger a routine.

EDIT:
Don't bother trying these with SmartThings (as of Jan 2022 anyway)...they kill batteries after 1-2 days. Not on issue if you're using an IKEA hub, but with every other manufacturer apparently battery death in 1-2 days is an unresolved issue.


tradfri-wireless-dimmer-white__0722076_pe733483_s5.jpg

With no hub in the house, you can just pair your lights to this little remote..it's their solution for on/off/dimming control of the Tradfri lights. If you chose to add this button to SmartThings there are two actions per button...pressed once, or held. I've set it up so a top button single press turns on all lights at 100% in the kitchen. Pressing the bottom button turns off the 10 overhead lights, and dims all the cabinet lights 90%...for night time ambience. Like HUE, the switch is held magnetically to the base, so can be easily removed to swap batteries. They are saying 2 yrs on the cells. Because the button works in SmartThings, you can use it anywhere in your house...for example open/close your garage door if you want.

From IKEA:

You can add up to 10 light sources and mix LED bulbs, LED light panels, or LED light doors so that they all switch on, off or are dimmed at the same time.

Works with IKEA Home smart.

With TRÅDFRI wireless dimmer you can dim your lighting without a hardwired installation.

The dimmer has a maximum range of 33 ft when not blocked by walls.

A magnet makes it easy to mount the dimmer to the wall bracket or other metal surfaces.

Battery is included, and last approx. 2 years.
 
Last edited:
OP
D

Denwood

Well-known member
Joined
Sep 22, 2014
Messages
4,224
Location
Thunder Bay, Ontario, Canada
Speaking of automation, I've updated my garage door system (call it 2.0) so that is now rock solid reliable, and the wireless sensors have not required a lithium battery replacement in over a year. The extreme cold weather typically kills the lithium cells in a few months. The system lets us know if the garage door (or man door) has been left open, and will shut the garage door automatically if no motion is detected in the garage for X (currently set for 10) minutes. Having a door sensor offline pretty much breaks the system as it can't detect a door open or closed...solar power charging fixes that. These bits can take a "dumb" garage with older infrastructure and make it quite smart :)

The 2.0 garage door automation system tweaks are basically these:


1. Add solar charging to wireless door sensors (my DIY guide is here: https://community.smartthings.com/t/solar-powered-smarthings-sensors-success/217329 )

8eb8d8de18e7ee28727a287cf1781cdcabb3ef06.jpg

2. The Zooz Zen16 multirelay is super cool, and can be used for more than just a garage door. I'll likely throw my "dumb" furnace thermostat on one of the relays to automate the Reznor hanging furnace in there. You can manage lighting, sprinklers etc. with this relay as it is very versatile..and has been rock solid for 2 years now.

Connect overhead door to Zooz Zen16 relay:


-plus-s2-multirelay-zen16-garage-door-installation.jpg

My wireless overhead door switch required a little "hack to connect". The two red wires were soldered onto the little switch (keypad removed) that opens/closes the overhead roll up door. The Zooz relay basically just closes those contacts ...which the opener then interprets as a button press.

garage_st6.jpg

Once you add a door sensor (I'm just using a SmartThings sensor) then you can use a built in app on SmartThings ( or buy Rboys which works great) the system becomes "smart" and can detect if the door is open, and then close it, notify you etc.
 

Pressingonward

Well-known member
Joined
Mar 9, 2016
Messages
522
Location
SW WA
Appreciate all the ERV info...need to decide what path to take for my old house here in the PNW.

Do you still have standard exhaust-only bathroom fans?
 
OP
D

Denwood

Well-known member
Joined
Sep 22, 2014
Messages
4,224
Location
Thunder Bay, Ontario, Canada
Pressing, yes we have standard exhausts for both baths, and the kitchen as well. Doing this again, I'd spend the extra dollars ($1100 USD) for the Panasonic FV-10VEC2 (cold climate) which can be installed completely standalone or combined with existing HVAC. The non-cold climate version (FV-10VE2) does not have a recirc damper for defrost so is a bit cheaper. If you don't go below -10 F, the 10VE2 is fine. The 10FEC2 is designed for temps down to -22 F.

Those units likely have the best price/performance ratio out there with 2 ECM motors, control over both intake and exhaust CFM, and the boost function. 100 CFM should be more than enough for most homes. For ours, 40 CFM does the trick fine to keep C02 levels down under 700 ppm. Neither of these units require a condensation drain, so you can put them just about anywhere. I like the idea of using these units standalone and running dedicated ducts from baths and kitchen to pull stale air if possible, then dumping fresh air into the living areas. You just have to makes sure if doing this that the fresh air has a chance to temper a bit before it hits people. The units do have an option for triggering your furnace fan, but it would be more efficient power wise to just run the ERV standalone (no HVAC tie in to existing) as you're only using about 50 watts to run it continuous in most applicatons. I really don't see the use for an HRV now that ERVs like this exist...in cooling or heating environments.

Cold climate version:

Warmer climate version:

All that said, I will likely not replace the smaller FV-04VE1 that we are using as it is keeping CO2 levels in check in our particular application. However if faced with the decision today, I'd buy one of the bigger units as it would be in exchange mode longer during our cold winters.

 
Last edited:
OP
D

Denwood

Well-known member
Joined
Sep 22, 2014
Messages
4,224
Location
Thunder Bay, Ontario, Canada
Back to the cabinet project...

The fridge area of the kitchen was a bit of a challenge in that I had to quite careful to check the fridge door properties and make sure it would swing open without interference. You'll see we have a short wall to the right of where the fridge will go. The other issue was how to fit a cabinet over the fridge without using a large filler panel. IKEA has "top" cabinets that are 24" deep to go over fridges in 30 and 36 inch widths. However, for 30 wide cabinets, you can only go 15" or 20" high (or stack them to get 35") I have a 28" gap to fill above the fridge as the tall cabinet is 95" high in total, and the fridge needs 68".

The solution was to use a few base cabinet side pieces and rip them down to make a 12" cabinet. You can order a door for a 12" wide base cabinet, which is 30" high. Turning that door on its side, voila, you have a door for your custom DIY 12" high cabinet, 30" wide and 24" deep :) That gets me a 27" high cabinet stack, that will be 27.5" once the cover panels are installed. More on that later..

Here is the 12" high, 30" wide and 24" custom cabinet, made from IKEA panels. Turns out the hinge system does not use any of the factory standard panel holes, so I could have just made this cabinet from 3/4" white melamine, but I also wanted to use the IKEA mount rail system..which does use factory holes in the rear of each cabinet.

IMG_7242.jpg

IKEA sells these super cool hinges for about 50 CAD which come with guides and templates to mount the door and cabinet bits. The doors can be unclipped in a few seconds if required. The hinges also adjustable for different weights. It's all Blum hardware, with IKEA customizations, but you could 100% use these hinges and included template guides for mounting the bits on any cabinet with a 3/4" panel and 3/4" full overlay door.

IMG_7243.jpg

IKEA sells white cover panels that hide the door machining holes (not used in this case) for conventional hinges so I'll add those later. IKEA doors come in 12, 15, and 18" widths, and drawer faces in 5, 10, and 15" heights so you have some options there to create custom cabinets that are various widths using this hinge system. It sure beats a big cover panel and adds storage to boot.

IMG_7244.jpg

I've built a spacer assembly behind these cabinets to bring them out 5" (for a total of 29"). Once the fridge cover panels are added, it will give a more built in look so the fridge doesn't poke out of the standard 24" deep cabinets.

IMG_7246.jpg

I'll detail the cover panel treatment a bit to illustrate how this will all tie together. The bottom cabinet (over the fridge) is a standard 15" high, 30" wide, and 24" deep fridge top cabinet with standard 15" doors. You can see how the custom 12" cabinet sits up there to complete the 27" high filler assembly. This way we maximize storage and avoid the use of 8" high filler panel...which is what I would have needed using a standard 20" high fridge top cabinet in there. I should point out that if you are going with a 36" wide fridge, IKEA does have a 10" high cabinet..go figure.

I'll post a pic of the spacer assembly that pushes this cabinet stack out 5" later. This setup does create a nice big vent up the back, which is ideal for most modern fridges that pull air in from underneath, and vent out the back.
 
Last edited:

drivesitfar

Well-known member
Joined
Oct 23, 2013
Messages
36,077
Location
Pacific Northwest
nice solution as per usual and loving all the work and pictures of your new kitchen. I wasn't thinking IKEA would be an option for new kitchen cabinets if I decided to remodel our kitchen again (1992 last time I did), but it certainly looks like a good product.

always thankful you post and explain all the modern electronics going on in your house and life and even though I probably will never have a SMART HOME it does show the rest of GJ how to do it right.

keep up the great work and STAY WARM!!
 
OP
D

Denwood

Well-known member
Joined
Sep 22, 2014
Messages
4,224
Location
Thunder Bay, Ontario, Canada
Drives, thanks as always for your interest :) Having built my own cabinets, and looked at a lot of alternatives, you simply can't beat IKEA's quality control and attention to detail. You can tell their engineers take time to simplify things, but also ensure quality at every step. It's obvious too they have learned how to make things strong enough, with the right mix of materials, that will outlast this kitchen's design life. I've now had my hands on hundreds of their components and have had precisely zero issues with any of them. The real trick is learning how to customise when required with their cover panels, and tricks like the 12" fridge top cabinet "hack". There are a number of companies out there that do custom fronts as well so you can plug into their "system" while getting exactly what you want for doors. It's rather daunting at first, but once you've done a few and know what's going on, easy peasy :) After being in the product design and manufacturing game for nearly 15 years, I have a different perspective than most. IKEA would be incredibly hard to compete with.

I would guess that IKEA likely like had some design input into their line of appliances, made by Whirlpool...or at least very carefully curate their choices. They all worked flawlessly out of the box, and have just the right feature set so that they work without complicated interfaces or feature sets that no one uses.

The family is loving induction cooking. It takes 45 seconds to boil a small pot of water and heat in the pans is surprisingly consistent.
 
To avoid these ads, REGISTER NOW!
Top Bottom