To avoid these ads, REGISTER NOW!

Between 265 & 485 SQ/FT Woody's Works Garage

Workspaces sized between 265 and 485 squarefeet.
OP
D

Denwood

Well-known member
Joined
Sep 22, 2014
Messages
4,224
Location
Thunder Bay, Ontario, Canada
@Pythong , this fellow was running out of a back yard shop, but has since opened a larger one:


He did a good job and they stand by their work. 2 years or so and no issues. I just had the front windows done in the max legal shade to match the rear of the LEAF. There are small kidney shaped windows in the reinforced A pillars..and he managed to do those nicely as well. The fellow who I purchased the car from (driving school) uses 12 Volt for his cars.

This is the window I'm referring to...quite hard to get to from the inside, but it looks much better tinted as it more or less disappears:

kidney_leaf_tint.jpg

The final product you were referring to :)

042117_2.jpg

042117_1.jpg

The LEAF has been 100% problem free, and a blast to drive over the last 2 years. It hovers around $17/month to operate so has somewhat insulated us from fuel prices as we use the car for most of our urban chores. I had six 13 year old girls piled into our Highlander on Monday night for an ice cream run. This was one of the few times we actually used the 3rd row of seating in that beast...and something the LEAF can't handle...ha.
 
Last edited:
To avoid these ads, REGISTER NOW!

Pythong

Well-known member
Joined
Aug 8, 2012
Messages
76
Location
Thunder Bay, ON, CA
@Denwood Thank you - I will check them out and see if they can accomplish the task with my high standards (No dust under the tint!), although i feel that isn't a high standard request and should be the standard for quality work :)

My Model 3 is 2 months old now and its unreal, if you see it around Say Hi :) .. if you want to upgrade to a M3 i'll take you for a ride and it pretty much convinces anyone that sits in it lol

When it was 20% tinted around, currently it's untinted as i had them remove it all.
 

Attachments

  • tint.png
    tint.png
    747.9 KB · Views: 34
OP
D

Denwood

Well-known member
Joined
Sep 22, 2014
Messages
4,224
Location
Thunder Bay, Ontario, Canada
@Pythong , is that the RWD, AWD, or Perf?

I'd go for a ride 100%..pm and we can exchange numbers, meet for a coffee or whatever :) It would be great to go over your purchase/ownership experience so far. Tesla is pretty much top of the heap with respect to EV tech! It would be great to get "under the hood" and take a good look. That said, my experience owning an Audi (no dealer in town) was a PITA. I know Tesla has the mobile service, but I also just talked to a guy at Enterprise renting a car as his M3 was getting flat-bedded to Winnipeg for a wheel bearing or similar issue. Not sure why a mobile unit could not fix that, but it took me right back to the Audi issues.

Used 2018 LEAF SLs like ours are going now for $39K (nearly twice what I paid 2 years ago!!), so I won't lie..I've been looking at the M3 AWD.
 
OP
D

Denwood

Well-known member
Joined
Sep 22, 2014
Messages
4,224
Location
Thunder Bay, Ontario, Canada
Its a 2022 M3 LR AWD, I'll shoot you a PM as i dont want to derail your thread with car talk lol
Ah, precisely the model I've been oggling via the Tesla ordering page :) Now you just have to lift it a few inches and put some truck tires on there to deal with the pothole / snowbank situations. I've seriously been airing down our cars a bit to deal with the roads.

Don't worry about derailing a garagejournal thread with car talk. I figure that's why most of us are here :)
 

Pythong

Well-known member
Joined
Aug 8, 2012
Messages
76
Location
Thunder Bay, ON, CA
Don't worry about derailing a garagejournal thread with car talk. I figure that's why most of us are here
Well then!:p

I'd be curious to compare your Leaf to my M3, Do you log hydro usage?

I average $0.03/km (Off peak charging, thats fully caluclated out with delivery fees, ontario energy rebate, +HST). Long distance travel via super chargers is super convenient and is more expensive than home charging (to be expected) but still way cheaper than gas. They recently changed the price model to time based due to Canada having regulations of 3rd party sellers charging based on kWh consumed. On the kWh model it was $0.24/kWh, on timebased it averaged out to about $0.50/kWh. They recently just reduced the time based charging last week by about 20cents for each tier. I haven't traveled anywhere to compare the savings. I will know in a month the difference as i will be going back to Winnipeg in the car and have stats on the old price model from our previous trip.

I've gone from Toronto to Thunder Bay, no problem (Order pickup was in Barrie,ON). I put ~1700KM on during that trip and supercharging was $108.11

2 Weeks ago we went to winnipeg and back and that was $115, I used autopilot for almost the whole drive from Thunder Bay to Winnipeg, minus 1hr where i took a road nap and my wife drove. It's unreal tech.

You're into home automation as much as me, the car logs so much and i have it fully tied into my house. Based on geofence it auto opens my garage doors when i arrive :) The options are endless.

If you like stats you can self log everything about the car using Teslamate.
Trips.PNGCharges.PNG
 
OP
D

Denwood

Well-known member
Joined
Sep 22, 2014
Messages
4,224
Location
Thunder Bay, Ontario, Canada
@Pythong , supercharging and coverage makes Tesla the only choice if you need to travel long distances in Canada. The longest we go in the LEAF is Lac de Mille Lac (260km return) and otherwise road trip in our Highlander...but I do have all the stats in the LEAF app. It logs each trip, efficiency etc. as well as calculates monthly energy cost. It's about $17/month to run the car. I also use an ODBII (bluetooth) dongle and the LeafSpy app to view codes, tweak settings, check on battery health etc. Best I've seen for efficiency is 7.9 km/kWh in August, and worst was 3.6 km/kWh in February. At 100% off peak charging, that's about $0.012/kWh (best) and $0.027 /kWh (worst) assuming a raw $0.01/kWh off peak energy cost.

The LEAF (SL trim) has ProPilot which I thoroughly enjoy on the highway. Between adaptive cruise and the ProPilot you really don't have to do much except keep your hands on the wheel. I find that it allows one to focus less on the road immediately in front (cuz the car is steering itself) and keep a wider eye out for idiot drivers, moose, etc. It's easily the most relaxing/quiet drive I've experienced in a car so far. All the other driving aids (lane departure, side impact, emergency stop blah blah) are a good addition given that the car is used by the whole family.

So, given price (used, about $24K with an extra set of alloys/TPMS/winters) it was pretty hard to pass up ... zero car payments and cheap driving. Today, the same 2018 LEAF SL with 65K kms on the odo is selling at $39-42K. That said, I would never have bought the LEAF if we were using it as a travel car beyond camp. I also would not buy one in a hot climate as the thermal management is ****. Right now, if long distance travel is a requirement, 100%, you buy a Tesla. The new LEAF is a lot better looking than the old one, but I still am not a fan of the aesthetic...Elon nailed that side of things with every T model.
 
Last edited:
OP
D

Denwood

Well-known member
Joined
Sep 22, 2014
Messages
4,224
Location
Thunder Bay, Ontario, Canada
We're just now opening up the camp, so the last few weeks have been all about getting the car work done. On my list have been a few issues on the 2003 CRV (still used by my youngest) including:

2003 Honda CRV Service - 189 664 kms.

1. Spraying the chassis with "Mike Sander's Grease".
2. Oil and filter.
3. Switch out winter rims to summer.
4. Sort CEL light and SRS light. CEL was an evap thing, so just cleared it. SRS was related to driver side seat belt buckle, so cleaned that contact and cleared the code :cool:
5. Replace drivers side transmission motor mount.
6. Sort a few issues related to drivers side door controls and dead speaker.

On point six, the last of the chores, I ended up pulling the door panel last night and figuring out how to get at the 22 odd wires that sit in the door harness. I suspected a few broken wires and ya, that's what it was.

Fixing broken door harness wires 2003 - 2007 Honda CRV:

Disconnect the vehicle battery.

Pulling the door panel was the usual few panels/screws and then popping the panel. Thanks youtube :) The door harness though was a different story as I found zero info on the 2003-2007 CRV online. Turns out you just need to disconnect two plugs in the driver's side footwell, and then tease the entire harness and rubber boot back through the door jam and then door itself.

This is just above the hood release, in the driver's side footwell. You can pop the plastic shroud around the hood release, and steering column cover to access this harness.

IMG_77277.jpg

Grey and white plug in driver's side foot well disconnected. The center of each plug (on one side only) has a release that you need to push in to disconnect the plug. Every plug I touched on the door and harness had grease inside...a good move by Honda. I wonder if they still do this on the new cars?

Note the wide grey and narrower white harness disconnected...both go to the door.

IMG_77300.jpg

Door skin removed, I was able to tease the whole mess through the door jam and door itself to get access to the wires. There is no need to remove the fender or door as some have done on the earlier models.

IMG_77288.jpg

Lo and behold, the broken wires. One (blue) goes to the driver side door speaker and the other (yellow) evidently controls the rear passenger window via the drivers door controls.

IMG_77299.jpg

Some short wire lengths inserted, solder and shrink, and it was good to go. I also dressed up a few other wires (cracked insulation) with liquid tape and pre-wrapped the entire harness with electrical tape to seal things up before sliding the rubber boot back down.

That white acoustic seal on the door was still tacky and pliable after nearly 20 years. I was able to pull back and then replace the door vapour barrier with zero issues.

At this point the old CRV is free of error lights, weird sounds and electrical gremlins :) No panic calls from my daughter in the last week over strange sounds either!
 
Last edited:
OP
D

Denwood

Well-known member
Joined
Sep 22, 2014
Messages
4,224
Location
Thunder Bay, Ontario, Canada
It's nearly time to sort the pool and pool solar heating system for season 4. I spent an afternoon simplifying the plumbing to the lower 4 roof panels by removing their internal "cross flow" restriction, (to match the upper panels) which meant I could eliminate the ABS intake manifold type deal I had in place for the lowers. The setup now is much cleaner, with fewer joints, and will also increase flow across the lower panels. Previously the water could bypass the lower array (4 panels) via the manifold I had built for them and I saw this to some degree by measuring panel temps while the system was running. I do expect another performance bump with this setup.

IMG_7784.jpg

IMG_7785_marked_up.jpg


Now on another note, our Blackstone Tailgater (camp) grill was in need of replacement flame tamper (they call it a tamper, vs a tamer). This is just the flame/heat diffuser plate that sits between the burner and the cast iron grill plates. It's just mild steel so while the barbecue is in perfect shape, the flame tamer pretty much disintegrated this year.

I ordered a replacement for a whopping $22 bucks, so figured I would take a few steps to increase longevity. I have used ceramic header coatings from Techline before but could not find a CAD supplier. It turns out that Krylon header paint ( specifically the coating rated to 2000 F ) is actually ceramic/silicon and HD carries it for $14 a can. The cure procedure for the product is very specific. If off a vehicle, you bake at 250 F for 30 min, cool for 30, bake at 400 F for 30 min, cool for 30, then 600 F for 30 as a final step. So we'll see how this does...so far so good on the bake cycle. I used our "town" barbecue to cure the part. It just took a minute to clean out the mouse nest in the side bucket of the "bake" barbecue ..little fellow had a good winter in there :)

IMG_7783.jpg

ceramic_paint.jpg

IMG_7782.jpg
 
Last edited:
OP
D

Denwood

Well-known member
Joined
Sep 22, 2014
Messages
4,224
Location
Thunder Bay, Ontario, Canada
It's been 4 years now since I've started using the "solar" hack for my pool/garage sensors so that they have become more or less perpetual with no lithium battery changes required (so far anyway). These are wireless senors that use zwave and zigbee wireless mesh protocols to communicate with the house SmartThings automation hub. I'm updating the pool water temp and roof sensors to a more robust box. This waterproof box houses a Fibaro FGK-10x sensor , and a 3xAA cell holder with rechargeable NiMH batteries. The lithium cell in the sensor (3.6 Volt) is removed, and + - leads soldered to the battery connectors inside the FGK-10x. I found reference to the 1st generation Fibaro door/window sensor (zwave) that has a connection block to allow use of an external temperature probe (DSB1820), so this is why they are being used to [control my pool solar heating system. ](https://community.smartthings.com/t/smartthings-swimming-pool-solar-heat-automation-diy/131994)
[/quote] I've hot glued two rare earth magnets (square, powerful) to the backside of this box so it will just attach to a pool frame vertical brace. The pool is not up yet, hence the ladder used for demo purposes :) I have 4 Fibaro door sensors, and 3 Smarthings multipurpose sensors which have stayed powered up and happy through 4 winters (-35C and a lot of snow) using this solar setup.

The little solar panel is a 5V from amazon and comes with a diode already installed. It works just fine with 2 x AA or 3 x AA cells, keeping them charged, but not damaging the NiMH cells. I have no charge controllers in play...the panel is connected directly to the NiMH cell holders. The oldest cells/sensors (which I have not touched) have been in continuous use, winter and summer for four years.

IMG_7786.jpg

IMG_7788.jpg


This is an older pic, but describes the internals (using a Smarthings motion/temp sensor) just fine :) The Smarthings sensors use a 3V lithium, (replaced with 2 x AA NiMH) and the Fibaro sensors use a 3.6 V cell (replaced with 3 x AA NiMH). When the little 5V solar panel is connected, the AA cells regulate voltage and the sensors report pretty much the same battery voltage daily. I would not have though that this would work so well (with no charge controller) but the panel is pretty small..only .5 watts@5V (100mA)


solarsensor1.jpg
 
Last edited:
OP
D

Denwood

Well-known member
Joined
Sep 22, 2014
Messages
4,224
Location
Thunder Bay, Ontario, Canada
Here is a pile of 2022 data that should help the next guy put together an efficient and high performing "DIY" solar pool heating system.

I've simplified the pool plumbing to the first four panels by removing the internal flow restrictions in each of the intake tubes on the four lower collectors, and removed basically a plumbed in manifold. The end result is much better flow to the lower four collectors which drape over the lower roof. We also set a new record last week raising the pool temperature 10 F in 1 day. That's 583K BTU in to raise 7000 US gallons by 10 F.

I have two pumps running in series (Intex OEM pump + 2 speed 1HP pool pump) to provide enough flow/pressure to supply the panel array/filter and ran a few tests of flow with the new plumbing setup into the current setup of 8 2’x20’ panels, 320 sq/ft.

Low Speed, both pumps 17.5s 5 US gallons (with solar) using 5.3 amps@120V :
1028 GPH total
= 17.14 GPM total
= 2.14 GPM/panel

High speed both pumps 10.5 seconds for 5 US gallons (with solar) at 11.4 amps@120V :
1714 GPH total
= 28.51 GPM total
= 3.57 GPM/panel

If you research ideal flow for this type of solar collector, most sources report 4 GPM (gallons per minute), per 40 sq/ft panel (0.1 GPM per sq/ft) is the most efficient balance between power use on the pumps, and energy gathering from the panels. I ran some tests on a sun/cloud type day, with air temps at about 72 F, around 2pm.

At 2.14 GPM/panel, the best we did was 75K BTU, with a 10 F difference between input/output temps.

At 3.57 GPM, output jumped to 100K BTU, although temperature rise (input vs output) dropped, as you'd expect with higher flow, to about 7F. This pretty much demonstrates the fact that you don't want high temps in the panels, as they lose a lot of efficiency when you exceed ambient temps (the panels start losing heat to radiation).

So the good news is the panels now output over 100K BTU, and we have yet to see a day with temps over 74 F. The theoretical max for this setup (capturing 100% of the sun's energy) is 136K BTU. I expect we will see 110 BTU on the system, which would work out to about 80% efficiency. Not bad at all!

The next tweak will be to try two Intex pumps in series to lower the power use of the pump combination. I've found that the Intex (pump that came with the pool) uses only 1.4 amps and is rated at 1600 GPH. I've tested it in the current system (solar panels off, but flowing through the sand filter) using 1.4 amps, but flowing 1200 GPH. Meanwhile the 2 speed pump is running at 4 amps at low speed, but only moving 750 GPH. I've ordered another Intex pump which I pieced together from the Intex site (replacement parts) which is rated at 2100 GPH (1600 when connected to filter) and uses 2.1 amps. The Intex pumps move a lot more water with far less power use than the 2 speed pool pump, so my hope is that we'll get down to 3.5 amps (vs 11.4 amps) of power use while moving close to 4 GPM for each panel.

These two parts will get you a working 2022 Intex pump rated at 2100 GPM:
https://intexcorp.com/uncategorized...r-12in-sand-filter-pump-26645-org-sp-12491eg/ ($ 105 USD)
https://intexcorp.com/replacement-p...mp/11826-pre-filter-assembly-for-28645-28646/ ($19)

Those bits get you a working pump for $125. If this experiment works, we should have the correct flow, but with power use more in line with a $1500 variable speed pool pump using two inexpensive Intex pumps in series.

Here is a snapshot of data from June 10, 2022 from https://www.hundredgraphs.com/public/denwood

IMG_7814.png

New solar charged SmartThings roof temp sensor

IMG_7813.jpg

About an hour of prep setup, to address a bad connection on one of the ABS feed pipes:

IMG_7812.jpg

The current panel setup:

IMG_7785.jpg

Taken around 11 am so you can see just how shaded this pool is...

IMG_7793.jpg
 
Last edited:
OP
D

Denwood

Well-known member
Joined
Sep 22, 2014
Messages
4,224
Location
Thunder Bay, Ontario, Canada
My brother got a nice deal on a used 16 ft Lund, with 75 HP Yamaha four stroke. Here we are on the maiden "sea trials" on Lake Superior. Even in summer, it's cold, cold water. He's a ********* fisherman (I am absolutely not...) so has been eyeing up a "real" boat to extend his adventures. It ran a bit rough at first (had been sitting for a few years with older gas in the internal tank) but after about 20 minutes of running, was purring like kitten.

IMG_7765.jpg


Meanwhile, we finally got a chance to head out to camp for weekend. My daughter is completely disconnected from the web, TV, or any electronics really with the result that her creative talents can shine a bit..ha. In our first paddleboard/kayak outing she had close encounters with two turtles, a muskrat, and a beaver all within a few minutes of our camp site :)

IMG_7817.jpg

It's about 130 km to the site, which would otherwise cost us about $70 at current fuel prices (260km return). The LEAF EV does the trip for about $12 bucks in power :) It charges up over a day to 100% just plugged into 120V@12 amps or so. We use about 70% of the 40kWh pack to get there with efficiency about 138 MPGe.
 
Last edited:

nicholam77

Well-known member
Joined
Dec 18, 2016
Messages
2,678
Location
Minneapolis, MN
Awesome, great to get outdoors and disconnect! My parents had a cottage on Lake Superior in Grand Marais, MN for many years, the water is pretty much always cold!

What are you using as a dashboard for your Smartthings sensors? I recently gave Home Assistant a try and ported all my Smartthings stuff into it, you can make some pretty cool dashboards with HA.
 
OP
D

Denwood

Well-known member
Joined
Sep 22, 2014
Messages
4,224
Location
Thunder Bay, Ontario, Canada
Nick ( @nicholam77 ), Hundregraphs.com has a free account setup that accepts data streams from ST. It makes it pretty easy to set up data streams and then set up up a publicly accessible page. Their setup is the easiest graphing interface I think I've ever used! They have SmartThings, Vera and Hubitat integrations as well as a general API.

I'll try and get some decent sailing pics from camp this year. Pulling out the windsurfing gear and the Hobie 18 next week if all goes well :)
 

nicholam77

Well-known member
Joined
Dec 18, 2016
Messages
2,678
Location
Minneapolis, MN
Nick ( @nicholam77 ), Hundregraphs.com has a free account setup that accepts data streams from ST. It makes it pretty easy to set up data streams and then set up up a publicly accessible page. Their setup is the easiest graphing interface I think I've ever used! They have SmartThings, Vera and Hubitat integrations as well as a general API.

I'll try and get some decent sailing pics from camp this year. Pulling out the windsurfing gear and the Hobie 18 next week if all goes well :)

Huh, cool, I had not heard of that. Enjoy the sailing!
 
OP
D

Denwood

Well-known member
Joined
Sep 22, 2014
Messages
4,224
Location
Thunder Bay, Ontario, Canada
@nicholam77, ya finally got the boat in the water this weekend!

A zero emission car towing a zero emission boat!

How about an 18 foot SX Hobie cat? I did not tow it far (just to the launch) however the 2018 LEAF SL had zero issues with the sand boat launch and towed the trailer with no effort at all. I installed a 2" receiver hitch and wiring (etrailer version for 2018 LEAF) more for use with a Thule bike rack, however the hitch comes in handy for stuff like this too.

This particular LEAF EV has 236 ft/lbs of torque available from 0 rpm up, so a light rig like this is pretty much a zero issue for short hauls. It was a pretty windy weekend so we managed to get the old cat flying a hull and passing a fishing boat or two :)

IMG_8026.jpg
 
Last edited:
drivesitfar

Well-known member
Joined
Oct 23, 2013
Messages
36,079
Location
Pacific Northwest
I’m happy to see that your summer weather has arrived and you are able to use your boat and lake property. Have a great summer and post up a few action pics on the water if you get time.

No bear issues this year I’m sure is the plan!!

Cheers!!
 
Last edited:
OP
D

Denwood

Well-known member
Joined
Sep 22, 2014
Messages
4,224
Location
Thunder Bay, Ontario, Canada
@drivesitfar , funny that you would mention the bear incident as there is a still a trace of bear spray in the trailer that is still there after a year. My wife still coughs a bit if it's been closed up for a week. We've seen a few moose, beaver or two, muskrat, piles of ducks/ducklings, a painted turtle (laying eggs on shore) and a first for us in the region...a pair of Arctic terns. No bears eating buns in our trailer yet, thankfully :)
 
OP
D

Denwood

Well-known member
Joined
Sep 22, 2014
Messages
4,224
Location
Thunder Bay, Ontario, Canada
Nick (@nicholam77) , looking like an epic weekend again :)

My youngest was pretty excited (and strangely comfortable..yikes!!) to take the LEAF for a test drive on the camp road. It's her first time behind the wheel and the look on her face was priceless. Don't worry...she had a 10 km/h speed limit :) After the fact, I severely questioned the wisdom of basic car education as I have visions of the garage door sliding open late at night as she sneaks out to hang with her buds .... !!

IMG_8041.png

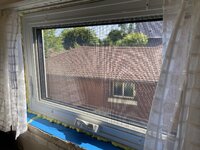
I finished off a micro-reno project this week, namely replacing a nasty window we had in our 2nd story bath. The double glazed slider was an issue every winter with bath condensation etc. so caused some water damage to the sill. I replaced it with triple glazed awning window which was surprisingly expensive at current pricing...over $500 CAD. The new window is miles better with respect to sealing and thermal efficiency. I changed up the trim a bit to make the window look a bit bigger than it is. Not sure if I like it, but the missus does, so it's all good. The window was manufactured locally which meant I got to stick my nose in a bit on their assembly operation. Pretty cool stuff! I purchased the new door for our kitchen reno from the same company which offers triple glazed door glass as an option for their full light doors. That door was very impressive with -30 C temps outside over the winter.

I used PVC (outdoor trim 1 x 6) material from HD and reversed it to have the smooth visible for the jam extension. I figure it will be impervious to moisture and is painted to address any UV issues. The outer trim is just finger jointed pine from HD, but with a surprisingly smooth primed finish. In case, my preferred method of assembly with CA glue worked a charm with both the trim and jam extension.

You can see the issue...after a bit of demo.

IMG_7803.jpg

New triple glaze awning unit foamed in with flashing tape in place...

IMG_7986.jpg

and trimmed out with the PVC jam extension, waiting for new window treatments...

IMG_8050.jpg
 
Last edited:
To avoid these ads, REGISTER NOW!

Bob Heine

ALLIANCE MEMBER
Joined
Oct 24, 2009
Messages
10,709
Location
Boca Raton, Florida
Dennis, showing your youngest daughter how to drive is a good idea. When our daughter turned 15 I taught her to drive a manual transmission car (they were popular back then) just in case she ended up at a party where alcohol might be consumed. First rule was call us but in the event she couldn't get to a phone (before cell phones) we wanted her to be able to take over as the designated driver. It never happened but we felt safer knowing she wasn't going to be the victim of a sad story.
 
OP
D

Denwood

Well-known member
Joined
Sep 22, 2014
Messages
4,224
Location
Thunder Bay, Ontario, Canada
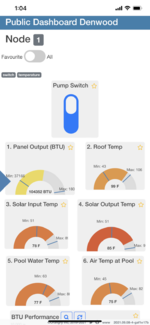
We set a new record for BTU output on the pool solar system at 104K BTU. Highest output for this installation is consistently in the 12:30 pm to 3:30pm window. This data was captured at 1:04 pm. Pool temps are now staying in the 80 to 84 F range as nights are warmer, and BTU loss is less. When nights drop to 12 C, the pool will lose 3-4 C, which then has to be added the next day just to replace heat loss.

You can click the image for live data from the system. This is how the hundredgraphs web site displays on an iPhone, a quicker way to check in on the system than using SmartThings 🙂

IMG_8047.png
 
OP
D

Denwood

Well-known member
Joined
Sep 22, 2014
Messages
4,224
Location
Thunder Bay, Ontario, Canada
My wife was all set to buy a new dining set in the latest two tone paint scheme, but I suggested we just refinish the chairs in our current set to bring them up to a more current look. The old dining set is the right size and shape for the room, and in great shape despite it's age.

I've used this catalysed paint before, and really like it. You catalyze the product in a 10:1 ratio and then add about 10% lacquer thinner to spray it.

IMG_8065.jpg

This is an older pic (not the paint I used for these chairs) with the Flexio 590 HVLP (finish spray gun setup) that I used. This again worked amazingly well, even with lacquer based paint. Of all the tools I've acquired, this one has been the biggest surprise with respect to price vs quality.

20180228_1.jpg

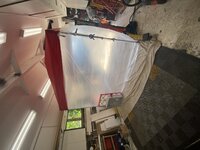
My neighbour built a spray booth using an inexpensive Walmart pop up shelter which I borrowed to do this setup in my shop. It took all of 20 minutes to setup and is a hot top for a quick spray setup!!

A box fan and a few furnace filters taped to the plastic worked great for positive pressure and clean air.

IMG_8059.jpg


The chairs need a few hours of prep with a sanding sponge, and TSP cleaner, followed by a clear water rinse and scouring pad finish. They were sealed already with a clear finish, so prep was not so bad. I sprayed the bottoms first, then about 20 minutes later, the top sides. The catalysed paint is good to sand in 30 minutes, so I did some sanding and final spray soon after.
IMG_8062.jpg

The Resistant Pigmented Varnish is not water base, so you need a good respirator setup. This 3M full face mask is pretty awesome, but forces me to ditch the glasses for contacts. Zero fog up and full face coverage makes this my favourite mask setup ever.

IMG_8063.jpg

It was a nice day, so I let chairs off gas for a few hours outside.


seats_outside.jpg

Final results were excellent. For 6-8 hours of effort, the "old" dining set is now sporting a modern look. Now I need to sort the china cabinet behind to bring in some charcoal highlights. My in-laws suggesting just adding some pull hardware on the cabinet, to match the chairs which I think will work great. The cabinet was built by my wife's dad as a gift to her, so replacing it is not an option :)

IMG_8110.jpg
 
OP
D

Denwood

Well-known member
Joined
Sep 22, 2014
Messages
4,224
Location
Thunder Bay, Ontario, Canada
Thanks Jon ( @jon04 ) . Saved us a few $1000 too...ha.

@jar944 , I ended up with some dry spray after the 2nd touch up coat, so ideally I'd give them a run over with 400 grit and hit them again, maybe with a clear urethane satin. We'll see how they hold up. I used the same catalysed finish on an entertainment unit (like 18 years back) and it held up amazingly well. We'll see how these chairs hold up.

I sorted some black hardware tonight from HD for the maple/birch china cabinet, so I think that will be a win to tie that unit into the updated aesthetic.
 

H1Pete

Active member
Joined
Dec 19, 2014
Messages
26
Every time I come back to this thread there’s tons of cool new projects. Amazing work as always OP.

Just bought one of those respirators for some rust removal and bead blasting work. They are awesome.
 

nicholam77

Well-known member
Joined
Dec 18, 2016
Messages
2,678
Location
Minneapolis, MN
The chairs look great Dennis! Nice work

Zero fog up and full face coverage makes this my favourite mask setup ever.

I could use something like that for cutting MDF :ROFLMAO: . I always wear my dust mask of course but it always seems to get in my eyes and nose somehow. Too bad I don't wear contacts.

I sorted some black hardware tonight from HD for the maple/birch china cabinet, so I think that will be a win to tie that unit into the updated aesthetic.

That's a great idea. That way you don't do anything major or irreversible to a sentimental piece.
 
OP
D

Denwood

Well-known member
Joined
Sep 22, 2014
Messages
4,224
Location
Thunder Bay, Ontario, Canada
@H1Pete , thanks for the kind words :)

Nick, ( @nicholam77 ) so contacts work great, however mine are not multifocal, so close up work is an issue. If I used the respirator a lot, I'd fork out for the 3M spectacle kit that allows you to use prescription lenses inside the face area.

On the china cab, I did just drill a bunch of holes! It does look great though :)
 
OP
D

Denwood

Well-known member
Joined
Sep 22, 2014
Messages
4,224
Location
Thunder Bay, Ontario, Canada
I've been bugged a bit by how much power the solar pool system eats up with the 2 speed (10 amp@120V) pump in series with the OEM Intex pump (about 2 amps) and the 12" sand filter. That got us to about 1714 GPH (or 3.57 GPM per solar pool heating panel). I was intrigued by how little power the Intex 2100 GPH SF-80110-1 pump consumed and wondered if just putting two in series would get me similar flow, but with far less power use. Power use ramps up quite a bit with flow, and it's not a linear relationship.

Anyway, I ordered up a new pump from Intex using their replacement parts site:

https://intexcorp.com/uncategorized...r-12in-sand-filter-pump-26645-org-sp-12491eg/ ($ 105 USD)
https://intexcorp.com/replacement-p...mp/11826-pre-filter-assembly-for-28645-28646/ ($19)

The above two parts gets you a working pump 2100 GPH pump (SF-80110-2) for about $124. These newer Intex pumps have a digital timer and can also be set for continuous operation. More importantly the GFCI plug and pump will revert to a powered state after power is cut to them...in my case by my Zwave outdoor plug. This has not been the case for some of their older products, which was a real PITA to work around. The first unit arrived DOA, however Intex replaced it with no issues or cost to me.

I also ordered up a 21" Hayward sand filter to reduce system pressure. This is quite a bit larger than the 12" sand filter, (.7 sq/t filter surface) with a lot more filter surface area (about 2.7 sq/ft)...so it offers up less resistance than a smaller unit.

I won't post up all my test results, but here is the skinny.

The previous setup using a 2 speed pool pump (10amps@120V on high speed), in series with the Intex SF 80110-1 pump, (2 amps@120V) and 12" sand filter flowed a decent 1714 GPH through the system with solar panels in the loop. This works out to 3.57 GPM to each of the eight panels. It used about 12.8 amps (about 1500 watts) with the salt water chlorinator on.

The new setup has one Intex pump before the 21" Hayward sand filter, and the 2nd Intex pump after the sand filter. They are plumbed essentially in series. Flow is now 1765 GPH, or 3.67 GPM per each of the eight solar panels. The big difference is that the system only uses 4.32 amps (about 494 watts) or 3.72 amps after the chlorinator completes it's 2 hour daily cycle. For anyone counting, that's 67% less power use during peak power rates in the afternoon! I also found an amazon sourced "intex" hose in the mix that was only 1" ID. The correct Intex hoses are 1.5" ID, so pulling that out of the mix, did make a small difference too. In any case, I'm pretty happy that we're close to the ideal flow rate/solar panel of 4 GPM, but with power use reduced 67%. Coolio! I calculated that the system tweaks drop the actual cost per month from about $50, to $17.

I would summarize the "hot tips" as follows:

1. Make sure all of your hoses and plumbing are 1.5" ID.
2. Use a larger sand filter. I bought a 21", but I suspect a 16" unit would have been fine too for my situation with a 7000 gallon pool.
3. If using two pumps in series as I am, plumb one in before the sand filter, and the other after it. This made a substantial difference in system flow.
4. Use the Game Intex 40mm to 1.5" plumbing adapters (for running hard pipe), and order 1.5" Intex hoses directly from Intex's site...they are much cheaper to buy this way.

Here's the latest setup:

IMG_8127.jpg

System power use with the chlorinator off:

IMG_8131.jpg

And with chlorinator on:

IMG_8130.jpg
 
Last edited:
OP
D

Denwood

Well-known member
Joined
Sep 22, 2014
Messages
4,224
Location
Thunder Bay, Ontario, Canada
We've been staring a bit at our dining room setup (you can see the old setup a few posts back, and how to tie in the cabinet, built by my wife's father for her. One idea (mother in law) was to tie in the black table bits by changing hardware. Then my brother showed up and started dragging furniture around, as well as suggested some different lighting and a wall mirror. Needless to say, for under $1000 we've transformed the room and more importantly, the boss is happy :)

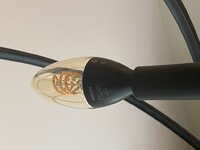
Fortunately for the automation bits, HUE makes an E12 chandler bulb with the retro LED spiral thing going on. They are rather ridiculously priced, however like the 60 odd other HUE bits in the house, are 100% rock solid on the automation side for reliability.

I also manged to find a few bottom up blinds (now banned for sale in NA) that match(ish) the rest of the window coverings in the house. It's unfortunate that you can't buy these anymore as they are a super flexible window covering for both privacy and light.

The wizz bang e12 HUE bulbs. They manage to hide the LED controller and Zigbee bits in a very small base package.

IMG_8157.jpg

The "new" room with refinished chairs in black satin (catalyzed pigmented varnish), new lighting, mirror, and maple cabinet with about $100 worth of black pulls and hinges. The diagonal setup works surprisingly well to both open up the space and increase room for when we have family over and need to squeeze a few extra at the table. This is my brother's artistic eye at play. Sadly I inherited zero of this skill set from my folks.

IMG_8156.jpg
 

Attachments

  • IMG_8157.jpg
    IMG_8157.jpg
    210.3 KB · Views: 12
  • IMG_8158.jpg
    IMG_8158.jpg
    288.3 KB · Views: 5
Last edited:

Matias

Well-known member
Joined
Feb 28, 2015
Messages
616
Location
Finland
Lot's of nice projects done! The chairs and the dining room turned out nice! And it's always good if you can use what you have instead of having to buy new.

If one day I would buy a pool, I know how I would keep it warm. It's great that you share all this, thanks! I suppose the biggest costs to owning a pool is to keep it fresh and to keep it warm.

Learning to drive is good, but even better I think is the time with 0% electronics. As you said, creativity goes up a couple of notches, and will also make up some nice memories for the future.
 
OP
D

Denwood

Well-known member
Joined
Sep 22, 2014
Messages
4,224
Location
Thunder Bay, Ontario, Canada
Lot's of nice projects done! The chairs and the dining room turned out nice! And it's always good if you can use what you have instead of having to buy new.

If one day I would buy a pool, I know how I would keep it warm. It's great that you share all this, thanks! I suppose the biggest costs to owning a pool is to keep it fresh and to keep it warm.

Learning to drive is good, but even better I think is the time with 0% electronics. As you said, creativity goes up a couple of notches, and will also make up some nice memories for the future.
Nice to hear from you Matias! Thanks for the kind words on the dining area…one more project off the list :) We missed a few weekends out at camp (one due the to the whole family getting Covid!) so this one feels pretty special. We get just 3-4 weeks a year where the mosquitos go away, and summer weather prevails. I call it the golden month…we’re enjoying every minute of it.
 
OP
D

Denwood

Well-known member
Joined
Sep 22, 2014
Messages
4,224
Location
Thunder Bay, Ontario, Canada
In keeping with the theme updating our main floor, I decided to take the very long overdue step of actually painting the primed exterior metal doors I installed over 20 years ago. On our kitchen reno I purchased a custom door, (full light, triple pane low E glass) already painted which is 100% the way to go as pulling a door apart for painting is a PITA if it has glass installed. It took a lot of time to tease the frames away from the glass and door as the exterior side is sealed with caulk.

It took a full day to strip the doors, sand and prep the dent areas, fill the myriad of dents with automotive body filler, sand and prime. I decided to paint them flat so I could use the Flexio 590 HVLP finish sprayer with my goto paint these days, PPG Breakthrough. It's not cheap at $117 CAD/gallon here but the end results speak for themselves. PPG Breakthrough dries very fast so I used about 5% Floetrol extender, and further thinned about 10% with water for the sprayer. The end result though is paint that lays down like an automotive finish, and is well suited for the wear/tear on a door. As a satin finish, it should also be very easy to touch up. The plastic frames got a good wash with TSP/scotch brite pads, and then sprayed with the PPG BT paint directly over.

Needless to say, I'm surprised honestly with will they turned out :) I took zero pics of the doors before which is too bad as they had about 20 small dents to fix, scratches, and UV yellowed frames...

After the first coat, the PPG paint laid down nearly perfectly flat. I was careful not to lay down too much paint on the first coat. After about an hour I could hit the surface with a scotch brite pad to take down any nibs, dust, bugs etc. (note that I was spraying with both garage doors open..no booth this time) then do the second coat with a bit more Floetrol extender and water in the mix for a finish that truly looks factory.

IMG_8296.jpg

IMG_8295.jpg

Fresh after spraying 2nd coat on one side...

IMG_8290.jpg

Frames look like new again..

IMG_8297.jpg

Now for some reassembly.
 

Attachments

  • IMG_8295.jpg
    IMG_8295.jpg
    161.2 KB · Views: 17
Last edited:

Dan in Pasadena

Well-known member
Joined
Feb 18, 2009
Messages
13,167
Location
Pasadena, CA
Denwood,
This may have been asked before but what made you select the Wagner Flexio 590 sprayer when there are a myriad of sprayers out there? Has it been successful with all latex paints you’ve used in it? Any experience spraying oil based or varnishes with it?
 
OP
D

Denwood

Well-known member
Joined
Sep 22, 2014
Messages
4,224
Location
Thunder Bay, Ontario, Canada
@Dan in Pasadena , the Flexio 590 came in a kit with a larger gun..still not tested! I’ve used the smaller 590 “finish” gun a lot with various paints including solvent based and it continues to perform strangely well for what is essentially a plastic spray gun attached to a hair dryer..ha.

It sprays far less volume vs an airless system, but is far easier to clean up after, and there is very little wasted paint. Thicker paints do need to be thinned 10% for the smaller gun, and addition of extenders like floetrol ensure the paint lays down flat with nearly zero orange peel. For projects like the metal doors, painting flat is much easier (no runs) but does take longer as you need to do 2 coats, wait a few hours (with the PPG Breakthrough), flip and repeat.

For projects like the dining room chairs (a few posts back) I used the same gun but with a catalyzed pigmented varnish. Again, results were excellent. I do take my time with gun/nozzle/parts cleanup as this is critical to any spray system.

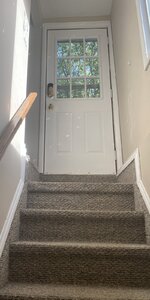
This door was a solid steel one previously but I swapped it in with one of the newly refinished doors (old back door) to brighten up the basement stair well :)

The three doors all look factory finished..
 

Attachments

  • EE6CC485-E5E9-449A-956B-EC798E66EC28.jpeg
    EE6CC485-E5E9-449A-956B-EC798E66EC28.jpeg
    261.9 KB · Views: 16

Dan in Pasadena

Well-known member
Joined
Feb 18, 2009
Messages
13,167
Location
Pasadena, CA
Denwood, Thanks a lot for the information. Sounds like it works really well and is worth strong consideration.

I have a large, standing airless Graco that’s maybe 10-12 years old I used to use in my girlfriend’s triplex but I no long do that and I’ve been considering selling it for a much smaller unit of some kind.

I was mostly wondering what prompted you to pick this particular unit? I’m glad to find out it works so well and I am thorough about cleaning spray equipment too; partly the reason to sell the Graco. It’s a LOT of work to clean up.
 
To avoid these ads, REGISTER NOW!
Top Bottom