SpeedCoach
Well-known member
What's better for a workbench, coarse thread or fine thread screws?
I was taught course thread for soft woods, fine threads for hard woods


What's better for a workbench, coarse thread or fine thread screws?
A question for those building a bench from wood:
If fastening with wood screws do you like to drill a small pilot hole for the screw? I like to do this, as I feel it helps prevent splitting the wood. It also helps ensure the screw finds the right path.
What's better for a workbench, coarse thread or fine thread screws?
I'm building a bench soon, and appreciate the advice.


In case you missed my other thread;
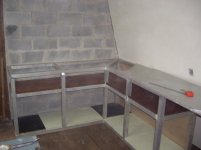
Backsplash is under construction

These are my work surfaces. Got the drawer cabinets for free and they are great I used doubled advantec for the tops covered with masonite.

In case you missed my other thread;
Backsplash is under construction
In case you missed my other thread;
Backsplash is under construction
i look at your benches and they mostly seem so narrow. Or pictures make it look like that? I 've always had them about 90 - 100 cm, (3-3,5 ft) wide to be able work also in the big lumps.
In case you missed my other thread;
Backsplash is under construction


I actually planned that for my front bench. I even got hydraulic/pneumatic cylinders for it.Finally, Someone "One upped" Jack O and built a bench that raises and lower via Remote Control.


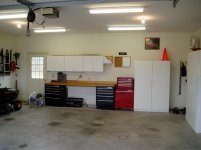
Very nice build, looks GREAT!
I like the grey painjob, made me double-check to see if it was wood or metal construction.
Question: Do you mind not being able to access the top storage of the Craftsman box with the "Cool It" sticker? That would bother me...


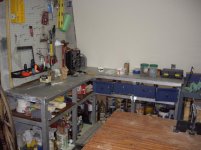
Here are some pics from the benches that I just built in the new garage.
One bench is 9' that is a little lower to make it easier to us the grinders and the drill press and such. The other bench on the wall is 12' long with the "L" section 12' long as well. All the benches are 24" deep with the end of the "L" being 36" deep.
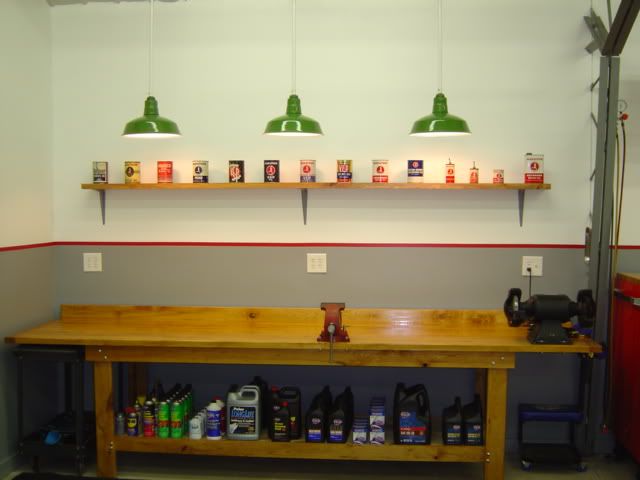


After looking through almost every bench on this thread and others, I decided for a simple but functional bench. It's 5 1/2' long, 30" deep and 42" high. The top piece is oak plywood and I want to give it a clear coat to protect from spills. I also added a drawer that I bought at Lowes for $5 and the peg board was purchased at Lowes on clearance.
Now I need to figure out how to mount my vise since I have the 2x4 on the front edge and I'm not sure that drilling a bolt down through a small 2x4 is a good idea.
")