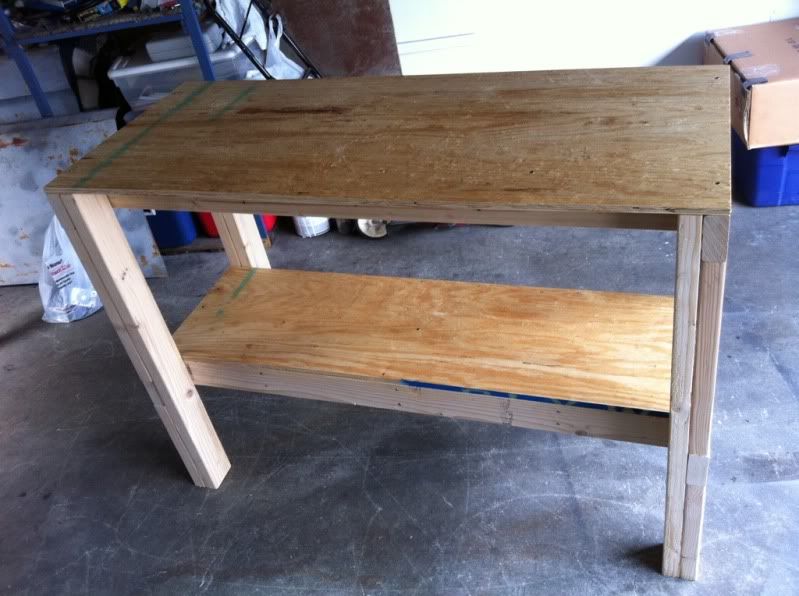
Nice looking bench OGJordan I would use 3/4" plywood for your bottom shelf. Slide it straight in & screw it down all around the edges. It's cheep & will add a lot of stability to the bench as well.
Steve
OGJordan - Nice work!
Thanks


Nice looking bench OGJordan I would use 3/4" plywood for your bottom shelf. Slide it straight in & screw it down all around the edges. It's cheep & will add a lot of stability to the bench as well.
Steve
OGJordan - Nice work!
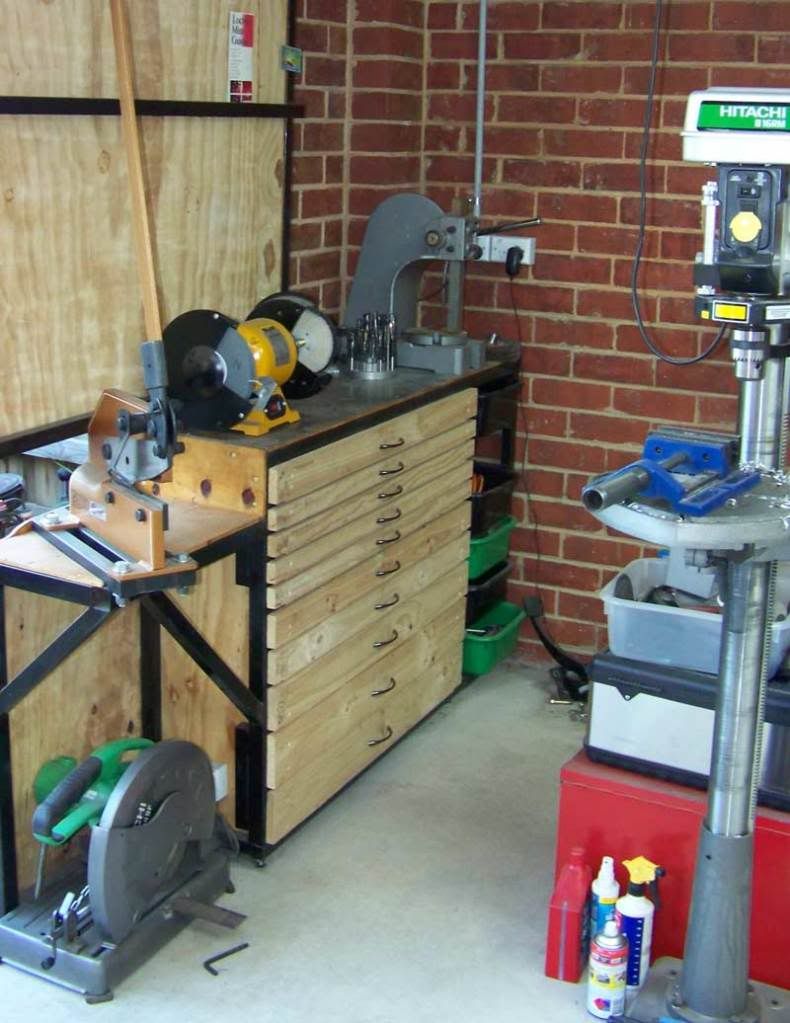

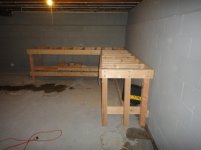
here are my two benches:
Nice!
Did you build the drawers from scratch? If so, how do you like them? Did you use full-length roller bearing sliders?
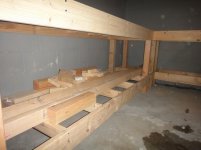
I love the column for the organizer trays, and saw your build pics of that in another thread.
Stupid question... Are most people making there benches to 36" height or something else?

Stupid question... Are most people making there benches to 36" height or something else?
I like mine around 40 - 42" tall - I'm 6'5" and that comfortable for me.
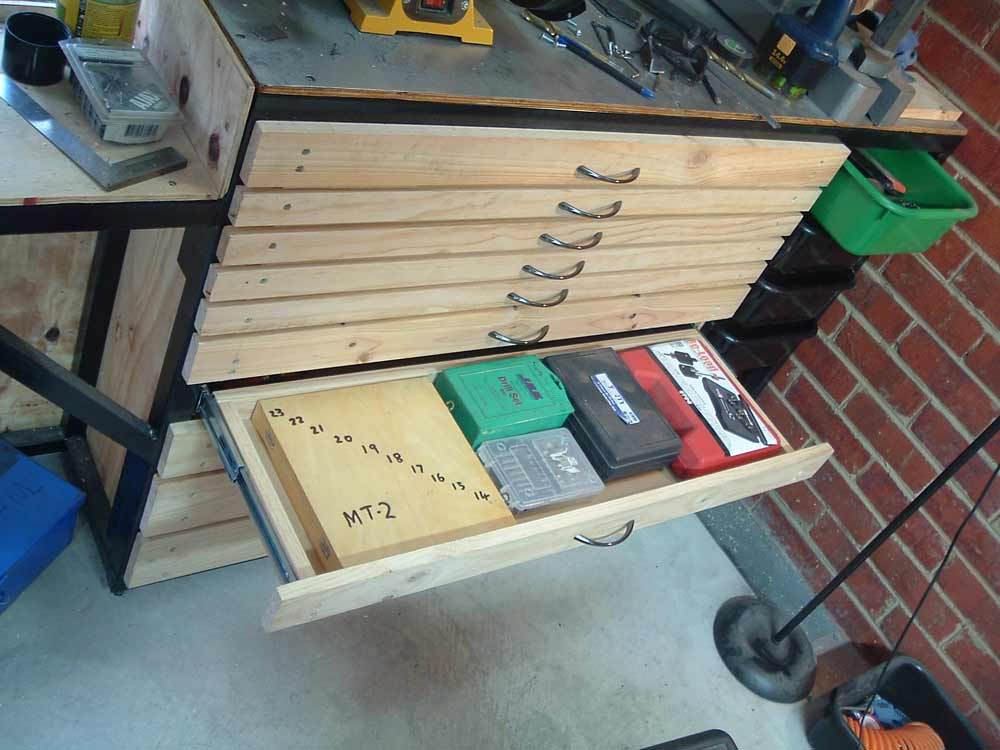
Yes I built everything from scratch, unlike the organiser tray holders they take a lot of time even with some experience behind me. Despite how simple they look it took me a lot of effort and time to work out the right process to make these and then actually do it. I am better now but it still takes my full concentration when making them. When I make my next set I would like to take some step by step photos of how I did it because I had a very specific order which I think makes it easier to do.
...

Stupid question... Are most people making there benches to 36" height or something else?
42" for me.
I built mine at 39 inches, when the casters are on it, it will raise the work surface up to 43 inches.
I like mine around 40 - 42" tall - I'm 6'5" and that comfortable for me.


If it weren't for this site I don't think I would have built my work bench this weekend, so it's only fair to share what I built I suppose. This thing is ridiculously overbuilt and does not rock one single bit. I'm still undecided on the top but I'll figure something out...
Shawn
edit: Please ignore my water issues, that's a whole other project all together
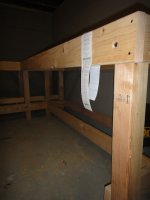
nicely done! - my $0.02 - put one more set of legs in the middle of each bench for added support, and the top should be made out of 2 x 6 boards laid flat
do both of the above, and you should be able to set an entire car engine and ****** on the bench w/o any problems

Not yet. Was going to postpone that until I finish the top and the shelf. I'm still not sure if I need/want to. With the way this thing is put together I simply cannot envision a scenario where it could tip. I guess wrenching on it when something is in my vice might pull it from the wall?Times two above. Is that bench fastened to the wall?
Now if only I could find a way to get it into the basementI'm figuring if you do the above noted improvements you should be able to set the engine and ****** on the bench still in the car


I'm still undecided on the top but I'll figure something out...
Shawn
edit: Please ignore my water issues, that's a whole other project all together
Awesome ideas on here.
Got mine almost done this wknd. With help from this thread and my 13, 7, and 4 year old sons! Just need to deceide on a top. Built it 8' by 30" deep. Height to be determined once I chose my top. Built out of 2 x 4 and 2 x 6. Will post pics soon. free standing for the time being, trying to think of a "quick" method to secure it to the wall.
Over time, I've found that if it's a bench for general work or non-metal work, I like to put a sheet of 3/4" ply over the support rails to which I screw or lag it to and then either screw or double-face tape 1/8" masonite over that to where it all lays flush with the outer wood rails /end caps so there is no raised lip.
Awesome ideas on here.
Got mine almost done this wknd. With help from this thread and my 13, 7, and 4 year old sons! Just need to deceide on a top. Built it 8' by 30" deep. Height to be determined once I chose my top. Built out of 2 x 4 and 2 x 6. Will post pics soon. free standing for the time being, trying to think of a "quick" method to secure it to the wall.

a bit cluttered right now...
Looks well-established yet tidy. Very nice.
I like lighted area under the shelf. Just wondering: do you prefer the power strip where it is, rather than on the front edge of the bench?


Welded something up...