mustanginky
Well-known member
- Joined
- Jul 30, 2011
- Messages
- 473
love this thread, subscribed just to take a look later on!


From the look of the can this is a poured on paint job.
")
...
I still need to brace the legs on the long sides... Not sure wether I want to do a little triangular bracing up high on the legs or wether I should continue to wrap the low bracing around and make a shelf on the bottom. I kinda like it without storage for now because it will be much easier to clean around and will attract less clutter.
^^^ super nice bench a**hole!
Very nice indeed.


... gotta lov'em
Great job
P.S.: that's a Corvette, right?
A thought to consider if your workspace is an attached garage...
Any bench that is attached to a wall for added stability will tranfer the sound from the bench to the wall. So the sound of hammering or grinding will be readily transmitted into the house for all to "enjoy"!

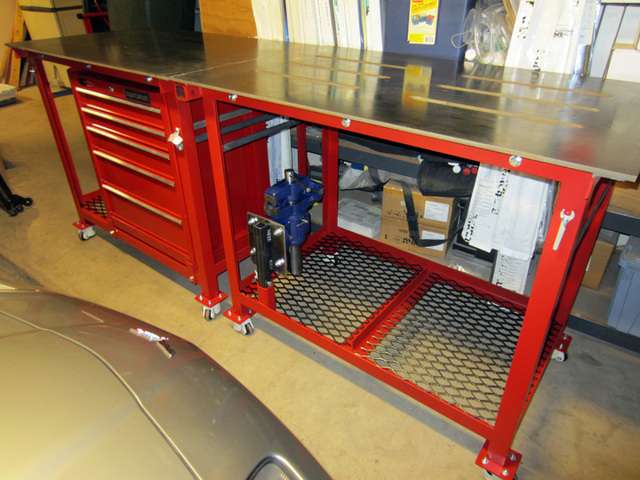
Here's mine. It's a simple 2x4 frame with 2x6 legs. Top has 3/4" plywood and is covered with 14 gauge stainless steel.
The cabinet on the bottom came from an old kitchen cabinet that I cut down about 5" to fit and added concrete float handles.

The railing can be as simple as a 2x4 with some grooves cut in it. Make the top groove taller, so you can lift the door up and install/remove it. Make the grooves a little bit wider than you think you need to allow for any eventual warp in the 2x4.


Hi everyone, I'm a weekend warrior who likes to try and make things in my garage - "try" being the operative word here.
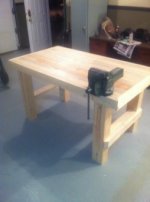
I recently tried to make a workbench after reviewing all of the great designs in this thread. I took a slightly different approach and used 4x6's, notched them out to receive 2x4 stretchers and used bolts to assemble the bench with 3\4" MDF surfaces.
I'm having difficulty with plumbing 1 set of 4x6's and I'm wondering if my deign is simply no good. I really want this to work as I love the look and mobility of the bench but I think I am out of my league here. If you have a moment, please take a look at the photos & let me know if you think this design is flawed.
Next step is to move the legs inside the framed 2x4's which will hopefully add strength.
BTW, I know it's "only" a workbench but I intentionally went overboard and over-engineered it just b\c I can. The whole thing has run me about $110. incl the casters from Rockler which is not too crazy.
Thanks
Definately has some character and does not look flimsy with those beefy legs.
I tend to over engineer/think things myself and when its all said and done any issues or mistakes I can pick most nobody else can unless I tell them. After a few rounds of Beers I eventually forget about them too and just enjoy the journey.
. Thanks for taking the time to comment.Hi everyone, I'm a weekend warrior who likes to try and make things in my garage - "try" being the operative word here.
I recently tried to make a workbench after reviewing all of the great designs in this thread. I took a slightly different approach and used 4x6's, notched them out to receive 2x4 stretchers and used bolts to assemble the bench with 3\4" MDF surfaces.
I'm having difficulty with plumbing 1 set of 4x6's and I'm wondering if my deign is simply no good. I really want this to work as I love the look and mobility of the bench but I think I am out of my league here. If you have a moment, please take a look at the photos & let me know if you think this design is flawed.
Next step is to move the legs inside the framed 2x4's which will hopefully add strength.
BTW, I know it's "only" a workbench but I intentionally went overboard and over-engineered it just b\c I can. The whole thing has run me about $110. incl the casters from Rockler which is not too crazy.
...


courtney wow nice shelf and bench......... i see an ohio plate are you from ohio?
Nice setup, Courtney!