Val_C
Well-known member
I admire your use of space with every update you post.You'll have a good working area in the end.

I admire your use of space with every update you post.You'll have a good working area in the end.
Glad to see that you feel you are making progress on the garage. Once that is done you will be able to work on other projects without having to move or look for stuff.
Did you finally evict your critter that had moved in over the winter?
As a side note, I took down the hideous (and broken) flood light and replaced it with this barn-light style unit from home depot. looks much better. I have thought of painting it a burnt red though, with white inside the shade, much like a real one.
what a great thread this is you done a great job on the space you have
i look forward to the updates
How did you find the quality of the 'cage' part? I thought it felt a little flimsy. So long as no one touches it though, it should be fine.
Eric, its nearly time to put our mowers into hibernation for the winter as the grass growing is slowing down some what.
I usually get about 10 years out of my mowers, changing the plug, filters and blades annually then if it doesn,t start first or second pull its time for a newy.
Cheers
Not flimsy, exactly, but kind of ill-fitting.
Hi Eric
I just read right through your thread from the beginning and really enjoyed it, your garage is looking great. I'm glad we don't have freezing weather or squirrels where I am, so many associated problems that have never occurred to me.
I just finished reading as well, in one sitting, no less! Great work you've done with a relatively small space. Looking forward to following your updates in the future.
Just stopping by to see what you have going on. Spare mower parts come in handy if it saves you one trip to the store and you can continue cutting. If anything else a little exploratory surgery to refresh your small engine diagnosis skills.
Big improvement there. You will enjoy the extra driveway space. In good weather it can be like doubling your garage space.
") . I also had them make the slope more gradual, it used to come up pretty steeply to the garage. This way, it's more like the garage floor blends with the driveway as one surface, should make it a continuous space in summer (it does have some slope though, for drainage).
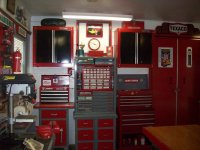
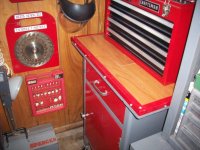
. I also had them make the slope more gradual, it used to come up pretty steeply to the garage. This way, it's more like the garage floor blends with the driveway as one surface, should make it a continuous space in summer (it does have some slope though, for drainage).In your post number 410 I see what looks like an old VA hospital cabinet. The one with the orange paint on it? I am including a stereo type photo of one, and a photo of how I got one and made a base cabinet for my tool box, the one in the left in the photo. Mine has casters on it, and it made a great bottom tool chest. I could not tell if yours is one like that or not.
Best Regards
Herb
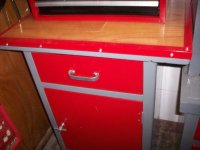
Yeah! I thought it was one. What I did to mine was enlarge the top with a
plywood top and cover it with hardwood and edging. It is heavy duty and made pretty tough!
Best Regards
Herb
Good job on the new door for the garage. I assume you just cut out the bad and replaced small sections at the base of the frame? Had to tell with the iPhone photos I am using. Would PT wood be acceptable for that or would not work out?
Does the outside area need to be regraded near the door to keep water channelling inside?

Great job on the door replacement Eric.
I am not sure wether these are available State side, these door seals are great for sealing the bottom of the door to the sill, keeping bugs and water out.
http://www.raven.com.au/domino/raven/ravenweb.nsf
In Australia the building code requires you to have a window area of 10% of the floor area for natural light. The extra window area makes a huge difference .
Have you considered putting a mesh security door on the outside as well??
Cheers
. Might also be a case of broadcasting 'if it's heavily protected, there must be something worth stealing inside.' That being said, the best they could make off with is my lathe, and I'd like to see someone try to run with that in their clutches.Screen, security doors are a standard fixture out here..
These are the typical big box store offerings..
http://www.bunnings.com.au/our-range/building-hardware/building-construction/doors/screen-doors
.I think the driveway is a great idea, I have the same problem in the front of my house the driveway is about the size of a car so when you step out you are on the lawn. I would like to do just what you are doing it seems it would keep the inside of the house and car cleaner.
Cant wait to see the finished product.
Great work on the garage and house as well. I like the deck and lawn very much. The shop door is a winner in every way. You should be very proud of all your doing to your home. I have been following your thread since day one. Great!!!
Best Regards
Herb