To avoid these ads, REGISTER NOW!

Between 705 & 1200 SQ/FT Workshop Build 30x30x12 Ocala, FL

Workspaces between 705 and 1200 squarefeet.
To avoid these ads, REGISTER NOW!
OP
W

wachuko

Well-known member
Joined
May 15, 2008
Messages
691
Location
Ocala, FL
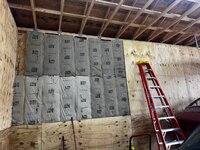
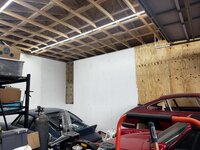
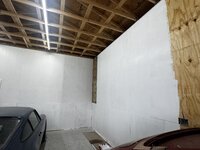
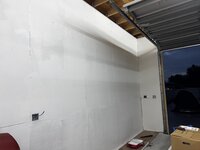
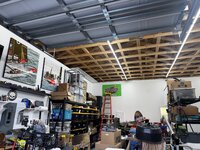
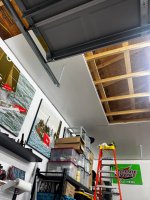
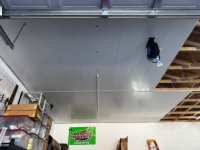
Wife helped me install the last few panels. Installed two additional 4x4 boxes and wiring for a few more power outlets…. And since it started to rain and I could not cut the last piece, started applying the primer…

IMG_3509.jpeg
IMG_3510.jpeg
IMG_3511.jpeg
IMG_3514.jpeg
IMG_3515.jpeg
IMG_3516.jpeg
IMG_3518.jpeg

Still need to run the wiring to this one… so last panel will go up when I do.

IMG_3517.jpeg

Forgot the last photos… primer is done.

IMG_3522.jpeg


That is it for today…

IMG_3519.jpeg
 
Last edited:
OP
W

wachuko

Well-known member
Joined
May 15, 2008
Messages
691
Location
Ocala, FL
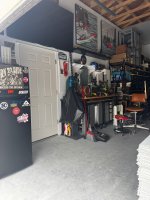
I managed to finish covering the areas above the doors. Yes, I used whatever leftover panels where available...

WS-1.jpeg
WS-2.jpeg

Also installed the 2x4 boxes for outlets on each side of the workshop... Next to each box, I placed a 2"x12"x22" piece of wood to be able to mount retractable power reels...should be able to also hold a retractable air reel as well...

WS-3.jpeg
 
OP
W

wachuko

Well-known member
Joined
May 15, 2008
Messages
691
Location
Ocala, FL
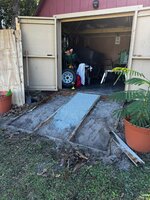
I was supposed to be working in the workshop Saturday... instead I had to spend the day repairing/replacing the floor on the ramp to the shed... I hate repair jobs... you finish and you have nothing to show for it... everything looks the same, lol. But it had to be done.

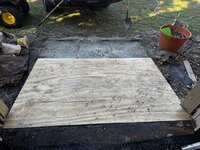
I filled the under space with concrete ready mix. If/when it rots again, I will have a concrete ramp ready to replace it...

Ramp-1.jpeg
Ramp-2.jpeg

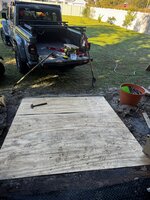
Concrete mix filling all area under the panels.

Ramp-3.jpeg
Ramp-4.jpeg
Ramp-5.jpeg

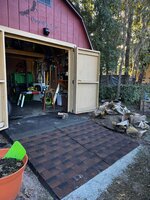
Left over shingles are great for providing a non-slippery surface.

Ramp-6.jpeg
Ramp-7.jpeg
Ramp-8.jpeg

Now to clean out and get rid of all the old rotted wood/material...
 
OP
W

wachuko

Well-known member
Joined
May 15, 2008
Messages
691
Location
Ocala, FL
why not just make the concrete ramp? the wood is going to rot out again anyway. You can always texture or stripe the concrete to provide more grip if you need it
My brother told me the same... But I could not wait for the concrete to dry..... needed to put everything back in the shed as we are getting ready to head out for a few days... So easier to cover with the panels and shingles for now...
 
Last edited:

Bob Heine

ALLIANCE MEMBER
Joined
Oct 24, 2009
Messages
10,708
Location
Boca Raton, Florida
I hate repair jobs... you finish and you have nothing to show for it.
@wachuko, I feel your pain. It seems everything I do looks the same when finished but without the underlying flaws. I was thinking of changing oil in the Cadillac today but maybe I'll put it off another day or two. It has been 1,178 miles since I changed it last. At least the Vevor air jack will make it more fun.
 
OP
W

wachuko

Well-known member
Joined
May 15, 2008
Messages
691
Location
Ocala, FL
Definitely need help doing this…tried installing a few and only got to do one… I will ask my cousin to stop by to give me a hand.

IMG_4633.jpeg
IMG_4635.jpeg
IMG_4636.jpeg

It is not difficult, just requires two people to avoid taking so long to get it installed.

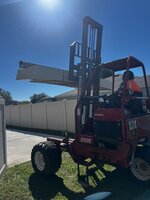
I will be renting one of these to make all this a piece of cake...

Scissor Scaffolding Lift-98.jpeg
 
Last edited:
OP
W

wachuko

Well-known member
Joined
May 15, 2008
Messages
691
Location
Ocala, FL
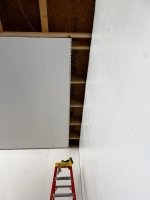
I am looking at it... kept looking at it... all I need is a hand to hold the end... that is it. There must be something that I can come up with to help me. These panels are not heavy. Here, hold my beer...

Helping hand-support.jpeg
Helping hand-support-2.jpeg


Heck yeah!!! Installed those three, by myself, in no time!
 
Last edited:
OP
W

wachuko

Well-known member
Joined
May 15, 2008
Messages
691
Location
Ocala, FL
Had to screw in a 2"x4"x10' to support the joint cover... It also worked as support for the end of the panel.

Helping hand-support-6.jpeg

Got lucky with the first garage door support bracket. It was an easy cut as it lined up with the end of the panel.

Helping hand-support-7.jpeg

The end of the panel looks out because it I had not installed the last screw when I took the photo...

Helping hand-support-8.jpeg

And that is because a friend arrived and pulled me from finishing, lol... all for now. Time for a break to relax with a friend.

Done for today.jpeg
 
To avoid these ads, REGISTER NOW!
OP
W

wachuko

Well-known member
Joined
May 15, 2008
Messages
691
Location
Ocala, FL
Oban, well deserved after all that work.
Thank you… I went back in to finish that panel and kept hearing in my head the Shanghai Noon skid Uno mas! Uno mas!

So did a couple more and installed another light…

IMG_4764.jpeg

IMG_4766.jpeg
Only to realize that I will need to remove it to install the cover… duh! I should have stopped after that first beer, lol.
 
Last edited:
OP
W

wachuko

Well-known member
Joined
May 15, 2008
Messages
691
Location
Ocala, FL
that's going to be amazing once you're done. Great reflection for good all round lighting and after you insulate you'll have a very comfortable space to work in
Thank you! Can't wait to see what it looks like with the LED lights on... I have to wait until that side is completed... working on that between breaks.

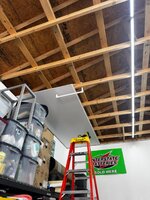
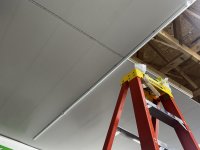
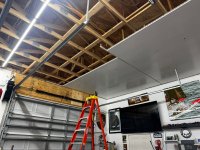
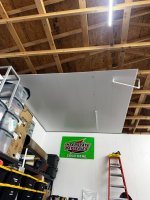
Installed a few more panels

Ceiling panels-1.jpeg

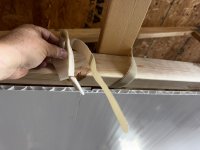
And the next 2"x4"x10'

Ceiling panels-2.jpeg

These Velcro straps are great for holding the 2x4 while I align it and secure it with the screws...

Ceiling panels-3.jpeg

I have to say, so far, it has been very doable putting all this together by myself. With the mess that I have and having to move stuff around as I work installing them, there was simply no way I could have paid someone to do it for me...
 
OP
W

wachuko

Well-known member
Joined
May 15, 2008
Messages
691
Location
Ocala, FL
That first panel is always a pita... but installed now. Now I can easily install the rest.

Ceiling panels-4.jpeg

I still have to paint that section over the door...

Ceiling panels-5.jpeg

Had to cut it to 107" (8'11")for that last section. Followed the recommendation of flipping the saw blade for a cleaner cut.

Ceiling panels-6.jpeg

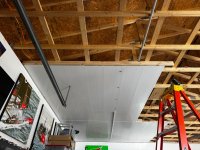
A few more installed...

Ceiling panels-7.jpeg
 
Last edited:

loganb

ALLIANCE MEMBER
Joined
Dec 29, 2011
Messages
5,616
Location
Omaha, NE
Love the progress and will have to keep that ceiling panel in mind if I ever need to finish one again. Looks easier to do solo and less noisy once done then metal liner panel
 
OP
W

wachuko

Well-known member
Joined
May 15, 2008
Messages
691
Location
Ocala, FL
Love the progress and will have to keep that ceiling panel in mind if I ever need to finish one again. Looks easier to do solo and less noisy once done then metal liner panel
Thank you... baby steps as I am doing it myself.

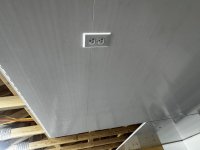
Today I was able to install and wired the two receptacles that go in the middle of each area. For having retractable power cords.

p4.jpeg

Now I can continue to install the panels...

p2.jpeg
p3.jpeg
IMG_4808.jpeg
IMG_4809.jpeg

Only 42 panels to go…

IMG_4807.jpeg
 
Last edited:
OP
W

wachuko

Well-known member
Joined
May 15, 2008
Messages
691
Location
Ocala, FL
So great to be able to move things around since most of it is on wheels... Got the bug out and moved one of the projects back... installed panels there, moved it back to the front and continue installing panels.

Did the panel with the outlet to the lights, the one with the support to the other side of the garage door... And was able to install the two middle trims pieces. Also installed another 2"x4"x10' for another center trim insert...

That is all for today. Will continue tomorrow morning.

WSC-0.jpeg
WSC-1.jpeg
WSC-2.jpeg
WSC-3.jpeg
WSC-4.jpeg
WSC-5.jpeg

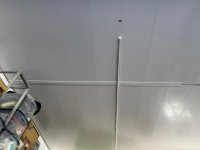
Here you can see the second center trim in place... and the panel with the cutout for the outlet done. That outlet is switched to power the lights.

WSC-6.jpeg

and the other center piece trim... and you can see that I already installed the retractable power cord reel. Secured to the 2"x12" under it...

WSC-7.jpeg
 
OP
W

wachuko

Well-known member
Joined
May 15, 2008
Messages
691
Location
Ocala, FL
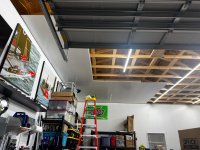
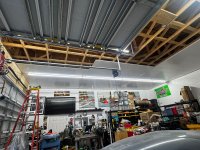
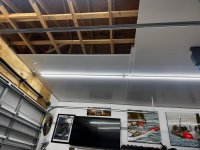
Could not leave alone… Installed the center trim. Also finished installing the center light strip and installed a couple more panels… enough for tonight…

IMG_4901.jpeg

I will call tomorrow to get quotes on blowning insulation. And to figure out how much space open they need to do so… before I install any more panels.

Well, I will install just a few more panels to be able to finish the 3rd row of lights...
 
Last edited:

Jayman17

Well-known member
Joined
Feb 6, 2017
Messages
3,815
Location
Seattle, Wa
I was wondering what that channel trim piece at the **** joint was for, now I see in your later photos it holds a finish trim piece over the **** joint. That finishes it off nicely. Good looking ceiling. (y)
 
OP
W

wachuko

Well-known member
Joined
May 15, 2008
Messages
691
Location
Ocala, FL
Got the first quote for insulation. Need to call another company as I have no idea what it costs to do this…

This was the quote for the 30’x30’ area:

IMG_4920.jpeg


And they only need a 24”x24” access to do the work…
 
OP
W

wachuko

Well-known member
Joined
May 15, 2008
Messages
691
Location
Ocala, FL
I was wondering what that channel trim piece at the **** joint was for, now I see in your later photos it holds a finish trim piece over the **** joint. That finishes it off nicely. Good looking ceiling. (y)
Correct. That is the reason that I have to add a 2x4 there… to hold the piece where the trim snaps in.
 

loganb

ALLIANCE MEMBER
Joined
Dec 29, 2011
Messages
5,616
Location
Omaha, NE
Got the first quote for insulation. Need to call another company as I have no idea what it costs to do this…

This was the quote for the 30’x30’ area:

IMG_4920.jpeg


And they only need a 24”x24” access to do the work…

Website says approximately 11.5 bags required for R30 without any waste or over coverage. Not finding the exact price for L77 but if it was standard off the shelf owens corning pink from Depot or Lowes it's approx $50 a bag...assume 12 bags that's 600 plus tax. They're getting the material cheaper ....but that price compared to retail doesn't seem bad. It's not a hard job but is a 2 person job, should be able to do it in a half day if it's DIY, they'll probably have it done in at least half that time.
 

Xti04

Well-known member
Joined
Nov 11, 2016
Messages
2,347
Stick up some of those tapes in your attic space and blow it in yourself. Blower is free when you buy x amount of bags at home depot. You could knock it out in a few hours and save the cash.
 

Miss the Pontiacs

Well-known member
Joined
Nov 7, 2016
Messages
16,517
Location
Saskatchewan Canada
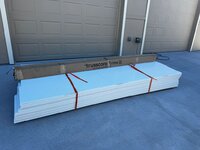
I’ve been watching your progress and I’m impressed. What is the name of the product you are using on the ceiling? I was thinking on tin but that might be a problem if I’m short of help and doing it myself. Doing any cuts for overhead door supports, lighting and electrical would be more manageable as well.
I was thinking of a 2x? of going around the base of the wall and using 3/4” plywood for the walls. Where I’m located 6/8 mil poly for a vapour barrier would be needed as well on the ceiling.
Keep up the good work we’re watching. 😉

 
OP
W

wachuko

Well-known member
Joined
May 15, 2008
Messages
691
Location
Ocala, FL
I’ve been watching your progress and I’m impressed. What is the name of the product you are using on the ceiling? I was thinking on tin but that might be a problem if I’m short of help and doing it myself. Doing any cuts for overhead door supports, lighting and electrical would be more manageable as well.
I was thinking of a 2x? of going around the base of the wall and using 3/4” plywood for the walls. Where I’m located 6/8 mil poly for a vapour barrier would be needed as well on the ceiling.
Keep up the good work we’re watching. 😉
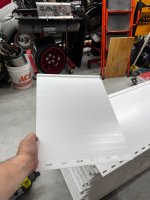
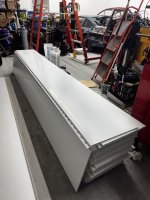
Thank you. This is what I am using:


Only got it for the ceiling as I used 3/4” plywood for the walls.
 
OP
W

wachuko

Well-known member
Joined
May 15, 2008
Messages
691
Location
Ocala, FL
Stick up some of those tapes in your attic space and blow it in yourself. Blower is free when you buy x amount of bags at home depot. You could knock it out in a few hours and save the cash.
Website says approximately 11.5 bags required for R30 without any waste or over coverage. Not finding the exact price for L77 but if it was standard off the shelf owens corning pink from Depot or Lowes it's approx $50 a bag...assume 12 bags that's 600 plus tax. They're getting the material cheaper ....but that price compared to retail doesn't seem bad. It's not a hard job but is a 2 person job, should be able to do it in a half day if it's DIY, they'll probably have it done in at least half that time.
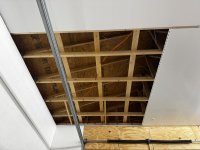
Thank you both, but I am not looking forward to doing that myself… that is one task I will gladly have someone else do it for me.

This is how I left it last night. Installed the panel and did the cut out for the outlet.

IMG_4938.jpeg

I will do the access panel today and finish installing the remaining 6 panels and the last row of lights.

I will pay someone to do the insulation while I sit and watch with a beer in hand…:) I am tired, lol. Where is that darn bottle of Advil!?
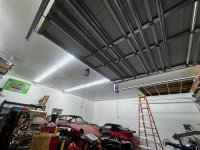
IMG_4939.jpeg
 
To avoid these ads, REGISTER NOW!
Top Bottom