To avoid these ads, REGISTER NOW!

yet another welding table, recommend options

pmason0

Well-known member
Joined
Nov 12, 2011
Messages
251
Location
East Tennessee
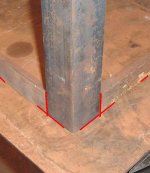
First true welding project, like most people is to build a welding table. Started welding mine up today. 2in square tubing for base, 3x4x1/2 plate for the top.
I plan on putting a 1in square tube across the ends to hang c-clamps, grinders, etc on. Plan on getting some sheet metal for the bottom shelf. Like many here I plan on using the 2x2 ends under the table as a receiver to mount a vice, grinder, etc.
Any thing else that is a must have for a welding table?
tablebase.jpg
 
To avoid these ads, REGISTER NOW!

machine_punk

Well-known member
Joined
May 14, 2011
Messages
2,540
Location
Napa Valley, California
Ummm...a top?!?

Just kidding. I am sure you have a plan for the top.

Looks good so far!

Make sure your top extends far enough out over the edge to give you some decent clamping room.

Kev
 
OP
P

pmason0

Well-known member
Joined
Nov 12, 2011
Messages
251
Location
East Tennessee
Oh I knew I forgot something :), No the top is setting over on the cart behind the base. I need to figure out how I'm going to mount it. Current thinking is I will mount some angle tabs on the base, drill and tap holes in the top and bolt it from below.
 

t100

Well-known member
Joined
Sep 3, 2009
Messages
6,101
assume your top plate is quite flat, just pin the top, don't bolt or weld, that will kill the flat top.

set the top on the frame, mark the 4 inside corners from the bottom. drill, tap and put 1/2" bolts at each corner, make sure these bolts are long enough for the hex head to clear the bottom of the frame.
 
OP
P

pmason0

Well-known member
Joined
Nov 12, 2011
Messages
251
Location
East Tennessee
Been searching the forum for ideas, for those that have mounted drawers where did you find/source the drawer? I was thinking of mounting one of those 2 or 3 drawer 26in middle section toolbox cabinets on one end.
Just fitted the 1in bars but haven't welded them yet.
tablebase2.jpg
 

srmofo

Well-known member
Joined
Oct 15, 2009
Messages
6,161
Location
SW ohio
When i designed built my welding cart, i had sourced drawers from beat up craftsman box that i had on hand. Are you trying to put the drawers under the top? Or down 1 side? If you are trying to go down 1 side,i would just buy a cheap craftsman chest
 

sberry

Banned
Joined
Jun 18, 2005
Messages
35,747
Location
Brethren, Michigan
Tacking the top down wont hurt a thing and not being perfect wont matter either.
 

Attachments

  • bench connect 1a.JPG
    bench connect 1a.JPG
    35.9 KB · Views: 147
  • bench connect 2a.JPG
    bench connect 2a.JPG
    45.1 KB · Views: 129
  • bench connecta.JPG
    bench connecta.JPG
    32.7 KB · Views: 125
Last edited:
OP
P

pmason0

Well-known member
Joined
Nov 12, 2011
Messages
251
Location
East Tennessee
I want to have the top deattachable as the whole thing will be pretty heavy. Made the tabs with holes in them for 1/2 in bolts, need to flip the base on to the top to mark the holes. Rent a magnetic drill for the holes.
Yes I was thinking a craftsmans middle box on one of the ends.
 
OP
P

pmason0

Well-known member
Joined
Nov 12, 2011
Messages
251
Location
East Tennessee
Yea, if I would of planned it I would of made the back opening large enough to take a 41in box, but the opening is 40x261/2. Just thinking now of just hangine one of the middle boxes.
 

MFGENG

Well-known member
Joined
Jul 21, 2011
Messages
79
I tapped some 1/2-13 holes in my 3/8 plate, then ran bolts up from the cross-members. Ground the bolts flush on the top. This way I can shim as needed or remove/replace the top as needed.
 

sberry

Banned
Joined
Jun 18, 2005
Messages
35,747
Location
Brethren, Michigan
These benches are fine, they are fine as built, the owners are thrilled but as a general fabricator with substantial experience and having built a dozen or more on various jobs and 200 for one alone it isnt the way it would be done.

I tack leg table end assembly up first, all square (in production we had plate jig, lay plate on backmark where legs went tack a set on, need to square/plumb only one direction once. Lay the long stiffners in, stitch weld along it a zip each side every foot, I think we put 3 welds along 4 ft bench, stood up second set of legs, tack and install 2 more angles for a shelf up about 18 inches.

While all this frame welding doesnt really hurt its a waste, there is almost no stress on welding over a post or at a connection in this type of bench, any deflection occurs mid span.

I was looking for a picture of the production one, couldnt find it right now but in general is similar to this scrap but based on the connections above with sq tube. About 8 inches of light weld made all he connections at a corner and another 6 or 8 spread along each cross member. Left it all so a board or expamded metal sheet could be tossed under for shelf. Gread ballast and wasted space that can be used to toss stuff underneath.

No holes in the top and a vise receiver is not a bad idea especially since in small shops this tabel is not only a welding table its a work bench, its really a work bench that doubles as welding area.

I will find pic. The only finish work we did was with 7 inch sander to smooth sharp edges from shear and zing the corners. No weld grinding or hand cutting at all and even sanded before we put it together.

That was for a remna factory, I went to steel yard as needed, couple times a week, buy4 1/4 X 8 plates and had designed a simple modular scheme, whack it up on shear according to demands in common sizes with a few spares, buy 10 pcs of angle, gang cut it right there on big band saw, same for tube legs, 10 at a time, lay it all on the plates basically and even had my helper weld most of it up. Took him about 15 minutes. Actually assembly was about 30, there were other overhead concerns, as I recall I billed about 1.5, back then it seems it was about 85$ for assembly delivered. Been 20 yrs.

Took a couple pallets to the steel yard, loaded all pieces on them. My only point here is that not all the stresses occur where they seem at first glance, the welding is primarily a little glue to keep the pieces from sliding around.
 
To avoid these ads, REGISTER NOW!

Spudland_Dave

Well-known member
Joined
Mar 12, 2010
Messages
3,025
Location
Maine
One thing to add would be a piece of angle iron along one of the long sides. Weld the angle iron with the "Vee" up...flush with the top of the table. This way if you ever want to **** weld Pipe or square tube, you can just clamp it in your Vee and have it perfectly aligned straight.
Dont use too big of an angle so it interferes with clamping along that edge though.
 
OP
P

pmason0

Well-known member
Joined
Nov 12, 2011
Messages
251
Location
East Tennessee
Update, pretty close to being complete. Just put the top on tonight and started cleaning it.
Ended up drilling and tapping the top to mount it. Painted the base a hammered finish, we will see how long that holds up. Started making the receivers for a vise and other items, also want to make some kind of mount to hold the grinders.
Thanks for everyone that provided in put.
table2.jpg
 

sharkytm

ALLIANCE MEMBER
Joined
May 17, 2008
Messages
596
Location
Pocasset, MA
As for hanging your grinders, you can always make them, but the ones sold by Swagg Offroad are really nice, and affordable. Plus, 100% USA-made, and the guys there are really friendly.
 

my58

Well-known member
Joined
Apr 12, 2005
Messages
238
Location
Ventura County California
Pmason0,

Great looking table. Have you found anything you wish you would have done differently yet?

Would you mind telling us the aprox cost breakdown of the materials you used.

Thanks
 
OP
P

pmason0

Well-known member
Joined
Nov 12, 2011
Messages
251
Location
East Tennessee
my58, I'm guessing I have ~$450 in it, the top was $240, the ~$200 un tubing & sheet metal, casters from grizzly. I have made two vice mounts and a grinder mount that can slide into any of the corners.
One that I would probably do different or might add is I use a pin to retain the vise mounts in the receiver tubes, but like just1more did on his was mount a nut on the hole and use a bolt to pinch the tube within the receive would hold the accessories more firm.
 

R.Anderson

Well-known member
Joined
May 26, 2012
Messages
906
Location
Wisconsin
1.5" or 2" angle steel works great for hanging grinders, its what I use. Its cheap, looks good, easy, and most likely to have a piece to use on hand.
 
To avoid these ads, REGISTER NOW!
Top Bottom